How to use TASMOTA inside BLYNK and HOME ASSISTANT [Work in Progress]

I am using Tasmota for few months now.
I think Tasmota is the best STABLE ready made sketch for beginners and even for professionals .
Tasmota came from [ Theo Arends Sonoff MQTT OTA ] (arendst (Theo Arends) · GitHub)
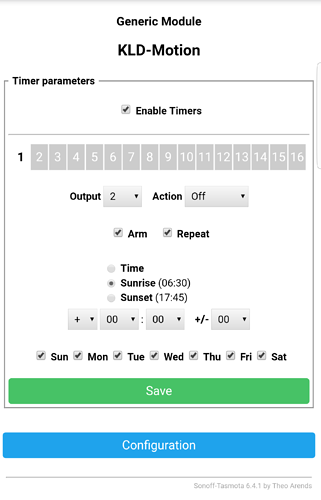
With Tasmota you get Wifi manager, 16 Timers including “Sunrise and Sunset”, OTA ‘Over The Air’ firmware updates, Domoticz, Belkin Wemo, Hue Bridge, Serial , HTTP , MQTT, KNX and a lot more.

sensors support for NodeMCU and Wemos

Supported Devices


Sensors Supported by Tasmota

Link: Tasmota Supported Sensors v1.0.1.2.xlsx


I like Blynk and its GUI than Tasmota.
to run Blynk with Tasmota you need an MQTT server (external or local )
in my case I am running Mosquitto on a local server (Pi 3).
the idea is to receive the MQTT messages published by Tasmota and to translate it to Blynk

here is the MQTT messages sent from my Sonoff Pow R2 Module

18:18:37 MQT: tele/SNF-Washer/STATE = {"Time":"2019-02-19T18:18:37","Uptime":"0T04:19:26","Vcc":3.471,"SleepMode":"Dynamic","Sleep":50,"LoadAvg":19,"POWER":"ON","Wifi":{"AP":1,"SSId":"xxxx","BSSId":"48:F8:xxxxxxxx","Channel":10,"RSSI":94}}
18:18:37 MQT: tele/SNF-Washer/SENSOR = {"Time":"2019-02-19T18:18:37","ENERGY":{"TotalStartTime":"2019-02-18T19:22:29","Total":0.030,"Yesterday":0.021,"Today":0.009,"Period":0,"Power":18,"ApparentPower":27,"ReactivePower":20,"Factor":0.66,"Voltage":221,"Current":0.121}} (retained)

here is another MQTT example sent from my Generic Module ESP01 with sensors
[ PIR, DHT22 (AM2301),Sunset power2 relay.]

18:26:56 MQT: stat/KLD-Secondary/POWER1 = OFF (retained)
18:27:20 MQT: tele/KLD-Secondary/STATE = {"Time":"2019-02-19T18:27:20","Uptime":"0T04:47:37","Vcc":3.220,"SleepMode":"Dynamic","Sleep":50,"LoadAvg":19,"POWER1":"OFF","POWER2":"ON","Wifi":{"AP":1,"SSId":"xxxx","BSSId":"48:F8:xxxx","Channel":10,"RSSI":74}}
18:27:20 MQT: tele/KLD-Secondary/SENSOR = {"Time":"2019-02-19T18:27:20","Switch1":"OFF","AM2301":{"Temperature":18.3,"Humidity":68.4},"TempUnit":"C"} (retained)
18:27:50 MQT: tele/KLD-Secondary/STATE = {"Time":"2019-02-19T18:27:50","Uptime":"0T04:48:07","Vcc":3.219,"SleepMode":"Dynamic","Sleep":50,"LoadAvg":19,"POWER1":"OFF","POWER2":"ON","Wifi":{"AP":1,"SSId":"xxxx","BSSId":"48:F8:xxxx","Channel":10,"RSSI":80}}
18:27:50 MQT: tele/KLD-Secondary/SENSOR = {"Time":"2019-02-19T18:27:50","Switch1":"OFF","AM2301":{"Temperature":18.4,"Humidity":68.5},"TempUnit":"C"} (retained)

My first attempt to decode MQTT messages was through Node-Red running on the same Pi
Hacking the new ITEAD Studio - Sonoff S31 - #18 by Ze_Pico

today I decided to made a template to help decoding MQTT messages inside Blynk sketch
@mrohner
Continuing the discussion from
Blynk - MQTT Bridge - Use Blynk app for non-Blynk devices:

@Jamin we missed you … welcome back :smile:

@Gyromike thanks

all comments are welcomed


Continuing the discussion from Light relay turn on with sunset and turn off with sunrise
**** Earned ‘Popular Link’

here is sunrise and sunset for Cairo depending on your location in Tasmota “my_user_config.h”

// -- Location ------------------------------------ (for Amsterdam)
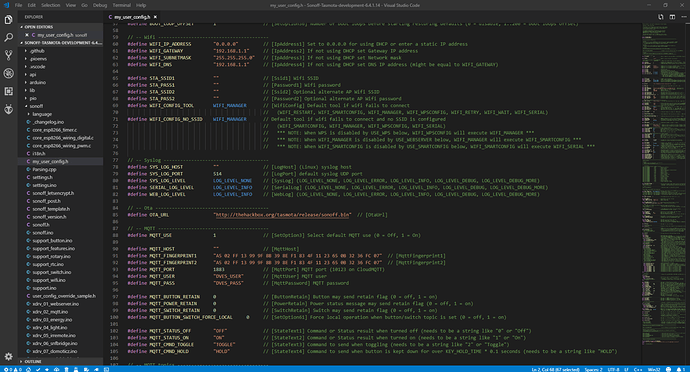
#define LATITUDE     48.858360   // [Latitude] Your location to be used with sunrise and sunset
#define LONGITUDE     2.294442   // [Longitude] Your location to be used with sunrise and sunset

MQTT and Home Assistant

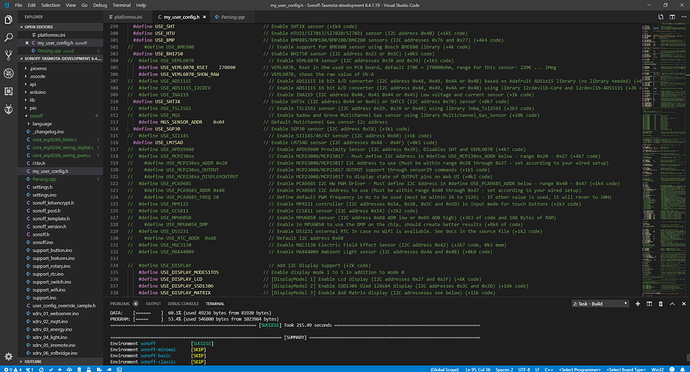
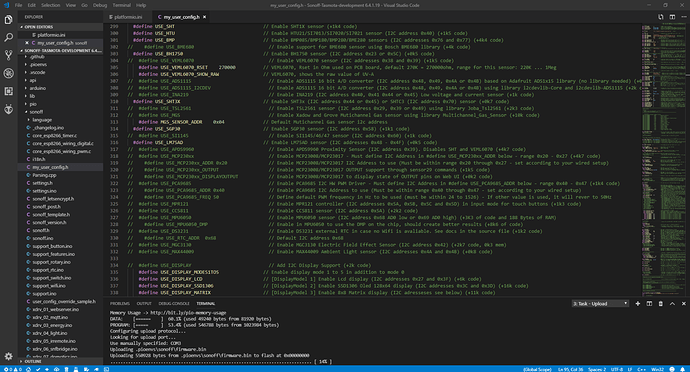
Tasmota settings in PlatformIO
4 Likes

First thing first you need to Backup the original firmware on your device
I will explain this in another Topic :

"How to Backup & Restore Official Firmware on any Espressif ESP8266 & ESP32 chips"


for now
Here is the “easiest way” for how to Flash a Sonoff Basic or any ESP8266 / ESP8285 boards with the .bin files.


Software needed :-
FlashEZ zip: https://github.com/letscontrolit/ESPEasy/releases
Tasmota releases : https://github.com/arendst/Sonoff-Tasmota/releases
sonoff.bin: https://github.com/arendst/Sonoff-Tasmota/releases/download/v6.4.1/sonoff.bin
Termite: https://www.compuphase.com/software_termite.htm
Example Backlog Command for Termite to enter Tasmota Commands: 
Backlog SSID1 xxxxxx; Password1 yyyyyy; MqttHost brokerIP; MqttUser xxxxxxx; MqttPassword yyyyyyy; GPIO14 09; Hostname sonoff_name; MqttClient unique_sonoff_name; Topic sonoff_name; FriendlyName1 Sonoff-Name

see also Tasmota Commands page in the wiki section

Commands

to change your location after flashing the .bin file we go to the Console menu
and type the Commands

 Latitude   <value>   (set your latitude)
 Longitude  <value>   (set your longitude)

also for a correct Time, Timezone must be entered mine is 2

Timezone   <value>   (set your Timezone)
 
   `-13..13`  = set timezone
   `99`  = use timezone configured with  `TimeDST`  and  `TimeSTD`

 TimeSTD    <value>   
    &
 TimeDST    <value>   

 Set standard (STD) and daylight saving (DST) timezones
    `0`  = reset timezone parameters to firmware defaults
    `H`  = hemisphere ( `0`  = northern hemisphere /  `1`  = southern hemisphere)
    `W`  = week ( `0`  = last week of month,  `1..4`  = first .. fourth)
    `M`  = month ( `1..12` )
    `D`  = day of week ( `1..7`  = sunday saturday saturday
    `h`  = hour ( `0..23` )
    `T`  = timezone ( `-780..780` )(offset from UTC in  **MINUTES**  - 780min/60min=13hrs)
2 Likes

Another great feature if you don’t want to use Termite and Backlog
is that you can Start Wifi manager by pressing the main button (GPIO0) 4 short presses providing an Access Point with IP address 192.168.4.1
and you are in.

Button usage

The main button on a Sonoff-Tasmota flashed module provides the following functionalities:

  • 1 short press: Toggles the relay either directly or by sending a MQTT message like cmnd/sonoff/POWER1 ON . This will blink the LED twice and sends a MQTT status message like stat/sonoff/POWER1 ON . If cmnd/sonoff/ButtonRetain on has been used the MQTT message will also contain the MQTT retain flag.
  • 2 short presses: Toggles the relay 2 if available on the device like Sonoff Dual. This will blink the LED twice and sends a MQTT status message like stat/sonoff/POWER2 on .
  • 3 short presses: Start Wifi smartconfig allowing for SSID and Password configuration using an Android mobile phone with the ESP8266 SmartConfig app. The LED will blink during the config period. A single button press during this period will abort and restart sonoff.
  • 4 short presses: Start Wifi manager providing an Access Point with IP address 192.168.4.1 and a web server allowing the configuration of Wifi. The LED will blink during the config period. A single button press during this period will abort and restart sonoff.
  • 5 short presses: Start Wifi Protected Setup (WPS) allowing for SSID and Password configuration using the router’s WPS button or webpage. The LED will blink during the config period. A single button press during this period will abort and restart sonoff.
  • 6 short presses: Will restart the module
  • 7 short presses: Start OTA download of firmware. The green LED is lit during the update
  • Pressing the button for over forty seconds: Reset settings to defaults as defined in user_config.h and restarts the device

The button is connected to GPIO 0 (NodeMCU pin D3)

3 Likes

MQTT

MQTT is the recommended protocol for controlling your devices. If you have no previous knowledge of MQTT you can learn more from MQTT Overview or get a complete course in the MQTT Essentials article series. After you have a working MQTT broker you need to configure Tasmota to communicate with it.

Configure MQTT

If you flashed a precompiled .bin or didn’t enter MQTT info in user_config_override.h before compiling you need to configure MQTT on your device first.

Configure MQTT using WebUI

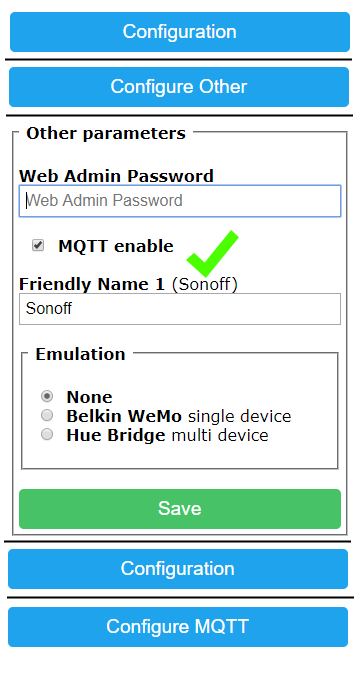
Go to Configuration -> Configure Other and make sure “MQTT Enable” box is checked.
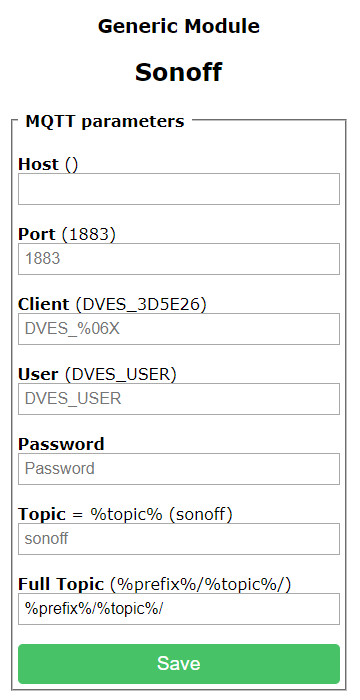
Once MQTT is enabled you need to set it up using Configuration -> Configure MQTT .

For a basic setup you only need to set Host , User and Password but it is recommended to change Topic to avoid issues. Each device should have a unique Topic .

  • Host = your MQTT broker address or IP
  • Port = your MQTT broker port (default port is set to 1883)
  • Client = device’s unique identifier, do not change if not sure what it is for
  • User = username for authenticating on your MQTT broker
  • Password = password for authenticating on your MQTT broker
  • Topic = unique identifying topic for your device (e.g. hallswitch , kitchen-light ). %topic% in wiki references to this.
  • FullTopic = full topic definition, do not change if not sure what it is for

Configure MQTT using Backlog

Using a serial connection or the WebUI Console you can issue (or even better, paste a premade) Backlog command for quick and easy MQTT setup.

Backlog mqtthost <mqtt_broker_address>; mqttport <mqtt_broker_port>; mqttuser <username>; mqttpassword <password>; topic <device_topic>

After a reboot all necessary MQTT settings are configured. Don’t forget, you can use Backlog for all commands!

1 Like

Another strong Tool you can find in Tasmota is

Rules

(more details can be found in Examples section)

Summary

Introduction

Rules expand the available functionality in Sonoff-Tasmota with user flexibility. It allows for different actions on different button, switch or power responses. Rules are stored in flash and therefore will survive a reboot. Rules act on triggers initiated by events like a System Boot or a Timer being activated.

Using rules many issues can be resolved.

Rules can be added directly from the Tasmota Console or By MQTT or by HTTP as any other Tasmota Command.

A great introduction to Home Assistant

1 Like

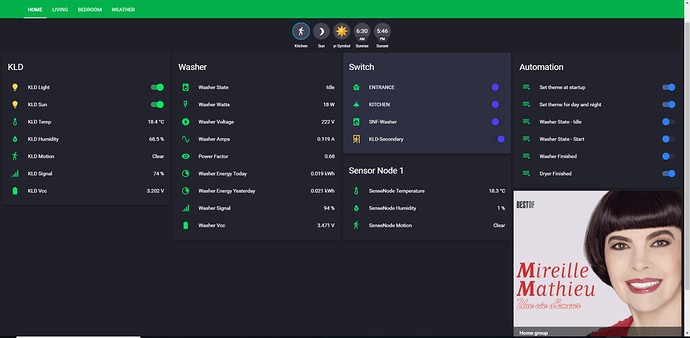
Best of Mireille Mathieu ?:joy::joy:

2 Likes

@Blynk_Coeur

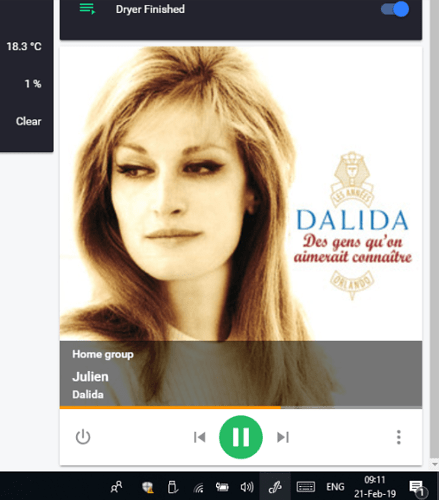
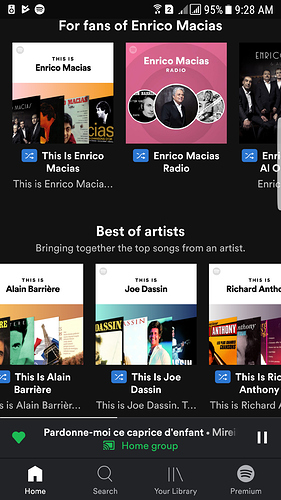
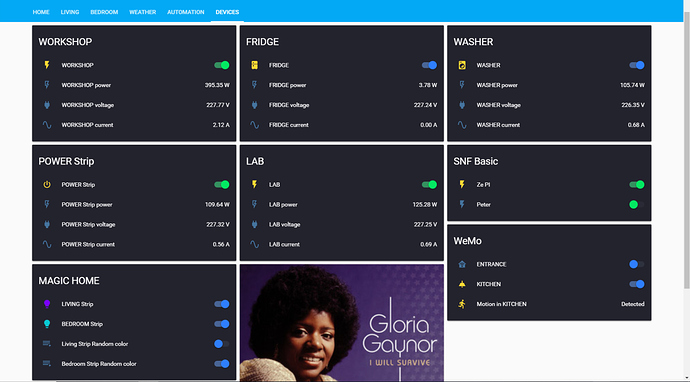
You can find all your Favorite songs on Spotify and they are displayed (Album Cover) on Home Assistant UI as long as you are hearing them on your Home Mini Speakers.
this service is free on Home Mini without Advertisement

same with Pandora on Echo Dot

1 Like

I’ll try to find Lana del Rey’s albums. :joy::joy:

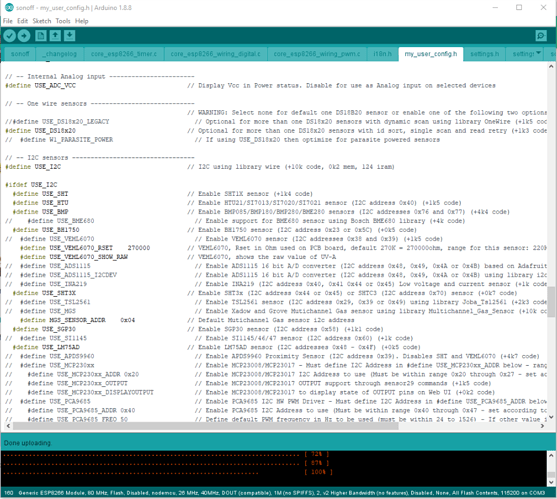
How to setup and configure Arduino IDE for Tasmota compilation and upload.

this is a very good wiki written with care, so try to follow the instructions for good results

Tasmota with " Arduino IDE "

IMPORTANT: For Windows users, before executing arduino.exe add an empty folder called portable in the known folder.

Serial Monitor

after enabling Home Assistant

you need to add this line in your configuration.yaml

mqtt:
  discovery: true

for auto discovery

15:32:53.216 -> 00:00:00 Project sonoff Sonoff Version 6.4.1(sonoff)-2_5_0
15:32:53.633 -> 00:00:00 WIF: Connecting to AP1 xxxxx in mode 11N as sonoff-2644...
15:32:58.133 -> 00:00:04 WIF: Connected
15:32:58.133 -> 00:00:04 DNS: Initialized
15:32:58.202 -> 00:00:04 HTP: Web server active on sonoff-2644.local with IP address 192.168.xxx.xxx
15:32:59.390 -> 15:32:58 MQT: Attempting connection...
15:32:59.538 -> 15:32:58 MQT: Connected
15:32:59.538 -> 15:32:58 MQT: sonoff/tele/LWT = Online (retained)
15:32:59.538 -> 15:32:58 MQT: sonoff/cmnd/POWER = 
15:32:59.591 -> 15:32:58 MQT: sonoff/tele/INFO1 = {"Module":"Sonoff Basic","Version":"6.4.1(sonoff)","FallbackTopic":"cmnd/DVES_F12A5454_fb/","GroupTopic":"sonoffs"}
15:32:59.591 -> 15:32:58 MQT: sonoff/tele/INFO2 = {"WebServerMode":"Admin","Hostname":"sonoff-2644","IPAddress":"192.168.xxx.xxx"}
15:32:59.591 -> 15:32:58 MQT: sonoff/tele/INFO3 = {"RestartReason":"External System"}
15:32:59.591 -> 15:32:58 MQT: sonoff/stat/RESULT = {"POWER":"OFF"}
15:32:59.591 -> 15:32:58 MQT: sonoff/stat/POWER = OFF
15:32:59.591 -> 15:32:58 MQT: homeassistant/light/F12A54_LI_1/config =  (retained)
15:32:59.640 -> 15:32:58 MQT: homeassistant/switch/F12A54_RL_1/config = {"name":"Sonoff","cmd_t":"~cmnd/POWER","stat_t":"~tele/STATE","val_tpl":"{{value_json.POWER}}","pl_off":"OFF","pl_on":"ON","avty_t":"~tele/LWT","pl_avail":"Online","pl_not_avail":"Offline","uniq_id":"F12A54_RL_1","device":{"identifiers":["F12A54"],"name":"Sonoff","model":"Sonoff Basic","sw_version":"6.4.1(sonoff)","manufacturer":"Tasmota"}, "~":"sonoff/"} (retained)
15:32:59.640 -> 15:32:58 MQT: homeassistant/light/F12A54_LI_2/config =  (retained)
15:32:59.640 -> 15:32:58 MQT: homeassistant/switch/F12A54_RL_2/config =  (retained)
15:32:59.690 -> 15:32:58 MQT: homeassistant/light/F12A54_LI_3/config =  (retained)
15:32:59.690 -> 15:32:58 MQT: homeassistant/switch/F12A54_RL_3/config =  (retained)
15:32:59.690 -> 15:32:58 MQT: homeassistant/light/F12A54_LI_4/config =  (retained)
15:32:59.690 -> 15:32:58 MQT: homeassistant/switch/F12A54_RL_4/config =  (retained)
15:32:59.690 -> 15:32:58 MQT: homeassistant/light/F12A54_LI_5/config =  (retained)
15:32:59.690 -> 15:32:58 MQT: homeassistant/switch/F12A54_RL_5/config =  (retained)
15:32:59.690 -> 15:32:58 MQT: homeassistant/light/F12A54_LI_6/config =  (retained)
15:32:59.690 -> 15:32:58 MQT: homeassistant/switch/F12A54_RL_6/config =  (retained)
15:32:59.690 -> 15:32:58 MQT: homeassistant/light/F12A54_LI_7/config =  (retained)
15:32:59.690 -> 15:32:58 MQT: homeassistant/switch/F12A54_RL_7/config =  (retained)
15:32:59.737 -> 15:32:58 MQT: homeassistant/light/F12A54_LI_8/config =  (retained)
15:32:59.737 -> 15:32:58 MQT: homeassistant/switch/F12A54_RL_8/config =  (retained)
15:33:07.674 -> 15:33:06 MQT: sonoff/tele/STATE = {"Time":"2019-02-25T15:33:06","Uptime":"0T00:00:14","Vcc":3.014,"SleepMode":"Dynamic","Sleep":50,"LoadAvg":19,"POWER":"OFF","Wifi":{"AP":1,"SSId":"xxxx","BSSId":"48:F8:B3:xx:xx:xx","Channel":10,"RSSI":68}}
15:33:33.802 -> 15:33:32 MQT: sonoff/tele/STATE = {"Time":"2019-02-25T15:33:32","Uptime":"0T00:00:40","Vcc":3.014,"SleepMode":"Dynamic","Sleep":50,"LoadAvg":19,"POWER":"ON","Wifi":{"AP":1,"SSId":"xxxx","BSSId":"48:F8:B3:xx:xx:xx","Channel":10,"RSSI":70}}
15:33:33.802 -> 15:33:32 MQT: sonoff/stat/RESULT = {"POWER":"ON"}
15:33:33.802 -> 15:33:32 MQT: sonoff/stat/POWER = ON
15:33:35.862 -> 15:33:34 MQT: sonoff/tele/STATE = {"Time":"2019-02-25T15:33:34","Uptime":"0T00:00:42","Vcc":3.015,"SleepMode":"Dynamic","Sleep":50,"LoadAvg":19,"POWER":"OFF","Wifi":{"AP":1,"SSId":"xxxx","BSSId":"48:F8:B3:xx:xx:xx","Channel":10,"RSSI":72}}
15:33:35.862 -> 15:33:34 MQT: sonoff/stat/RESULT = {"POWER":"OFF"}
15:33:35.862 -> 15:33:34 MQT: sonoff/stat/POWER = OFF

Information Menu

Program Version 6.4.1(sonoff)
Build Date & Time 2019-02-25T15:26:12
Core/SDK Version 2_5_0/3.0.0-dev(c0f7b44)
Uptime 0T00:56:05
Flash write Count 11 at 0xF9000
Boot Count 1
Restart Reason External System
Friendly Name 1 Sonoff
AP1 SSId (RSSI) xxxx (72%)
Hostname sonoff-2644
IP Address 192.168.xxx.xxx
Gateway 192.168.xxx.xxx
Subnet Mask 255.255.255.0
DNS Server 192.168.xxx.xxx
MAC Address 5C:CF:7F:F1:2A:54
MQTT Host 192.168.xxx.xxx
MQTT Port 1883
MQTT User xxxx
MQTT Client DVES_F12A5454
MQTT Topic sonoff
MQTT Group Topic sonoffs
MQTT Full Topic sonoff/cmnd/
MQTT Fallback Topic cmnd/DVES_F12A5454_fb/
Emulation None
mDNS Discovery Enabled
mDNS Advertise Web Server
ESP Chip Id 15805012
Flash Chip Id 0x1640EF
Flash Size 4096kB
Program Flash Size 1024kB
Program Size 548kB
Free Program Space 452kB
Free Memory 22kB
1 Like

How to setup and configure PlatformIO for Tasmota compilation and upload.

Tasmota with " PlatformIO "

PIO Building firmware

PIO Uploading firmware

Over-the-Air ESP8266 programming using PlatformIO for MAC PC

Templates

Sonoff-Tasmota Templates Wiki

Starting with version 6.4.1.16 Sonoff-Tasmota Modules can be extended by users using a Template . Version 6.4.1.17 introduced a menu to configure templates.

These are intended to be an easy way for users to create and share configurations for devices that are unsupported in Sonoff-Tasmota but have common characteristics with existing modules. We encourage everyone who creates a template for a new unknown device to add it to the database with an image of the device, links to the manufaturer or where it can be found and, of course, the template for it.

here is Tasmota Development version 6.4.1.19

almost daly development changelog can be found in “sonoff /_changelog.ino”

How to Install Platform IO and Build Tasmota

This is a great video ( Live Stream ~1:30 h ) for Platform IO on Windows 10 showing how you can reduce the size of your .bin file by removing sensors that you don’t actually use or are not available in your country.

Did anyone ever tried to use the Blynk protocol directly from Tasmota? So, I would like Tasmota to talk Blynk directly to the Blynk server. I read that it seems difficult, but I don’t know what the problem is.

for the moment I think MQTT is our solution unless the Blynk stuff can find a better solution

A HA video on Lovelace and Floorplan

Home Assistant is always updating to make things easier, you may find little difference between videos and actual HA.

Home Assistant working with all my devices “Official Firmware”

  • WeMo (Belkin latest ver)
  • Magic Home (fw ver 1.2.7 Build 25)
  • Sonoff POW R2 (fw ver 2.8.0)
  • Sonoff Basic (fw ver 2.6.1)
  • Sonoff Slampher RF (fw ver 3.0.0)

All Devices also working with Alexa & Google Home (Natural Speech Commands)


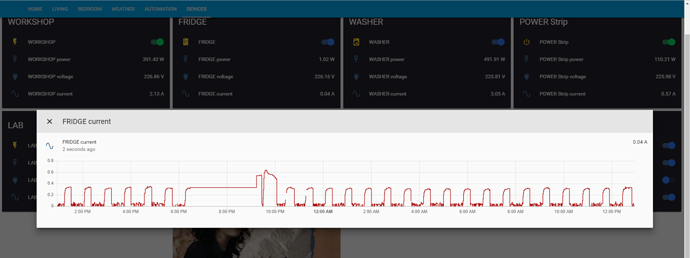
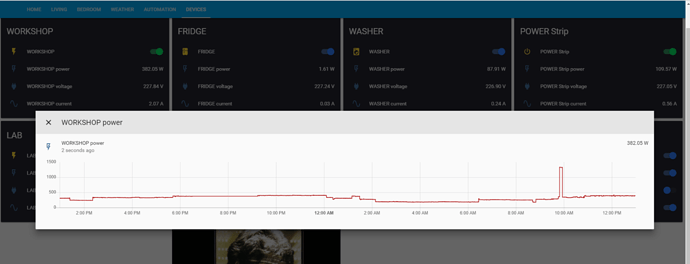
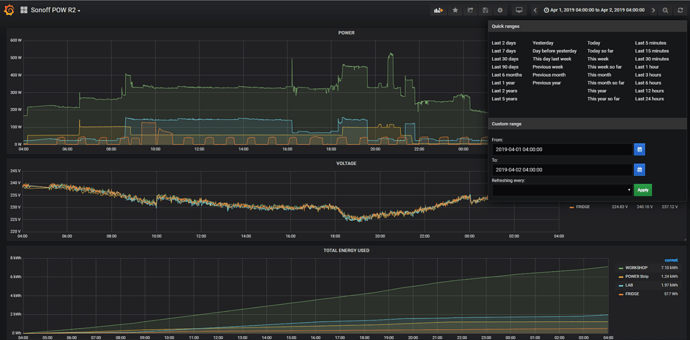
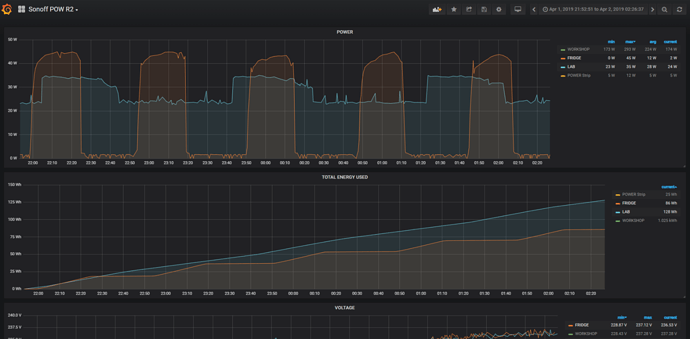
GRAFANA


HA on my phone 9 March

2 Likes

You’ve been busy!

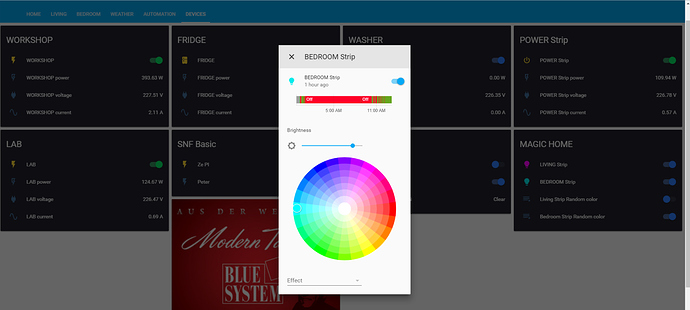
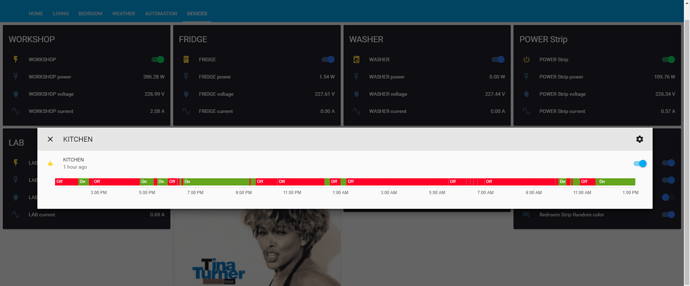
The “Bedroom Strip” with a bit of Tina’s ‘Private Dancer’ playing in the background certainly sounds interesting! :rofl::rofl::rofl:

Pete.

1 Like

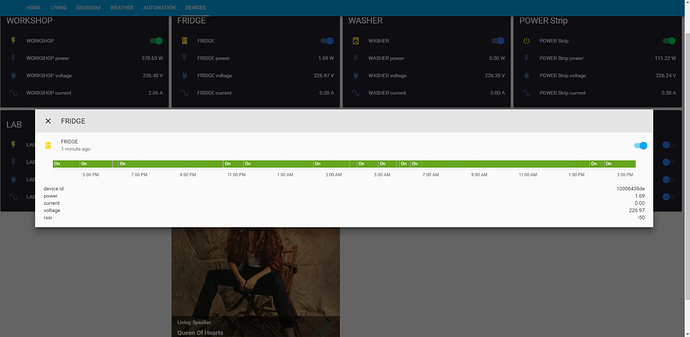
Device ID & RSSI are shown here


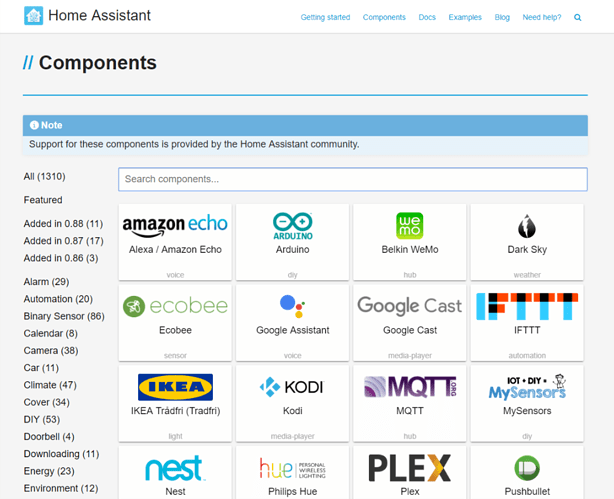
HA Components are growing every day All (1310)


Components for:

WeMo

Magic Home

ONVIF Camera

For Sonoff there is “No component yet”

I am using a custom component that works fine.

Home Assistant component for original firmware Sonoff / eWeLink smart devices

I am receiving warnings from HA but every thing is OK

You are using a custom component for sonoff.switch which has not been tested by Home Assistant. This component might cause stability problems, be sure to disable it if you do experience issues with Home Assistant.

3:21 PM loader.py (WARNING)

You are using a custom component for sonoff.sensor which has not been tested by Home Assistant. This component might cause stability problems, be sure to disable it if you do experience issues with Home Assistant.

3:21 PM loader.py (WARNING)

Compatibility list

Model Supported 1.6 1.8.1 2.6 2.6.1 2.7.1 3.0.0 Remarks
Sonoff Basic yes yes yes yes yes
Sonoff Dual yes
Sonoff RF yes yes yes
Sonoff G1 ?
Sonoff 4CH Pro yes yes yes
Sonoff 4CH Pro R2 yes yes
Sonoff S20 yes yes yes
Sonoff S31 yes
Sonoff S26 yes yes yes version: Euro
Sonoff T1 1C yes yes
Sonoff T1 EU 2C yes yes
Sonoff T1 UK 3C yes yes yes
Sonoff T1 US 3C yes
Sonoff Pow yes + power sensor
Sonoff Pow R2 yes + power/current/voltage sensors
Sonoff TH10/TH16 yes + temp/humidity sensors
Sonoff iFan02 yes it creates 4 switches, 1 for the light and 3 for the various fan speeds
Sonoff HT-TH31 ?
Sonoff Slampher RF yes yes yes
3 Gang Generic Wall Switch yes yes Manfufacturer: pro-sw, Model: PS-15-ES (according to ewelink app)
1 Gang Generic Wall Switch yes yes yes manfufacturer: KingART, model: KING-N1 (according to ewelink app), Chip: PSF-B85 (ESP8285)
WHDTS WiFi Momentary Inching Relay yes displayed as a switch button
MHCOZY WiFi Wireless 5V/12V yes
Geekcreit 2 Channel AC 85V-250V yes yes
Smart Wi-Fi Outlet yes

yes = confirmed version, [empty] = unknown for sure

As we see all components are using .py extension to work with HA

HASS-sonoff-ewelink/sensor/ sonoff.py

HASS-sonoff-ewelink/switch/ sonoff.py


@PeteKnight
@Emilio

Here I am asking if there is anyone on this forum having a good knowledge of python programming language to help us translating this to BLYNK without the need to change the SONOFF firmware to TASMOTA to be able to use MQTT publish and subscribe message protocol.

Continuing the discussion from Hacking the new ITEAD Studio - Sonoff S31

Today I think I knew how Peter Buga can control Sonoff / eWeLink smart devices.

Download and install Python 2.x or 3.x from https://www.python.org/downloads

Go to sonoff-debug.py
To run this just, cd to the location of the script and:

python sonoff-debug.py -u 'email or phone-number username' -p 'password' > devices.json

you will get a file named “devices.json”

this is one of my Sonoff POW R2 but the file contain all Sonoffs in my Home.
if you take a close look to the file you will find all the variables power, voltage, current, rssi, device id, and more…

[
  {
    "__v": 0, 
    "_id": "[hidden]", 
    "apikey": "xxxxxxxx-xxxx-xxxx-xxxx-xxxxxxxxxxxx", 
    "brandLogoUrl": "", 
    "brandName": "Sonoff", 
    "createdAt": "xxxx-xx-xxxxx:xx:xx.xxx", 
    "deviceStatus": "", 
    "deviceUrl": "", 
    "deviceid": "[hidden]", 
    "devicekey": "xxxxxxxx-xxxx-xxxx-xxxx-xxxxxxxxxxxx", 
    "extra": {
      "_id": "[hidden]", 
      "extra": {
        "apmac": "xx:xx:xx:xx:xx:xx", 
        "brandId": "58e5f344baeb368720e25469", 
        "description": "WO1881982", 
        "mac": "xx:xx:xx:xx:xx:xx", 
        "manufacturer": "\u6df1\u5733\u677e\u8bfa\u6280\u672f\u6709\u9650\u516c\u53f8", 
        "model": "PSC-B67-GL", 
        "modelInfo": "5a2e1ae50cf772f92c342ef6", 
        "ui": "\u529f\u7387\u68c0\u6d4b\u63d2\u5ea7\u8fc7\u8f7d\u544a\u8b66", 
        "uiid": 32
      }
    }, 
    "group": "", 
    "groups": [], 
    "ip": "[hidden]", 
    "location": "", 
    "name": "[hidden]",, 
    "offlineTime": "xxxx-xx-xxxxx:xx:xx.xxx", 
    "online": true, 
    "onlineTime": "xxxx-xx-xxxxx:xx:xx.xxx", 
    "params": {
      "alarmCValue": [
        -1, 
        10
      ], 
      "alarmPValue": [
        -1, 
        -1
      ], 
      "alarmType": "pcv", 
      "alarmVValue": [
        -1, 
        240
      ], 
      "bindInfos": {
        "alexa": [
          "xxxxxx-xxxx-xxxxx-xxxxx-xxxxxxxxxxxxx_26ca1996a20e8bd63617axxxxxxxxxxxxxxxxxxxx"
        ], 
        "gaction": [
          "xxxxxxxxxx-xxxxx-xxxxxx-xxxxxxxxxxx_ewelink-google-home-v1"
        ]
      }, 
      "current": "0.28", 
      "endTime": "xxxx-xx-xxxxx:xx:xx.xxx", 
      "fwVersion": "2.8.0", 
      "hundredDaysKwh": "get", 
      "init": 1, 
      "oneKwh": "stop", 
      "partnerApikey": "xxxxxxxx-xxxx-xxxx-xxxx-xxxxxxxxxxxx", 
      "power": "59.81", 
      "rssi": -71, 
      "sledOnline": "on", 
      "staMac": "xx:xx:xx:xx:xx:xx", 
      "startTime": "xxxx-xx-xxxxx:xx:xx.xxx", 
      "startup": "stay", 
      "switch": "on", 
      "timeZone": 2, 
      "voltage": "234.57"
    }, 
    "productModel": "Pow_R2", 
    "settings": {
      "alarmNotify": 1, 
      "opsHistory": 1, 
      "opsNotify": 0
    }, 
    "sharedTo": [
      {
        "nickname": "Pico", 
        "note": "", 
        "permit": 15, 
        "phoneNumber": "[hidden]",, 
        "shareTime": 1551282301502
      }
    ], 
    "showBrand": true, 
    "type": "10", 
    "uiid": 32
  }, 

to remove all hidden information in this file go to sonoff-debug.py and comment

data = re.sub(r'"phoneNumber": ".*"', '"phoneNumber": "[hidden]",', data)
data = re.sub(r'"name": ".*"', '"name": "[hidden]",', data)
data = re.sub(r'"ip": ".*",', '"ip": "[hidden]",', data)
data = re.sub(r'"deviceid": ".*",', '"deviceid": "[hidden]",', data)
data = re.sub(r'"_id": ".*",', '"_id": "[hidden]",', data)
data = re.sub(r'"\w{2}:\w{2}:\w{2}:\w{2}:\w{2}:\w{2}"', '"xx:xx:xx:xx:xx:xx"', data)
data = re.sub(r'"\w{8}-\w{4}-\w{4}-\w{4}-\w{12}"', '"xxxxxxxx-xxxx-xxxx-xxxx-xxxxxxxxxxxx"', data)
data = re.sub(r'"\d{4}-\d{2}-\d{2}T\d{2}:\d{2}:\d{2}\.\d+Z"', '"xxxx-xx-xxxxx:xx:xx.xxx"', data)

before running the script .


at end I think https://community.home-assistant.io/u/peterbuga has done a great job
and here is what he wrote:
the data that you see/get, it’s exactly what I get from eWeLink API and nothing more.
I recently found out that sensor data is propagated over websocket messages too, not just basic requests (as it now), when I do find the time I’ll update the component to take advantage of this and hopefully an overall better output :crossed_fingers: