How to integrate Blynk and IFTTT (Google Assistant)

What do you mean by port?
Sending a 0 to a virtual pin will do just that, set the virtual pin to 0. What happens after that will depend on what is in the code.

To send a pulse, you will need to make it so when you send a 0 or 1 to the virtual pin what ever action you need to occur will, and then set the virtual pin back to the state you want.

For example, this is how I use it when activating my garage door opener. Sending a value of 1to the virtual pin with Google Assistant.

BLYNK_WRITE(V20) 
{
  int value = param.asInt();
  if (value == 1) 
   {
    Serial.println("Garage Opener Activated");
     digitalWrite(led_pin, HIGH);//Active High Relay
    timer.setTimeout(1000L, []() { 
     digitalWrite(led_pin, LOW);
     Blynk.virtualWrite(V20, 0);
      });  // END Timer Function
  }
}
1 Like

Can we put multi virtual pin from Webhook to blynk ? Thanks

This is how I did the linkys using Amazon Alexa and google IFTTT for my project on here

Firstly make sure the IP address works in your browser

0 turns off - A 1 turns pin on

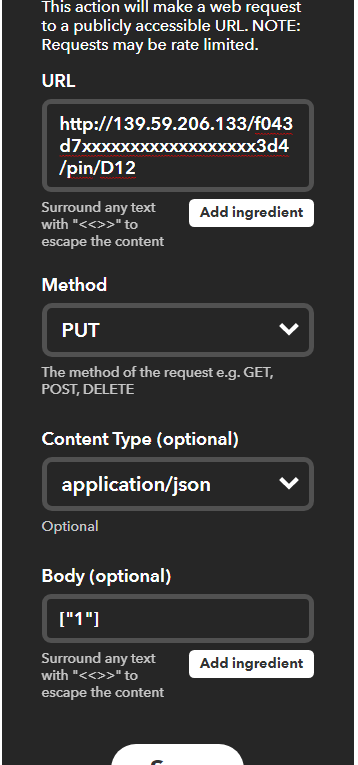
So in this example I am controlling virtual pin V43 which is the soffit light button on my blynk app - clearly make sure your button on the blynk app works first!!!

This is the IFTTT Applet to go with it


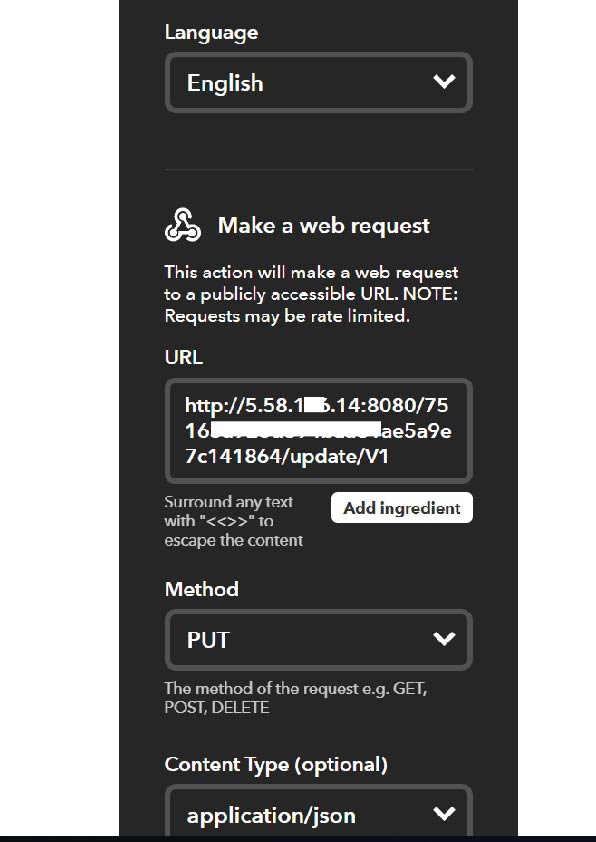
So I use the phrase ‘soffit lights on’ then a webhook to the public IP then your token and pin as shown
the method is ‘PUT’
COntent type is application/JSON
and the body is [“1”] so this turns

then you creat another applett to turn off ie changing trigger wording and put a 0 in the body.
Dont forget to save your applett and make sure it is turned on.

I also do this with a slider and alexa for a lounge dimmer just have an applet for 10, 20, 30 and so on. Then when you say trigger lounge 30 ie get 30% power - simples!!! and you see the slider move on the app.

Cheers

kev

Hi, if we need to chang more than 1 pin, ex: V1 and V2 in one url, can we do that?

No… but you can refer to another vPin’s function that will change as many other vPins as you want.

PS, this type of question is not really suited for this topic’s purpose and has been answered a few times…

1 Like

Ok thanks Gunner

Come faccio a trovare il blynk-cloud.com per Italia? Grazie

It is just around the corner, to the right, past the post office :rofl:

Actually you would run the ping command on your PC…

https://www.google.com/search?q=ping+a+url

2 Likes

Hello dear,

I have managed to control devices on/off via google voice but is it possible that i could get the sensor reading via google assistant.

for example .
i am using a temperature sensor and its value is fed to blynk .

and if i ask google assistant to tell me my room temperature it should tell me the value of my temperature sensor.

regards

No, I do not think this is possible with Blynk and IFTTT. The flow is GA → IFTTT → something.

Hello everyone, if I use the direct link on the web written like this:

http://blynk-cloud.com/f043d7ab0dxxxxxxx3242exxx83d4/update/D12?value=1

it works perfectly, but through ifftt the applet does not react … any ideas?

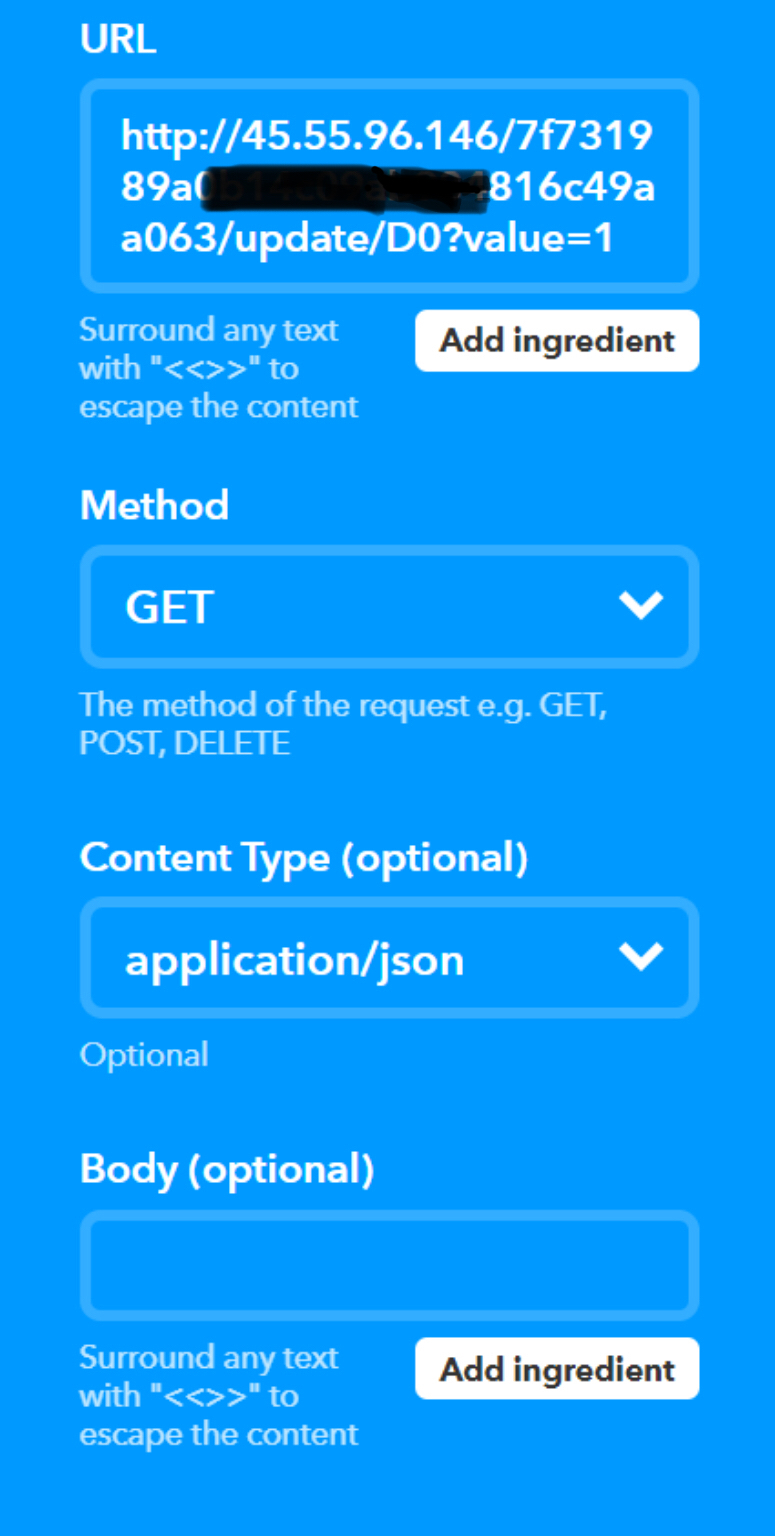
You’re better using GET rather than PUT with IFTTT.
Also, when you test the URL in your browser you should use the IP address not blynk-cloud.com as there may be an issue with the IP address you’re using and you’d never know.

Pete.

Meanwhile, thanks for the answer, I used the ip right now in the browser and it works anyway …
http://139.59.206.133/xxxxxxxxxxxxxxxxxxxxxxxxxx/update/D12?value=1

I do not understand is not good put?

or my god that error, I tried clicking on check now and not doing the applet correctly … now it works … thanks a lot for the support :roll_eyes::relaxed:

1 Like

If you want to use GET then use this syntax:

You’ll need to replace the IP address to the one you’ve been using and the pin to D12 instead of D0

Pete.

1 Like

say me “a private page!”

Okay, that thread was in an area that you don’t have access to. I’ve edited my previous post with a screenshot instead.

Pete.

Thank you so much Pete !!!

1 Like

I have the IFTTT stopped working. Last time it started 2 months ago and everything worked and now with the same settings, it does not work.
Anyone else has such problems?

The question is removed.
You need to add port 8080 to the server address.

1 Like