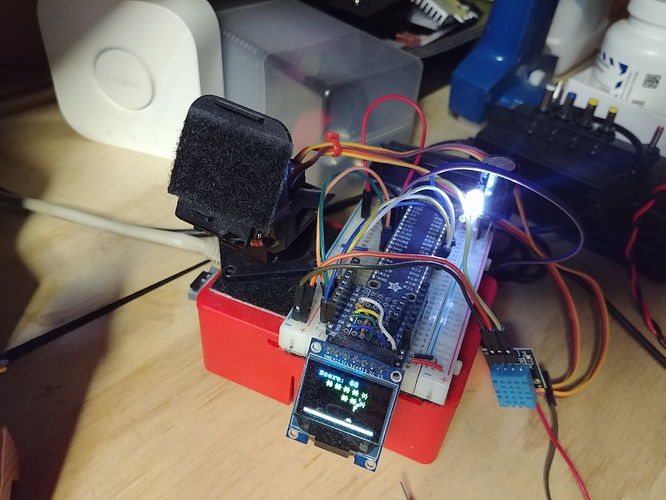
Blynk on Udoo Neo running!

Hi guys,

I’m one step close to have my unsupported board running with blynk under Ubuntu OS,
actually is already working from the server and app communication point of view.
The only thing I have to figure out at this point is how to pass this terminal command here “cat /sys/bus/iio/devices/iio:device0/in_voltage0_raw” inside the blynk loop with a proper time interval and have blynk client map the value to a virtual pin and push it to blynkcloud.

The command above works for reading input on analog pin A0 as mentioned here

The board is working with virtual pins and is forwarding the inputs from Blynk app to board terminal when the .js script is running.

If it runs Linux, then you should have full widget (or near enogh) support with either the Blynk NodeJS or Blynk Python client libraries… There should be no need to custom code anything else :face_with_raised_eyebrow: The App only needs the Generic or any Linux board settings and virtual pins.

What exactly are you trying to do… or what is your question about?

I’m trying to make Blynk access the GPIOs on the board because it has a different processor (A9)
than other boards like raspberry Pi.
So even with generic board and blynk running with node js I can’t access the pins state without accessing the files for pin state.

Well all I can suggest is the answer is in the GPIO coding directions for your board… I have briefly made a C.H.I.P. Linux based MCU (now defunct) work with specific GPIO code and python code for that board, then I just used that code activated or triggered by Blynk. It wasn’t easy (and I have since lost the code when the device crashed), but that difficulty had nothing to do with Blynk as long as I only used virtual pins.

I know is not easy, I just need a way to make blynk read the pin state files and then bound the value to a virtual pin.

I need to know how to modify this index.js script.

As I do not have that hardware, I have no way to determine how to take it’s GPIO control methods and interface it with Blynk’s virtual pins.

Here would be a possible (untested of course :stuck_out_tongue_winking_eye: ) generic NodeJS example of how to read and pass on most any GPIO input to a Blynk Widget.

In your case you need to use whatever methods are mentioned here - https://www.udoo.org/docs-neo/Hardware_&_Accessories/GPIO.html - And apply them to code like below.

// setup whatever library method for reading your devices GPIO

const Blynk = require('blynk-library');  // Links variable 'Blynk' to the Blynk Library
const AUTH = 'xxxxxxxxxx';  // Your top secret auth code
const blynk = new Blynk.Blynk(AUTH, options = {
  connector : new Blynk.TcpClient()
});

var myValue = // use whatever command to setup your devices GPIO input to this variable

// Automatically update sensor value every 2 seconds
setInterval(function() {
  // use whatever command to read your GPIOs variable... in this case myValue
  blynk.virtualWrite(0, myValue);  // Send the value of the variable myValue to a Widget on V0
}, 2000);

And for another example… but using an RPi and the pigpio library (one of many for the RPi), I can read a DHT sensor with NodeJS and Blynk…

const Gpio = require('pigpio').Gpio;  // I use this library to read my devices GPIO pins
var sensorLib = require('node-dht-sensor');  // I use this library, compatible to my device, to interpret the DHT sensors data and assign that control to the variable sensorLib

const Blynk = require('blynk-library');  // Links variable 'Blynk' to the Blynk Library
const AUTH = 'xxxxxxxxxx';  // Your top secret auth code
const blynk = new Blynk.Blynk(AUTH, options = {
  connector : new Blynk.TcpClient()
});

// Setup sensor, exit if failed
var sensorType = 11; // 11 for DHT11, 22 for DHT22 and AM2302
var sensorPin  = 4;  // The GPIO pin number for sensor signal
if (!sensorLib.initialize(sensorType, sensorPin)) {
  console.warn('Failed to initialize sensor');
  process.exit(1);
}

// Automatically update sensor value every 2 seconds
setInterval(function() {
  var readout = sensorLib.read();  // read the sensor and apply the full data to the variable
  blynk.virtualWrite(0, readout.temperature.toFixed(0));  // Send parsed temp value to widget on V0
  blynk.virtualWrite(1, readout.humidity.toFixed(0));  // Send parsed value to widget on V1
}, 2000);

So… basicly you need to find out how to access your devices GPIO from linux side, then find any sensor specific librarys, if neede, then apply them in much the same way to send the data to Blynk.

Controlling the GPIO from Blynk is much the same way, but using Blynk functions that respond to Widget state changes…

In this code snippets case, I watch for a Blynk Button and reboot my device if it is pressed…

/ ----- RPi Reboot Command -----
var process = require('child_process'); // A Linux library that allows this script to run CLI commands
var RPiReboot = new blynk.VirtualPin(20);  // Setup a variable linked to the Reboot Button on V20

RPiReboot.on('write', function(param) {  // Watches for  Button press
if (param == 1) {  // Runs the CLI command if the button on V20 is pressed 
process.exec('sudo /sbin/shutdown -r', function (msg) { console.log(msg) });
}
});

I think this is the missing piece I need in order to make blynk run CLI commands for retriving values!

Can’t wait to get home and try…

I tested last piece of your code and works for rebooting the board, but not for reading the value.
This code when pressing V20 button returns a “null” instead of the value in the terminal.
Do you think blynk script is getting the value but not showing in the console?

const Blynk = require('blynk-library');
const AUTH = 'xxxxxxxxxxxxxxxxxxxxxxxxxxxxx';
const blynk = new Blynk.Blynk(AUTH, options = {connector : new Blynk.TcpClient() });
var process = require('child_process'); 
var RPiReboot = new blynk.VirtualPin(20);  
RPiReboot.on('write', function(param) { 
if (param == 1) {  
process.exec('cat /sys/bus/iio/devices/iio\:device0/in_voltage0_raw', function (msg) { console.log(msg) });
}
});

Whatever this does, it does in the CLI window as a separate child process (if I understand correctly)… I have no idea how you would get any value response back from it into your script.

DOH!
I really want this board working with blynk beacuse I spent almost 300 € in hardware for a water level project…
Is there a way to map the CLI output to the virtual pin like you did here:

 var myValue = // use whatever command to setup your devices GPIO input to this variable

 // Automatically update sensor value every 2 seconds
 setInterval(function() {
  // use whatever command to read your GPIOs variable... in this case myValue
  blynk.virtualWrite(0, myValue);  // Send the value of the variable myValue to a Widget on V0
}, 2000);

But I didn’t do anything with CLI or child processes there. That was just a dummy example to show the Blynk and timer relevant parts. Besides…

Yes, it has been a whole hour, but I still don’t know how :blush:

I would focus on running the relevant GPIO commands INSIDE your script. I did briefly poke around at that boards documentation, but again without the hardware in hand (and a nice dark room with LCD light for days on end :stuck_out_tongue_winking_eye: ) I really have no idea how to interpret or control that boards GPIO from Linux.

Perhaps you might consider spending about $10-$30 more and getting an ESP8266, ESP32 or even a lower cost RPi like the ZeroW or 3 Model A+ - Buy a Raspberry Pi – Raspberry Pi

Much more support, particularly for the ESP lineup and C++ code with Blynk. But even the RPis have a metric butt ton of community support on the web.

I understand your point of view but my choice has been influenced by many factors, you can make yourself an idea in this previous post.
Anyway I’ll try to call the value inside the script as you said and will see.
Thank you for your support my friend!

Ah, ethernet… well the RPi model 3B+ has that - https://www.raspberrypi.org/products/raspberry-pi-3-model-b-plus/

I am running the slightly older RPi 3B on Ethernet, with Blynk and lots of GPIO connections…

You would still be using Linux… getting things done with more backup and support availed. And as you gain in experience, you will be able to transfer that to your UDOO board as well… so no real losses at all.

I know and I was decided to buy it but then I would have to use something to convert my 12 V POE supply to 5 V, instead with the Udoo I can power the board and the sensor with one ethernet cable only. :slight_smile:

Yes, I saw that, but that is a relatively easy fix… Although I am unsure why you have 12v POE… generally it is 48v… higher voltage means less loss over distance.

EDIT - looks like this was already suggested…

Double EDIT - this one goes to 5v with micro USB.

But it seems that learning to manage that fansnazy board’s dual-personality GPIO the way you want… not so much simple :stuck_out_tongue_winking_eye:

Anyhow, it was just a suggestion.

Yes this has 48 V on the injector side but 12 V on the splitter because the sensor only allows 9-32 V range.
And I knew I would have to do an extra effort somwhere else for having the hardware so easy to setup, even if I have to code a new libray for handling the pins, I’ll do that so others can benefit also.

1 Like

But once it is done, it is done… you could take your device end POE, make up a basic power distribution board that splits off 12v for the sensor and 5v for the MCU, and never touch it again! Also potentially allows for easy switching or adding of other sensors or MCUs down the road should you need (within current limits of course)… Just saying… lots of ways to pet the kitty (I like cats, so no skinning :stuck_out_tongue_winking_eye: )

I managed to put together this lua code that should be able to incorporate the value, but because of a colon inside the string to call i get this error. :face_with_head_bandage:

#!/usr/bin/env lua

--[[
  This is the default example for Linux, Windows, OpenWrt
]]

local socket = require("socket")
local use_ssl, ssl = pcall(require, "ssl")

local Blynk = require("blynk.socket")
local Timer = require("timer")

assert(#arg >= 1, "Please specify Auth Token")
local auth = arg[1]

local blynk = Blynk.new(auth, {
  heartbeat = 10, -- default h-beat is 30
  --log = print,
})

local function connectBlynk()
  local host = "blynk-cloud.com"

  local sock = assert(socket.tcp())
  sock:setoption("tcp-nodelay", true)

  if use_ssl then
	print("Connecting Blynk (secure)...")
	sock:connect(host, 443)
	local opts = {
	  mode = "client",
	  protocol = "tlsv1"
	}
	sock = assert(ssl.wrap(sock, opts))
	sock:dohandshake()
  else
	print("Connecting Blynk...")
	sock:connect(host, 80)
  end

  -- tell Blynk to use this socket
  blynk:connect(sock)
end

blynk:on("connected", function(ping)
  print("Ready. Ping: "..math.floor(ping*1000).."ms")
  -- whenever we connect, request an update of V1
  blynk:syncVirtual(1)
end)

blynk:on("disconnected", function()
  print("Disconnected.")
  -- auto-reconnect after 5 seconds
  socket.sleep(5)
  connectBlynk()
end)

function exec_out(cmd)
  local file = io.popen(cmd)
  if not file then return nil end
  local output = file:read('*all')
  file:close()
  -- print("Run: "..cmd.." -> "..output)
  return output
end

function read_file(path)
  local file = io.open(path, "rb")
  if not file then return nil end
  local content = file:read "*a"
  file:close()
  -- print("Read: "..path.." -> "..content)
  return content
end

function getArpClients()
  return tonumber(exec_out("cat /sys/bus/iio/devices/iio\:device0/in_voltage0_raw"))
end

function getUptime()
  return tonumber(exec_out("cat /proc/uptime | awk '{print $1}'"))
end

-- callback to run when V1 changes
blynk:on("V1", function(param)
  print("V1:", tonumber(param[1]), tonumber(param[2]))
end)

-- callback to run when cloud requests V2 value
blynk:on("readV2", function(param)
  blynk:virtualWrite(2, os.time())
end)

-- create a timer to update widget property
local tmr1 = Timer:new{interval = 5000, func = function()
  blynk:setProperty(2, "label", os.time())
end}

local tmr2 = Timer:new{interval = 5*60*1000, func = function()
  blynk:virtualWrite(10, getArpClients())
  blynk:virtualWrite(11, string.format("%.1f h", getUptime()/60/60))
end}

connectBlynk()

while true do
  blynk:run()
  tmr1:run()
end

I know nothing about Lua…

Are you sure it is the colon that is causing the issue (you have at least 4 of them in different print commands) and not some other misinterpreted escape sequence?