Okay, I’ve done some testing and you’re right, you can’t trigger a BLYNK_WRITE(vPin) event on the device using the Write node.
I think this was previously achieved using the Bride node in the Blynk contrib vor Legacy, but that method has been removed from Blynk now, so doesn’t appear in the IoT contrib.
But. there is a simple(ish) workaround that is very effective…
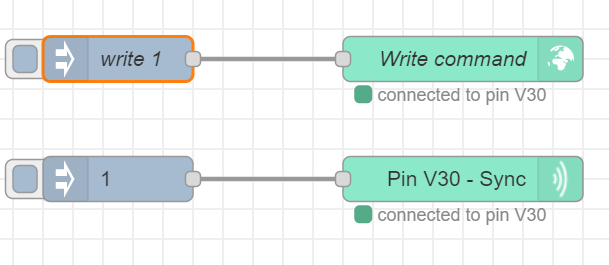
In the example above, I’ve set-up 6 Inject nodes that inject the numbers 1-6 on the msg.payload (but they could also be text if you wish), Node-Red isn’t fussy.
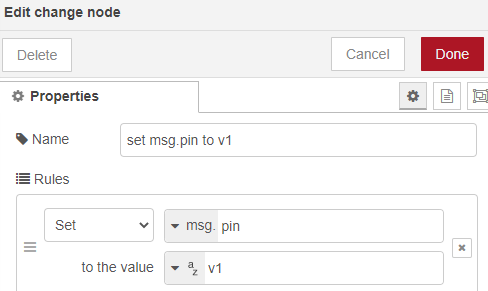
These then feed into a Change node, which simply sets the msg.pin value to “v1” like this:
There two more of these Change nodes below, for illustration. As you can see, you could set-up a flow like this with data coming in to multiple virtual pins on the same device, with very little extra work.
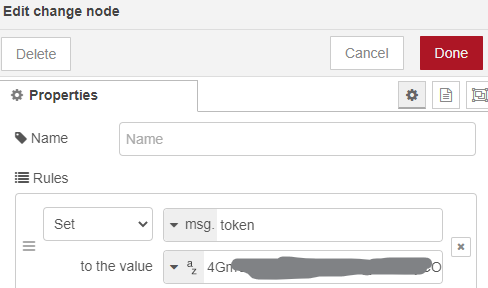
The next node is similar to the last one, it sets msg.token to the auth token for your device…
If I add a debug node set to show the complete message object after the set msg.token node like this:
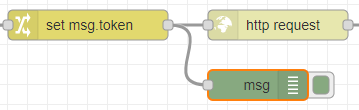
the output when I press the Inject 1 node looks like this:
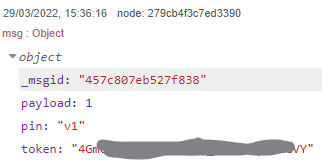
so the msg object now has three elements:
the payload, which was set to “1” by the Inject node
the “pin”, which was set to “v1” by the “set msg.pin to v1” node
the “token” which was set to the auth token by the “set msg.token” node
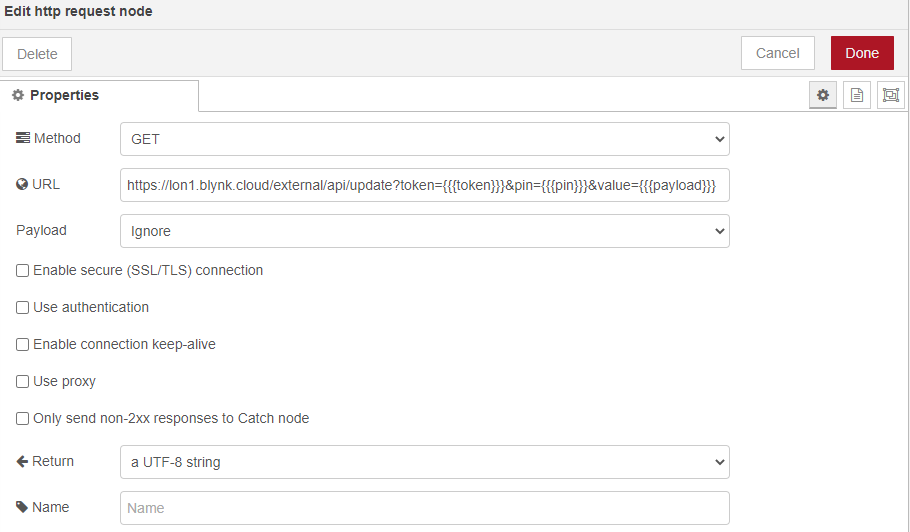
These three elements are then use as parameters in the HTTP request node to call the Blynk API…
That URL looks like this:
https://lon1.blynk.cloud/external/api/update?token={{{token}}}&pin={{{pin}}}&value={{{payload}}}
The triple curly (moustache) brackets tell Node-Red to replace this with the values that we’ve assigned to these msg elements earlier.
The lon1. part at the beginning of the url is the Blynk cloud server where my project lives, and is optional - but should be changed to match yours if you do include it.
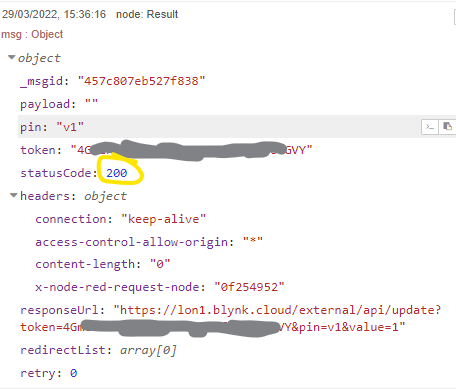
The “Result” debug node is also set to show “complete msg object” and displays the status code returned by the Blynk server, which should be “200”
Hope this helps.
Pete.