WeMos D1 Mini Pro

Not so much a project but more a quick review of the “Pro”.

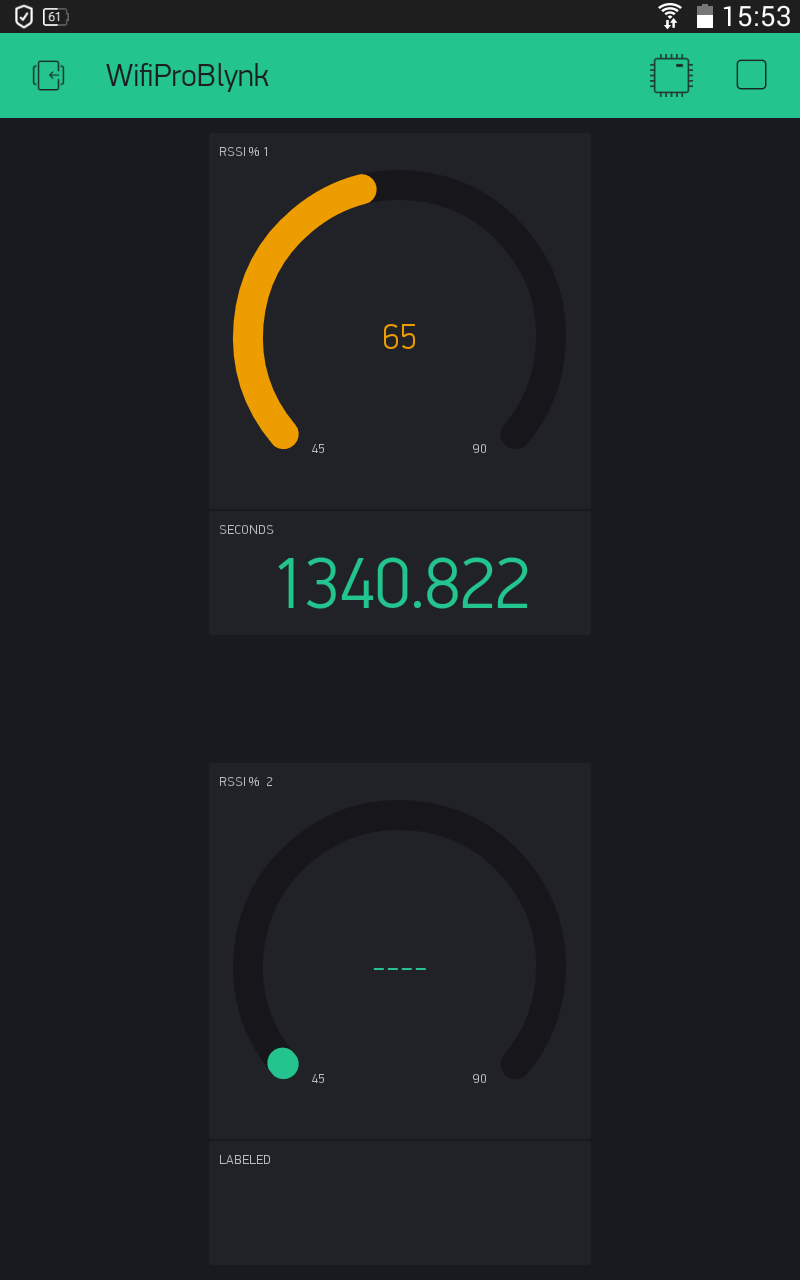
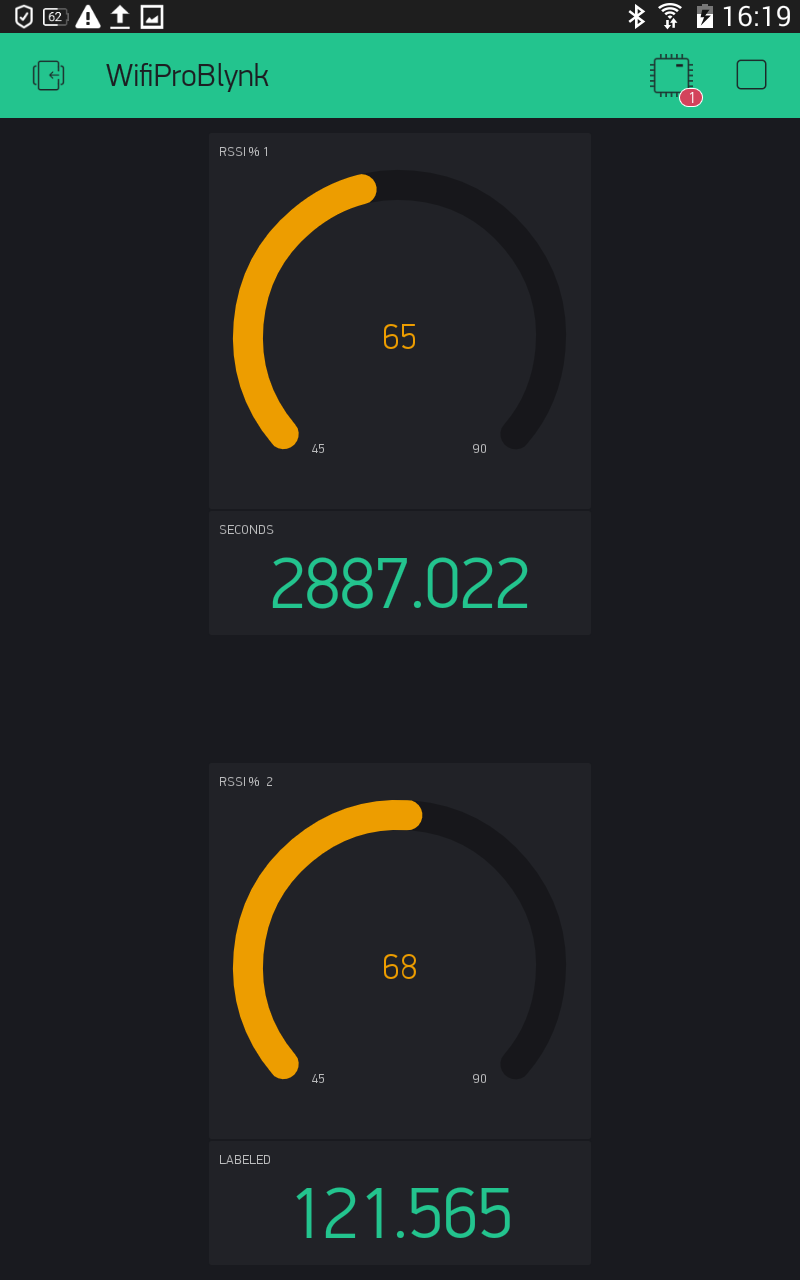
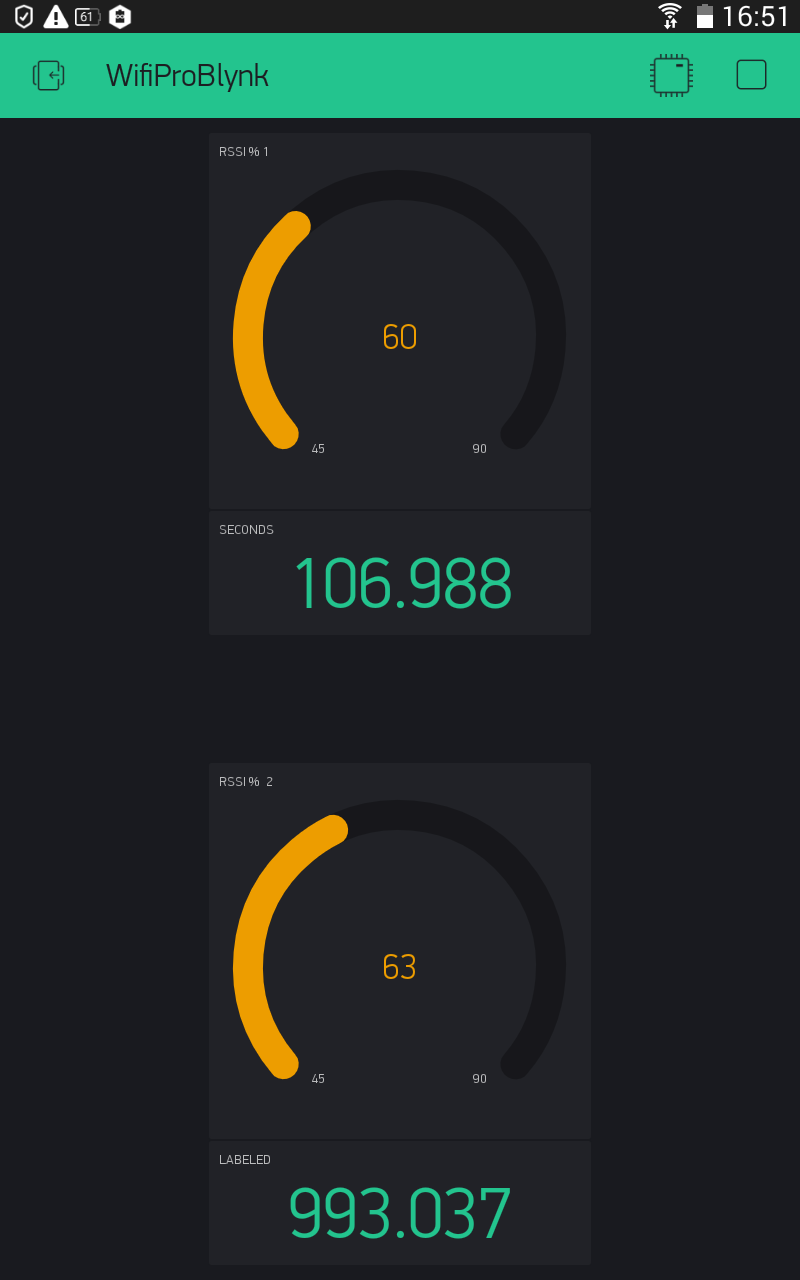
This is the code that goes with the video above (excluding the “kitten”) that I was asked to post to show the signal strength of the WeMos D1 Mini Pro with an external aerial connected.

// WiFiPro.ino  Project name WiFiPro4Blynk by Costas 18th Sept 2016

#define BLYNK_PRINT Serial    // Comment this out to disable prints and save space
#include <ArduinoOTA.h>       // for local OTA updates
#include <ESP8266WiFi.h>
#include <BlynkSimpleEsp8266.h>
#include <SimpleTimer.h>      // Essential for almost all sketches
SimpleTimer timer;

//********************* SECTION FOR YOU TO COMPLETE WITH YOUR DETAILS *************
// Get Auth Token in the Blynk App.
char auth[] = "xxxx"; // Go to the Project Settings (nut icon).
char cloudserver[16] = "blynk-cloud.com";
char localserver[16] = "192.168.10.229";          // Enter your IP details for the local server
char ssid[] = "GargoyleTest";                   // Your WiFi credentials.
char pass[] = "xxxx";                     // Set password to "" for open networks.
char OTAhost[] = "WiFiPro4Blynk";              // Optional, but very useful
//************************************************************************************************

// pick colours from http://www.w3schools.com/colors/colors_picker.asp
#define BLYNK_RED         "#D3435C"  // used when RSSI is worse than -83 dBm (< 60%)
#define BLYNK_YELLOW      "#ED9D00"  // used when RSSI is between -83 dBm and -57 dBm (60% to 75%)
#define BLYNK_GREEN       "#23C48E"  // used when RSSI is better than -57 dBm (> 75%)
/* other colors, not used
#define BLYNK_BLUE      "#04C0F8"
#define BLYNK_DARK_BLUE "#5F7CD8"
#define BLYNK_BLACK     "#000000"
#define BLYNK_WHITE     "#FFFFFF"
#define BLYNK_MAROON    "#A12345" 
#define BLYNK_PINK      "#FFB3B3"
#define BLYNK_OLIVE     "#808000" */

void reconnectBlynk() {                         // reconnect to server if disconnected, timer checks every 60 seconds
  if (!Blynk.connected()) {
    if(Blynk.connect()) {
      BLYNK_LOG("Reconnected");
    } else {
      BLYNK_LOG("Not reconnected");
    }
  }
}

void setup()
{
  Serial.begin(115200);
  Serial.println("\n Starting");
  //Blynk.begin(auth, ssid, pass);              // normal Blynk Cloud server connection     
  //Blynk.config(auth, cloudserver);            // for Blynk's cloud server if WiFi already connected
  Blynk.begin(auth, ssid, pass, localserver);   // for a local server requiring WiFi connection
  int mytimeout = millis() / 1000;
  while (Blynk.connect(1000) == false) {        // wait here until connected to the server
    if((millis() / 1000) > mytimeout + 8){      // try to connect to the server for less than 9 seconds
      break;                                    // continue with the sketch regardless of connection to the server
    }
  }  
  Serial.println(map(WiFi.RSSI(), -110, -30, 45, 90) + String('%'));  // only display on bootup
  ArduinoOTA.setHostname(OTAhost);              // for local OTA updates
  ArduinoOTA.begin();                           // for local OTA updates
  timer.setInterval(15000, reconnectBlynk);     // check every 15 seconds if we are connected to the server
  timer.setInterval(300, showRSSI);             // was 600
}

void showRSSI(){
  //Serial.println(map(WiFi.RSSI(), -110, -30, 30, 100) + String('%'));
  if(WiFi.RSSI() < -83){
    Blynk.setProperty(V0, "color", BLYNK_RED);   // red gauge
  }
  else if(WiFi.RSSI() > -57){
    Blynk.setProperty(V0, "color", BLYNK_GREEN);   // green gauge
  }
  else{
    Blynk.setProperty(V0, "color", BLYNK_YELLOW);   // yellow gauge    
  }
  delay(30);
  Blynk.virtualWrite(V0, map(WiFi.RSSI(), -110, -30, 45, 90));
  float cycle = millis() / (1000.0);
  Blynk.virtualWrite(V1, cycle);
}

void loop()
{
  if (Blynk.connected()) {   // to ensure that Blynk.run() function is only called if we are still connected to the server
    Blynk.run();
  }
  timer.run();
  ArduinoOTA.handle();       // for local OTA updates
}

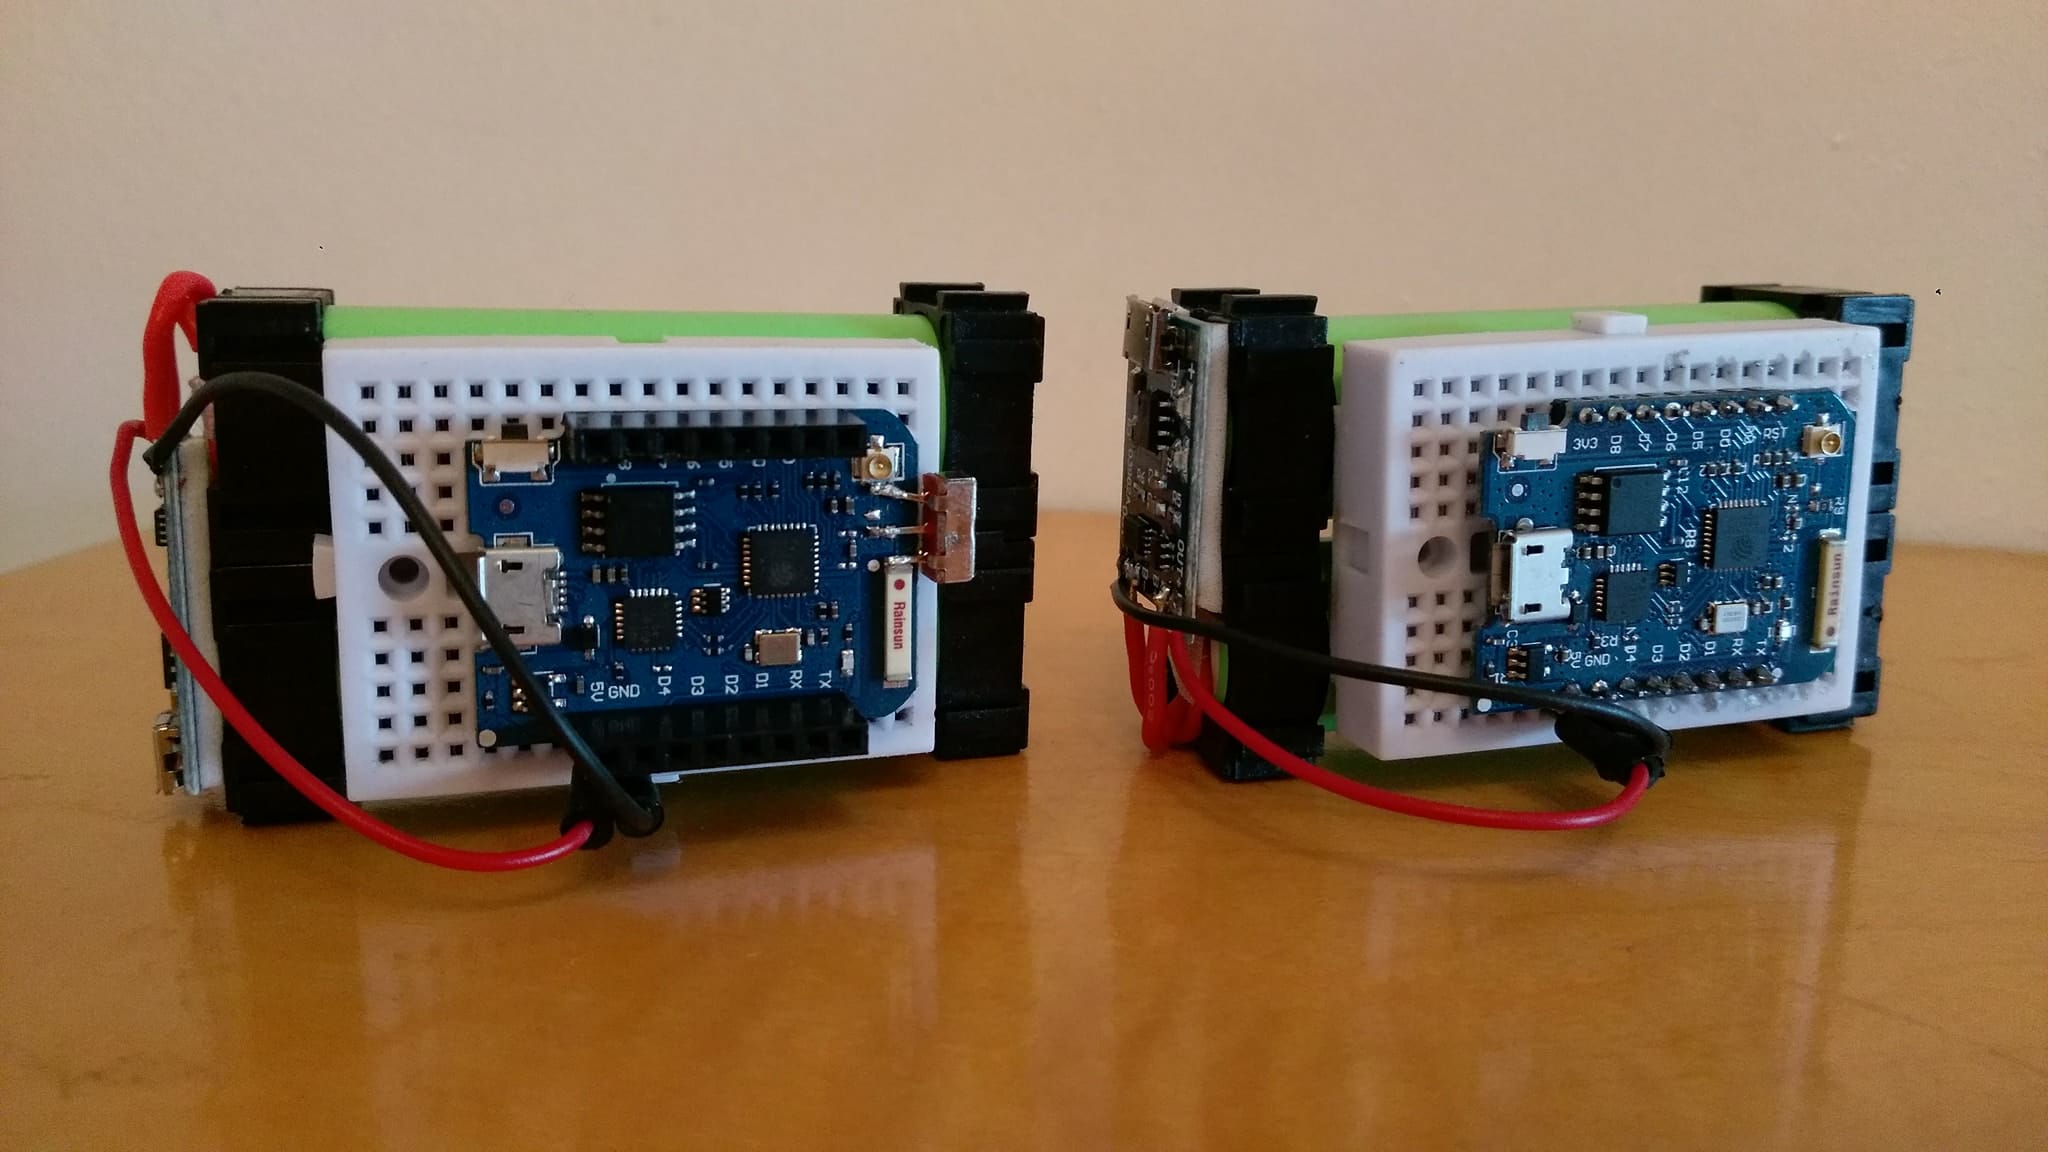
Review of the ceramic V external antenna at http://forum.wemos.cc/topic/702/mini-pro-wifi-testing. As with our work with the ESP07’s the ceramic aerials don’t generally appear to be any better than the onboard antenna’s of an ESP01/12 but an external aerial certainly improves things. An external antenna is even more important once you have put your ESP in a sealed case.

It might be partly because the “RSSI” sketch is very short compared with our real projects but the upload times with the new serial chip on the Pro are lightening fast and reliable. Previously with the regular Mini 921600 baud was quite hit and miss but no so with the Pro.

The Pro’s are noticeably lighter than the Mini’s so might be useful if you are using them in a drone. They are also single sided, so now lay flat on a circuit board unlike the regular Mini’s.

All in all a big improvement over the standard Mini and that is before taking into account the flash size increase from 4MB (16M) to 16MB (128M).

9 Likes

@Costas Awesome write up. Out of curiosity, what esp8266 library/Blynk library are you using in Arduino IDE?

@zeeko the libraries are shown in the sketch. I am using Arduino IDE 1.6.9 with ESP8266 version 2.3.0 core (in Boards Manager) and just selecting the regular 4M Mini board as 16M Pro’s aren’t available yet.

1 Like

Thanks for sharing

Wait… you can change widget colors on the fly!!! Oh, this is cool. Is there a list of available colors somewhere? Are there other widget properties that can be changed remotely? Fonts? Background colors?

You not reading the announcements @chrome1000?

The standard colours are included in the sketch. I haven’t tried but I think you can have any colour within the hexadecimal palette.

You can change Music Player controls on the fly and labels for buttons etc.

Covered in recent announcements and docs.

1 Like

Obviously, I’ve been asleep at the wheel. Thanks for the recap @Costas :slight_smile:

Updated the sketch above and confirming you can use any colours (colors for Pavel) you like:

// pick colours from http://www.w3schools.com/colors/colors_picker.asp
#define BLYNK_RED         "#D3435C"  // used when RSSI is worse than -83 dBm (< 60%)
#define BLYNK_YELLOW      "#ED9D00"  // used when RSSI is between -83 dBm and -57 dBm (60% to 75%)
#define BLYNK_GREEN       "#23C48E"  // used when RSSI is better than -57 dBm (> 75%)
/* other colors, not used
#define BLYNK_BLUE      "#04C0F8"
#define BLYNK_DARK_BLUE "#5F7CD8"
#define BLYNK_BLACK     "#000000"
#define BLYNK_WHITE     "#FFFFFF"
#define BLYNK_MAROON    "#A12345" 
#define BLYNK_PINK      "#FFB3B3"
#define BLYNK_OLIVE     "#808000" */

@Costas Can you supply a Blynk QR code for this?

@Shadeyman I don’t have a QR code to hand as it was 18 months ago but the sketch suggests it’s just a gauge on V0 and a display widget on V1. Both set as PUSH frequency. I wouldn’t worry too much about the cute kitten gif.

2 Likes

@Costas Sorry to drag up an old thread. But I hoped I could add an extra device(Wemos D1 Pro) to the project, basically run two Wemos D1 Mini Pro’s side by side so I could compare the results. I’m not sure if that’s possible so thought I’d just try it, see what happens. Changed the V pins for the second Wemos but I’m getting nothing in the gauge or display widget. Is it just not possible or is it something I’ve done ?

Did you change the V pins in the sketch for the 2nd device?

Both devices have the same token, right?

Yes

And no. :roll_eyes:
Thanks, its working now …

@Shadeyman they don’t need to have the same token if you are using tags / tiles / devices or whatever they are called.

1 Like

Put the same token in both Wemos and changed the V pins in the second, works perfectly. Thank you, I can now compare antenna setups. :beers:

RSSI (Recieved Signal Strength Indicator) is a common name for the signal strength in a wireless network environment. It is a measure of the power level that a RF client device is receiving from an access point, for example. … For example, RSSI of -65 is better than -85.

Ah ok, let us know if you find any interesting results.

interesting” for me, yes, for others, probably not.

I’ve soldered a tiny two way switch between the ceramic antenna and the external antenna. Basically to see if I could easily switch between the two. I was struggling to test if I’d made things worse/better etc. until I found this project. I now have these two part way down the garden, 15 to 20 meters away from the house and it’s WiFi.

Wemos A on the left has the switch, Wemos B on the right is untouched. Wemos A is the top gauge, Wemos B is the bottom gauge.

My bodged switch doesn’t seem to effect it much.

Switching to the antenna connector without an antenna should weaken the WiFi signal. Do you have an antenna?

Ordered 8 of them 3 weeks ago from China. I forgot its was Chinese new year last week so its taken longer than expected for them to be delivered.

However, this was to test if the switch I had installed had weakened the signal from the ceramic antenna. Using your project to compare it with 3 other Wemos D1 Mini Pro’s it doesn’t seem to have made much difference at all to the ceramic antenna. Hopefully the 8 external antenna’s I ordered will turn up soon so I can compare the external one too …

1 Like

I haven’t had enough coffee yet… so without even Googling my facts first :stuck_out_tongue:

I think that RSSI (a measure of signal decibel) is non-linear, so even a few Db can indicate a fairly significant change.

Also, due the nature of, well… nature… a wireless signal can jump all over the place… so taking longer term samplings and averaging them will help with better comparison.

2 Likes