TUTORIAL: From (PI) Zero to Local Blynk Server:

Hi Blynkers,
We have done this little tutorial to be able to run the Local Blynk Server from Zero.
There’re lots of people without knowledge about Raspberry Pi, Raspbian or Lunix, so, I think it could be useful.

Keep in mind my own knowledge regarding Raspberry Pi and Linux is very limited, this tutorial is really basic but useful, at least for me…

Here we go:

1-Prepare the SD card (8Gb Minimum) to place the Pi operating system on it

The SD card MUST be formatted as FAT32, install SDFormatter 4.0 from here:


Run SDFormatter V4.0 as Admin User

Click on “options” and choose “Format size adjustment” ON
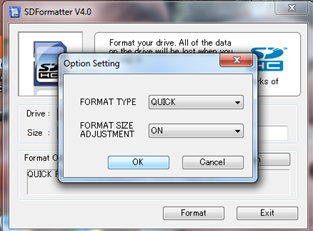
Your SD is ready to add the files for Raspbian…Good!

2-Noobs 1.9.2:
Go to https://www.raspberrypi.org/downloads/noobs/ and Download Noobs 1.9.2
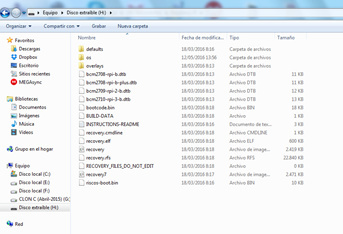
Unzip NOOBS and copy the unzipped files to the SD card.
You should connect your Pi Zero like this example:
There’s a USB HUB with a Wi-Fi dongle and a Keyboard. Be aware, at the moment the Wi-Fi dongle WON’T work till next step.
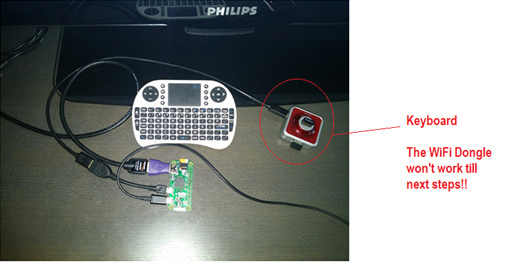
(You can also use Ethernet to USB adaptor instead of Wi-Fi dongle)

3-Raspbian:
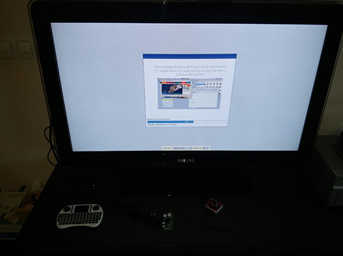
Turn ON your Pi Zero and install Raspbian.
There is a Vimeo of that here: https://vimeo.com/90518800
4-Wi-Fi dongle:
It’s time to prepare your Pi Zero to use the Wi-Fi dongle
Follow “Solution 3” from this great instructable.

update all the important stuff:

Open a Terminal and type:
-$ sudo apt-get update
-$ sudo apt-get upgrade
-$ sudo apt-get dist-upgrade
-$ sudo rpi-update

It takes a lot of time… be patient – it is checking for and getting the latest versions of everything…

Once your PI finishes updating, disconnect your Smartphone, restart your PI and connect the Wi-Fi Dongle and join your home WiFi network, you need your SSID and password for this.

If using Ethernet – it will just connect to your network.

5-Installing TightVNCserver:

This way you will be able to access to your Pi Zero from almost any computer.
Open Terminal and type:
-$ sudo apt-get install tightvncserver

After installation type:
-$ tightvncserver

First time the program will ask you for a password – enter your chosen password and remember it (even write it down!), after that it will ask you if it is “view only” mode, write N, for no - this is important!!!
If you want to run VNC Server automatically every time the Pi is started you should follow this process:

Open the Terminal and type:
-$ cd .config
-$ mkdir autostart
-$ cd autostart
-$ nano tightvnc.desktop

You should type the text as you can see in the picture:
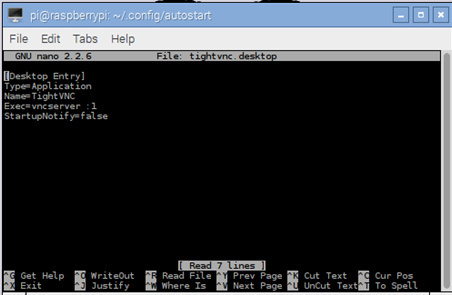
[Desktop Entry]
Type=Application
Name=TightVNC
Exec=vncserver :1
StartupNotify=false

Press CTRL+X to exit and save changes!!
Restart your Pi Zero; from now on going you can use almost any computer to manage your Zero (the computer must have VNC Viewer installed!).

7-VNC at your computer:

Using your computer go to: https://chrome.google.com/webstore/category/apps
Add VNC Viewer:

Go to chrome://apps/ and click at VNC Viewer:
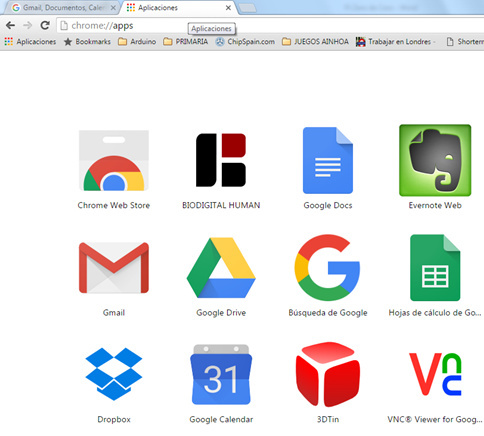
Alternatively, you can install and run VNC viewer as standalone software from:

https://www.realvnc.com/download/vnc/

Once you run the VNC Viewer in Chrome or standalone a new window will open. Type the IP address of your Pi Zero followed by :5901 (by default, TightVNC runs on a port 5901) and press Connect.
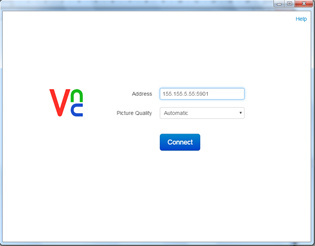
Now add the password from Step 5 and press OK
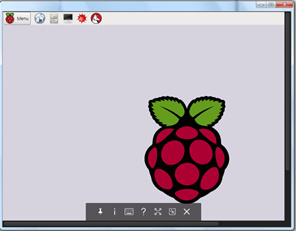
Congratulations, you can access to your Pi Zero from your computer. We are really close!

6-Preparing the Router to Blynk Local Server, fixing the Zero’s IP address:

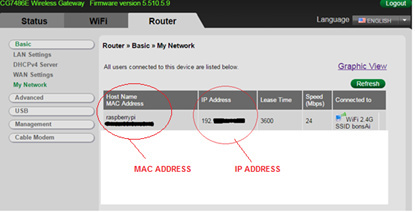
As you want to access to your Zero through your computer using VNC, open your Router admin page and check your devices (maybe in the “MAC Address” list), you will find your Raspberry Pi and you will see the IP address it has been assigned.
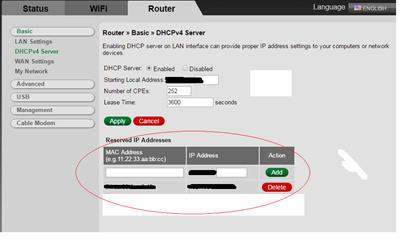
Next find “Reserved IP Addresses” or something similar (exact section depends your router)It should be at “DHCPv4 Server” and set this IP to your Pi Zero.
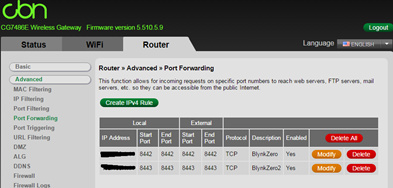
After you set your Pi Zero IP address, go to your routers Port Forwarding section, here you will open 8442 and 8443 ports to access Local Server using 3G/4G:
Save changes and restart your router.

8-Installing Local Blynk Server:

Open a Terminal and Install/Check your Pi has the latest java:

-$ sudo apt-get install oracle-java8-jdk

Make sure you are using Java 8

-$ java –version

Output should be something as recent as: java version “1.8.0_40”

Download Blynk server jar file (or manually copy it to raspberry via ssh and scp command) :
wget https://github.com/blynkkk/blynk-server/releases/download/v0.18.3/server-0.18.3.jar

(or whichever is the latest server version!)

Move the Blynk Server .jar from “Downloads” to “home/pi”:
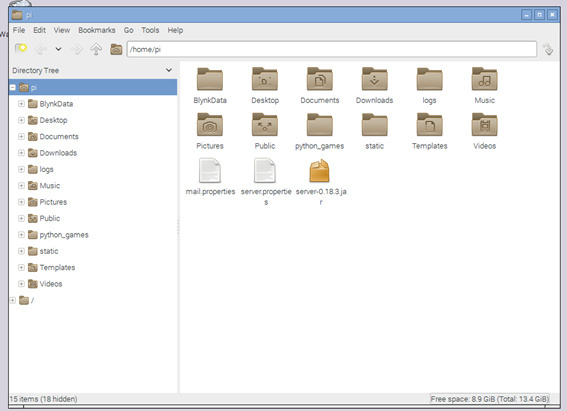
Create a New Folder “BlynkData”
To run the Blynk server on default ‘hardware port 8442’ and default ‘application port 8443’ (SSL port):

-$ sudo java -jar server-0.18.3.jar -dataFolder /home/pi/BlynkData &
(or adjust for the version you have)
That’s it! It should be running!

9-Enabling server auto restart using Crontab –e:

Open a Terminal:

-$ crontab -e
Add the following line at the end:
@reboot sudo java -jar server-0.18.3.jar -dataFolder /home/pi/BlynkData &
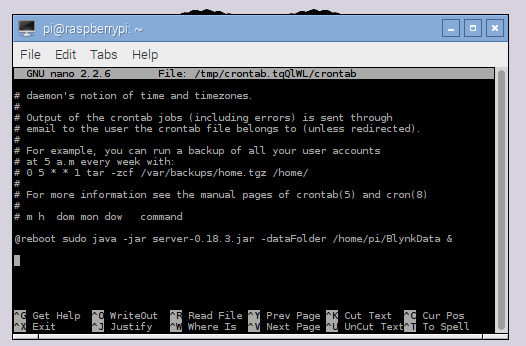
Save and exit.

10- Blynk App from 3G/4G and Create New Account:

Go to http://www.whatismypublicip.com/ and check and write down your Public IP (you need to have a static IP from your ISP).
Open Blynk APP and Create New Account:
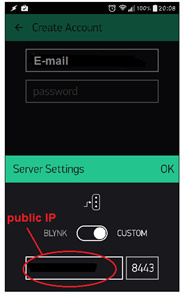
11. create server.properties file:

Create a New Empty File at /home/pi and paste the code at:

Rename the file as server.properties
Read all items and be careful if you do changes here!

12. create mail.properties file:

Create a New Empty File at /home/pi and paste the code at:


Rename the file as mail.properties and change fields as per your details.
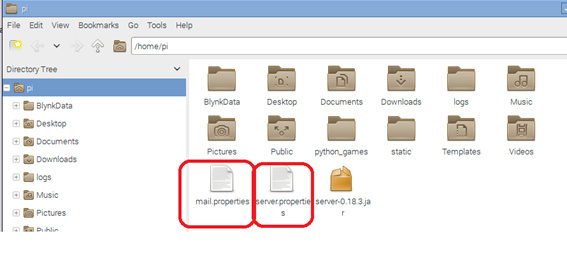
That’s all folkes!

Thanks to @Dave1829 reviewing this little tutorial before posting it and to @Costas.

@Dmitriy, @Pavel @vshymanskyy, please, let me know if you see mistakes and I’ll change it.

I hope you like it.
Kind regards!

20 Likes

Very nice tutorial @psoro it would make a nice Instructable.

In my crontab, before calling the Blynk server I run another little script called setports.
The content of setports is:

#!/bin/sh
sudo iptables -t nat -A PREROUTING -p tcp --dport 80 -j REDIRECT --to-port 8080
sudo iptables -t nat -A PREROUTING -p tcp --dport 443 -j REDIRECT --to-port 9443

This ensures that some of the advanced Blynk features run correctly.

Good point @Costas, thanks for your comments, I’ll add those lines and edit the tutorial.

Please note that port 8442 is where the hardware connects and it is not secure! All communication is done without encryption. The SSL hardware port is not mentioned in your tutorial, so if you have a remote Pi connecting to the server acting as Blynk client it will not work because that needs to connect on 8441 :slight_smile:

Other than that, it’s really complete and accurate as far as I can see.

-edit

It may be worth noting that in the GitHub server.properties only access from the localhost to the admin page is allowed. It may be worth noting this or have the user set it to 0.0.0.0/0 so he/she can access it from the entire local network.

-more edit

Not sure what I’m doing wrong, but the tightvncserver part doesn’t work for me… it doesn’t auto start and if it does (via rc.local) it says auth failed, despite the right password. probably something user settings.

Hi @Lichtsignaal,
The port 8442 is the one suggested by Blynk, I’ll have a look at your considerations. Thanks :slight_smile:

On the other hand, regarding the tightvncserver… try to change your password using -$ vncpasswd
If it doesn’t work… no idea… sorry… I’m really newbie using the Raspberry Pi.

Regards!

Very cool! Thank you!

May we ask you to post it on hackster.io and instructables? @Dmitriy - Could you please add some Energy for @psoro?

I’ll take a look at the VNC thing and see what’s wrong and get back to you on that. You can’t help it the hardware doesn’t talk SSL, that’s the way the ESP/Arduino is designed, but I thought I’d just mention it as some ppl use the Pi as client and with SSL that does port 8441, but you are right, in most cases (AVR chips) 8442 will suffice for the hardware part.

You could consider explaining why to forward both ports. Myself, I only have forwarded 8443 as to let the App talk to the server since all my hardware is at my local network :slight_smile:

Hi @Pavel, it will be a pleasure, but I should wait as per last comments and improve the tutorial.
Kind regards

To be honest I don’t remember the reason why I opened both ports… I think it was something I did at the very beginning… I will check it. Thanks!

Hi @Costas,
I’m struggling with the new Home Screen Widgets using my Local Server, I have added your lines in Crontab and it works fine IF I use my Local IP Address during my Log-in. Using my Public IP the Button doesn’t work…

I have forwarded ports 8080 and 9443 at my router but I guess I’m doing something wrong and I’m a bit lost…

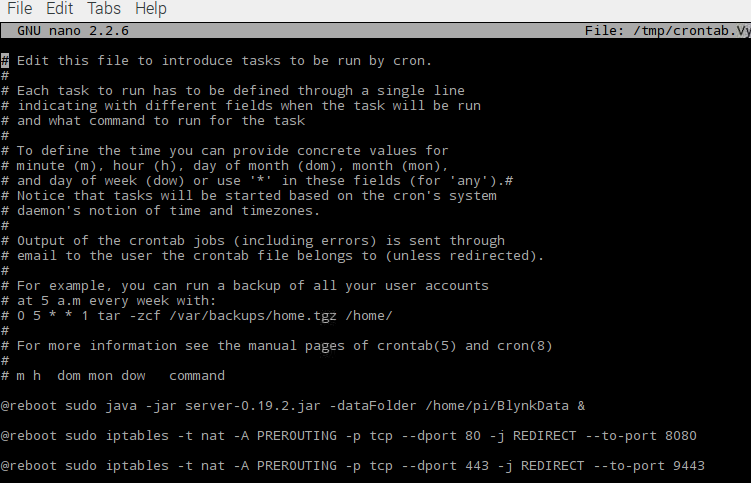
This is my Crontab:

Could you please be so kind to provide the way to do it properly?

Thanks!!

@psoro so it’s specifically the Home Screen widget you are having problems with when trying to access your local server on an external IP, right?

Does everything else work fine with Blynk on the external IP address?

Unfortunately I’m not sure I can help as I don’t do any port forwarding. My internet connection is provided by a WISP rather than an ISP so port forwarding is not available.

I have either purely local servers that can only be accessed internally or purely external servers.

Just checked and the Home Button widget is working fine with the external servers.

When you set up the Home Button widget are you selecting the button based on an external IP address i.e. is the running account of Blynk on an external IP address?

Actually I remember that originally I had quite a few problems with the Home Screen Button and my external servers and @vshymanskyy did a lot of debugging to narrow down the problem. In the end I think the issue was down to the SSL certificates.

My external servers have their own domains and therefore they are able to have proper SSL certificates unlike self signed certs that you have for servers without domains i.e. local servers. Most of my servers use the free Lets Encrypt certificates so it’s not that you have to specifically buy trusted certificates but the certification is different to self signed certs.

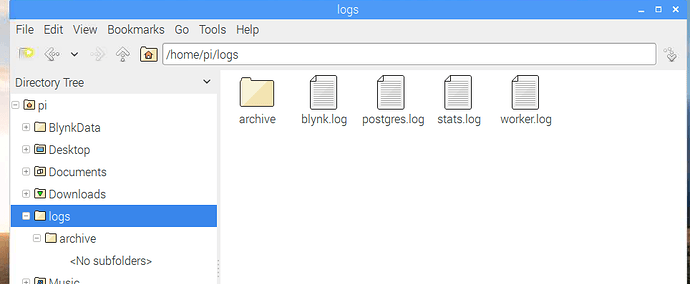
Take a look in your logs as it should indicate if certification is an issue when trying to use the Home Screen widget.

If it helps you could message me your IP details and I could try setting up an account on your server using the external IP address and see if the Home Screen widget works from here.

Costas

Hi @Costas,
Thanks for your comments,
At the moment I’m facing this problem only with the “Home Screen Widget” on an External IP. All other stuff is working properly on the External IP.

I know what you mean, I did following test using Wi-Fi connection (NOT 4G ):
-Log-in using my Local IP and after that I added the Home Button → OK, it works.
-Log-in using my External IP and after that I added the Home Button → NOK, Button doesn’t work (Blynk APP is working fine)

I’ll have a look at my Logs and come back to you! I have no time now…

Kind regards!

hi - @costas @Dmitriy quick clarification for me (and maybe others on this forum :-)). would you be able to help me with the following questions:

  • communication between Blynk App (ioS or Android) to and from a local Blynk Server is automatically encrypted ? (if so using what key type)
  • communication between Arduino and ESP8266, to and from local Blynk Server is encrypted ?

Another basic question: The SSL certificates that can be created for your local Blynk Server, what communication are they used for i.e. to and from App and Arduino/ESP ?

App <> Server is always encrypted. With local server you can generate your own certs, like with any other webserver.

Encryption between hardware <> server depends on hardware. If you attach an Arduino to a Pi via USB you can use SSL, but since Arduino and ESP do not support SSL yet, those communications are not encrypted. (ESP has experimental support I believe though).

1 Like

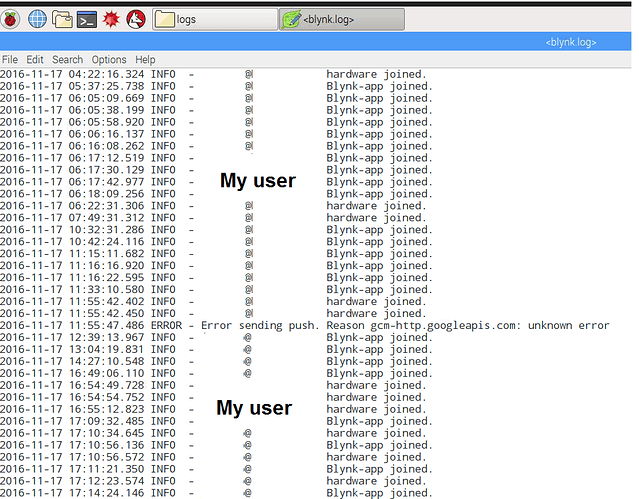
Stupid question but… Where do I have to look at?? :sweat:

The only error I can see is the one you can see below and I’m not sure about it…

@Lichtsignaal,
Now I can remember… Lol
I opened port 8442 cause I wanted to show a friend of mine a small device managed by Blynk out of home, and, instead of using my Local IP Server in the Sketch, I added my Public IP and details about Wi-Fi and Password to join my own Smartphone.

Test it, it works and your device can stay out of your Router reaching internet access through your Smartphone.

Regards!

so you mean non of esp series don’t support SSL ?

ESP’s do support SSL but it takes a lot of processing power for the decryption. This means you need to take care which libraries you use alongside SSL.

I think there is one now which supports SSL, but the originals don’t.

@Costas, I guess I will skip this for now, lot to cover :smile: thanks

@Lichtsignaal

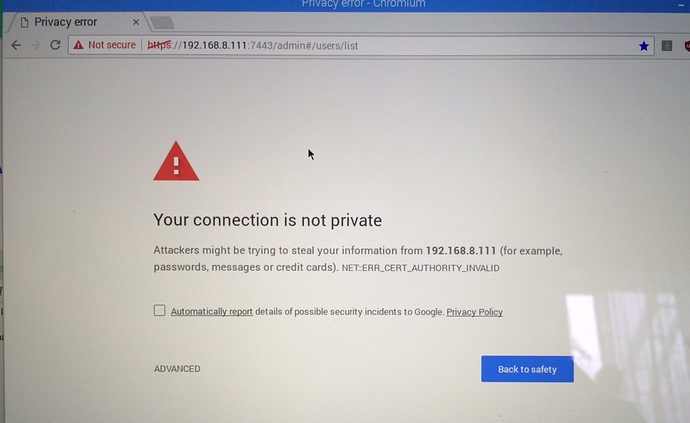
is this related to SSL on my server to ?

it says not secure, how to solve this