The two are totally unconnected.
I’m really struggling to understand what you’re doing, and whether you’re doing this from the web console or from the app.
I find that it’s easier to do it from the web console, as you can then copy/paste the quickstart sketch straight into your Arduino IDE.
I’d recommend that you delete all the existing templates and devices in the web console, and check that they have also been deleted from the app.
Then, do this…
-
in the web console, click the the “lifebelt” icon (third icon up from the bottom on the left) and choose Quickstart. This will lunch the Quickstart “wizard”
-
Click “Lets go!” then in the next screen choose ESP8266 and WiFi then click Next
-
Choose the IDE that you’re using (hopefully that’s Arduino) then click Next
-
Presumably you’ve already installed the Blynk 1.0.1 library, so you can skip the next step
-
Type your WiFi SSID and password into the boxes on the left hand side (take care with this, both are case-sensitive). Then, on the right had side iof the screen you have two buttons at the top of the code window, “Copy Code” and “Download as File”. Click the “Copy Code” button.
-
Navigate to your Arduino IDE and click File > New. Delete the code that the IDE automatically inserts, then paste the code that you’ve just copied from the Blynk web console. Choose the correct board type, port etc, then upload the code to your board. It’s usually a good idea to press the reset button on the board when that is complete, then open the serial monitor.
-
Go back to the Blynk web console and click the Next button. You should briefly see a “Connecting” animation, then a fireworks animation and the “Go to Device” button should be enabled. When this happens click the button. If it can’t connect then you’ve probably mis-typed your WiFi credentials and if this is the case then correct them in the IDE and re-upload the sketch to your board.
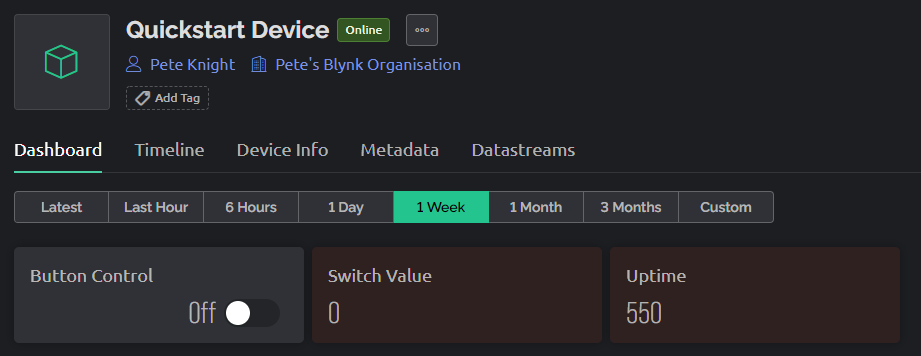
You should now see a web dashboard that looks like this:
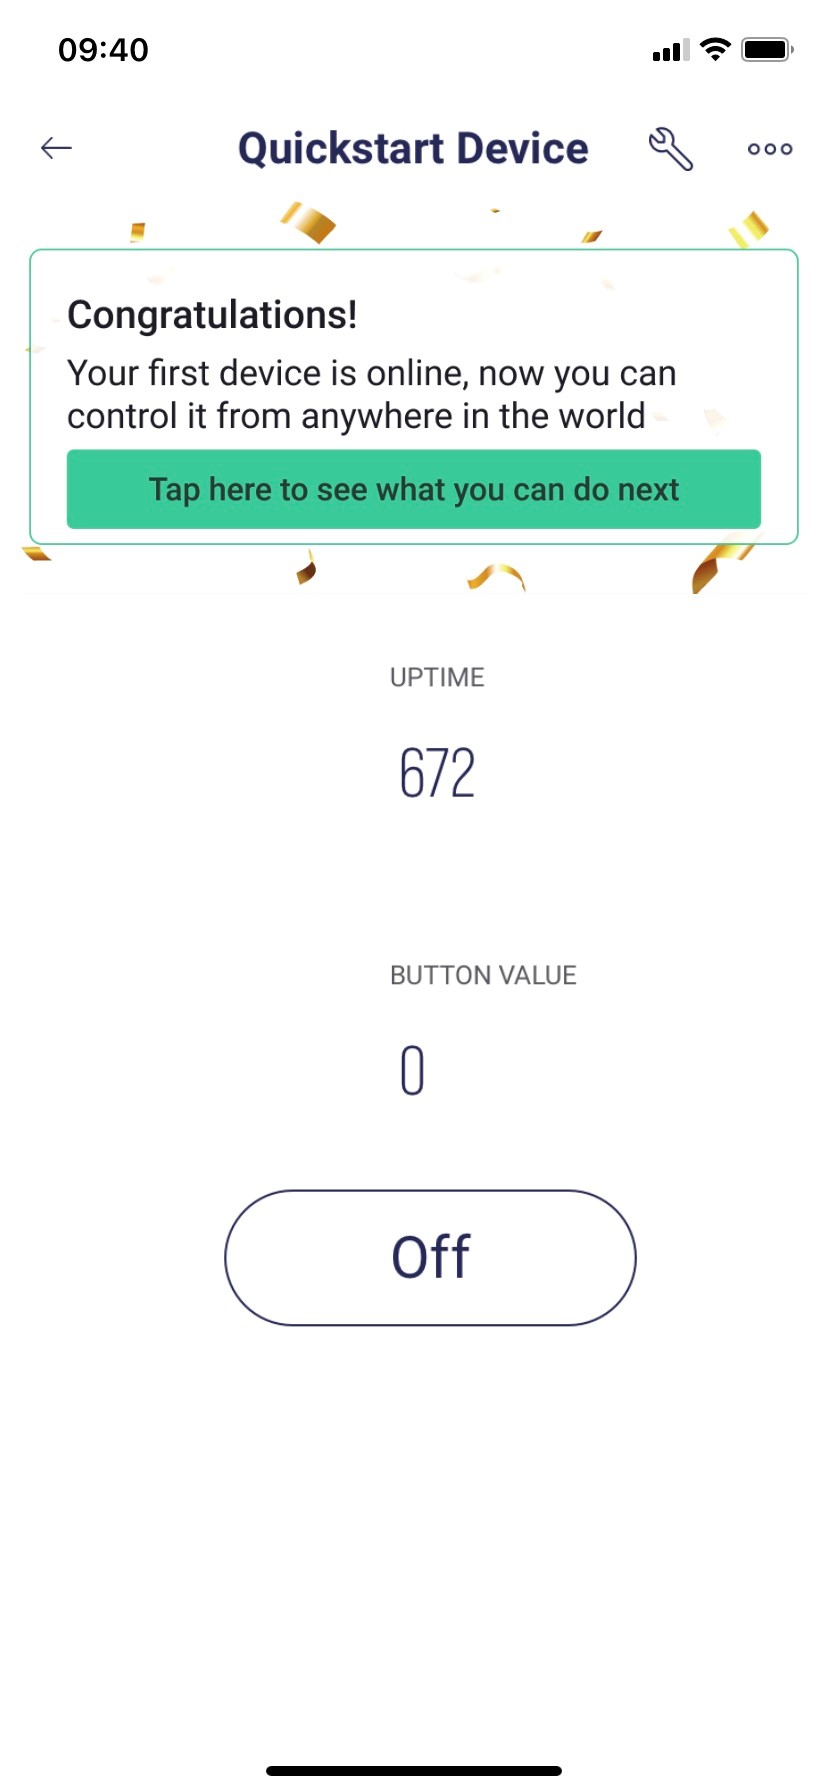
and when you go to the app you should see a device called “Quickstart Device” on the main screen, and when you tap that device you should see a mobile dashboard that looks like this:
If you have any problems along the way, refer to the numbered steps above and try to clearly explain what went wrong at which point in the process.
Once you have everything working correctly you can the start to edit the Blynk sketch to change what happens when the On/Off button is pressed. This button is attached to V0, and when its value changes it triggers the BLYNK_WRITE(V0) function in the sketch.
Read this tutorial to learn how to control the GPIO pins on your board when the value of the virtual pin changes…
Pete.