I’m in the process of migrating my large Arduino Mega based hydroponics controller over to several ESP boards and I know I need to use the Bridge widget to link the app to all of the varying boards with individual auth keys, but when splitting my sketch apart, should I keep the bulk of the functions together to be loaded to the master ESP and just load base code to the slave, ie just enough to tell the pins how to behave?
Here is my github with the project code. I was in the process of dividing the functions when I realized I may need to keep everything together to use the Bridge widget, but I don’t fully understand really how it works I guess and seek added explanation. Would it best to keep the sketch intact, load the gist of it to a master and load network and pinMode code to the slaves?
@Skybound Generally all the Bridge set up goes in the sketch doing the sending, but any and all can send to others, thus there is no “Master or Slave” with Bridge link… it is just two or more independently running sketches that can send data to another sketch’s vPin, or back and forth, etc.
For many projects Bridge works well as a master and slave system. Generally slaves don’t need to pass data to other slaves and a master doesn’t need to pass data to any of the slaves. It’s just individual slaves passing data to the master.
It will depend on the precise details of each project, but for most, if you use master and slave it will reduce the complexity of the sketches.
As of now, I was planning to put the 3 sensors to one ESP and make it the master. All of the slaves will just be turning on various devices/hardware for a time. That said, can I do all of the tests on the master, and have it tell the slave how long to activate the device for?
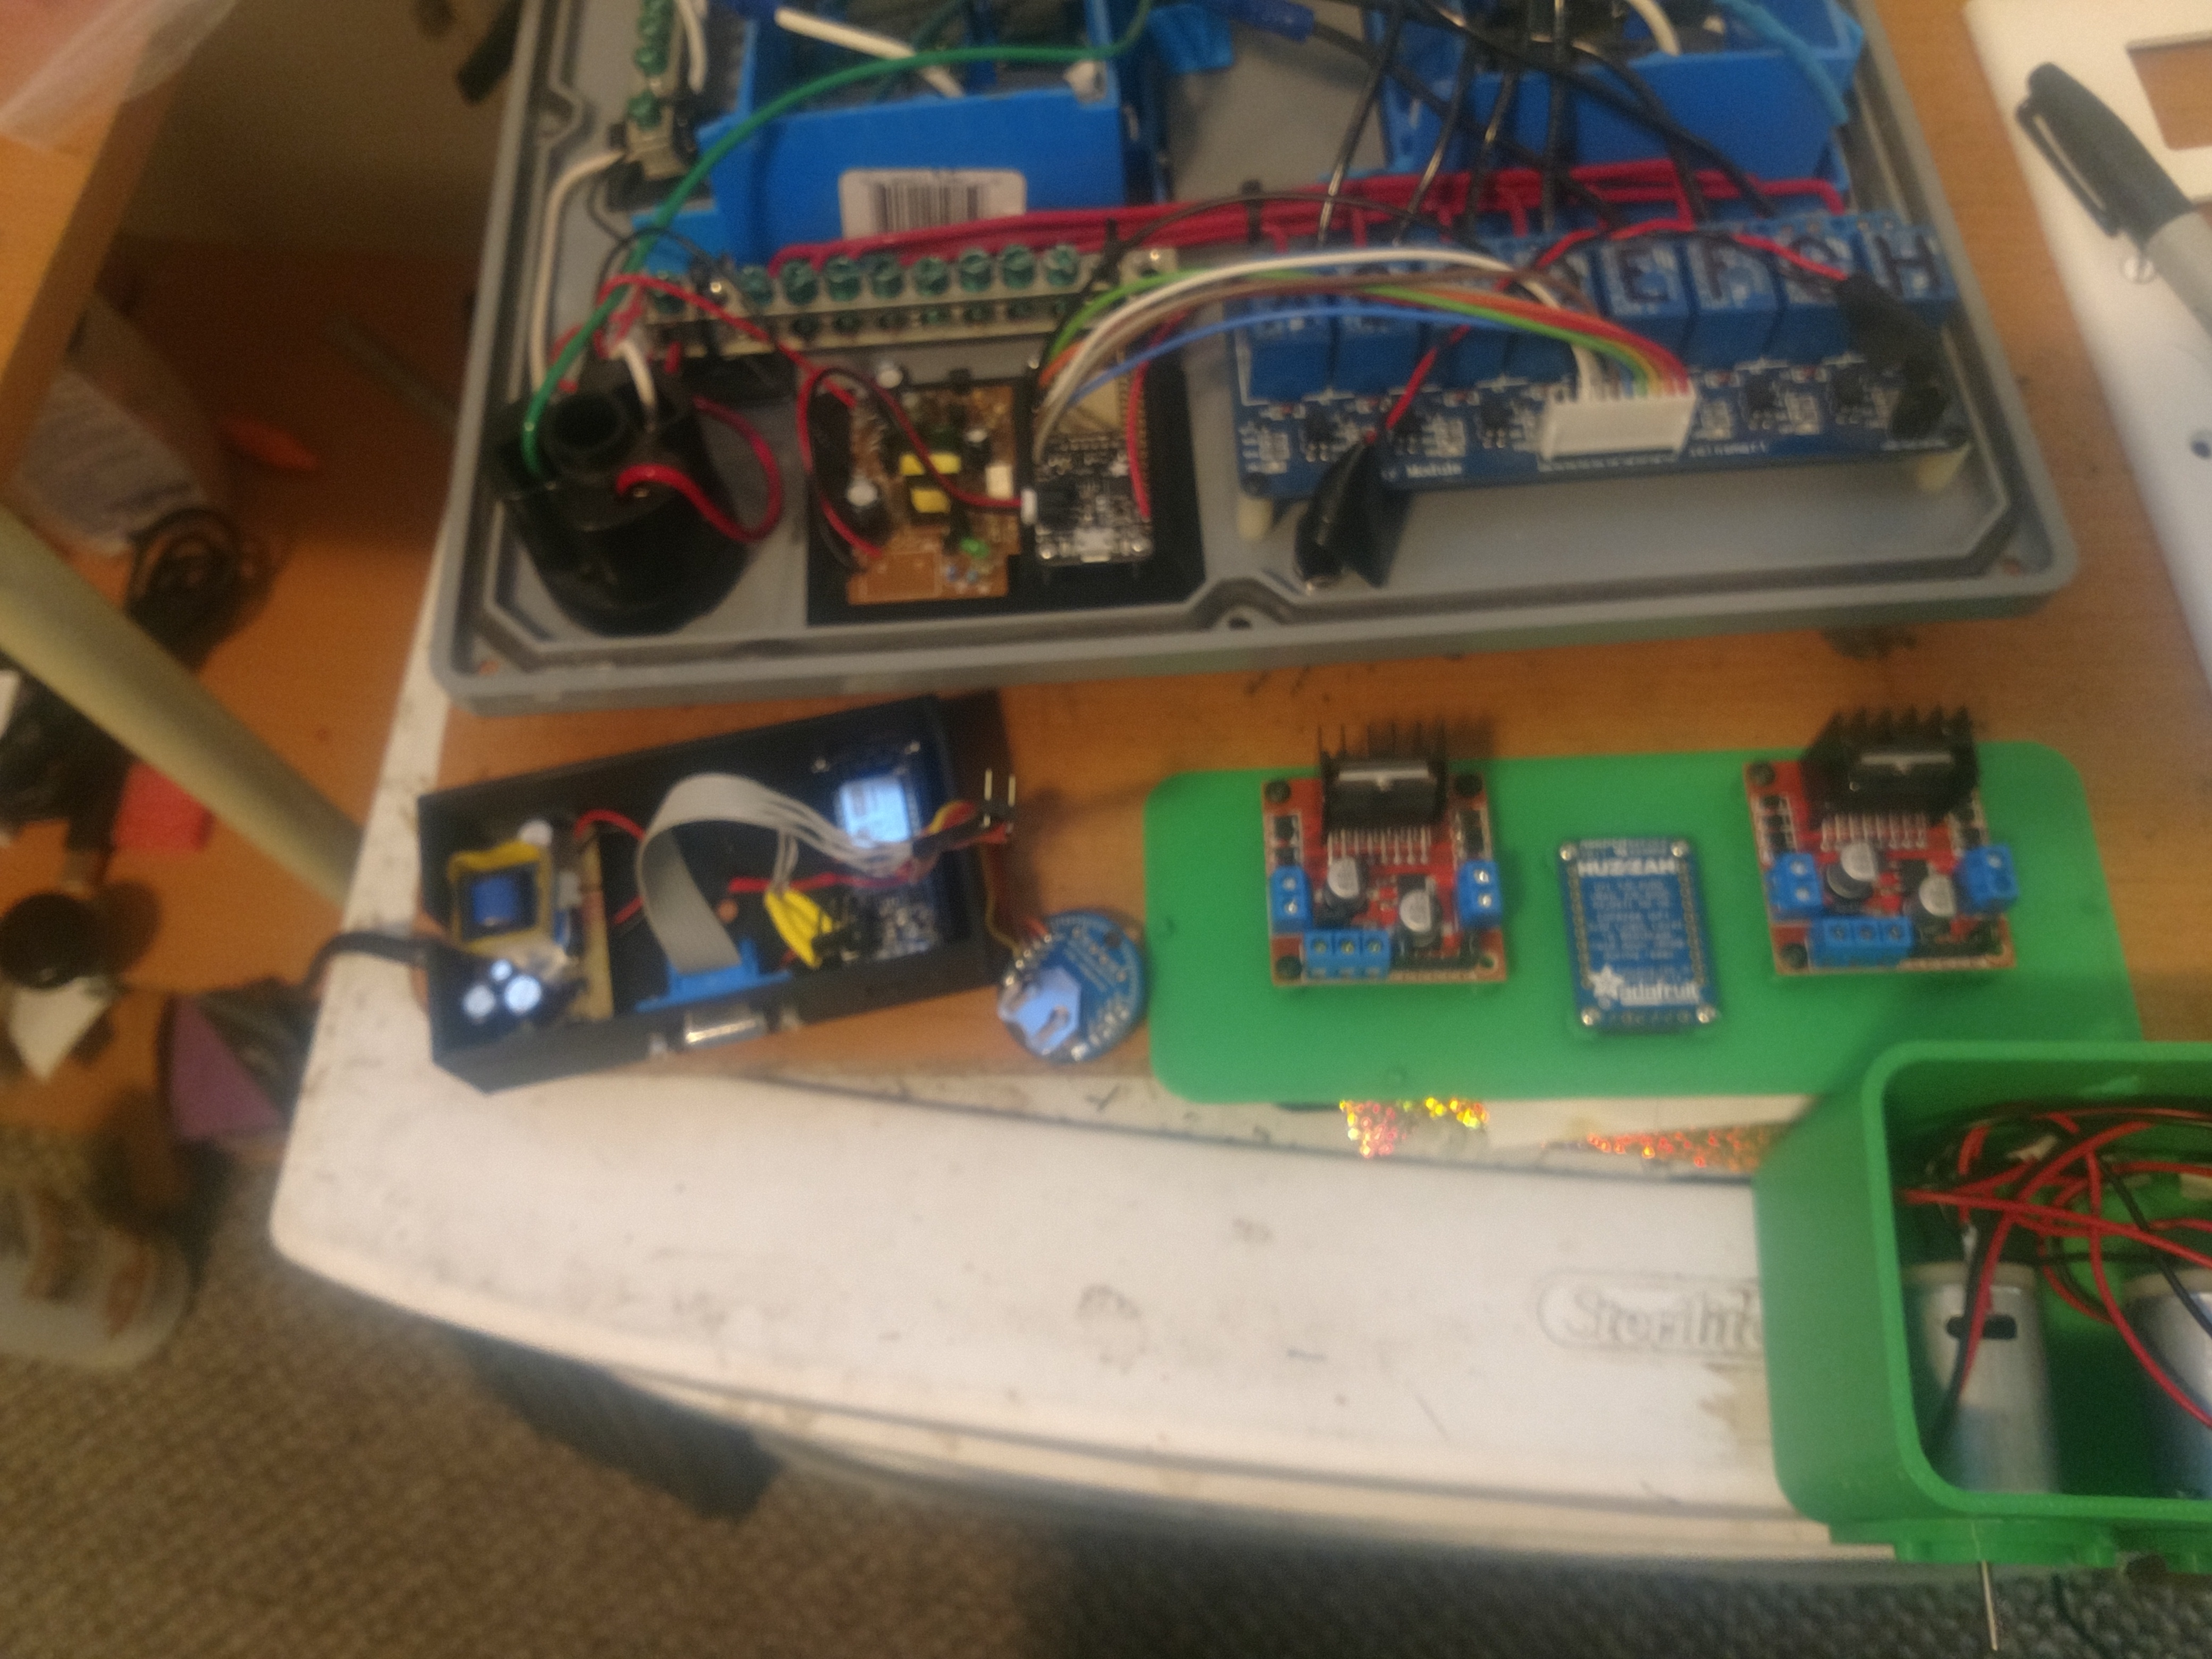
Edit - Another reason why I strongly suggest makers get a cheap 3D printer. They are so handy for quick designing custom project boxes for our projects. In both the small black case, as well as the Relays ESP, both utilize cellphone chargers to power the ESPs.
@Gunner, @Costas To your knowledge, is the following method possible, and if yes which data type can WidgetBridge be converted to? In the parent function, array positions are selected based on an app widget value, but in this project, I had to divide the previous grouping of 8 devices into 2 banks of 4, each with their own MCU/Auth Key.
  int bridgeX = Bridge2;
  if (x <= 3) {
    bridgeX = Bridge1;
  }
  else() {
    bridgeX = Bridge2;
  }
Using a Step V widget, I flip between 8 positions that correlate to several array positions in the sketch. I want to designate positions 0-3 to direct the remaining flow of code to Bridge2 and array positions 4-7 I want diverted to Bridge3.
Well, you have already assigned identifications to the Bridges (Bridge1, Bridge2… etc), so I don’t think you can change their identification names mid-code, if that is what you are referring to.
According to the error I’m getting, I need to know what data type WidgetBridge is so that I can create the same type of variables, and then assign my array positions correctly.
I’m not so versed in coding and switch case is currently out of my knowledge. It took me the better part of a year to get a grasp on the arrays, but they work.
I find the desire to bridge between 3 ESP boards, 1 master as the head, and 2 slaves as headless. That said, I’m trying to only have an app linked to the master ESP to interact with the overall project. The sensors all are controlled by the master as well and the slaves just apply power to relays or motors. So I aim to dial up a value with step widget, send the value to the master, and also send that value directly over the bridge, or copy the value to another variable to be sent over the bridge to the slave ESP. Would it be improper to ask for a pseudocode example without sharing my sketches? Until I figure out exactly what is and isn’t needed, both sketches are fairly large and I feel that sharing them at this time might confuse readers.
Edit - some processing would be done on each ESP. Master illuminates LED widgets in the app for the duration that the motors/relays are energized on the slaves.
if this is a serious long-term home automation project and theres’s the probability that in future you’ll want to add more slave devices then you should take a serious look at Node-Red and MQTT.
This is the system I use and it makes integrating devices so much easier. You still get the Blynk functionality, plus ease of integration with services such as Amazon Alexa. You have two-way communication between the master (which in this case is Node-Red running on a Raspberry Pi) and the slave devices.
Thanks for the info Pete, but my code skills, though hard fought to earn over 4 years, are still very basic and restricted to the Arduino programming language. Working with ESPs are outside of my scope as well, but the Mega no longer functions well in my project so I needed to advance. Still, for now at least, I NEED to stay on my current path. I know my project can run reliably, I just need to fight my way through learning new things, ESP, Bridges, multiple devices sharing the responsibilities of what used to be a single MCUs job.
You will need a project for each “slave” at least as far as setting up the device and AUTH… and of course code on the devices sides. But once setup, you should be able to effectively ignore those projects and control the devices via the master bridge project.
And setting up multiple devices in a single project (with Device Selector) should accomplish much the same thing without needing Bridge and separate projects.
Ok, I think I mis-explained my project, but here’s some code snippets to hopefully convey what I’m trying to do.
#define BLYNK_PRINT Serial          // Comment this out to     disable prints and save space
#include <ESP8266WiFi.h>
#include <BlynkSimpleEsp8266.h>
#include <WidgetRTC.h>
#include <TimeLib.h>
#include <DHT.h>
#include <Wire.h>

char auth[] = "MASTER_AUTH";   // Cloud Server

//Initiating Bridge Widget
WidgetBridge Bridge1(V0);   //Relays
WidgetBridge Bridge2(V1);   //Pumps 1-4
WidgetBridge Bridge3(V2);   //Pumps 5-8

BLYNK_CONNECTED() {
  Bridge1.setAuthToken("SLAVE1"); // Slave_Relays
  Bridge2.setAuthToken("SLAVE2"); // Slave_Pumps 1-4
  Bridge3.setAuthToken("SLAVE3"); // Slave_Pumps 5-8
  //Bridge4.setAuthToken("AUTH"); // Slave_XXX
}
uint32_t msPerGallon = 33000; //ms per gallon
uint32_t ROstart = 0;
uint32_t countGallons;
boolean runningRO = false;
int ROpumpOn = 0;     //Blynk Triggered RO Pump
float totalGallons;   //Number of RO Gallons Selected in Widget
BLYNK_WRITE(V34) {
  totalGallons = param.asFloat();  // ROpump remote
}

void ROcheck()  //RO Pump = 34 seconds on time per gallon
{
  if (ROpumpOn == 1 && runningRO == false)            // Activates when Blynk button is toggled
  {
    Bridge1.virtualWrite(V61, totalGallons);          // Calculates length of runtime for pump
    terminal.print("Pumping:");
    terminal.print(totalGallons);
    terminal.println(" Gallons of RO");
    Blynk.virtualWrite(V33, 1);                     // Illuminates Blynk button widget
    runningRO = true;
    ROstart = millis();
    countGallons = msPerGallon * totalGallons;        // Calculates length of runtime for
  }
  if (millis() - ROstart > countGallons)              // Determines when runtime ends
  {
    ROpumpOn = 0;
    runningRO = false;
    Blynk.virtualWrite(V32, 0);                 // Turn off lit button widget
    Blynk.virtualWrite(V33, 0);                 // Turn off lit button widget
  }
  terminal.flush();
}
I want the above sketch to retrieve the value from it’s app, then apply the value to a Vpin and send that value over to the below slave. The app will illuminate the button widget like an LED for the duration that the slave relay is energized.
//------------SLAVE RELAYS

#define BLYNK_PRINT Serial          // Comment this out to     disable prints and save space
#include <ESP8266WiFi.h>
#include <BlynkSimpleEsp8266.h>

char auth[] = "SLAVE1_AUTH";   // Cloud Server

char ssid[] = "network";
char pass[] = "password";

//Initiating Bridge Widget
WidgetBridge Bridge1(V0);   //Relays

uint32_t msPerGallon = 33000; //ms per gallon
uint32_t ROstart = 0;
uint32_t countGallons;
boolean runningRO = false;
int ROpumpOn = 0;     //Blynk Triggered RO Pump
float totalGallons;   //Number of RO Gallons Selected in Widget

BLYNK_WRITE(V61) {
  totalGallons = param.asFloat();  // ROpump remote
}
void ROcheck()  //RO Pump = 34 seconds on time per gallon
{
  if (totalGallons > 0 && runningRO == false)            // Activates when Blynk button is toggled
  {
    digitalWrite(ROpump, TURN_ON);
    runningRO = true;
    ROstart = millis();
    countGallons = msPerGallon * totalGallons;        // Calculates length of runtime for pump
  }
  if (millis() - ROstart > countGallons)              // Determines when runtime ends
  {
    digitalWrite(ROpump, TURN_OFF);
    runningRO = false;
  }
}
By using the Bridge widget, I figure I can circumvent the need to manually switch between AUTHs using the selector widget. Am I misunderstanding that? I’ll use a selector widget if left with no other choice, but if possible, I would greatly prefer to use the bridges, and just work everything out in code. I realize figuring out all the back and forth will be a task, but once through it, I’ll have a worry free project again.