Pulse sensor with arduino uno+blynk

[Updated]
hi guys i need your help please.
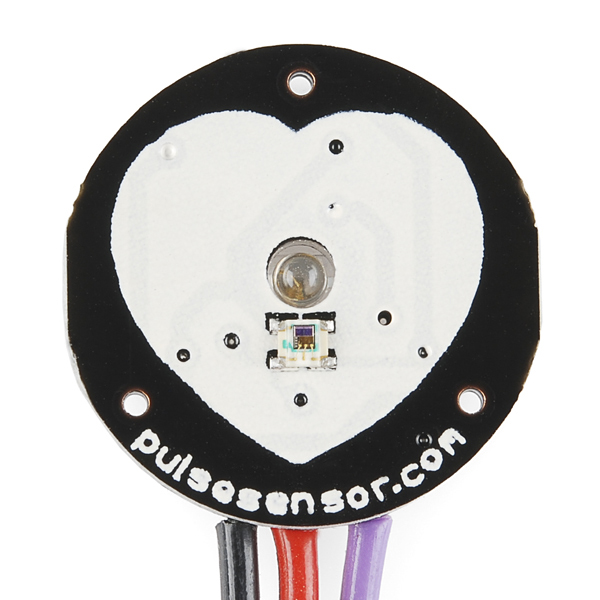
Ok so i am using pulse sensor like https://cdn.sparkfun.com//assets/parts/7/5/5/9/11574-02.jpg
i need to measure the heart rate beat per min to display on my Blynk terminal widget…
i keep on getting extreme value and the sensor doesn’t seems to be responding according to my finger placement… if i didn’t put my finger onto the sensor , it still showing beat per min … and the result seems to be weird… showing 1.xx beat per minute or 4.xx beat per minute…

i have my code reference through https://arduino.stackexchange.com/questions/43956/getting-bpm-from-the-given-code
i cant use two timer method because it cause my other sensor(not pulse sensor) to run too fast.

(when i do the testing without blynk code):
if i use the coding without two timer, it show INF BPM in serial monitor

if i use two timer coding, it showing 2xx BPM up to 3000+ BPM in serial monitor …

so for testing purpose, i decided to test the output in serial monitor

and i deleted everything in the loop fn except analogRead and serialprint…
when i place my finger onto the sensor, i show 0 value reading whereas i lift my hand up (nothing on sensor) will show 995 value reading…

hmm…

i cant use serial printer because i am using USB connection for my blynk app…
and my baud rate are 9600 cannot be higher or lower since i have other sensor running with this pulse sensor at the same time…

P/S: i will add in anything that i missed when i realised later on.

#include <BlynkSimpleStream.h>

char auth [] = "my token";
//Declare the variables
int UpperThreshold = 518;
int LowerThreshold = 490;
int reading = 0;
float BPM = 0.0;
bool IgnoreReading = false;
bool FirstPulseDetected = false;
unsigned long FirstPulseTime = 0;
unsigned long SecondPulseTime = 0;
unsigned long PulseInterval = 0;

void setup()
{
Serial.begin(9600); //BaudRate
  Blynk.begin(Serial, auth);
}

void loop()
{
reading = analogRead(0); 

      // Heart beat leading edge detected.
      if(reading > UpperThreshold && IgnoreReading == false){
        if(FirstPulseDetected == false){
          FirstPulseTime = millis();
          FirstPulseDetected = true;
        }
        else{
          SecondPulseTime = millis();
          PulseInterval = SecondPulseTime - FirstPulseTime;
          FirstPulseTime = SecondPulseTime;
        }
        IgnoreReading = true;
      }

      // Heart beat trailing edge detected.
      if(reading < LowerThreshold){
        IgnoreReading = false;
      }  

      BPM = (1.0/PulseInterval) * 60.0 * 1000 ;

     
      Blynk.virtualWrite(V7, "\n Heart Rate =", BPM);
      Blynk.virtualWrite(V7, " BPM");
    
}

TLDR: i want to design Blynk app that collect data from LM35 temp sensor using arduino uno and showing it in Blynk app (to show IoT), i saw one youtube video showing no need to connect with ESP8266 for controlling of Blynk app for LEDs (is this possible?). I am way too new for all this Blynk stuff and my project are near to due… Please Help me steps by steps …Please :frowning:

To use the ESP-01 as a Wi-Fi adapter for the Arduino, the ESP needs to be running the standard AT firmware that was on the device when you first bought it. By uploading a Blynk sketch to the ESP you’ve overwritten the AT firmware, so you’ll need to download the AT firmware and re-flash the ESP.

As you’re using hardware serial to communicate between the Arduino and the ESP, you won’t be able to upload code to the Arduino while the ESP is connected.

The ESP and the hardware serial of the Arduino need to be at the same baud rate. The ESP baud rate is set by issuing an AT command.

The link you posted for the connections between the Arduino and the ESP gives a 404 error. I think the correct URL is this one:
http://www.teomaragakis.com/hardware/electronics/how-to-connect-an-esp8266-to-an-arduino-uno/

Pete.

Thanks for the reply but can u guide me step by step where should i start now? i am really no idea how should i do it right now.

I’ve never felt masochistic enough to try the combination of Arduino and ESP-01.
Search this forum and you’ll find lots of info about this hardware combination and links to download the AT firmware from Expressif, or use Google.

Pete.

Yes study all the docs for USB connection.

You might want to consider Ethernet

Don’t think about adding the ESP to the Arduino, not worth the effort and it will not be an IOT project.

Comments like that normally result is less support as we assume you are not really that serious about your project.

1 Like

:cat2::stuck_out_tongue_winking_eye: jk … It is no different than connecting any other sensor to an MCU… proper wiring + driver + code = “It Verks!!!”.

It’s a bit like driving an old car that doesn’t have aircon, so choosing to tow a modern care behind you that does have aircon. Sure it works, but there comes a point where you just abandon the old car at the side of the road drive the new car instead :red_car::red_car:

Pete.

Oh, I wasn’t debating the value of the merger, only the complexity or comparably lack thereof, of hooking them up. Two totally different issues.

Just like adding aircon to an old car… for a skilled mechanic, no big deal. Otherwise it is just a personal preference of old/refurbished vs new.

On a side note, I am on the fence about the whole concept of replacing old with new as the “better” way to go. There are still a few things a MEGA can do much better then any ESP… quantity of I/O being the far top of the list, not to mention full compatibility with both 3.3v and 5v sensors.

I agree, I have a few Arduino kicking around, and I wouldn’t throw them out -partly because I’m a bit of a hoarder, but also just in case I get a project where I need the Arduino’s capability. Its just that in the last 18 months I haven’tfound a project that needs anything other than a D1 Mini or Mini Pro.

I just find it frustrating that newbies start by picking-up an Arduino, then buy an ESP-01 to make it Wi-Fi capable without realising that for most things they’d be better-off buying a Wemos or NodeMCU.

Pete.

Brand recognition.

I am no neophyte when it comes to technology… but I still didn’t have a clue what an ESPthingy was until months into using Blynk (despite having heard the name many times and being aware that is was a MCU of some sort), and even then i didn’t fully understand much about the standalone options with the “normal” IDE until later… but everyone who is a tinkerer knows what an Arduino is.

hi guys, so i am working on my project related to IoT monitoring of LM35 temperature sensor, i will have to display the temperature value to Blynk app via serial USB of arduino uno…

now i tried the most basic for serial USB example which is controlling a LED thru blynk app, it’s of course successful. Before connecting to Blynk for IoT, i can see the serial output at serial monitor at arduino IDE
but now after combining my code with the basic Blynk LED control example in the Blynk libraries, my overall code is as shown below ( it can be succesfully compiled but not uploaded)

#include <SoftwareSerial.h>
SoftwareSerial DebugSerial (0, 1); //RX , TX
#define BLYNK_PRINT DebugSerial
#include <BlynkSimpleStream.h>

char auth [] = "My auth token";
Declare the variables
int temp;
int temppin = 5;
int led1 = 7;
int led2 = 6;

void setup ()
{
 DebugSerial.begin(9600);
 Serial.begin(9600);
 Blynk.begin(auth, Serial);


 pinMode(led1, OUTPUT);
 pinMode(led2, OUTPUT);
}

 void loop()
{
 temp = analogRead(temppin);
 float t = (temp / 1024.0) * 5000;
 float celsius = t / 10; //Celsius Temperature
 Serial.print("Temperature =");
 Serial.print(celsius);
 Serial.print("°C");
 Serial.println();
 delay(1000);
 if (celsius > 30)
 {
   digitalWrite(led2, HIGH);
   digitalWrite(led1, LOW);
 }
 else
 {
   digitalWrite(led2, LOW);
   digitalWrite(led1, HIGH);
 }
 if (celsius < 30)
 {
   digitalWrite(led1, HIGH);
   digitalWrite(led2, LOW);
 }
 else
 {
   digitalWrite(led2, HIGH);
   digitalWrite(led1, LOW);
 }

 {
   Blynk.run();
 }

}

i keep on getting error like when i tried to open serial monitor

Error opening serial port ‘COM5’. (Port busy)

and when i tried to change baud rate at serial monitor it give

processing.app.SerialException: Error opening serial port ‘COM5’.

i am not able to get the output display at Blynk app.

is it multiple serial usb not allowed? how should i solve it :o :frowning:

Can anyone help me please…

thanks

Close the USB connection to Blynk.
Unless you are using a USB2TTL adaptor remove all the DebugSerial stuff, you will have to work without debug.
Change the sketch to remove all that stuff from loop() as per PUSH_DATA example.
Flash sketch to MCU.
Keep Serial Monitor.
Restart USB connection to Blynk.

you means that i should follow the example from Blynk library such as

#define BLYNK_PRINT DebugSerial


// You could use a spare Hardware Serial on boards that have it (like Mega)
#include <SoftwareSerial.h>
SoftwareSerial DebugSerial(2, 3); // RX, TX

#include <BlynkSimpleStream.h>

// You should get Auth Token in the Blynk App.
// Go to the Project Settings (nut icon).
char auth[] = "YourAuthToken";


void setup()
{
 // Debug console
 DebugSerial.begin(9600);

 // Blynk will work through Serial
 // Do not read or write this serial manually in your sketch
 Serial.begin(9600);
 Blynk.begin(Serial, auth);
}

void loop()
{
 Blynk.run();
}

then my code for temp sensor

   //Declare the variables  
   int temp;  
   int temppin = 5;  
   int led1 = 7;  
   int led2 = 6;  
   void setup()  
   {  
       pinMode(led1, OUTPUT);  
       pinMode(led2, OUTPUT);  
       Serial.begin(9600); //BaudRate  
   }  
   void loop()  
   {  
       temp = analogRead(temppin);  
       float t = (temp / 1024.0) * 5000;  
       float celsius = t / 10;  
       float farh = (celsius * 9) / 5 + 32;  
       //Celsius Temperature  
       Serial.print("Temperature =");  
       Serial.print(celsius);  
       Serial.print("°C");  
       Serial.println();  
       delay(1000);  
       if (celsius > 30)  
       {  
           digitalWrite(led2, HIGH);
           digitalWrite(led1, LOW);  
       }  
       else  
       {  
           digitalWrite(led2, LOW);
           digitalWrite(led1, HIGH);  
       }  
       if (celsius < 30)  
       {  
           digitalWrite(led1, HIGH);
           digitalWrite(led2, LOW);  
       }  
       else  
       {  
           digitalWrite(led2, HIGH);
           digitalWrite(led1, LOW);  
       }  
        
   }  

burn it to bootloader

is it?

i am not so understand what you means by PUSH_DATA example , is it using the PUSH data example from blynk library? does it need to use any shield (i don’t have any shield available to use not unless online shop it again)?

USB2TTL, you know what one is? Do you have one?

PUSH DATA is a Blynk sketch that demonstrates how to take that rubbish out of loop().
Read the docs, you can’t read the temperature sensor thousands of times and second like you are trying to do in loop().
Even if you could, you will create a thermo-nuclear reaction on the Blynk server trying to send data at that speed.

USB2TTL, after google it seems like another type of shield to arduino and no i don’t have this shield. I just have ESP8266 , but seems like very confusing for me to setup for Blynk that’s why i switch to connection by USB serial.

implement it in PUSH DATA , do i need to add in any shield for arduino uno?

P/S: sorry i am not really understand how this flow work, so pls guide me in understandable way :sleepy:

The Arduino Uno has one hardware serial port which is accessible via the USB connector on the board and also via the Tx and Rx pins.
You can only use this for one thing - either for your serial debug, or for talking to a peripheral like the ESP-01.
If you want to connect the ESP-01 to the hardware serial port (which is the most reliable way to do this, and which allows you to use faster baud rates for the communication without any issues) then you’ll need to find another way of sending the debug serial data to your PC.
This can be done by using the Software Serial library, which gives you an additional ‘virtual’ serial port. The problem is that you PC can’t understand this data unless you use a Serial to USB adapter (otherwise know as a USB2TTL or FTDI adapter). With one of these you’d connect it as follows:

USB connector plugs in to your PC
Tx pin on the adapter to the software serial Rx pin on the Arduino
Rx pin on the adapter to the software serial Tx pin on the Arduino
Ground pin on the adapter to the Ground pin on the Arduino

Without a USB to Serial adapter you have five choices:

  1. Buy a USB to Serial adapter (recommended, as they’re handy anyway)
  2. Do without serial debug data (okay in the long term, but not good for debugging)
  3. Connect the ESP-01 to the software serial and use the hardware serial for debugging
  4. Throw away the Arduino and ESP-01 and buy a Wemos D1 Mini instead (the most sensible choice)
  5. Use an Arduino Mega as this has more serial ports built-in (not worth buying one just for this, but a Wemos instead)

If you go for option 3 then don’t use a baud rate faster than 9600. Whichever option you use to connect your ESP-01 to your Arduino, both devices need to be talking to each other at the same baud rate (9600 with Software serial, or faster with hardware serial). The baud rate of the ESP-01 is set by connecting it to your Serial monitor (using a USB to Serial Adapter) and issuing an AT command to set the baud rate to the one you want.

Dos this clarify you situation and your choice of what hardware you need to buy next?

Pete.

1 Like

Hi guys, please help me…i really having no idea now on this pulse sensor.

Although I can’t help (I do not know this sensor), it might be a good idea to summarise your efforts. It seems you had (have?) some more issues, and the topic is a bit messed because of that.

1 Like

i have edited all the previous question that i used to have in this blynk community because last week i tried to open another thread for other question but moderator moved my new thread back to this existing thread.

so i am just updating the question on first post as well as the title…

1 Like