Dear all,
I’m trying to set up an automation. I have seen the tutorials available on the internet, however my Blynk Console does not behave the way it is shown in the various tutorials. I can make a lamp turn on at the scheduled time but I cannot turn off the lamp at the scheduled time. My console does not offer the possibility to put a switch. All that appears is an icon to be colored that does not work as an on/off switch. I can’t change this anywhere in the console. Could any of you help me with this problem?
Thanks
Have you set-up your datastreams correctly?
Pete.
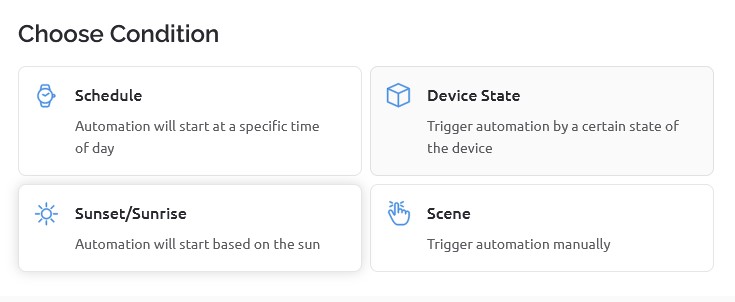
You need to go to Templates > Automations and ensure that you’ve set your datastreams up correctly.
You also need to learn to use the sniping tool in Windows to capture screenshots rather than taking photos of your monitor.
Pete.
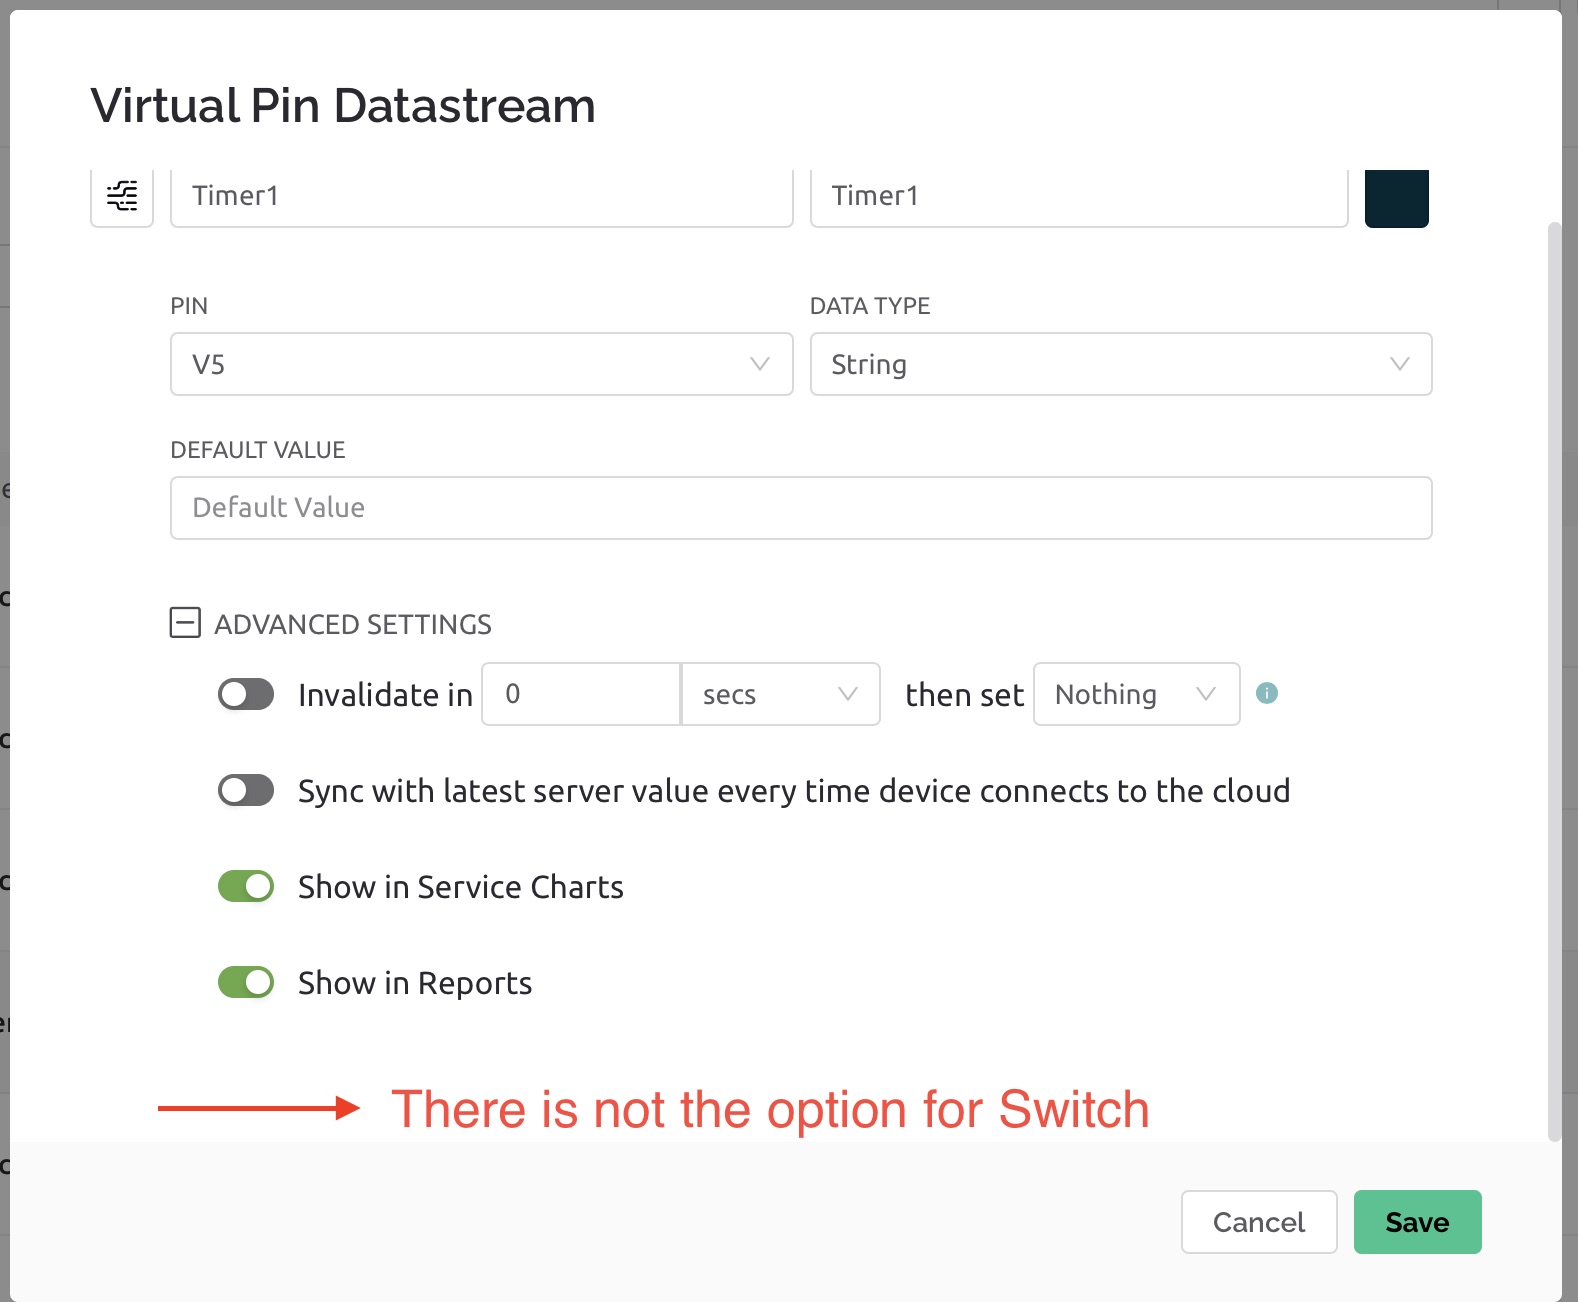
Sorry, but nothing I do in Templates > Automations or datastreams change the condition. There is no option to get the switch.
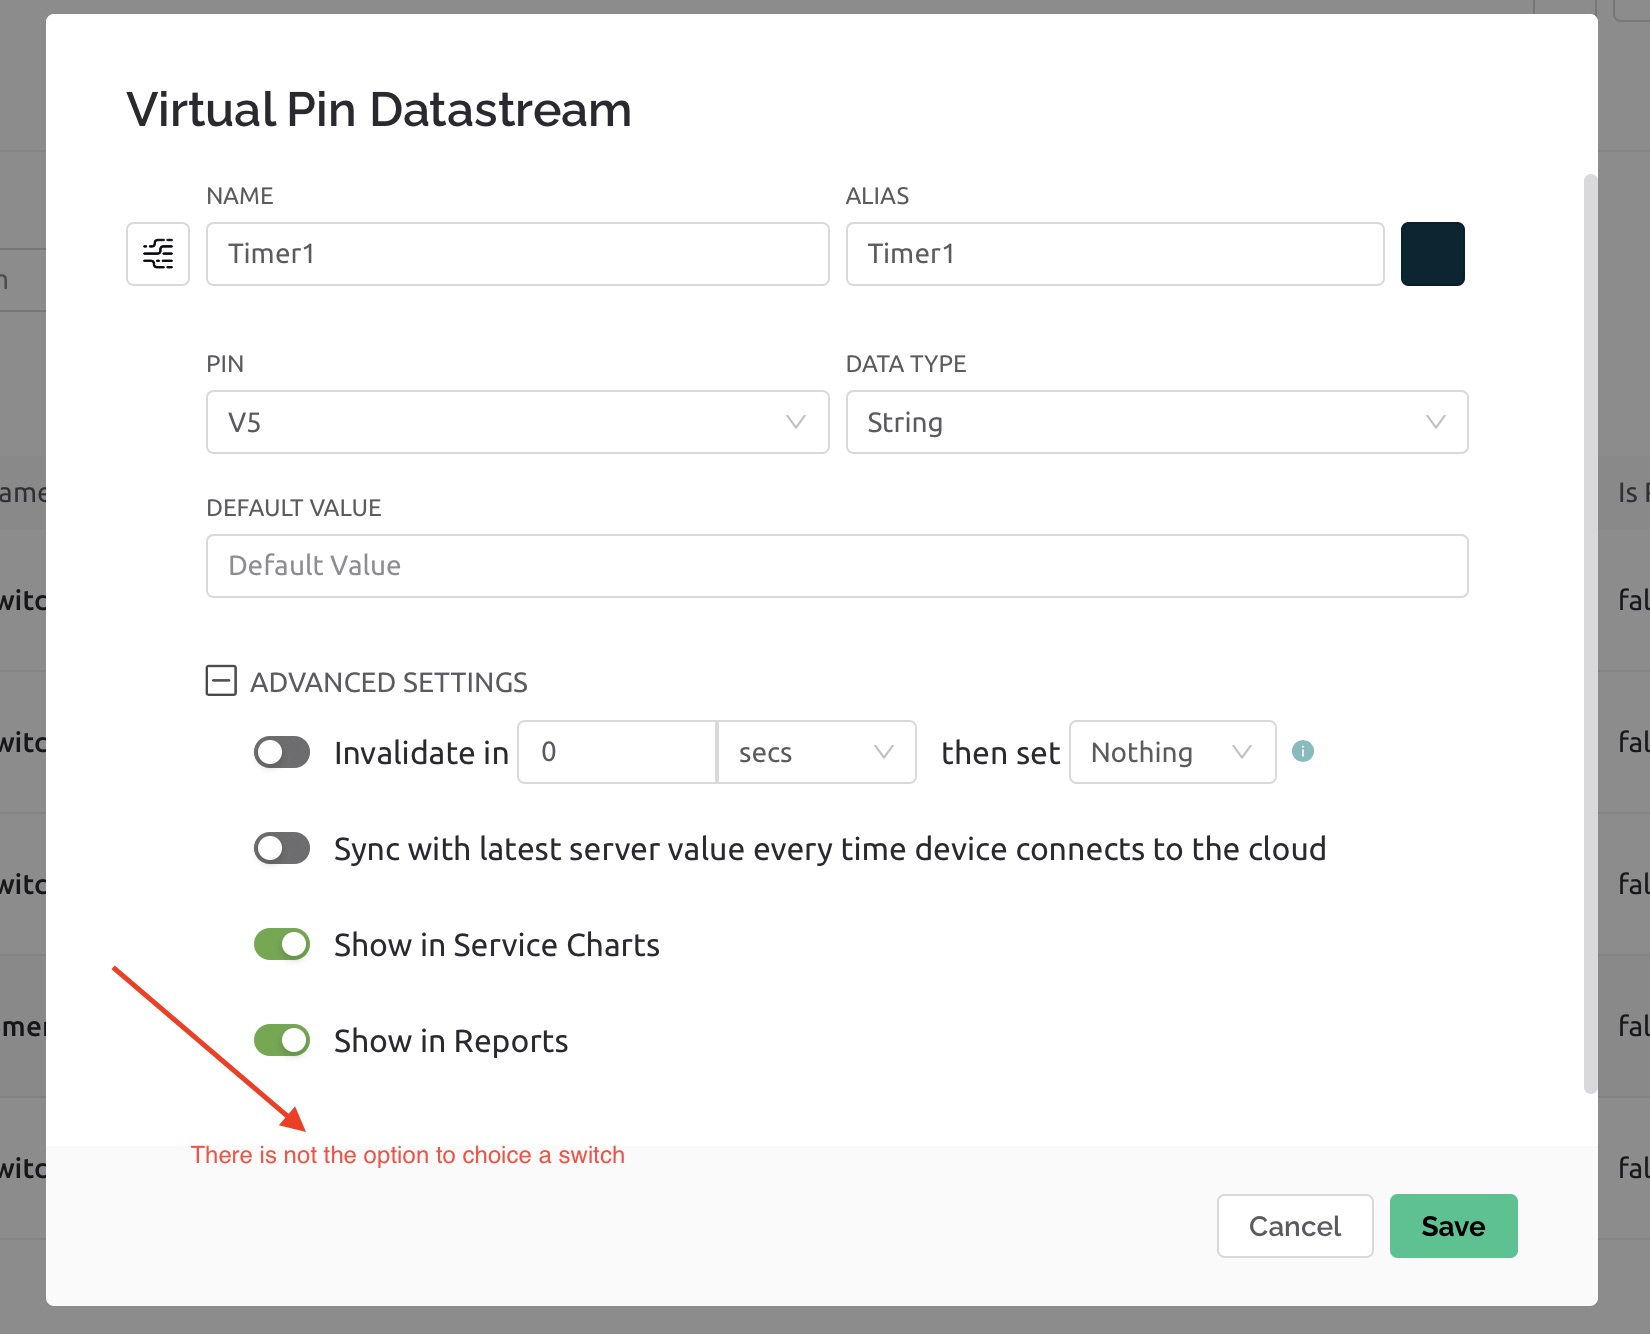

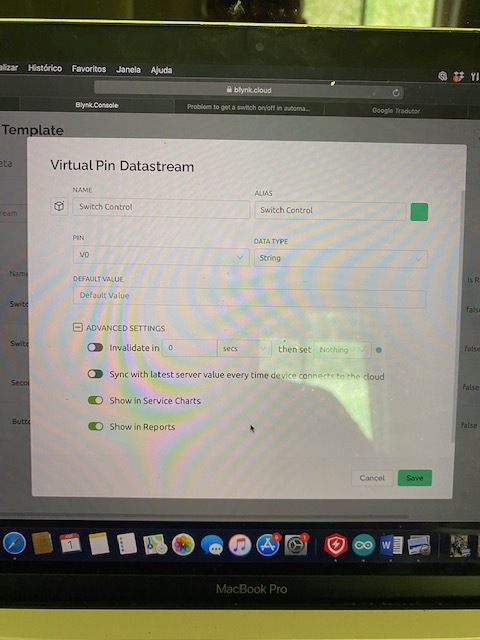
You can’t use a string data type for V5 if you want it to be a switch.
Pete.
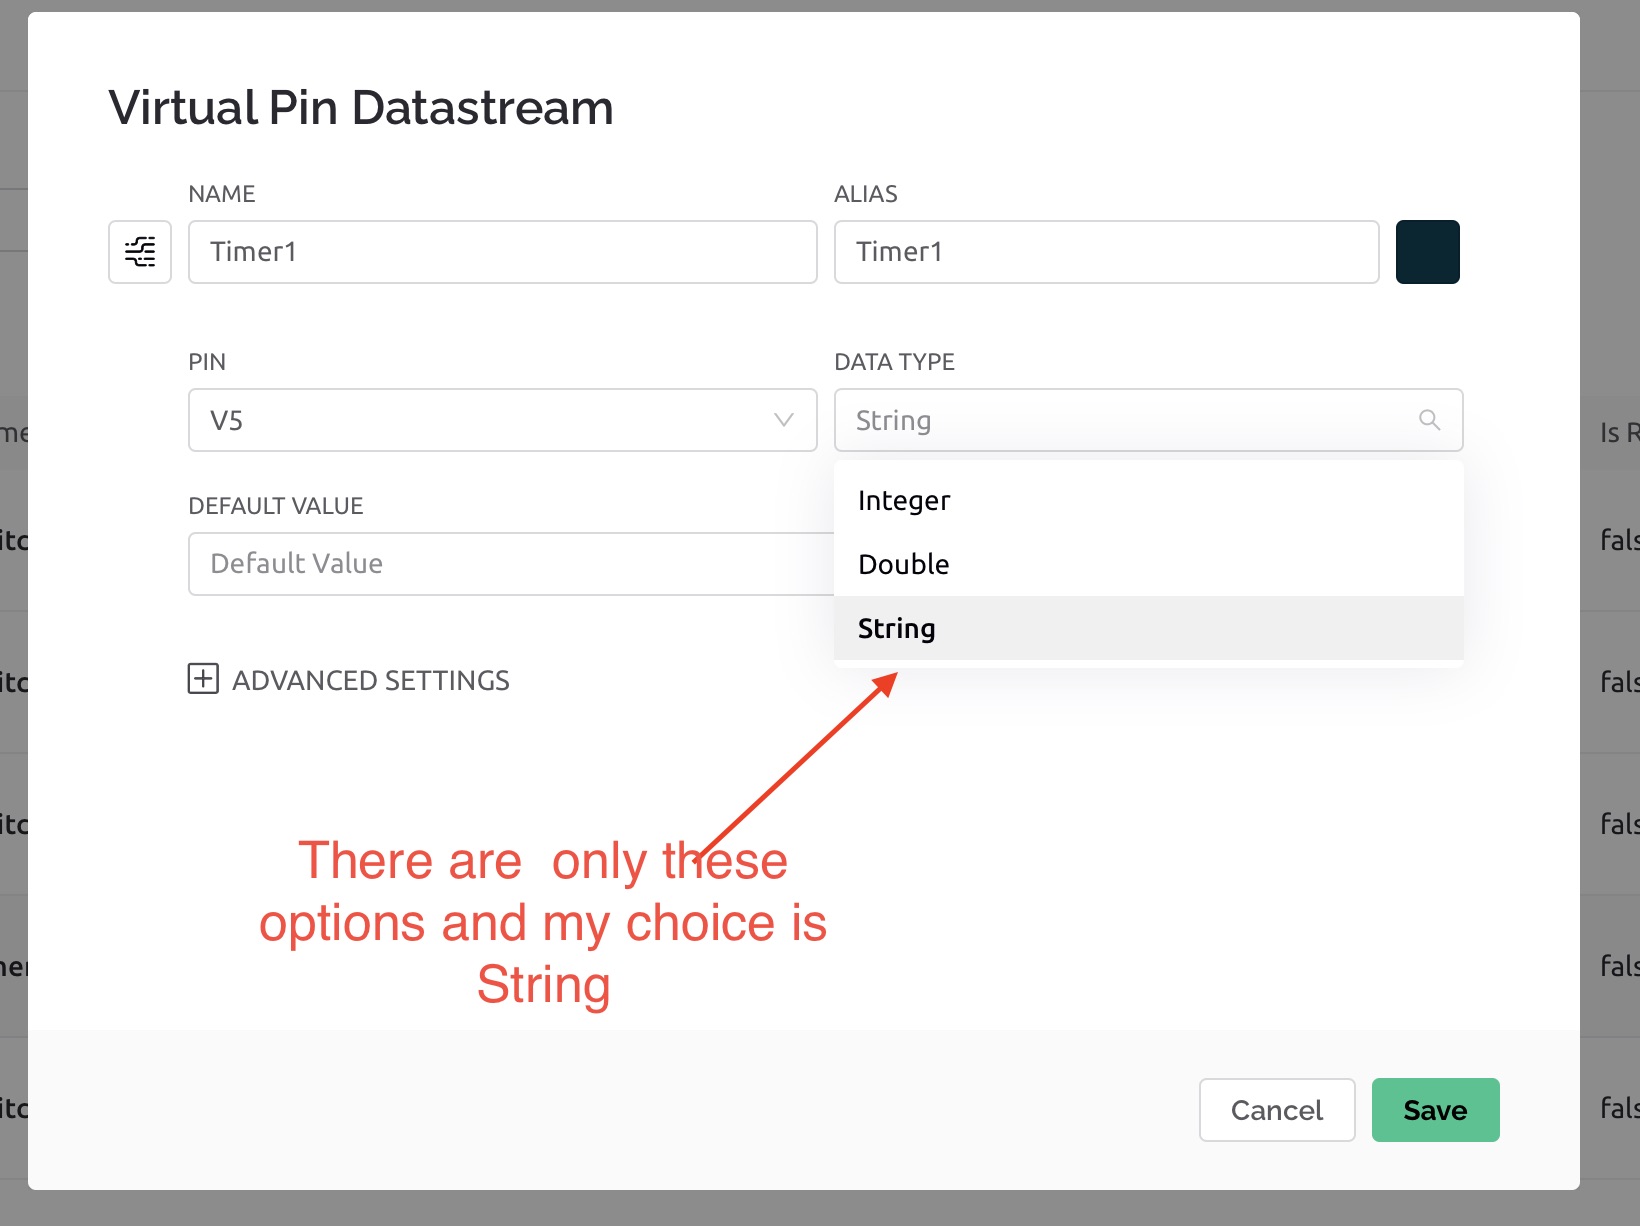
Yes, as I said, you can’t use String.
It needs to be Integer.
0=off 1=on.
Have you actually bothered to read the Automations documentation?
Pete.
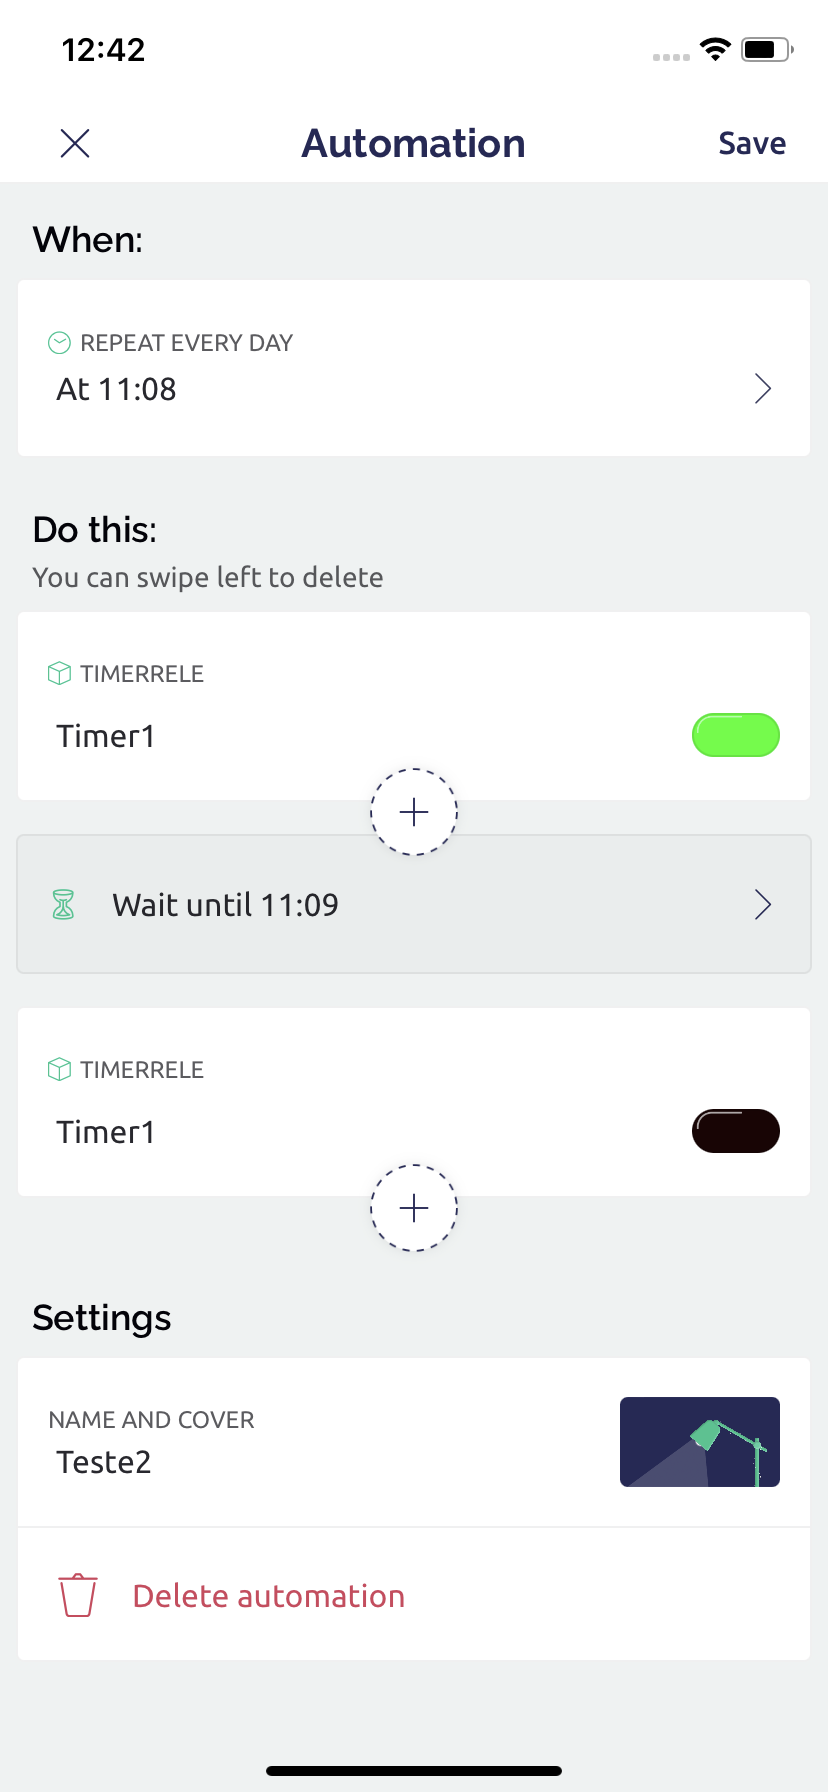
Ok, I have done your suggestion. However the system doesn’t work yet. System turn on but doesn’t turn off. What am I still doing wrong?
Impossible to tell without further information.
Pete.
Ok, What information? What do I need to do to put clear my problem.
The target looks like simple. I just want automation to schedule time to control a rele.
Please, say me What information you need and I will prepare carefully.
Thanks for your patience.
Datastreams, automation settings, automations, code, serial output, detailed symptoms etc etc.
Pete.
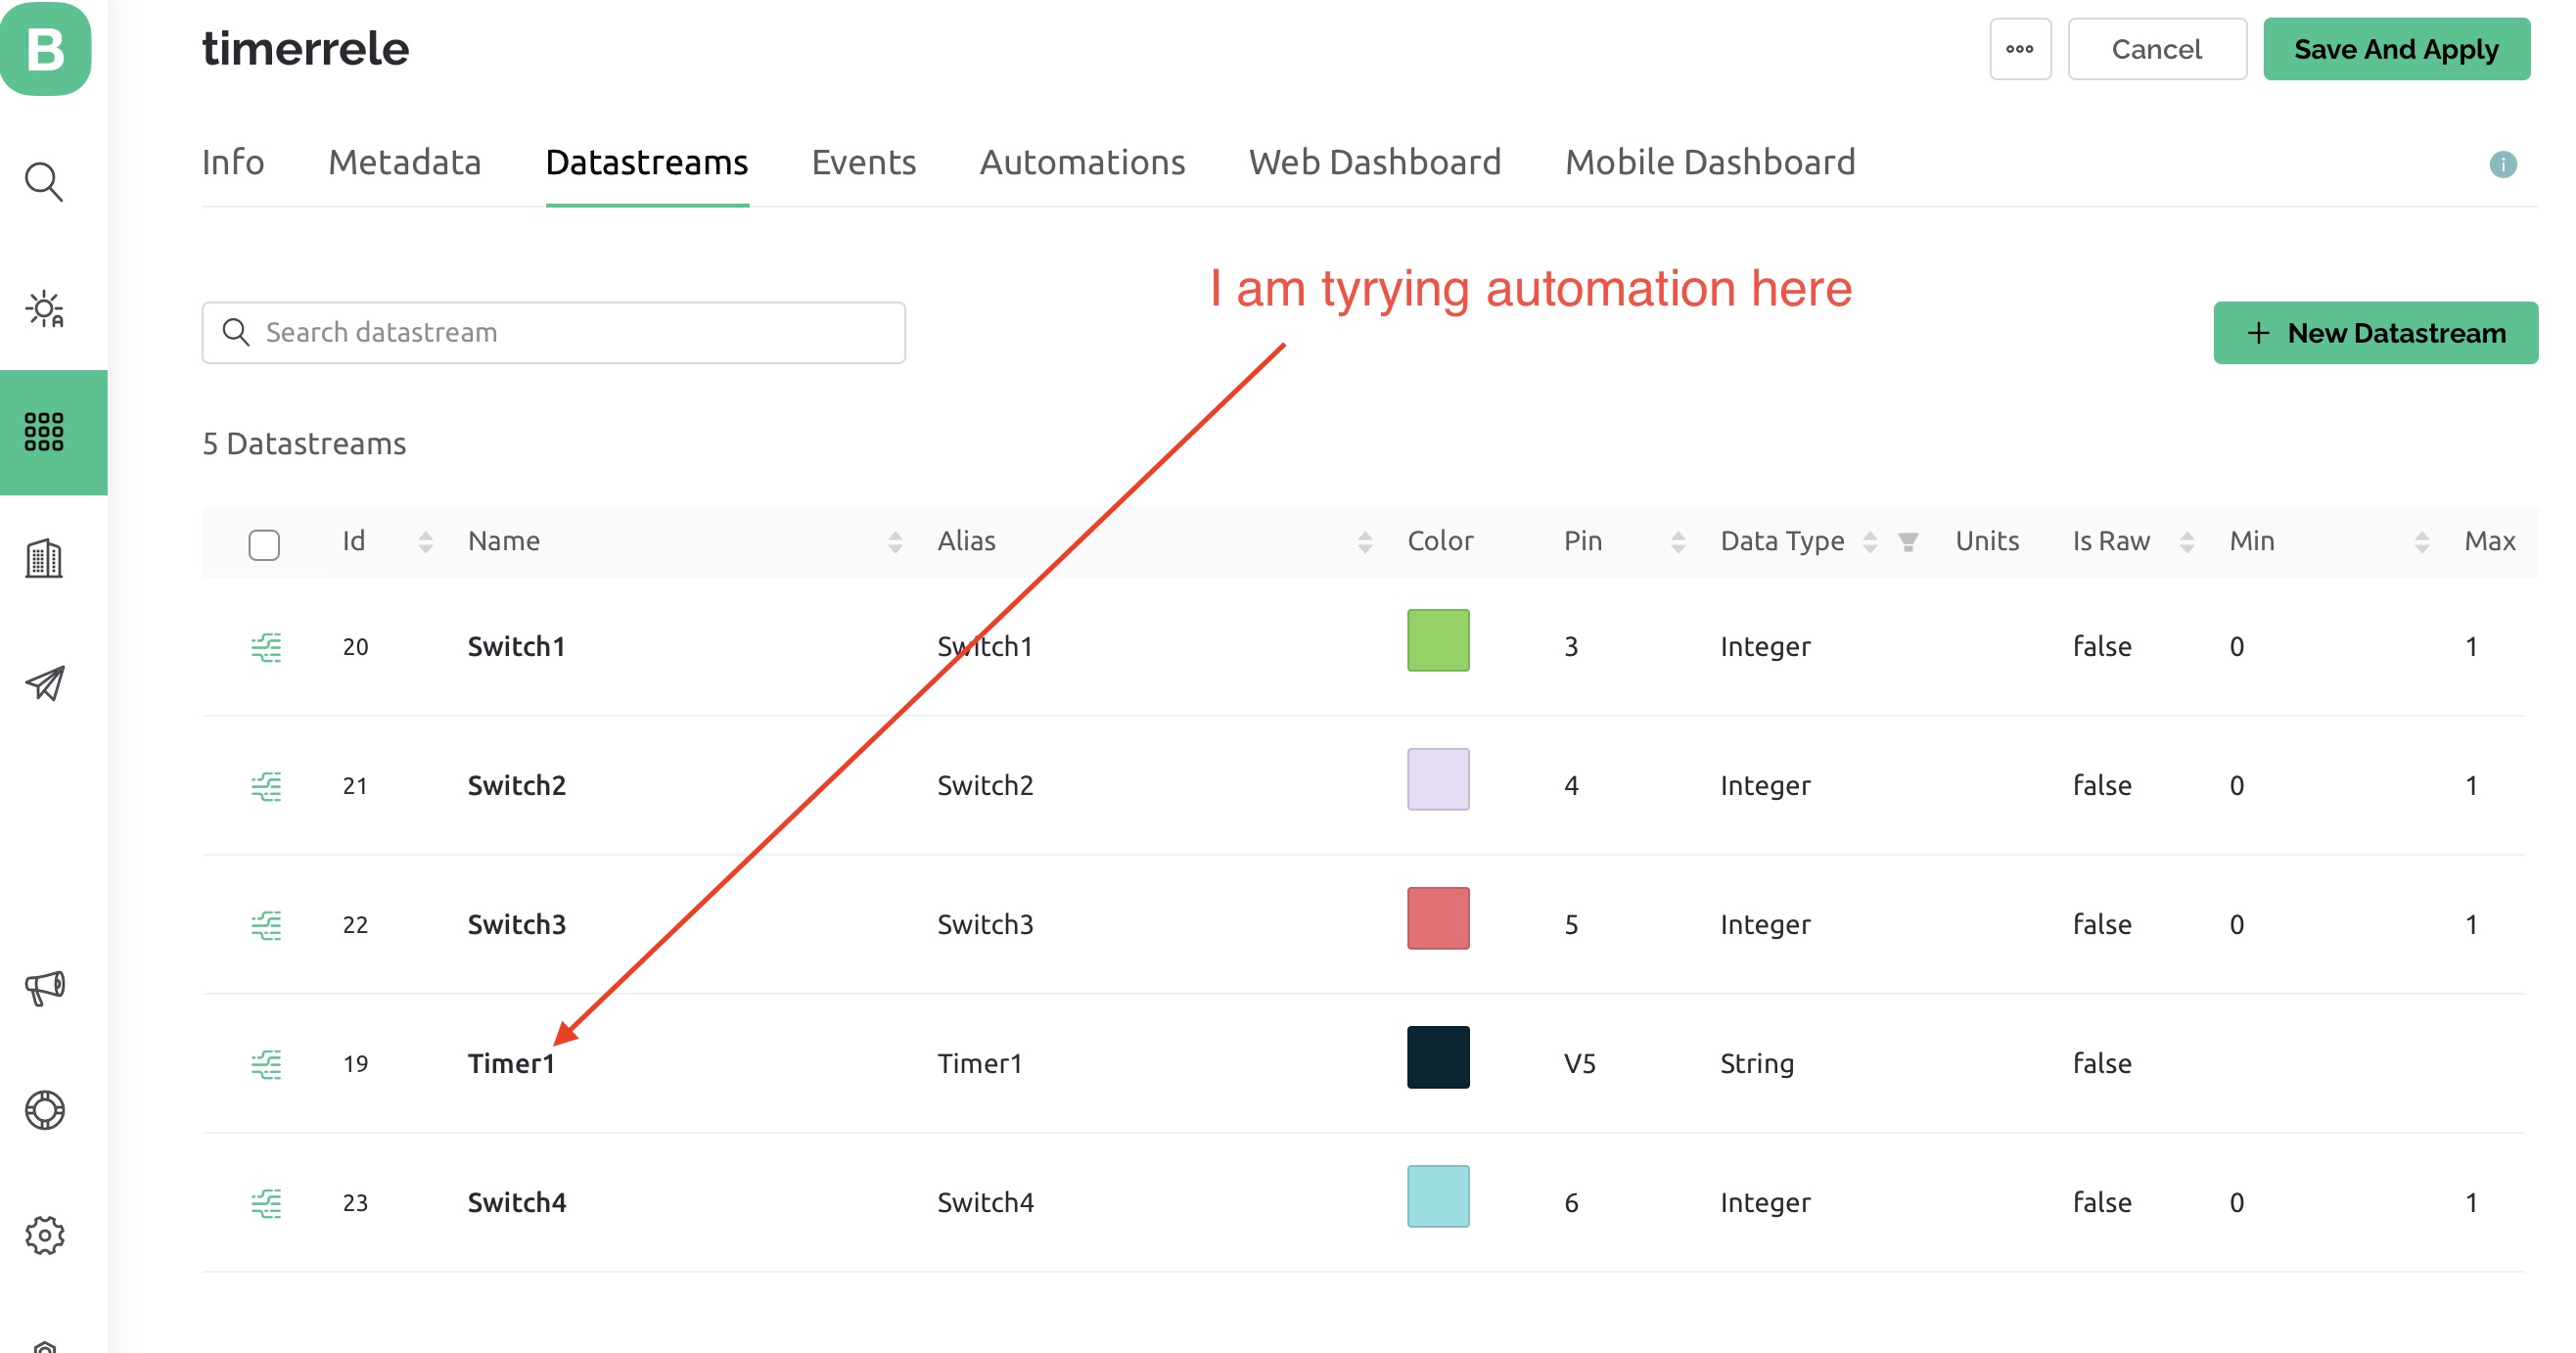
I have a photon particle that uses digital outputs 3,4,5,6 to drive 4 relays that control 4 lamps. So there are 4 switches that turn each of these 4 relays on and off. Furthermore, the relay coupled to digital output 3 must be automated to allow it to be turned on and off at a shedulled time.
The on/off switches work correctly. However, I’m having problems automating the relay connected to Photon digital output 3. Digital output 3 is represented by virtual pin V5 as shown in the sketch:
#define BLYNK_TEMPLATE_ID "TMPLZicnEEss"
#define BLYNK_DEVICE_NAME "timerrele"

char auth[] = "....";

#define BLYNK_PRINT Serial
#define BLYNK_DEBUG

#include <blynk.h>

const int relay_2 = 4;
const int relay_1 = 3;
const int relay_3 = 5;
const int relay_4 = 6;


WidgetLED led1(V2);
WidgetLED led2(V1);
WidgetLED led3(V3);
WidgetLED led4(V4);

SimpleTimer timer;


void buttonLedWidget()
{
if (digitalRead(relay_1) == LOW)
{
led1.on();
}
if (digitalRead(relay_1)== HIGH)
{
led1.off();
}

if (digitalRead(relay_2) == LOW)
{
led2.on();
}
if (digitalRead(relay_2)== HIGH)
{
led2.off();
}

if (digitalRead(relay_3) == LOW)
{
led3.on();
}
if (digitalRead(relay_3)== HIGH)
{
led3.off();
}

if (digitalRead(relay_4) == LOW)
{
led4.on();
}
if (digitalRead(relay_4)== HIGH)
{
led4.off();
}

}


BLYNK_WRITE(V5)
{
  int value = param.asInt();
  digitalWrite(3,value);
}

BLYNK_WRITE(V0)
{
  int value = param.asInt();
  digitalWrite(4,value);
}

BLYNK_WRITE(V6)
{
  int value = param.asInt();
  digitalWrite(5,value);
}

BLYNK_WRITE(V7)
{
  int value = param.asInt();
  digitalWrite(6,value);
}


void setup()
{
Serial.begin(9600);
Blynk.begin(auth);


digitalWrite (4,HIGH);
digitalWrite (3,HIGH);
digitalWrite (5,HIGH);
digitalWrite (6,HIGH);

pinMode(relay_1,OUTPUT);
pinMode(relay_2,OUTPUT);
pinMode(relay_3,OUTPUT);
pinMode(relay_4,OUTPUT);
timer.setInterval(500L, buttonLedWidget);
}

void loop()
{
Blynk.run();
timer.run(); // running timer every second
}
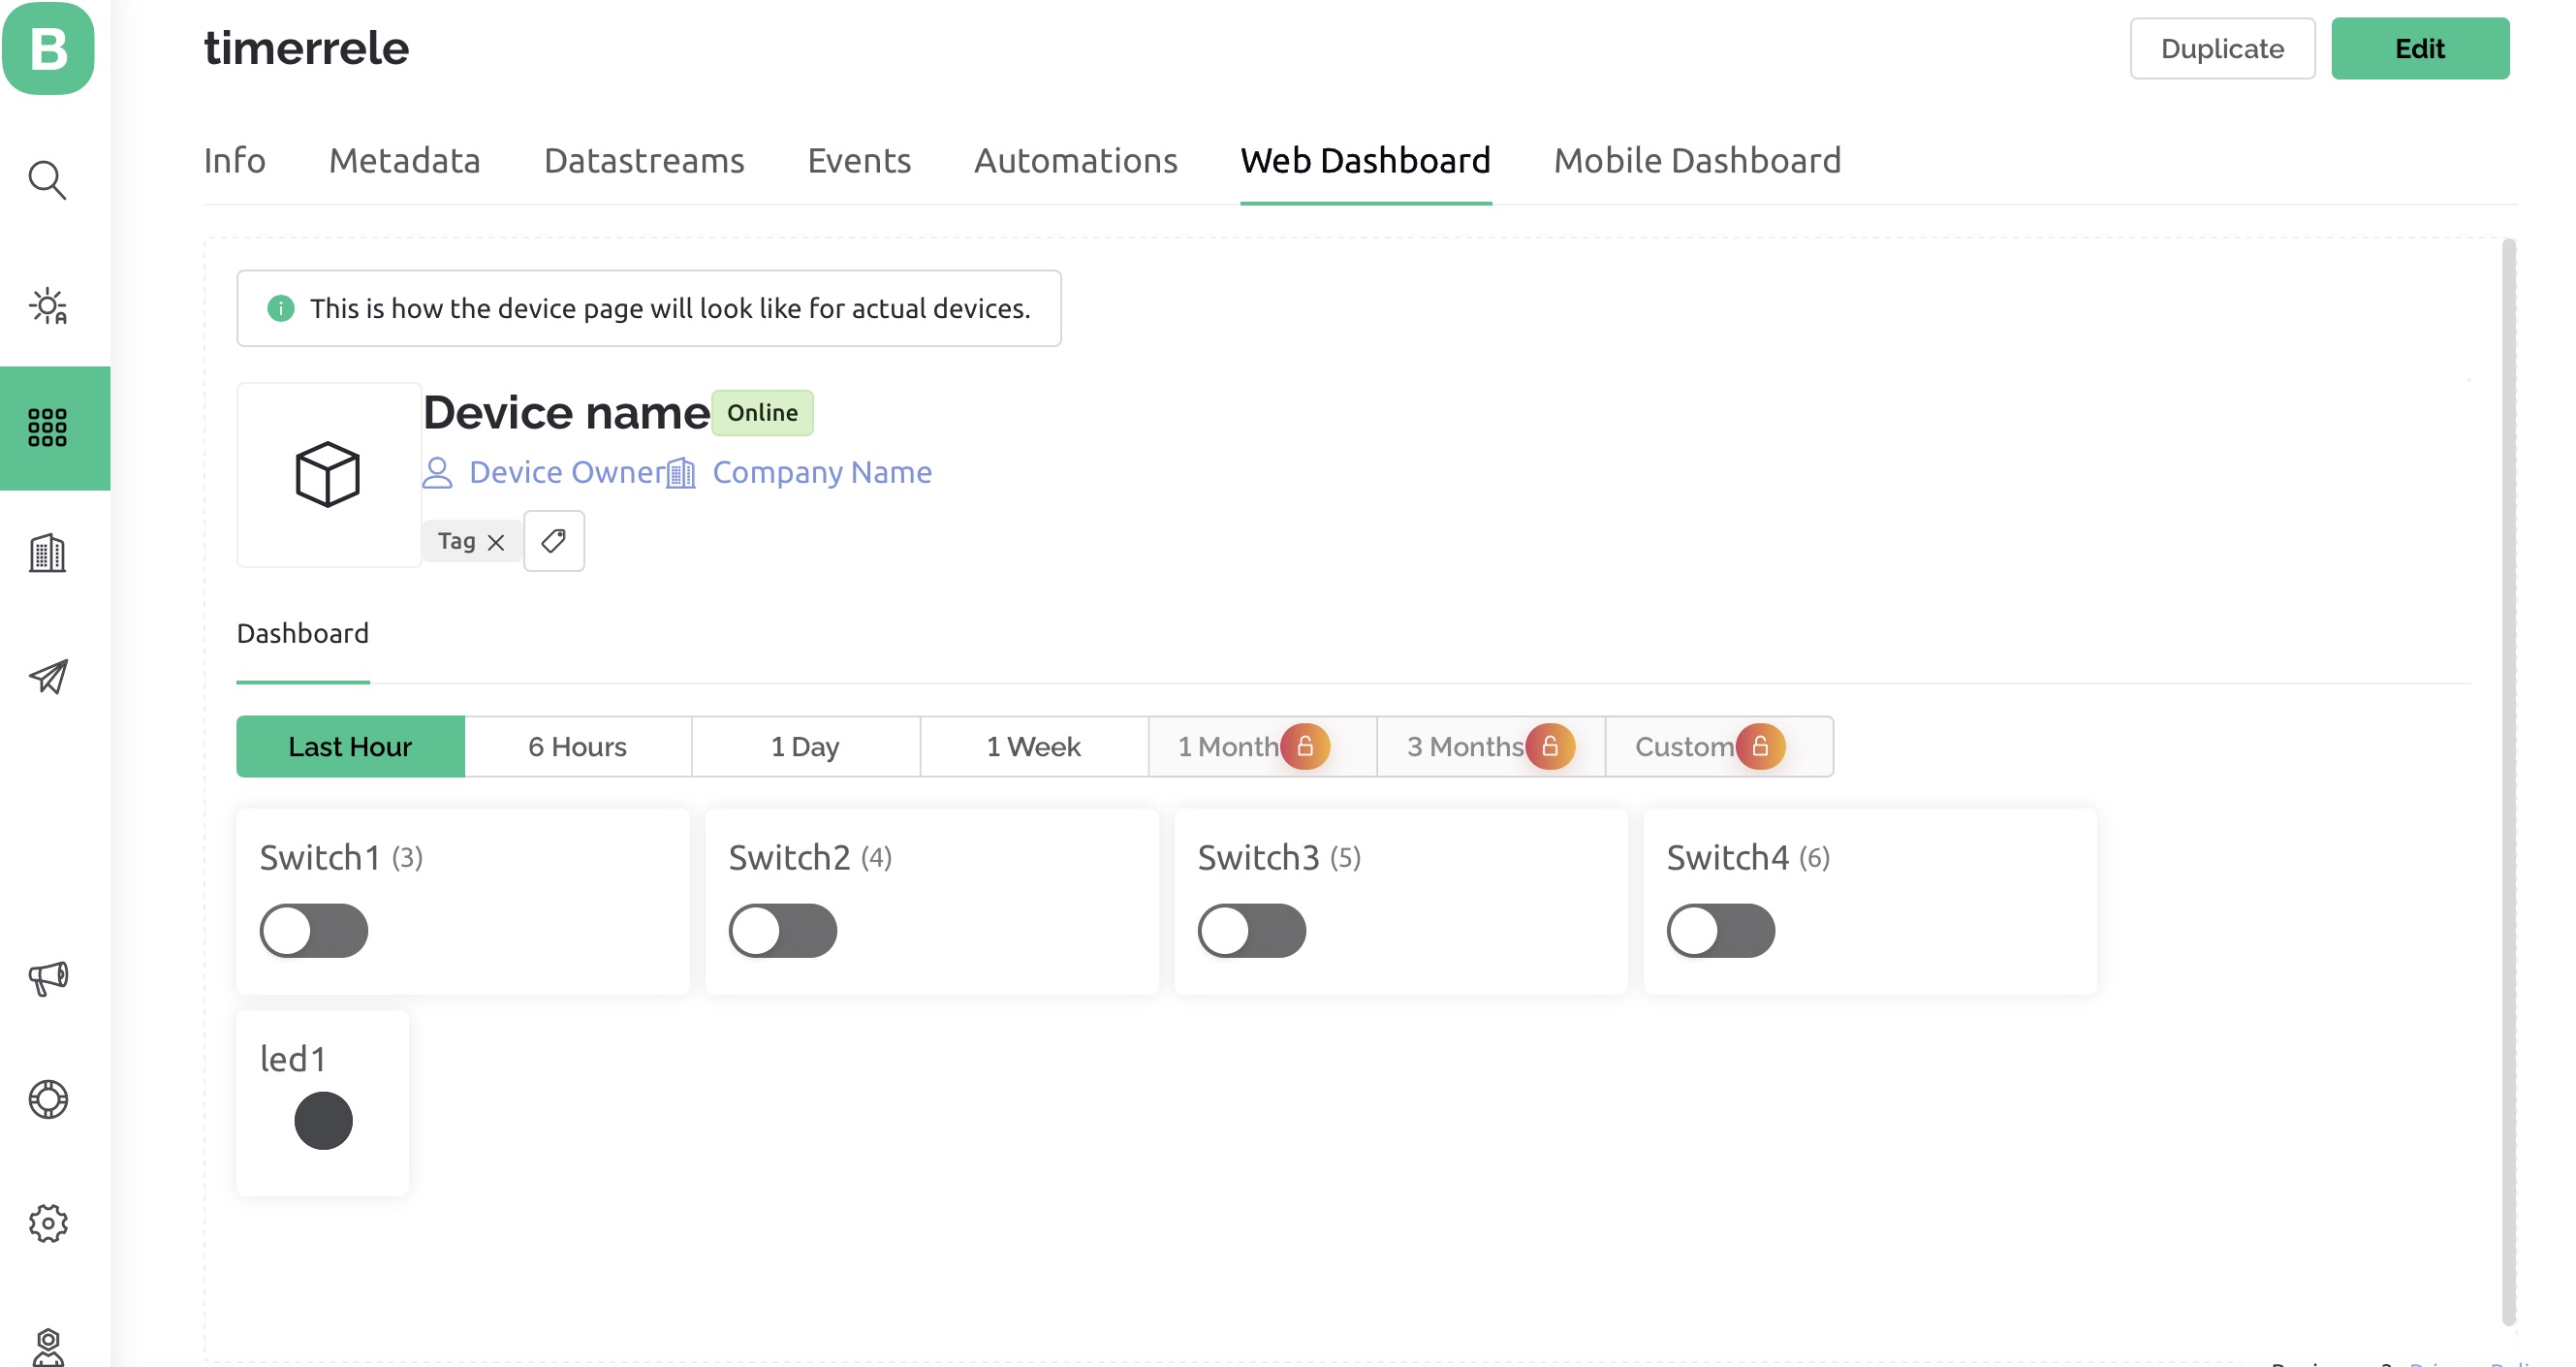
For now my Blynk plan is free. Below are the screens for Datascreams, Automations and Web Dasboard.
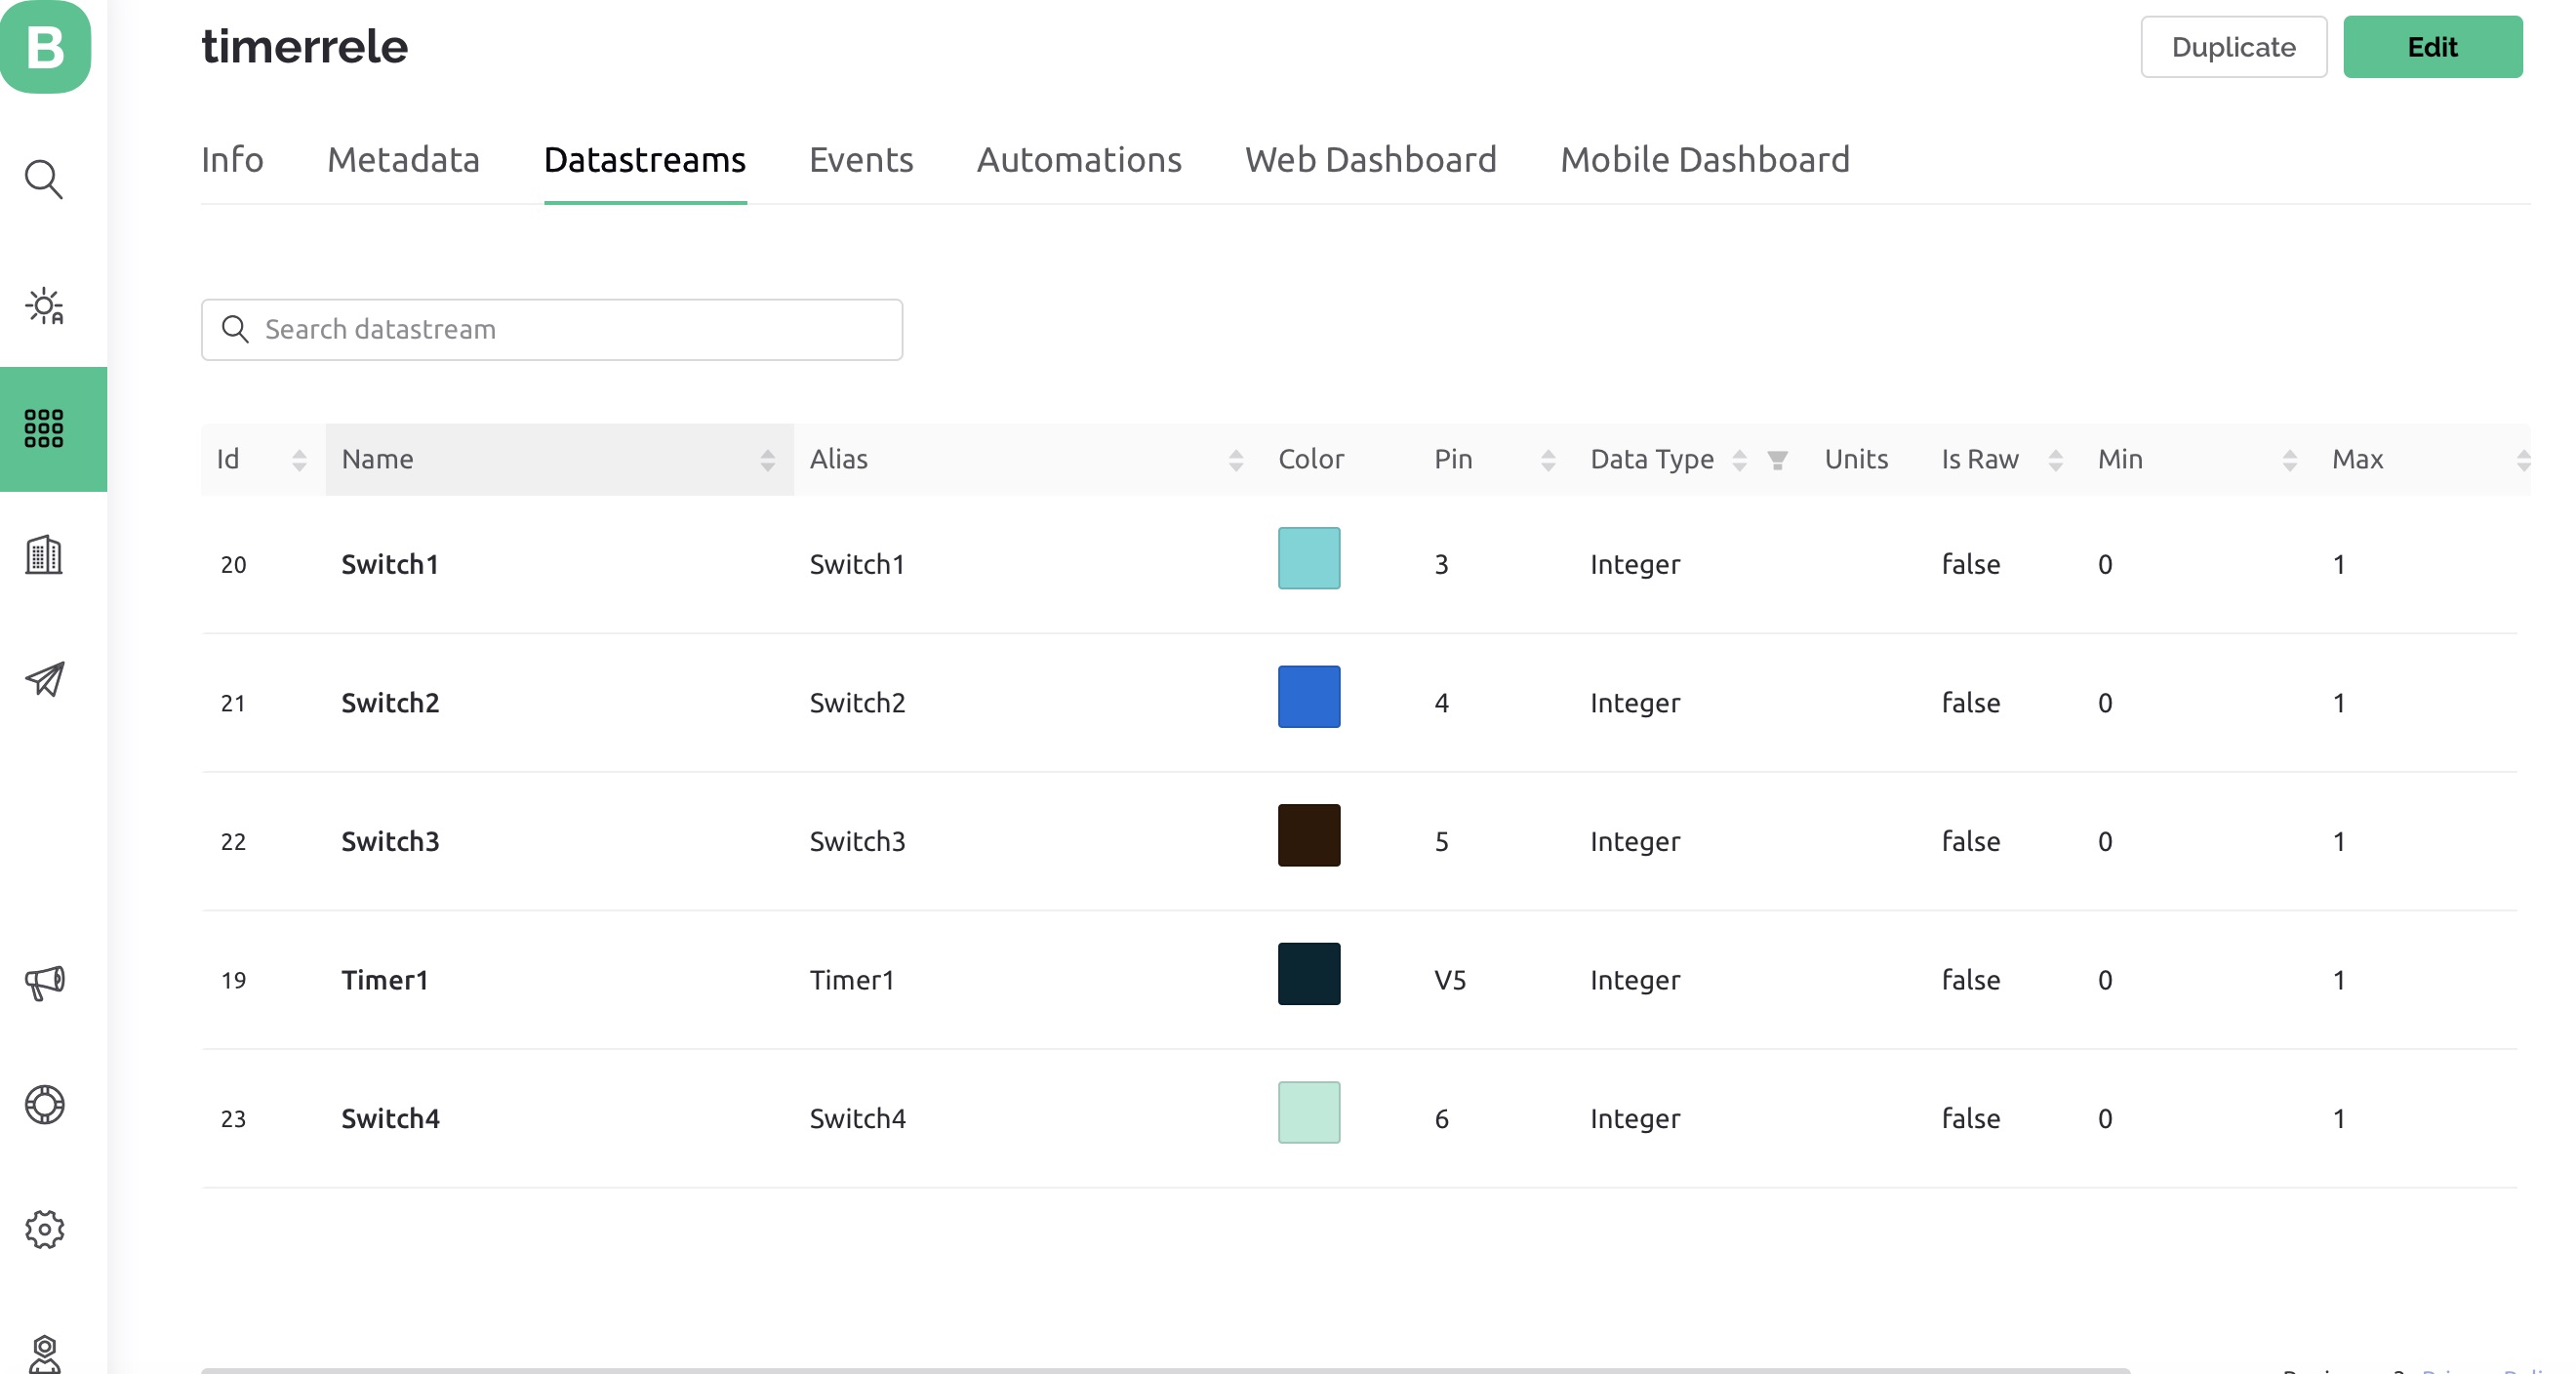
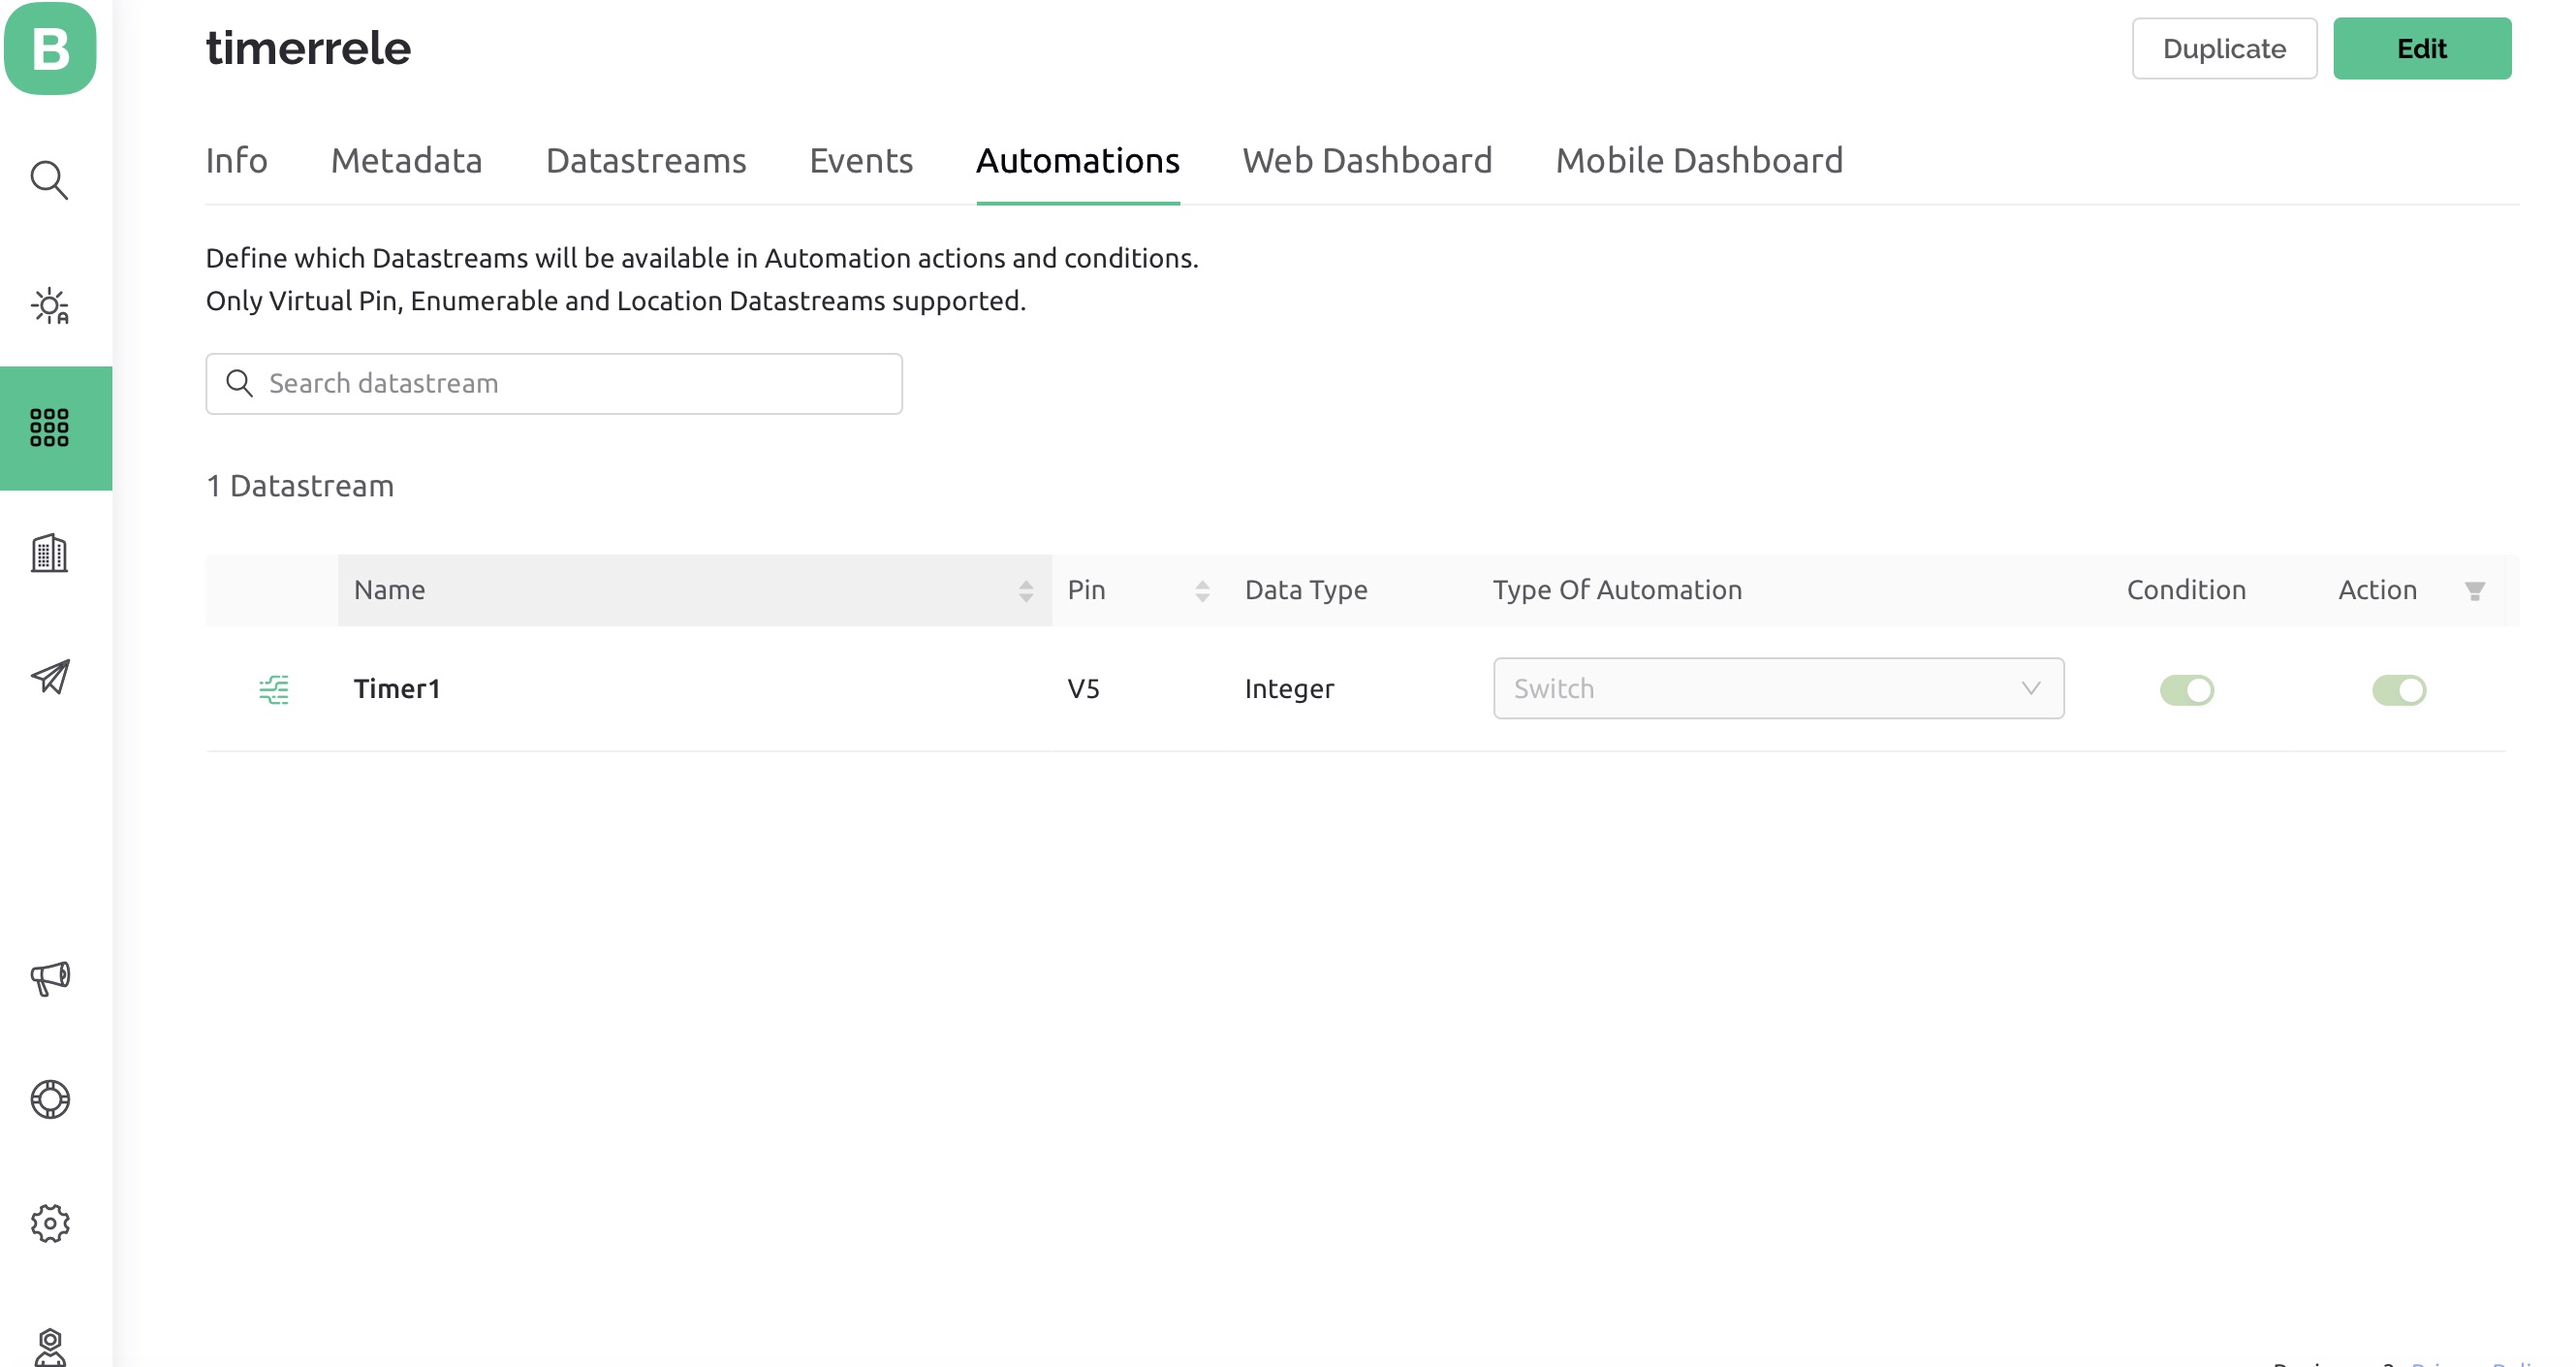
Can you see something wrong with this information?
Thanks…
I don’t understand why you’ve defined the alias of relay_1 for pin 3, but you aren’t using that alias here…
I also don’t understand why you are attempting to do digitalWrites to pins (once again using the PIN numbers rather than the aliases) BEFORE you’re initialising those pins as output pins…
The initialisation via the pinMode command should come first.
I also don’t understand why you’re using the buttonLedWidget() function to read the status of your relay pins every half a second and using the results to torn your LED widgets on/off.
It would make far more sense to do a `Blynk.virtualWrite(vPin) to the corresponding LED widget at the same time that you do the digitalWrites to the relay pins.
As far as the automation issue is concerned, I’d start by adding a serial print command to the start of tour BLYNK_WRITE(V5) function so that you can see when the function is triggered, and what value is being received from the Blynk server.
You could also add an LED widget to your dashboard connected to your V5 datastream to visualise the current value and test the automation.
Pete.
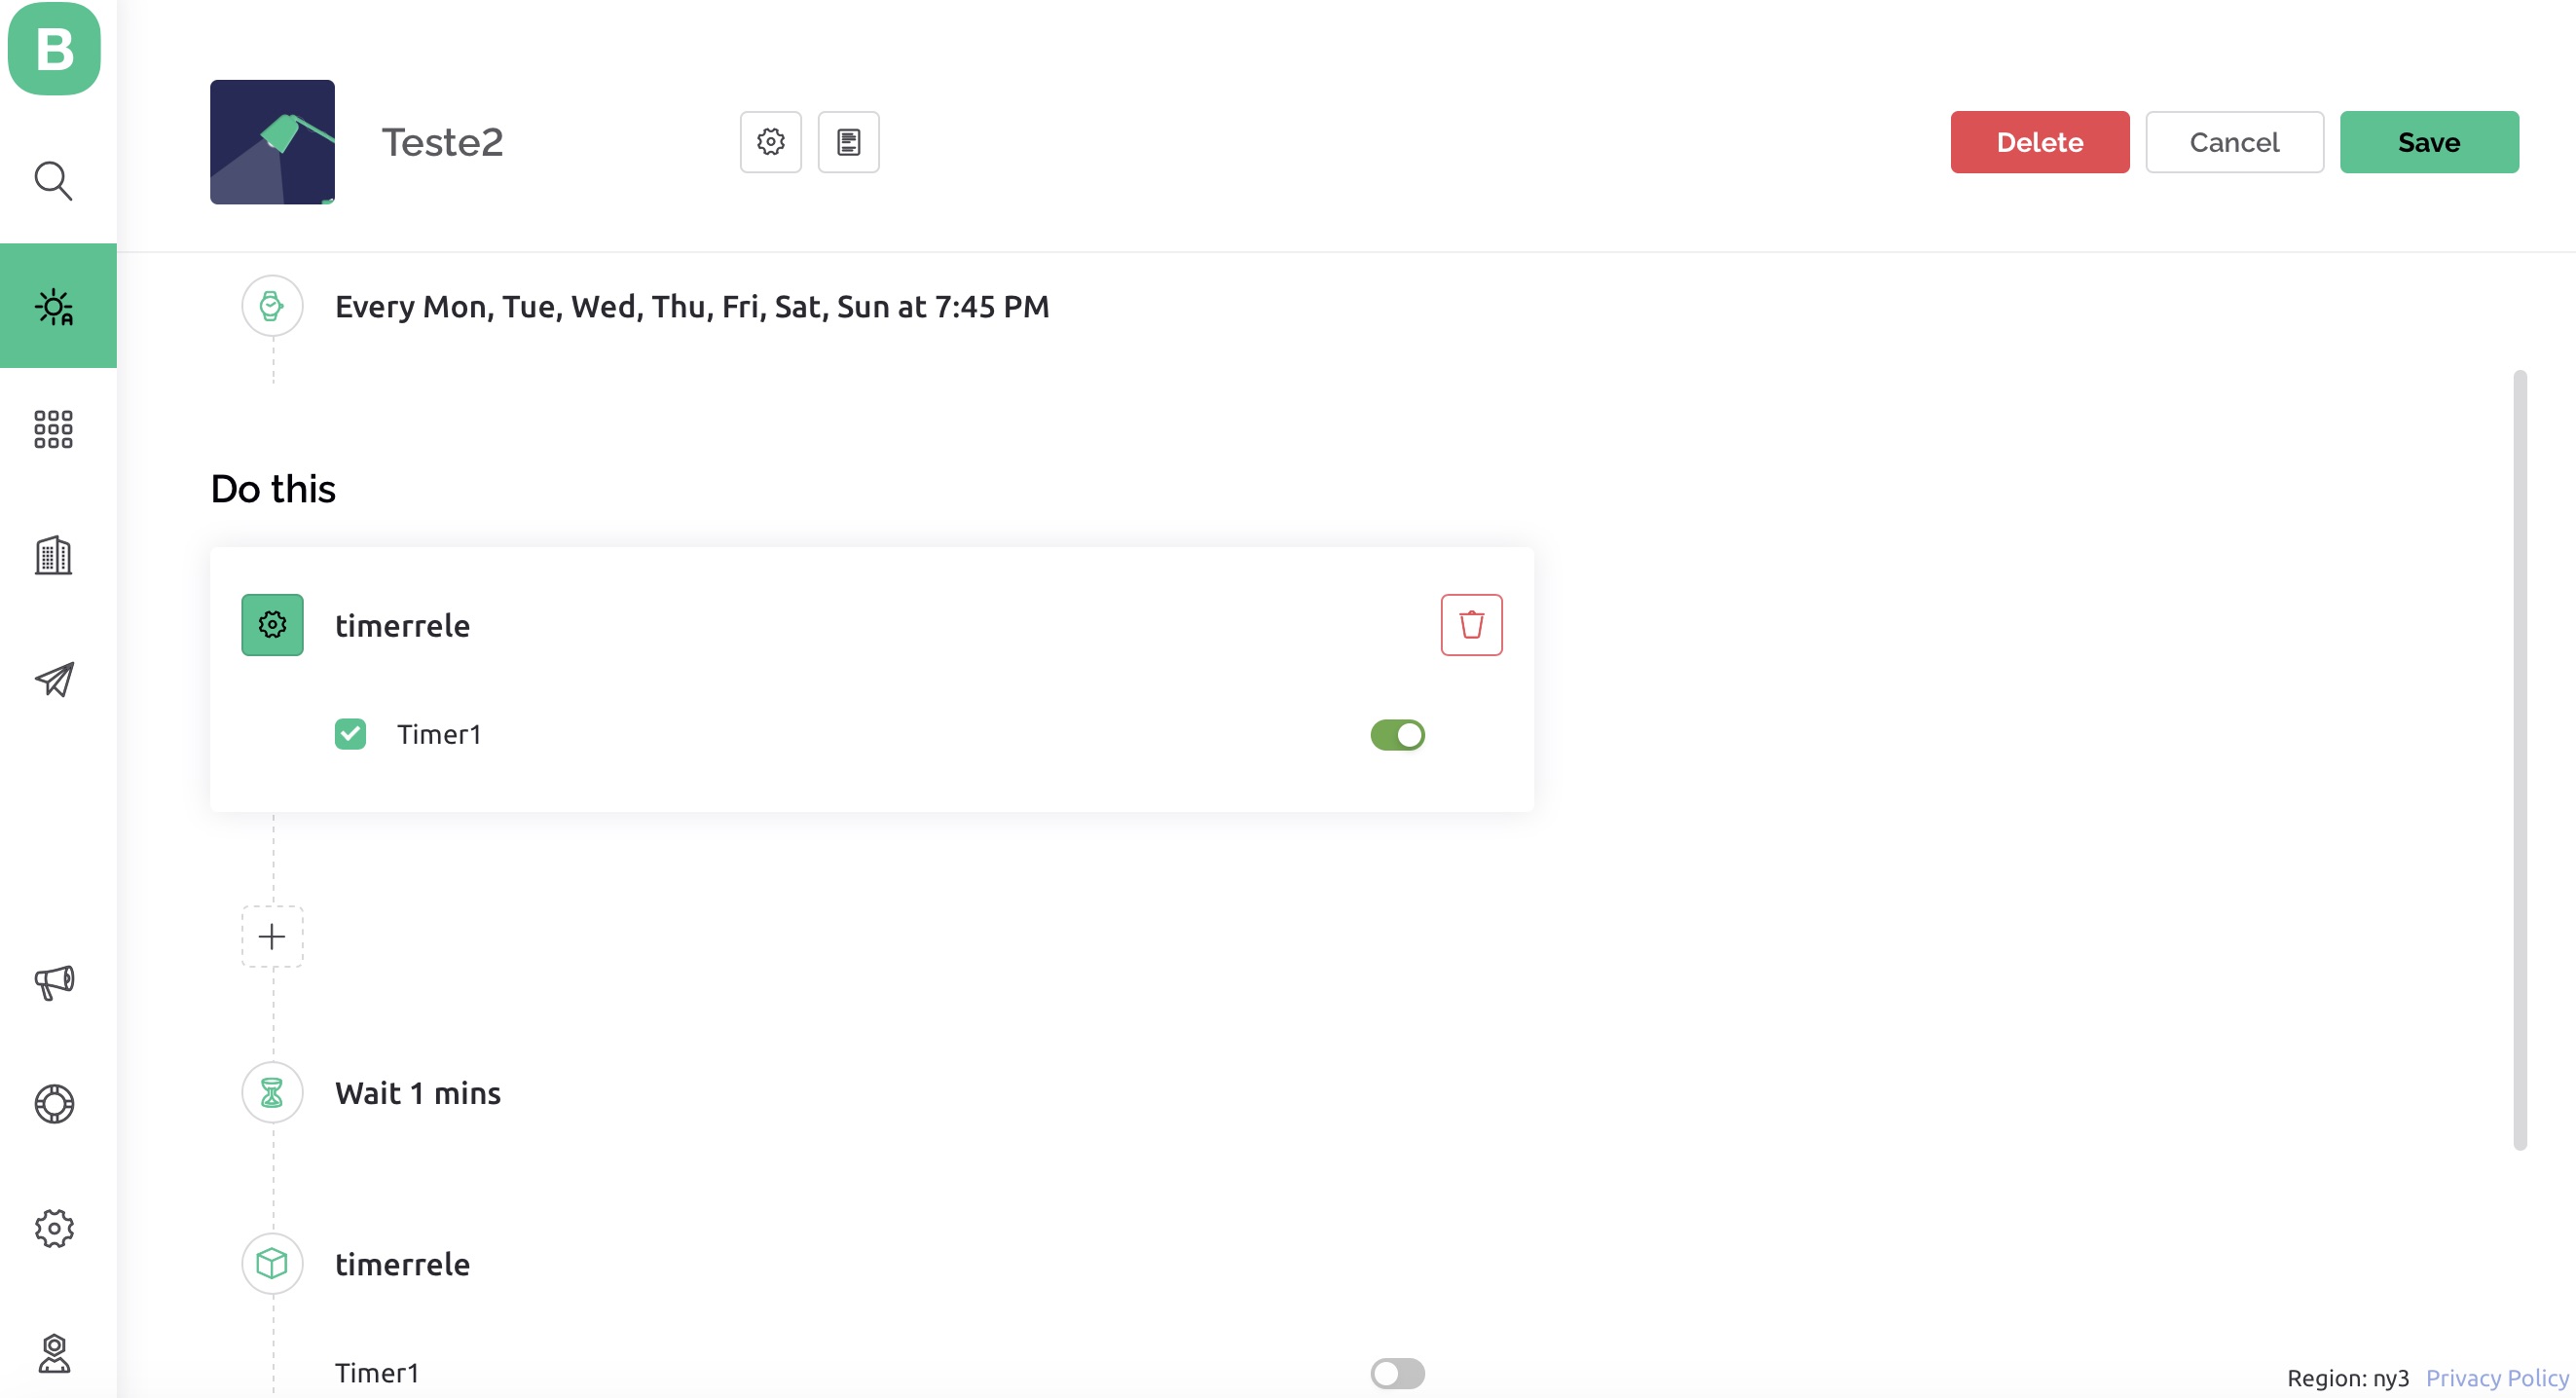
I added an LED widget connected with V5 datastream and I can see the first parte of automation working. The LED turn on, but doesn’t turn off.
Are you sure that the LED turning on is because of the automation?
Is the automation showing as “running” during the one minute after the automation turns on?
Have you tried an on period of more than 1 minute?
Did you do the serial print thing?
Pete.
You are right. There are several redundant or useless parts of the code. The code was written many years ago and worked with old Blynk. As I haven’t worked with this for a long time I don’t remember the reason for parts of the code anymore. I’m trying to understand to make the set work again with Blynk 2.0
Yes, I am sure. The LED turn on just in time of the shedulle. But doesn’t turn off