with this project you can monitoring your MikroTik Router resources on your Blynk app remotely 
Materials:
MikroTik Router with USB port. ( like RB951Ui or any router that have USB port )
ESP8266 NodeMCU
MicroUSB cable to programming the NodeMCU and for connecting the NodeMCU to your MikroTik Router.
Guide:
1- install the LCD package on your MikroTik Router from the official MikroTik download page.
2- Upload the below Arduino Sketch to your NodeMCU
#include <ESP8266WiFi.h>
#include <BlynkSimpleEsp8266.h>
#include <SimpleTimer.h>

// You should get Auth Token in the Blynk App.
// Go to the Project Settings (nut icon).
char auth[] = "92221bbfc31d48d0979aaff275b3730b";

// Your WiFi credentials.
// Set password to "" for open networks.
char ssid[] = "MikroTik Tesla";
char pass[] = "12345678";
char server[] = "10.5.5.18";

SimpleTimer timer;

void setup()
{
  // Debug console
  Serial.begin(9600);
  while (!Serial) {
    ; // wait for serial port to connect. Needed for native USB port only
  }
  Blynk.begin(auth, ssid, pass, server, 8080);
  timer.setInterval(1000L, prt);
}

void prt()
{
       String content = "";  //null string constant ( an empty string )
       char character;
       while(Serial.available()) {
            character = Serial.read();
            content.concat(character);

       }
       if (content != "") {
            Blynk.virtualWrite (V0, content);
       }
}

void loop()
{
  Blynk.run();
  timer.run();
}
3- Connect your NodeMCU to your MirkroTik Router usb port.
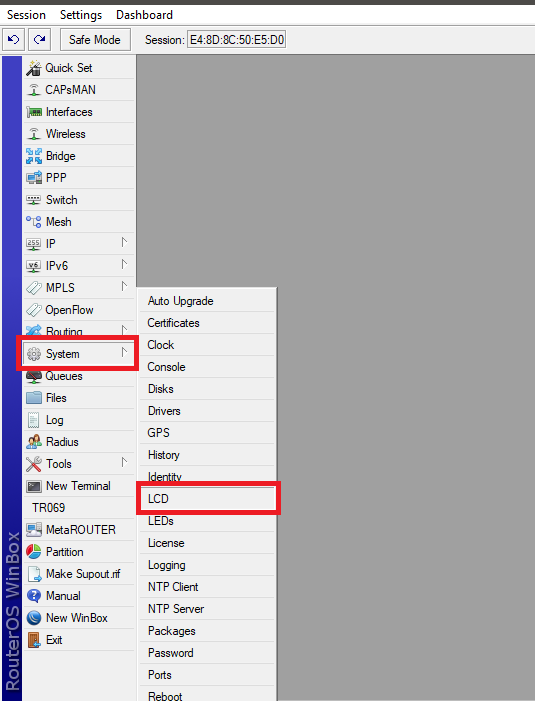
4- enabling the LCD mode from winbox system > LCD
5- in LCD settings check the Enabled
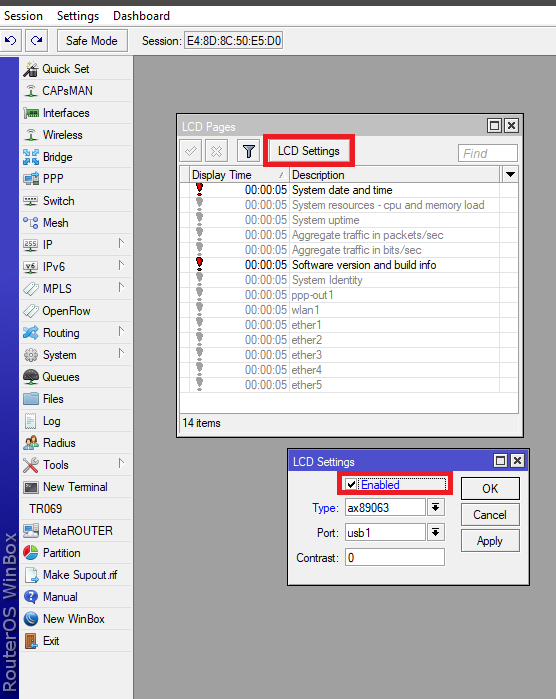
6- select the Type as ax89063
select the port to usb1 or other ( on your router the port maybe usb2 or anything ) then click on apply.
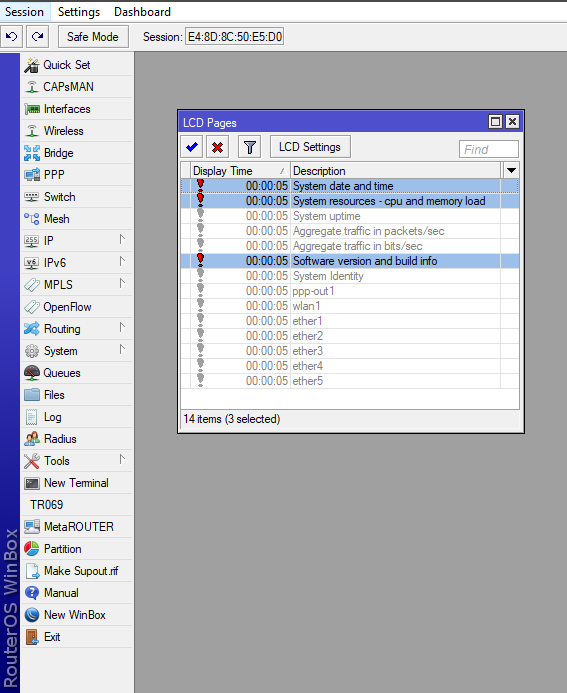
7- in the LCD page you can select and enable your favorite resources. I’m select this options you can see in below picture
8- in Blynk App add the Terminal widget then select V0

Finally you can monitoring your MikroTik Router resources from the blynk app

if not working, just rebooting your router