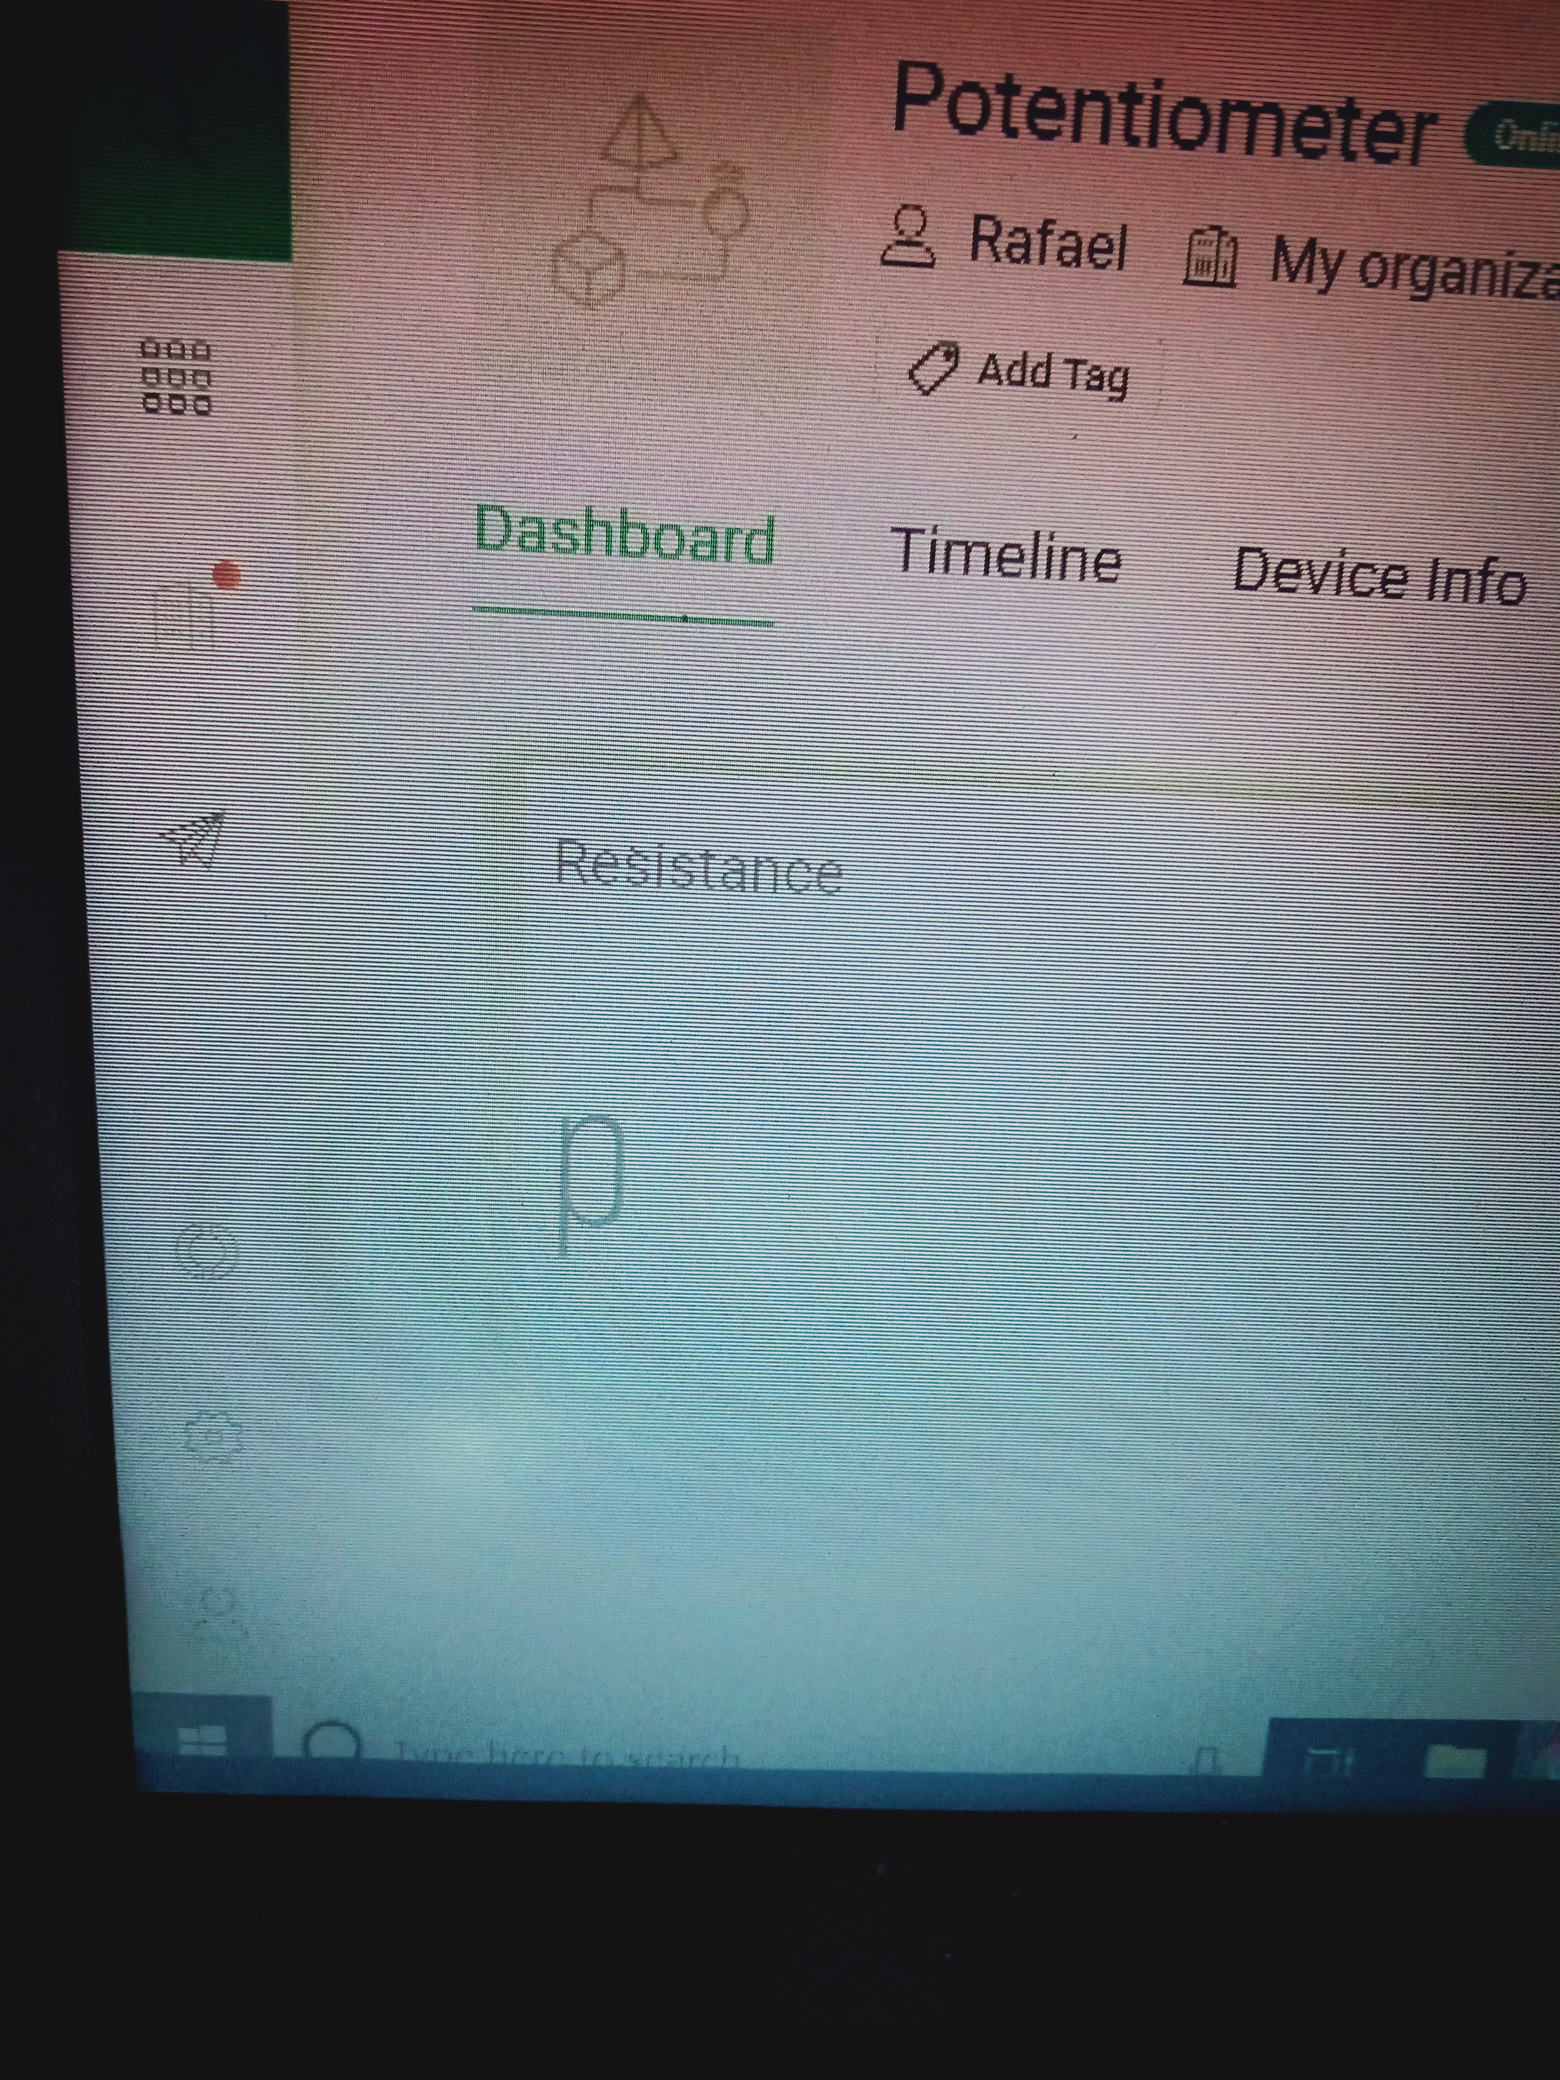
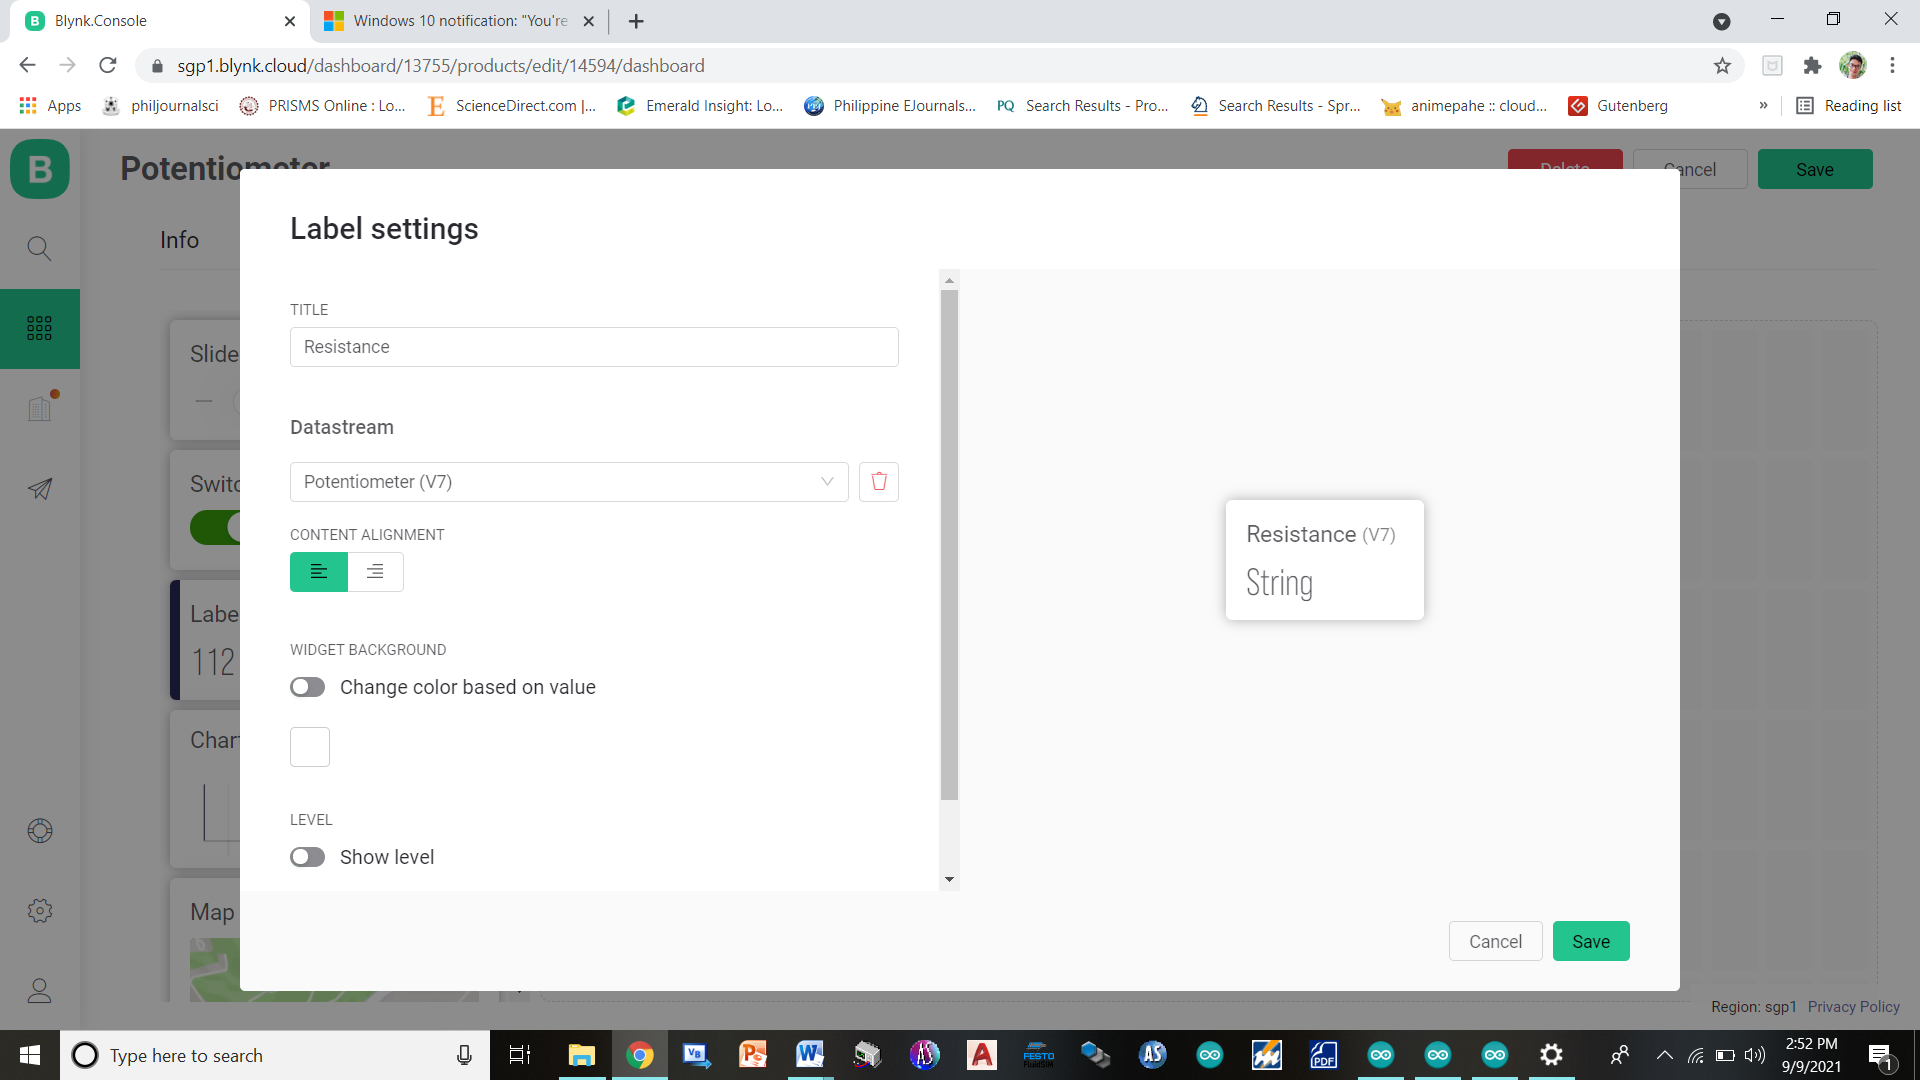
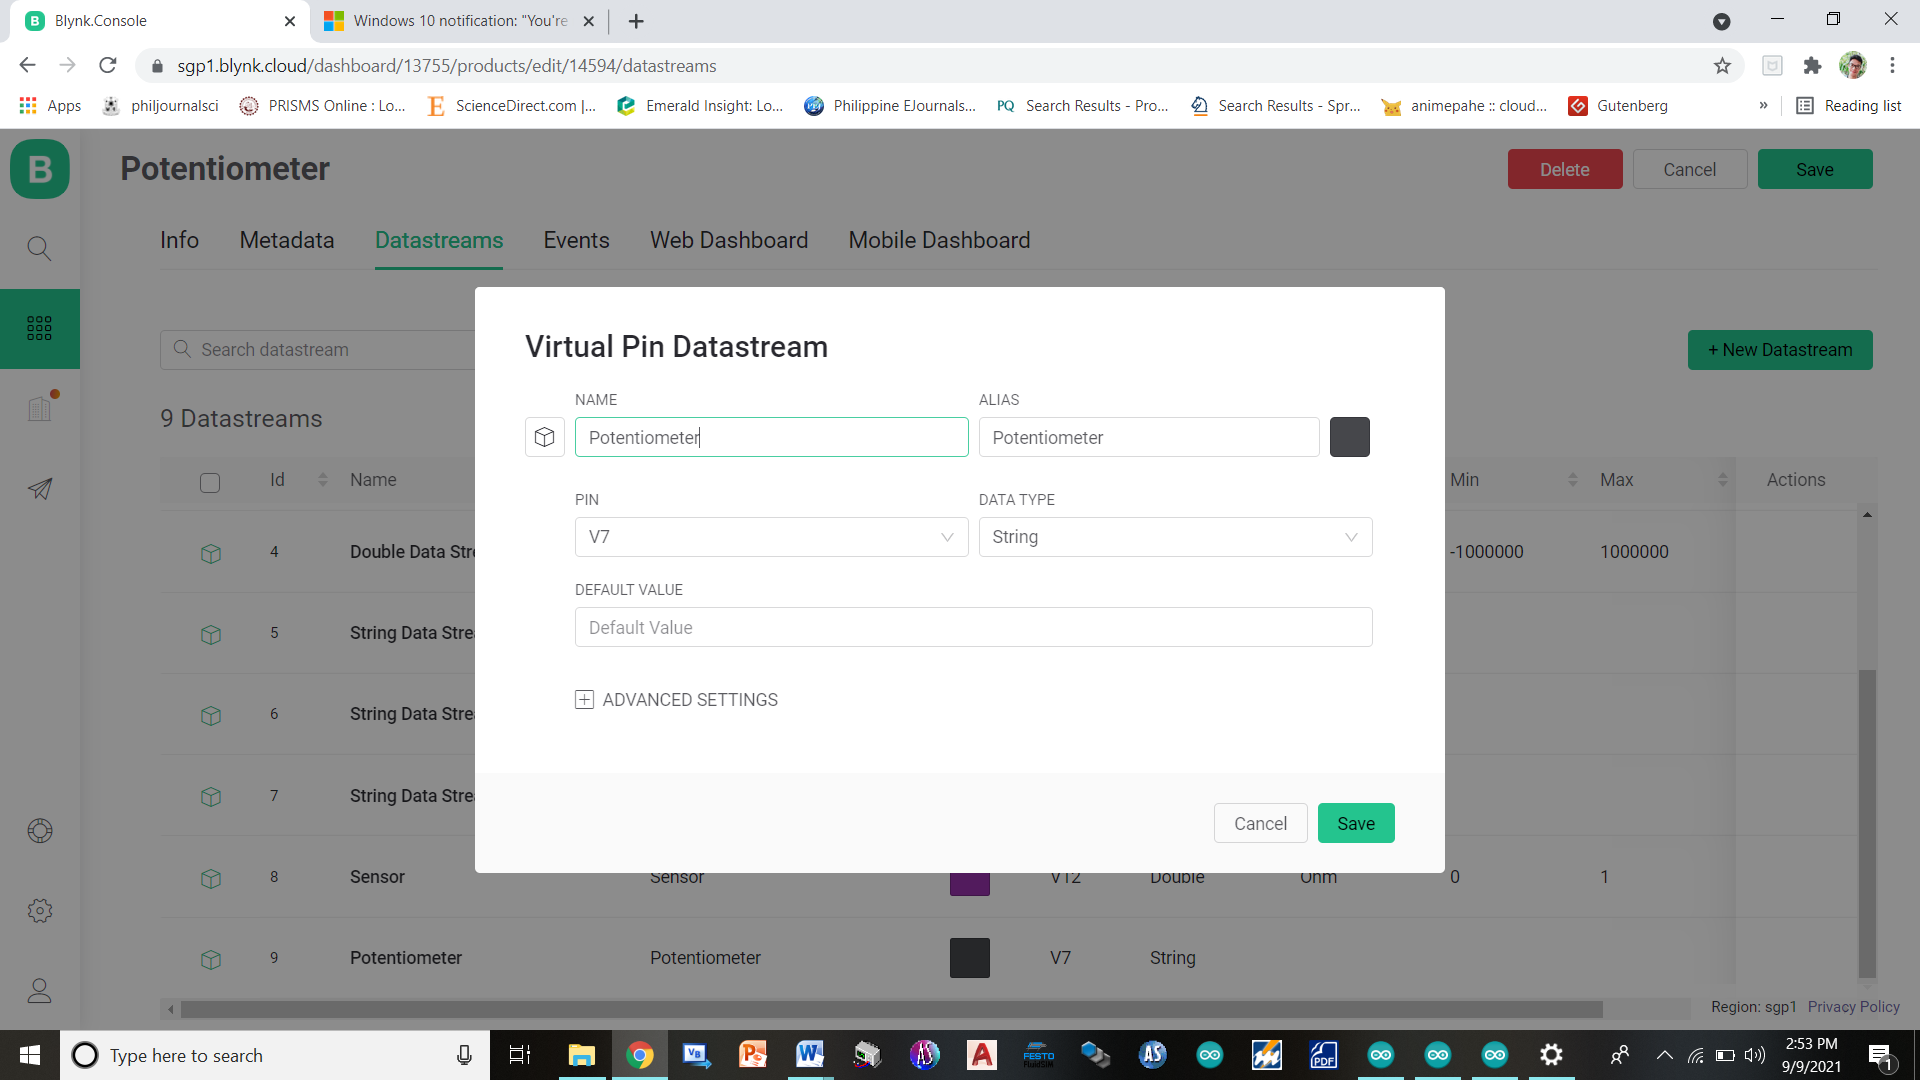
i m having problem migrating my program to be able to use in the new blynk app. ive tried adding the template id, device name, as well as the auth token and it seems to connect. but the problem is, it wont work like it used to in the old blynk app. the data wont be displayed on the lcd. what should i do? thanks for those wholl help
#define BLYNK_PRINT Serial

/* Fill-in your Template ID (only if using Blynk.Cloud) */
#define BLYNK_TEMPLATE_ID "TMPLyMhBYuUA"
#define BLYNK_DEVICE_NAME "Monitoring System"

#include <ESP8266WiFi.h>
#include <BlynkSimpleEsp8266.h>
#include <SoftwareSerial.h>

WidgetLCD lcd(V2);

String data;
String I;
char auth[] = "Nt7IlQ1LKrJATx0Li43e7Im01kN_jsAr";

// Your WiFi credentials.
// Set password to "" for open networks.
char ssid[] = "realme C12";
char pass[] = "qwertyuiop";

BlynkTimer timer;
String myString; // complete message from arduino, which consists of sensors data
char rdata; // received charactors

// This function sends Arduino's up time every second to Virtual Pin (1).
// In the app, Widget's reading frequency should be set to PUSH. This means
// that you define how often to send data to Blynk App.
void myTimerEvent() {
  // You can send any value at any time.
  // Please don't send more that 10 values per second.
  Blynk.virtualWrite(V1, millis() / 1000);

}

void setup() {
  // Debug console
  Serial.begin(9600);
  Blynk.begin(auth, ssid, pass);
  timer.setInterval(1000L, sensorvalue1);

}

void loop() {
  if (Serial.available() == 0 ) {
    Blynk.run();
    timer.run(); // Initiates BlynkTimer
  }
  if (Serial.available() > 0 ) {
    rdata = Serial.read();
    myString = myString + rdata;
    Serial.print(rdata);

    if ( rdata == '\n') {
      I = getValue(myString, ',', 0);
      myString = "";
      lcd.print(0, 0, "Resistance:");
    }
  }
}

void sensorvalue1() {
  data = data + I;
  lcd.print(0, 0, "Resistance:");
  lcd.print(0, 1, data);
  data = "";
  delay(1000);
  lcd.clear();

}


String getValue(String data, char separator, int index) {
  int found = 0;
  int strIndex[] = { 0, -1 };
  int maxIndex = data.length() - 1;

  for (int i = 0; i <= maxIndex && found <= index; i++) {
    if (data.charAt(i) == separator || i == maxIndex) {
      found++;
      strIndex[0] = strIndex[1] + 1;
      strIndex[1] = (i == maxIndex) ? i + 1 : i;
    }
  }

  return found > index ? data.substring(strIndex[0], strIndex[1]) : "";

}