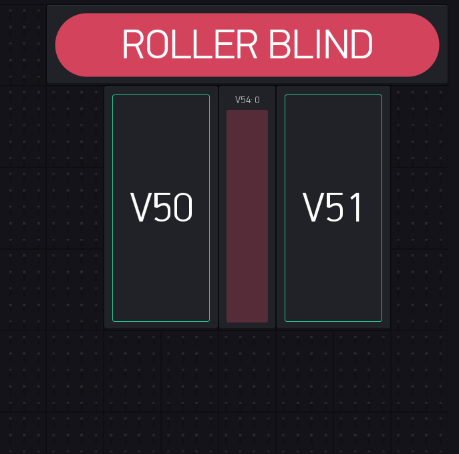
Hi all, I’m working on new domotic project and i’m immediately locked in a problem. To close and open my roller blind i need a button UP/DOWN, i see in the blynk app that there are a simple button but i have notice that it’s possible press both button, and this may be a problem. My question is, as a title, is possible push a button and lock the other? Or you have another solution?
yes, you have to put a if condition in your sketch to lock the other button
BLYNK_WRITE(V1) {
BTN1 = param.asInt();
//do something
}
BLYNK_WRITE(V2) {
if (BTN1 == true) {
Blynk.virtualWrite(V2, LOW);//change state of V2 to low
}else{
//do something
}
}
Or you could use the joystick widget or a segmented switch with 3 options (up - stop - down)
no he asked for two buttons, not a joystick
and segmented button is not suitable for blocking segment 2.
you did not understand his rule
I think a 3 position segmented switch should do the job, it prevents up and down being selected at the same time, which is what I think @Andrewa80 was trying to achieve.
Having said that, I do think it would be really useful to be able to disable buttons and other controls via code - greying-out the button/slider etc so that it doesn’t respond at all until it’s re-enabled again.
This would allow the user to design an interface that changes based on the settings of other controls. For example, you might want to have a fully automatic or manual mode for a system that you’re controlling. If you had a switch that chose Auto or Manual then in auto mode a group of controls would be greyed-out, but in manual mode they’d be enabled.
I have suggested this in the roadmap portal:
There is also a similar proposal to allow controls to be added or removed via hardware commands, which would give a much more powerful development environment, but I could imagine it could get very messy - you’d need the ability to specify where on the screen you wanted to add the control, and then you would have to handle what happens if that overlaps with an existing control.
Pete.
Hey! Great Idea! +1
good idea +1
exactly
do you need my basic scketch ? you will have to complete it
Oh great!, I’m studying my project to apply it to blynk, I see it very hard! But I don’t give up!
this is,
you have to complete my sketch with blynk code too …
//declarations
bool BTN1,BTN2;//flags
int StartRollerTimerUP,StartRollerTimerDOWN; // timers UP and DOWN
int start, count; //counters
// in setup
StartRollerTimerUP = timer.setInterval(600L, StartRollerUP); //init StartRollerTimerUP
timer.disable(StartRollerTimerUP); // Turn StartRollerTimerUP off
StartRollerTimerDOWN = timer.setInterval(600L, StartRollerDOWN); //init StartRollerTimerDOWN
timer.disable(StartRollerTimerDOWN); // Turn StartRollerTimerDOWN off
void StartRollerUP() {
if (Count <= 10) {
Blynk.virtualWrite(V51, LOW);
Blynk.virtualWrite(V54, Count);
} else {
timer.disable(StartRollerTimerUP); // Turn HeatingTimer on
Count = 0;
Blynk.virtualWrite(V50, LOW);
BTN1 = false;
}
Count ++;
}
void StartRollerDOWN() {
if (Count >= 0) {
Blynk.virtualWrite(V50, LOW);
Blynk.virtualWrite(V54, Count);
} else {
timer.disable(StartRollerTimerDOWN); // Turn HeatingTimer on
Count = 10;
BTN2 = false;
Blynk.virtualWrite(V51, LOW);
}
Count --;
}
/**************** UP **************/
BLYNK_WRITE(V50) {//roller blind
start= param.asInt();
if (start == true && BTN2 == false) // check if BTN2 is ON
{
BTN1 = true;
Count = 0;
timer.enable(StartRollerTimerUP); // Turn StartRollerTimerUP on;
} else {
timer.disable(StartRollerTimerUP); // Turn StartRollerTimerUP off
BTN1 = false;
}
}
/**************** DOWN **************/
BLYNK_WRITE(V51) {//roller blind
start= param.asInt();
if (start == true && BTN1 == false) // check if BTN1 is ON
{
BTN2 = true;
Count = 10;
timer.enable(StartRollerTimerDOWN); // Turn StartRollerDOWN on;
} else {
timer.disable(StartRollerTimerDOWN); // Turn StartRollerDOWN off
BTN2 = false;
}
}
V50 and 51 as styled button (switch mode)
V54 level widget