I’m simply trying to change image gallery photo using a button connected to V3. But it’s not working. The photo is not changing.
My code is:
#include <Arduino.h>


// *** MAIN SETTINGS ***
// Replace this block with correct template settings.
// You can find it for every template here:
//
//   https://blynk.cloud/dashboard/templates

#define BLYNK_TEMPLATE_ID "TMPL5-swU26dE"
#define BLYNK_TEMPLATE_NAME "LED ESP32"


#define BLYNK_FIRMWARE_VERSION        "0.1.0"

#define BLYNK_PRINT Serial
//#define BLYNK_DEBUG

#define APP_DEBUG

#include "BlynkEdgent.h"

#define LED_PIN 2  // Use pin 2 for LED (change it, if your board uses another pin)


// V0 is a datastream used to transfer and store LED switch state.
// Evey time you use the LED switch in the app, this function
// will listen and update the state on device
BLYNK_WRITE(V0)
{
  // Local variable `value` stores the incoming LED switch state (1 or 0)
  // Based on this value, the physical LED on the board will be on or off:
  int value = param.asInt();

  if (value == 1) {
    digitalWrite(LED_PIN, HIGH);
    Serial.print("value V0 = ");
    Serial.println(value);
  } else {
    digitalWrite(LED_PIN, LOW);
    Serial.print("value V0 = ");
    Serial.println(value);
  }
}

BLYNK_WRITE(V3)
{
  // Local variable `value` stores the incoming LED switch state (1 or 0)
  // Based on this value, the physical LED on the board will be on or off:
  int value = param.asInt();

  if (value == 1) {
    Blynk.setProperty(V3, "urls", "https://www.google.com/images/branding/googlelogo/1x/googlelogo_light_color_272x92dp.png");
    Serial.print("value V3 = ");
    Serial.println(value);

  } else {
    Blynk.setProperty(V3, "urls", "https://seeklogo.com/images/Y/yahoo-new-2019-logo-FE1BC0938E-seeklogo.com.png");

  }

}

void setup()
{
  pinMode(LED_PIN, OUTPUT);

  // Debug console. Make sure you have the same baud rate selected in your serial monitor
  Serial.begin(115200);
  delay(100);

  BlynkEdgent.begin();

}

void loop() {
  BlynkEdgent.run();
  delay(10);

}
@gavishka10 Please edit your post, using the pencil icon at the bottom, and add triple backticks at the beginning and end of your code so that it displays correctly.
Triple backticks look like this:
```
Copy and paste these if you can’t find the correct symbol on your keyboard.
Sorry about that Pete.
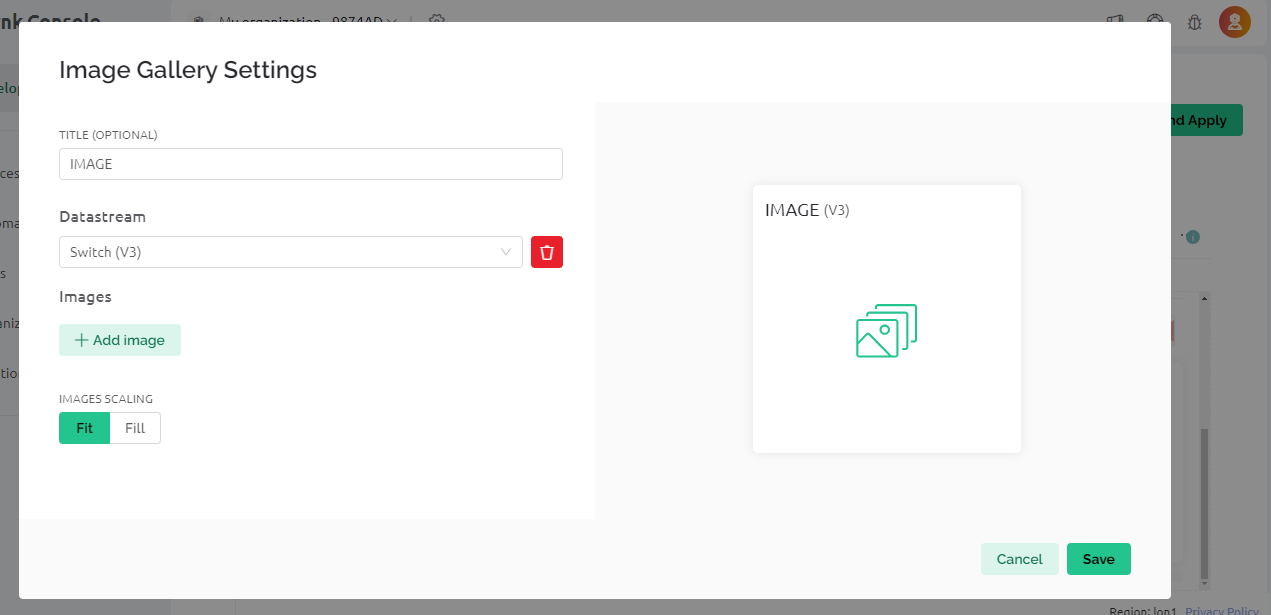
Images are displaying when i manually give the link in the web dashboard image gallery settings. But not when i use the setProperty function.
If you edit your previous post and insert the actual code rather than a screenshot then I’ll do some testing based on the image urls you’ve tried to use.
BLYNK_WRITE(V2)
{
  // Local variable `value` stores the incoming LED switch state (1 or 0)
  // Based on this value, the physical LED on the board will be on or off:
  int value = param.asInt();

  if (value == 1) {
    Blynk.setProperty(V3, "url", 1, "https://community.blynk.cc/uploads/default/original/2X/b/bfe53d09be202d13304ee085e1491ccb2c599e73.gif");
    Serial.print("value V2 = ");
    Serial.println(value);
  } else {
    Blynk.setProperty(V3, "url", 1, "https://community.blynk.cc/uploads/default/original/2X/3/32e4b6de68f113e83a4e0f6f66fc838ffaa7985c.gif");


  }

}
#include <Arduino.h>


// *** MAIN SETTINGS ***
// Replace this block with correct template settings.
// You can find it for every template here:
//
//   https://blynk.cloud/dashboard/templates

#define BLYNK_TEMPLATE_ID "TMPL5-swU26dE"
#define BLYNK_TEMPLATE_NAME "LED ESP32"


#define BLYNK_FIRMWARE_VERSION        "0.1.0"

#define BLYNK_PRINT Serial
//#define BLYNK_DEBUG

#define APP_DEBUG

#include "BlynkEdgent.h"

#define LED_PIN 2  // Use pin 2 for LED (change it, if your board uses another pin)


// V0 is a datastream used to transfer and store LED switch state.
// Evey time you use the LED switch in the app, this function
// will listen and update the state on device
BLYNK_WRITE(V0)
{
  // Local variable `value` stores the incoming LED switch state (1 or 0)
  // Based on this value, the physical LED on the board will be on or off:
  int value = param.asInt();

  if (value == 1) {
    digitalWrite(LED_PIN, HIGH);
    Serial.print("value V0 = ");
    Serial.println(value);
  } else {
    digitalWrite(LED_PIN, LOW);
    Serial.print("value V0 = ");
    Serial.println(value);
  }
}

BLYNK_WRITE(V3)
{
  // Local variable `value` stores the incoming LED switch state (1 or 0)
  // Based on this value, the physical LED on the board will be on or off:
  int value = param.asInt();

  if (value == 1) {
    Blynk.setProperty(V2, "urls", "https://community.blynk.cc/uploads/default/original/2X/b/bfe53d09be202d13304ee085e1491ccb2c599e73.gif", "https://community.blynk.cc/uploads/default/original/2X/3/32e4b6de68f113e83a4e0f6f66fc838ffaa7985c.gif");
    Serial.print("value V3 = ");
    Serial.println(value);
    Blynk.virtualWrite(V2, 0);
  } else {
    Blynk.setProperty(V2, "urls", "https://community.blynk.cc/uploads/default/original/2X/b/bfe53d09be202d13304ee085e1491ccb2c599e73.gif", "https://community.blynk.cc/uploads/default/original/2X/3/32e4b6de68f113e83a4e0f6f66fc838ffaa7985c.gif");
    Blynk.virtualWrite(V2, 1);

  }

}

void setup()
{
  pinMode(LED_PIN, OUTPUT);

  // Debug console. Make sure you have the same baud rate selected in your serial monitor
  Serial.begin(115200);
  delay(100);

  BlynkEdgent.begin();

}

void loop() {
  BlynkEdgent.run();
  delay(10);

}