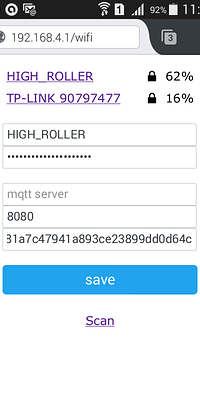
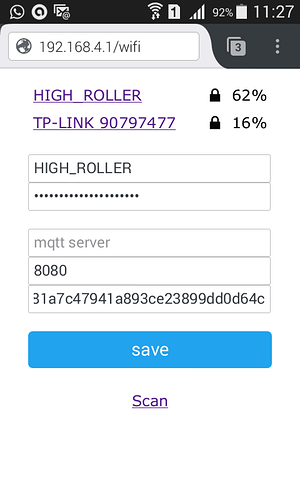
@Dmytro thanks for this commit https://github.com/blynkkk/blynk-server/commit/a72696582c7554081d8268e5ab61cd16852fd655
Using this on the NodeMCU 3 go well.
char auth[] = "xxxxxxxxxxxxx";
char ssid[] = "xxxxxxxxxxxxx";
char pass[] = "xxxxxxxxxxxx";

  Serial.begin(9600);
  delay(10);
  // Set ESP8266 baud rate
  EspSerial.begin(ESP8266_BAUD);
  delay(10);
  Blynk.begin(auth, wifi, ssid, pass );
How can I do on the Arduino Mega and ESP8266-01?
@mauroviana below is the ESP8288_Shield example in Arduino’s IDE. Obviously you will change the board in the IDE to Mega from NodeMCU3. Also the project settings in the app will need to be Arduino Mega.
/**************************************************************
 * Blynk is a platform with iOS and Android apps to control
 * Arduino, Raspberry Pi and the likes over the Internet.
 * You can easily build graphic interfaces for all your
 * projects by simply dragging and dropping widgets.
 *
 *   Downloads, docs, tutorials: http://www.blynk.cc
 *   Blynk community:            http://community.blynk.cc
 *   Social networks:            http://www.fb.com/blynkapp
 *                               http://twitter.com/blynk_app
 *
 * Blynk library is licensed under MIT license
 * This example code is in public domain.
 *
 **************************************************************
 *
 * This example shows how to use ESP8266 Shield (with AT commands)
 * to connect your project to Blynk.
 *
 * Note: Ensure a stable serial connection to ESP8266!
 *       Firmware version 1.0.0 (AT v0.22) is needed.
 *       You can change ESP baud rate. Connect to AT console and call:
 *           AT+UART_DEF=9600,8,1,0,0
 *       In general, Soft Serial may be unstable.
 *       It is highly recommended to switch to Hard Serial.
 *
 * Change WiFi ssid, pass, and Blynk auth token to run :)
 * Feel free to apply it to any other example. It's simple!
 *
 **************************************************************/

#define BLYNK_PRINT Serial    // Comment this out to disable prints and save space
#include <ESP8266_Lib.h>
#include <BlynkSimpleShieldEsp8266.h>

// You should get Auth Token in the Blynk App.
// Go to the Project Settings (nut icon).
char auth[] = "YourAuthToken";

// Your WiFi credentials.
// Set password to "" for open networks.
char ssid[] = "YourNetworkName";
char pass[] = "YourPassword";

// Hardware Serial on Mega, Leonardo, Micro...
#define EspSerial Serial1

// or Software Serial on Uno, Nano...
//#include <SoftwareSerial.h>
//SoftwareSerial EspSerial(2, 3); // RX, TX

// Your ESP8266 baud rate:
#define ESP8266_BAUD 9600

ESP8266 wifi(&EspSerial);

void setup()
{
  // Set console baud rate
  Serial.begin(9600);
  delay(10);
  // Set ESP8266 baud rate
  EspSerial.begin(ESP8266_BAUD);
  delay(10);

  Blynk.begin(auth, wifi, ssid, pass);
}

void loop()
{
  Blynk.run();
}
@mauroviana Hi guys.
im using local blynk local server but it is working fine. no any problem installed in Intel NUC I5 PC windows 10. before i run the java server, i configure first the ports manually from inbound firewall to make sure no problem from the firewall.
after that run the server to test wow, its working, then i created my local blynk account add some project. and it works very well.
other than that i create batch file and convert it to “.exe” then i put to run folder so every time s restarted my local server my blynk server java apps is automatically run by it self. so cool…
I think that I just needed of this:
Blynk.begin(auth, wifi, ssid, pass, "192.168.xx.xx" );
I need help with this:
How to read the historic?
I need of some program to uncompress this data?
What is the best way of enjoy of it?
Sorry for so many questions.
Good to see you have some data now @mauroviana
csv file’s can be opened in Excel to produce your own fancy graphs.
.gz are just compressed zip files (Use 7zip).
I don’t think the bin files are for you and I to touch, right @Dmytro?
Correct. BINs - are binaries. For human data we have CSV API and button in history graph.
I’m having dificulties to work with the WiFiManager and Blynk. Can you tell what I need? I’m trying this code, I can save the configurations in the WiFiManager but the Blynk doesn’t begin.
#include <FS.h>                   //this needs to be first, or it all crashes and burns...

#include <ESP8266WiFi.h>          //https://github.com/esp8266/Arduino
//----------------------------
#define BLYNK_PRINT Serial
#include <BlynkSimpleEsp8266.h>
//----------------------------
//needed for library
#include <DNSServer.h>
#include <ESP8266WebServer.h>
#include <WiFiManager.h>          //https://github.com/tzapu/WiFiManager

#include <ArduinoJson.h>          //https://github.com/bblanchon/ArduinoJson

//define your default values here, if there are different values in config.json, they are overwritten.
char mqtt_server[40];
char mqtt_port[6] = "8080";
char blynk_token[33] = "YOUR_BLYNK_TOKEN";

//flag for saving data
bool shouldSaveConfig = false;

//callback notifying us of the need to save config
void saveConfigCallback () {
  Serial.println("Should save config");
  shouldSaveConfig = true;
}


void setup() {
  // put your setup code here, to run once:
  Serial.begin(9600);
  Serial.println();

  //clean FS, for testing
  //SPIFFS.format();

  //read configuration from FS json
  Serial.println("mounting FS...");

  if (SPIFFS.begin()) {
    Serial.println("mounted file system");
    if (SPIFFS.exists("/config.json")) {
      //file exists, reading and loading
      Serial.println("reading config file");
      File configFile = SPIFFS.open("/config.json", "r");
      if (configFile) {
        Serial.println("opened config file");
        size_t size = configFile.size();
        // Allocate a buffer to store contents of the file.
        std::unique_ptr<char[]> buf(new char[size]);

        configFile.readBytes(buf.get(), size);
        DynamicJsonBuffer jsonBuffer;
        JsonObject& json = jsonBuffer.parseObject(buf.get());
        json.printTo(Serial);
        if (json.success()) {
          Serial.println("\nparsed json");

          strcpy(mqtt_server, json["mqtt_server"]);
          strcpy(mqtt_port, json["mqtt_port"]);
          strcpy(blynk_token, json["blynk_token"]);

        } else {
          Serial.println("failed to load json config");
        }
      }
    }
  } else {
    Serial.println("failed to mount FS");
  }
  //end read


  // The extra parameters to be configured (can be either global or just in the setup)
  // After connecting, parameter.getValue() will get you the configured value
  // id/name placeholder/prompt default length
  WiFiManagerParameter custom_mqtt_server("server", "mqtt server", mqtt_server, 40);
  WiFiManagerParameter custom_mqtt_port("port", "mqtt port", mqtt_port, 5);
  WiFiManagerParameter custom_blynk_token("blynk", "blynk token", blynk_token, 33 );

  //WiFiManager
  //Local intialization. Once its business is done, there is no need to keep it around
  WiFiManager wifiManager;

  //set config save notify callback
  wifiManager.setSaveConfigCallback(saveConfigCallback);

  //set static ip
  //wifiManager.setSTAStaticIPConfig(IPAddress(192,168,7,47), IPAddress(192,168,7,29), IPAddress(255,255,255,0));

  //add all your parameters here
  wifiManager.addParameter(&custom_mqtt_server);
  wifiManager.addParameter(&custom_mqtt_port);
  wifiManager.addParameter(&custom_blynk_token);

//------------------------------------
  //reset settings - for testing
  //wifiManager.resetSettings();
//------------------------------------

   // Redefinir as configurações - para testes
   // wifiManager.resetSettings ();

   // Definir a qualidade minimu do sinal para que ele ignora AP está sob essa qualidade
   // Padrão para 8%
   // wifiManager.setMinimumSignalQuality ();

   // conjuntos tempo limite até portal configuração é desligado
   // Útil para fazer tudo novamente ou ir dormir
   // em segundos
   // wifiManager.setTimeout(120);

   // Obtém SSID e passar e tenta se conectar
   // Se ele não ligar ela começa um ponto de acesso com o nome especificado
   // Aqui "AutoConnectAP"
   // E entra em uma configuração de circuito de bloqueio aguarda


  if (!wifiManager.autoConnect("AutoConnectAP", "123456789")) {
    Serial.println("failed to connect and hit timeout");
    delay(3000);
    //reset and try again, or maybe put it to deep sleep
    ESP.reset();
    delay(5000);
 }

  //if you get here you have connected to the WiFi
  Serial.println("Conectado... :)");

  //read updated parameters
  strcpy(mqtt_server, custom_mqtt_server.getValue());
  strcpy(mqtt_port, custom_mqtt_port.getValue());
  strcpy(blynk_token, custom_blynk_token.getValue());

  //save the custom parameters to FS
  if (shouldSaveConfig) {
    Serial.println("saving config");
    DynamicJsonBuffer jsonBuffer;
    JsonObject& json = jsonBuffer.createObject();
    json["mqtt_server"] = mqtt_server;
    json["mqtt_port"] = mqtt_port;
    json["blynk_token"] = blynk_token;

    File configFile = SPIFFS.open("/config.json", "w");
    if (!configFile) {
      Serial.println("failed to open config file for writing");
    }

    json.printTo(Serial);
    json.printTo(configFile);
    configFile.close();
    //end save
  }

  Serial.println("local ip");
  Serial.println(WiFi.localIP());
This is the part that I’m trying change.
//------------------------------------------------------------
//Blynk.config(settings.blynkToken, settings.blynkServer, atoi(settings.blynkPort));
//Blynk.config(blynk_token, mqtt_server[33], mqtt_port[6]   );
//WiFiManager wifi;
//wifi.autoConnect("ESP8266");
//Blynk.config(blynk_token);
//WiFiManager wifi;
//wifi.autoConnect("Blynk");


Blynk.config(WiFi.SSID().c_str(), WiFi.psk().c_str());
Blynk.config(blynk_token);

   Serial.print("Token");
   Serial.println(blynk_token);

   while (Blynk.connect() == false) {
   Serial.println("Conectando...");
  }
   Serial.println("Conectado...");
}

//-------------------------------------------------------

void loop() {
  // put your main code here, to run repeatedly:
Blynk.run();
}
What is this supposed to do?
Are you trying to connect to Blynk’s server or another server?
If it is another server you will need:
Blynk.config(blynk_token, "xxx.xxx.xxx.xxx"); // enter IP address
When I use WiFi Manager all I use is Blynk.config() because it is already connected to the WiFi router so your line of:
Blynk.config(WiFi.SSID().c_str(), WiFi.psk().c_str());
makes no sense to me.
The other thing to do is ensure you display variables in Serial Monitor to be sure they are exactly how you expect them to be.
At my server, the “Blynk Server”.
I’ve have tried this to connect.
This is what appears at the Serial Monitor:
  Conectando...
    [580923] Connecting to blynk-cloud.com:8442
    [581937] Invalid auth token
If you want to connect to YOUR server that is running the Blynk server software then you need to include an IP somewhere. Connecting to blynk-cloud.com:8442 states you are trying to connect to Blynk’s cloud server not one of your servers.
Do you mean storing tokens etc on an Arduino instead of on an ESP i.e. a WiFiManager equivalent for Arduino devices?
yes arduino and esp8266 together.
This is a subject I have looked at very closely.
When I first became a Blynker I knocked up some very bad code that used an Android app called DroidTerm to do this.
There are several threads on this site about implementing it with EEPROM for Arduino’s.
There are several Apps that can do the same as WiFiManager but they are ESP based.
Very recently I found the “perfect” solution but it’s not something I can say much about.
Yes, I’ve seen some of they but I haven’t found none of then that can help me to understand and adapt to my necessities.
Yes but I think that the “ATmega328P” and “ESP8266” together I’ll have more options of ports.
![]() I understand. You’ve helped me so much and I can just thanks you. I’m still searching for this “perfect” solution, if everything goes well I want that the client can himself put your login, password and token before begin the Blynk.
I understand. You’ve helped me so much and I can just thanks you. I’m still searching for this “perfect” solution, if everything goes well I want that the client can himself put your login, password and token before begin the Blynk. ![]()
 .
.

