Paste the sketch that you used.
  #define BLYNK_PRINT Serial
  #include <Blynk.h>
  #include <ESP8266WiFi.h>
  #include <Wire.h>
  #include <BlynkSimpleEsp8266.h>
  #include <Adafruit_Sensor.h>
  #include <Adafruit_BME280.h>
  #define SEALEVELPRESSURE_HPA (1013.25)
  //Setup connection of the sensor
  Adafruit_BME280 bme; // I2C

  char auth[] = "3efa4091d9fc4ff89e2a43fe454a58ca";
  char ssid[] = "BTHub6-P38S";
  char pass[] = "wAwhd7rKg3cT";

  BlynkTimer timer;

  float pressure;     //To store the barometric pressure (Pa)
  float temperature;  //To store the temperature (oC)
  int humidity;      //To store the humidity (%) (you can also use it as a float variable)

  void setup() {
    //Wire.begin(int sda, int scl)
    Wire.begin(2, 15);
    bme.begin();    //Begin the sensor
    Serial.begin(9600); //Begin serial communication at 9600bps
    Serial.println("Adafruit BME280 test:");
    Blynk.begin(auth, ssid, pass);
    timer.setInterval(2000L, ReadSensors);   // read sensor every 2s
  }

  void ReadSensors(){
    //Read values from the sensor:
    pressure = bme.readPressure();
    temperature = bme.readTemperature();
    humidity = bme.readHumidity ();

    Blynk.virtualWrite(V1, pressure/100);     // write pressure to V1 value display widget
    Blynk.virtualWrite(V2, temperature);  // write temperature to V2 value display widget
    Blynk.virtualWrite(V3, humidity);    // write altimeter to V3 value display widget

    //Print values to serial monitor:
    Serial.print(F("Pressure: "));
    Serial.print(pressure);
    Serial.print(" Mb");
    Serial.print("\t");
    Serial.print(("Temp: "));
    Serial.print(temperature);
    Serial.print(" °C");
    Serial.print("\t");
    Serial.print("Humidity: ");
    Serial.print(humidity); // this should be adjusted to your local forcase
    Serial.println(" %");
    //delay(2000); //Update every 2 sec
  }

  void loop() {
    Blynk.run();
    timer.run();
  }
The BME280 i2c test sketch not the Blynk sketch.
Oooops …
BME280 I2C Test.ino
This code shows how to record data from the BME280 environmental sensor
using I2C interface. This file is an example file, part of the Arduino
BME280 library.
GNU General Public License
Written: Dec 30 2015.
Last Updated: Oct 07 2017.
Connecting the BME280 Sensor:
Sensor -> Board
-----------------------------
Vin (Voltage In) -> 3.3V
Gnd (Ground) -> Gnd
SDA (Serial Data) -> A4 on Uno/Pro-Mini, 20 on Mega2560/Due, 2 Leonardo/Pro-Micro
SCK (Serial Clock) -> A5 on Uno/Pro-Mini, 21 on Mega2560/Due, 3 Leonardo/Pro-Micro
*/
#include <BME280I2C.h>
#include <Wire.h>
#define SERIAL_BAUD 115200
BME280I2C bme; // Default : forced mode, standby time = 1000 ms
// Oversampling = pressure ×1, temperature ×1, humidity ×1, filter off,
//////////////////////////////////////////////////////////////////
void setup()
{
Serial.begin(SERIAL_BAUD);
while(!Serial) {} // Wait
Wire.begin(2, 15);
while(!bme.begin())
{
Serial.println("Could not find BME280 sensor!");
delay(1000);
}
switch(bme.chipModel())
{
case BME280::ChipModel_BME280:
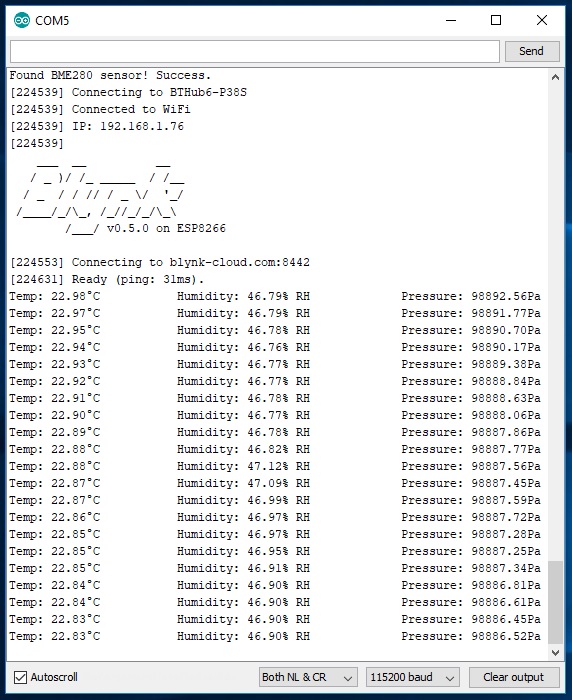
Serial.println("Found BME280 sensor! Success.");
break;
case BME280::ChipModel_BMP280:
Serial.println("Found BMP280 sensor! No Humidity available.");
break;
default:
Serial.println("Found UNKNOWN sensor! Error!");
}
}
//////////////////////////////////////////////////////////////////
void loop()
{
printBME280Data(&Serial);
delay(500);
}
//////////////////////////////////////////////////////////////////
void printBME280Data
(
Stream* client
)
{
float temp(NAN), hum(NAN), pres(NAN);
BME280::TempUnit tempUnit(BME280::TempUnit_Celsius);
BME280::PresUnit presUnit(BME280::PresUnit_Pa);
bme.read(pres, temp, hum, tempUnit, presUnit);
client->print("Temp: ");
client->print(temp);
client->print("°"+ String(tempUnit == BME280::TempUnit_Celsius ? 'C' :'F'));
client->print("\t\tHumidity: ");
client->print(hum);
client->print("% RH");
client->print("\t\tPressure: ");
client->print(pres);
client->println("Pa");
delay(1000);
}
Take the working sketch and just add the Blynk parts to it. Use Blynk Timer to call printBME280Data(&Serial) and comment this line out of loop().
Seeing that short sentence you wrote made me think, “yeh, I can do that”. Until I read it, not a clue have I got. ![]()
Give me a few minutes.
Presumably you are using ESP8285 in the IDE?
Yes. ?
This compiles OK for ESP8285.
It’s only got Serial Monitor output at the moment. Let me know if it works. You can add the Blynk widgets later.
/* BME280ESP8285.ino for https://community.blynk.cc/t/esp8285-i2c-pins/21458
This code shows how to record data from the BME280 environmental sensor
using I2C interface. This file is an example file, part of the Arduino
BME280 library.
GNU General Public License
Written: Dec 30 2015.
Last Updated: Oct 07 2017.
Connecting the BME280 Sensor:
Sensor -> Board
-----------------------------
Vin (Voltage In) -> 3.3V
Gnd (Ground) -> Gnd
SDA (Serial Data) -> A4 on Uno/Pro-Mini, 20 on Mega2560/Due, 2 Leonardo/Pro-Micro
SCK (Serial Clock) -> A5 on Uno/Pro-Mini, 21 on Mega2560/Due, 3 Leonardo/Pro-Micro
*/
#include <BME280I2C.h>
#include <Wire.h>
#define BLYNK_PRINT Serial
#include <ESP8266WiFi.h>
#include <BlynkSimpleEsp8266.h>
#define SERIAL_BAUD 115200
BME280I2C bme; // Default : forced mode, standby time = 1000 ms
// Oversampling = pressure ×1, temperature ×1, humidity ×1, filter off,
char auth[] = "3efa4091d9fc4ff89e2a43fe454a58ca";
char ssid[] = "BTHub6-P38S";
char pass[] = "wAwhd7rKg3cT";
BlynkTimer timer;
//////////////////////////////////////////////////////////////////
void setup()
{
Serial.begin(SERIAL_BAUD);
while(!Serial) {} // Wait
Wire.begin(2, 15);
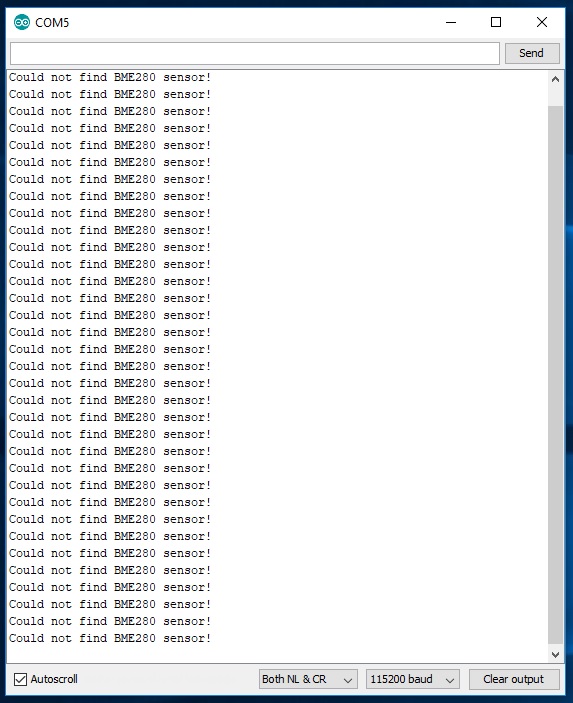
while(!bme.begin())
{
Serial.println("Could not find BME280 sensor!");
delay(1000);
}
switch(bme.chipModel())
{
case BME280::ChipModel_BME280:
Serial.println("Found BME280 sensor! Success.");
break;
case BME280::ChipModel_BMP280:
Serial.println("Found BMP280 sensor! No Humidity available.");
break;
default:
Serial.println("Found UNKNOWN sensor! Error!");
}
Blynk.begin(auth, ssid, pass);
timer.setInterval(3000L, readSensor); // every 3s
}
//////////////////////////////////////////////////////////////////
void loop()
{
Blynk.run();
timer.run(); // Initiates BlynkTimer
}
//////////////////////////////////////////////////////////////////
void readSensor(){
printBME280Data(&Serial);
}
void printBME280Data
(
Stream* client
)
{
float temp(NAN), hum(NAN), pres(NAN);
BME280::TempUnit tempUnit(BME280::TempUnit_Celsius);
BME280::PresUnit presUnit(BME280::PresUnit_Pa);
bme.read(pres, temp, hum, tempUnit, presUnit);
client->print("Temp: ");
client->print(temp);
client->print("°"+ String(tempUnit == BME280::TempUnit_Celsius ? 'C' :'F'));
client->print("\t\tHumidity: ");
client->print(hum);
client->print("% RH");
client->print("\t\tPressure: ");
client->print(pres);
client->println("Pa");
//delay(1000);
}
1 Like

@Costas Ok, again I thought this bit sounded easy so I did what I thought needed to be done. So why is the data in the Blynk app on my phone on 1 second and off the next?
Good.
Add the following before //delay(1000);
Blynk.virtualWrite(V1, pres/100.0);     // write pressure to V1 value display widget
Blynk.virtualWrite(V2, temp);  // write temperature to V2 value display widget
Blynk.virtualWrite(V3, hum);    // write humidity to V3 value display widget
Do you have the widgets set as PUSH frequency?
Yes,
Does Serial Monitor show a Blynk reconnect when your phone shows a problem?
Hang on, there’s two delay(1000); put it before both of them?
There is only one //delay(1000) the other is delay(1000)
1 Like
The one at the very bottom. ![]()
Tried them in a few places, stil on 1 second and off the next?
Is the float function responsible for this bit?