Hi there,
Iv’e got some Problems with the App. I will use a simply button to switch a relais but if i will configurate the button with any GPIO the GPIO will activated automatic (but the relais need to be off first) and will not turn off till i turn off the Microcontroller.
I use this Parts:
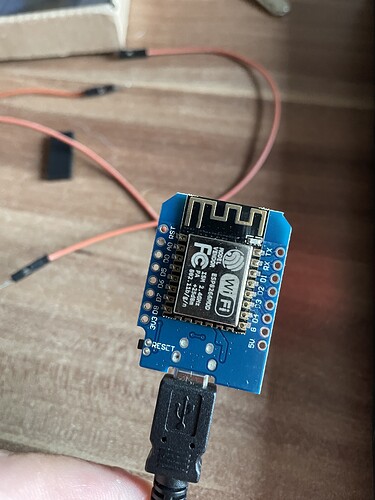
WeMos D1 mini clone (Vendor ESP8266MOD)
Simple noname 5V relaisboard
I tested some board types in the Arduino IDE and also some board types in the App. Also i test it with the Android and iOS App, all times the Same issue.
Please post the code here properly formatted with triple back ticks. Without seeing the code its hard for us to help you out.
1 Like
Hi, notebook was charging now. But i use the sample from Blynk for WiFi Board type WeMos D1, R1 and mini and change only Token / WiFi nothing else (if this will help)
What is your relay type ? Active Low or Active High ? What have you defined in your setup ‘pinMode’
Please post your code properly formatted.
1 Like
I use a HW-307 Relayboard but the problem was the controler / the App because every GPIO i choose will switch instant from off to on if i press play on the Smartphone. This was my code:
  Change WiFi ssid, pass, and Blynk auth token to run :)
  Feel free to apply it to any other example. It's simple!
 *************************************************************/

/* Comment this out to disable prints and save space */
#define BLYNK_PRINT Serial

/* Fill-in your Template ID (only if using Blynk.Cloud) */
//#define BLYNK_TEMPLATE_ID   "YourTemplateID"


#include <ESP8266WiFi.h>
#include <BlynkSimpleEsp8266.h>

// You should get Auth Token in the Blynk App.
// Go to the Project Settings (nut icon).
char auth[] = "YourAuthToken";

// Your WiFi credentials.
// Set password to "" for open networks.
char ssid[] = "YourNetworkName";
char pass[] = "YourPassword";

void setup()
{
  // Debug console
  Serial.begin(9600);

  Blynk.begin(auth, ssid, pass);
  // You can also specify server:
  //Blynk.begin(auth, ssid, pass, "blynk-cloud", 80);
  //Blynk.begin(auth, ssid, pass, IPAddress(192,168,1,100), 8080);
}

void loop()
{
  Blynk.run();
}
Hello Pete,
i work also with your guide but i´ve got also the same Problems. I use the GPIO16 (IO only). Here´s my code:
  Change WiFi ssid, pass, and Blynk auth token to run :)
  Feel free to apply it to any other example. It's simple!
 *************************************************************/

/* Comment this out to disable prints and save space */
#define BLYNK_PRINT Serial

/* Fill-in your Template ID (only if using Blynk.Cloud) */
//#define BLYNK_TEMPLATE_ID   "YourTemplateID"


#include <ESP8266WiFi.h>
#include <BlynkSimpleEsp8266.h>

// You should get Auth Token in the Blynk App.
// Go to the Project Settings (nut icon).
char auth[] = "yd9dog6b5pDUecLSg_BpkHsaAD0t-DGS";

// Your WiFi credentials.
// Set password to "" for open networks.
char ssid[] = "Phön";
char pass[] = "7107484cAo";

void setup()
{
  // Debug console
  Serial.begin(9600);

  Blynk.begin(auth, ssid, pass);
  // You can also specify server:
  //Blynk.begin(auth, ssid, pass, "blynk-cloud.com", 80);
  //Blynk.begin(auth, ssid, pass, IPAddress(192,168,1,100), 8080);

  pinMode(16, OUTPUT); // Initialise digital pin 2 as an output pin
}

BLYNK_WRITE(V1) // Executes when the value of virtual pin 1 changes
{
  if(param.asInt() == 1)
  {
    // execute this code if the switch widget is now ON
    digitalWrite(16,HIGH);  // Set digital pin 2 HIGH
  }
  else
  {
    // execute this code if the switch widget is now OFF
    digitalWrite(16,LOW);  // Set digital pin 2 LOW
  }
}

void loop()
{
  Blynk.run();
}
This is my ESP8266MOD
Why are you referring to “digital pin 2” ?
How is your app widget configured?
Is your relay active HIGH or LOW ?
Pete.
Oh, sorry i did not referring anything by my self i´ve only did copy / paste to do some tests. I´ve found the problem with your question. It´s a LOW level trigger relay. I´ve read that i need to use the 3.3V for the ACC port on the relay board for LOW level trigger  . Now it will work fine with the virtual pin.
I thank you so much for your help!
Could have saved yourself 6 hours if you’d noted @Madhukesh’s question…
Pete.
1 Like

 . Now it will work fine with the virtual pin.