Use CTRL-C
1 Like
I’m in! 
But Now I have another problem … 
But im guessing I dont need the pretty Pi interface as I’ll be using PuTTy to install Blynk?
I have never used VNC to install the Blynk server.
I just cut and paste the command line via Putty.
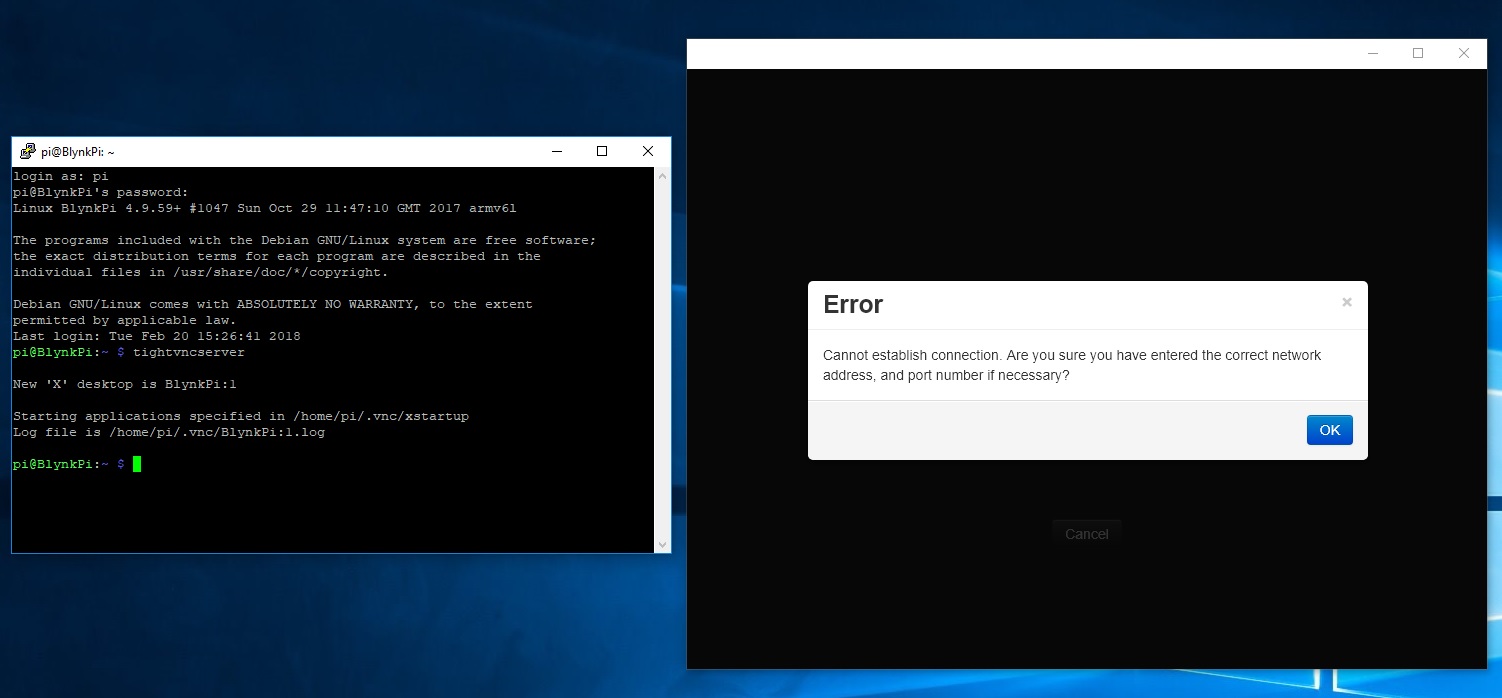
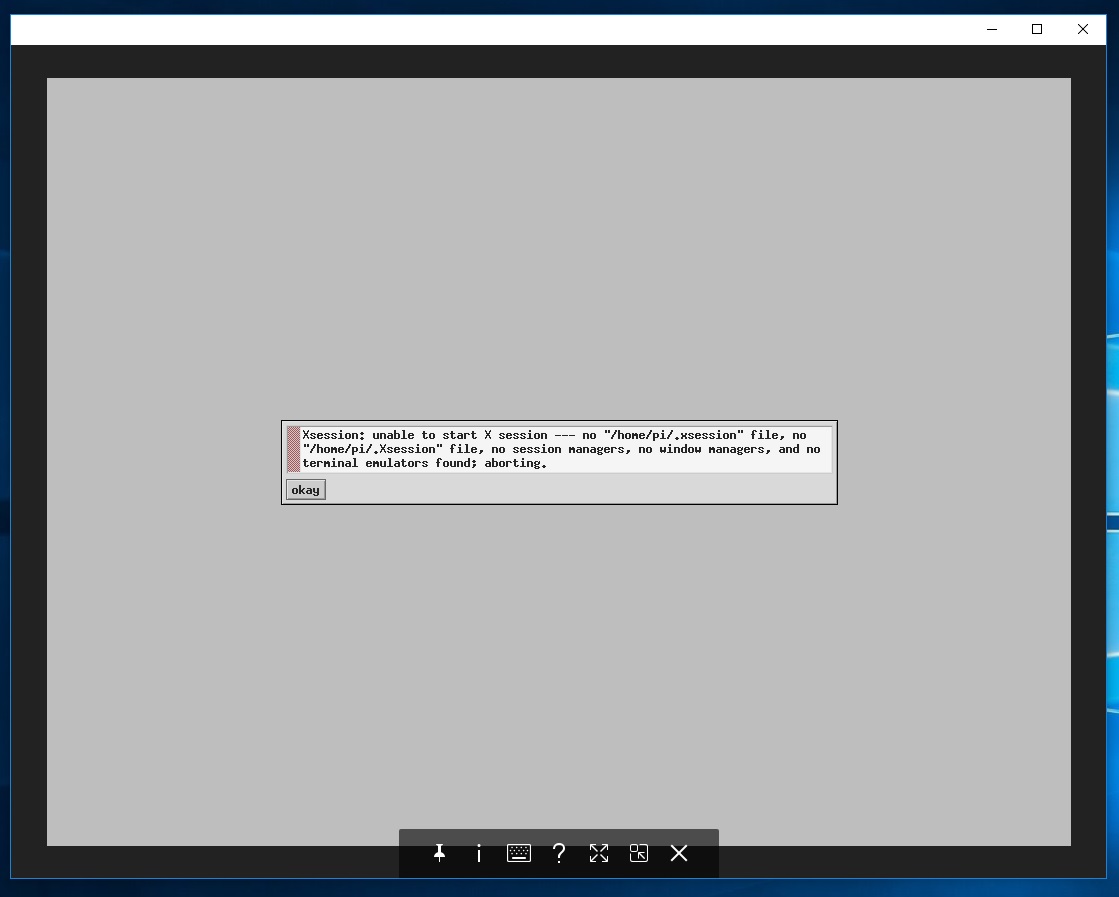
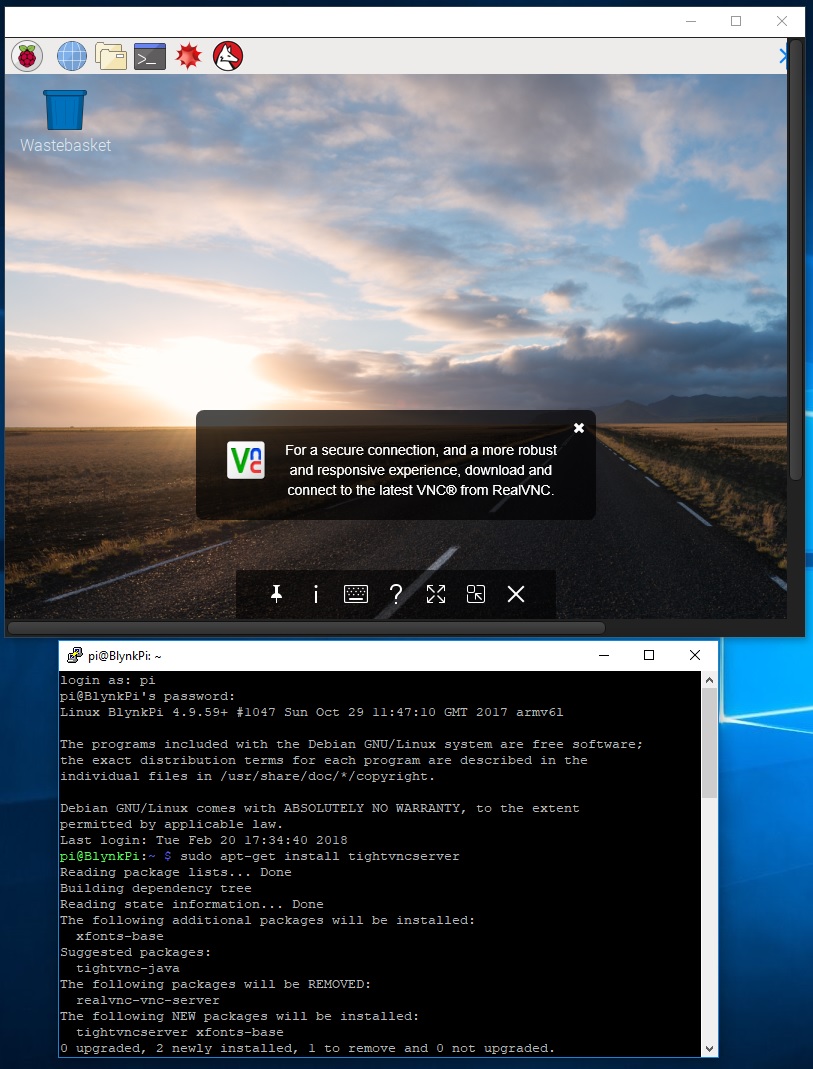
Think I’ve installed the wrong Raspbian, I installed “lite” and this process requires Raspbian with “desktop” … ![]()
I thought you decided you were going to go for the full version?
VNC and GUI is not really needed as Putty and WinSCP does all you need.
Either that or flash the SD again with the full version.
1 Like
I’m here to learn and learn I shall, the hard way, from the begging …
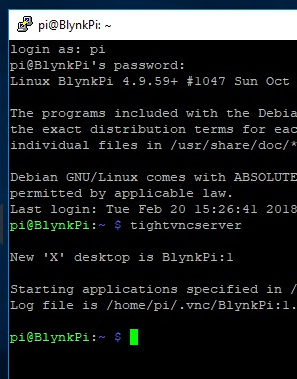
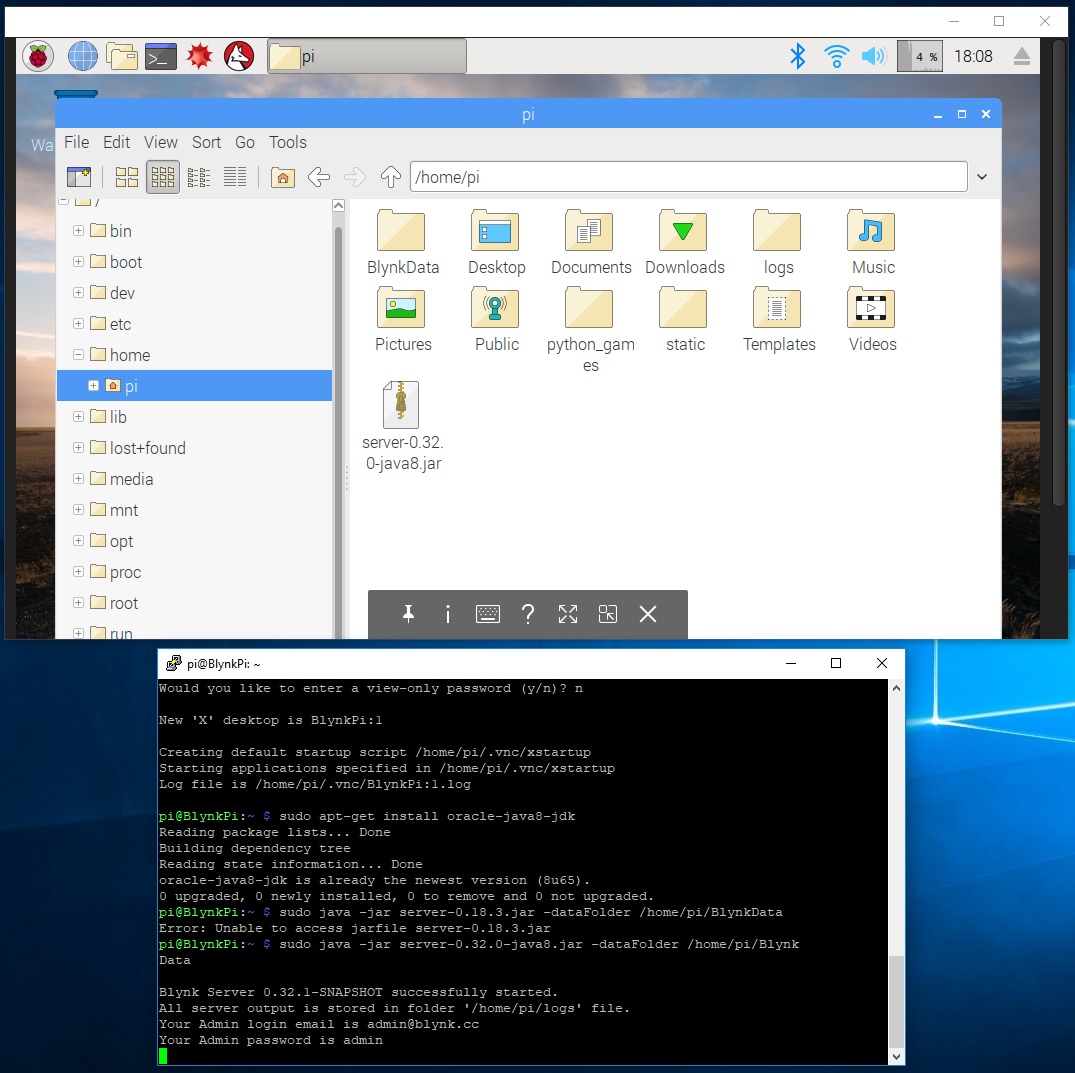
Based on that first screenshot, you should already have putty access… just don’t try to start vncserver and keep on going with the rest of the Blynk install from the command line. Where you are right now… in this shot…
1 Like
I’ve started again, learnt a lot the first time around. So this time I was more confident in what I was doing making things much quicker, minutes instead of hours … 
Now to install Blynk.
And remember to do
pi@raspberrypi3:~ $ sudo apt-get update && sudo apt-get upgrade
before attempting to install Blynk.
You will also need:
pi@raspberrypi3:~ $ sudo apt-get install oracle-java8-jdk
And other handy stuff is screen (I LOVE screen).
pi@raspberrypi3:~ $ sudo apt-get install screen
What screen does is setup some sort of virtual screen which you can detach and attach at another terminal, for example:
pi@raspberrypi3:~ $ screen
Will just open a new screen, now you can do whatever you want there, run a script and what, for example some stupid thing like this:
pi@raspberrypi3:~/blynk $ while true ; do ip addr & sleep 30; done &
This dumbass script will show your IP configuration every 30s. Really silly, but bare with me, press enter and do:
pi@raspberrypi3:~ $ screen -d
The script will now run in the detached virtual screen.
pi@raspberrypi3:~ $ screen -ls
Will list running sessions:
pi@raspberrypi3:~/blynk $ screen -ls
There is a screen on:
10284.pts-0.raspberrypi3 (20/02/18 18:54:14) (Detached)
1 Socket in /run/screen/S-pi.
pi@raspberrypi3:~/blynk $
Now reattach with:
pi@raspberrypi3:~/blynk $ screen -r 10284
Et voila! Your dumbass script is still running in the background! To terminate the session, CTRL-C and type exit (like with any regular terminal).
And there are many more nifty Linux tricks where that came from, but this is one I always install right after updating ![]()
2 Likes

1 Like
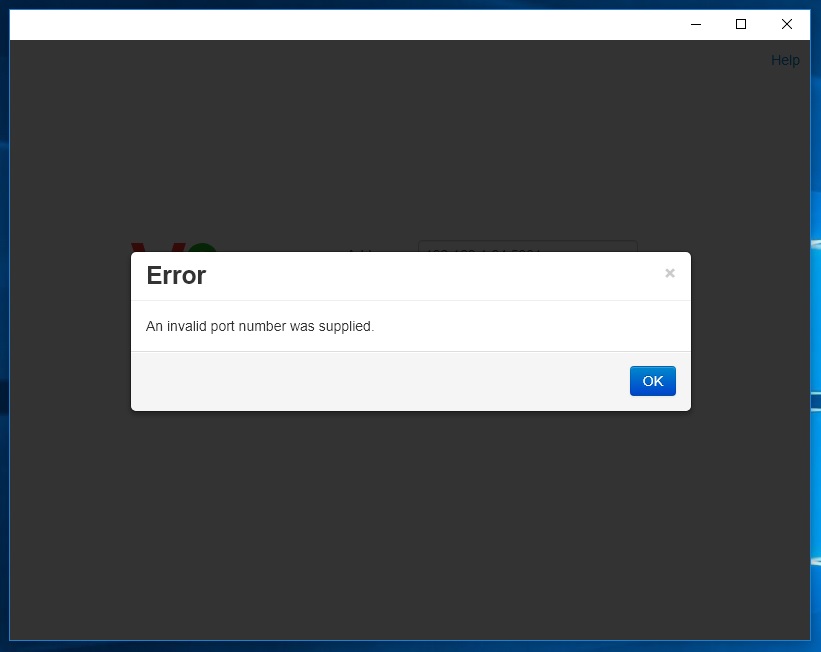
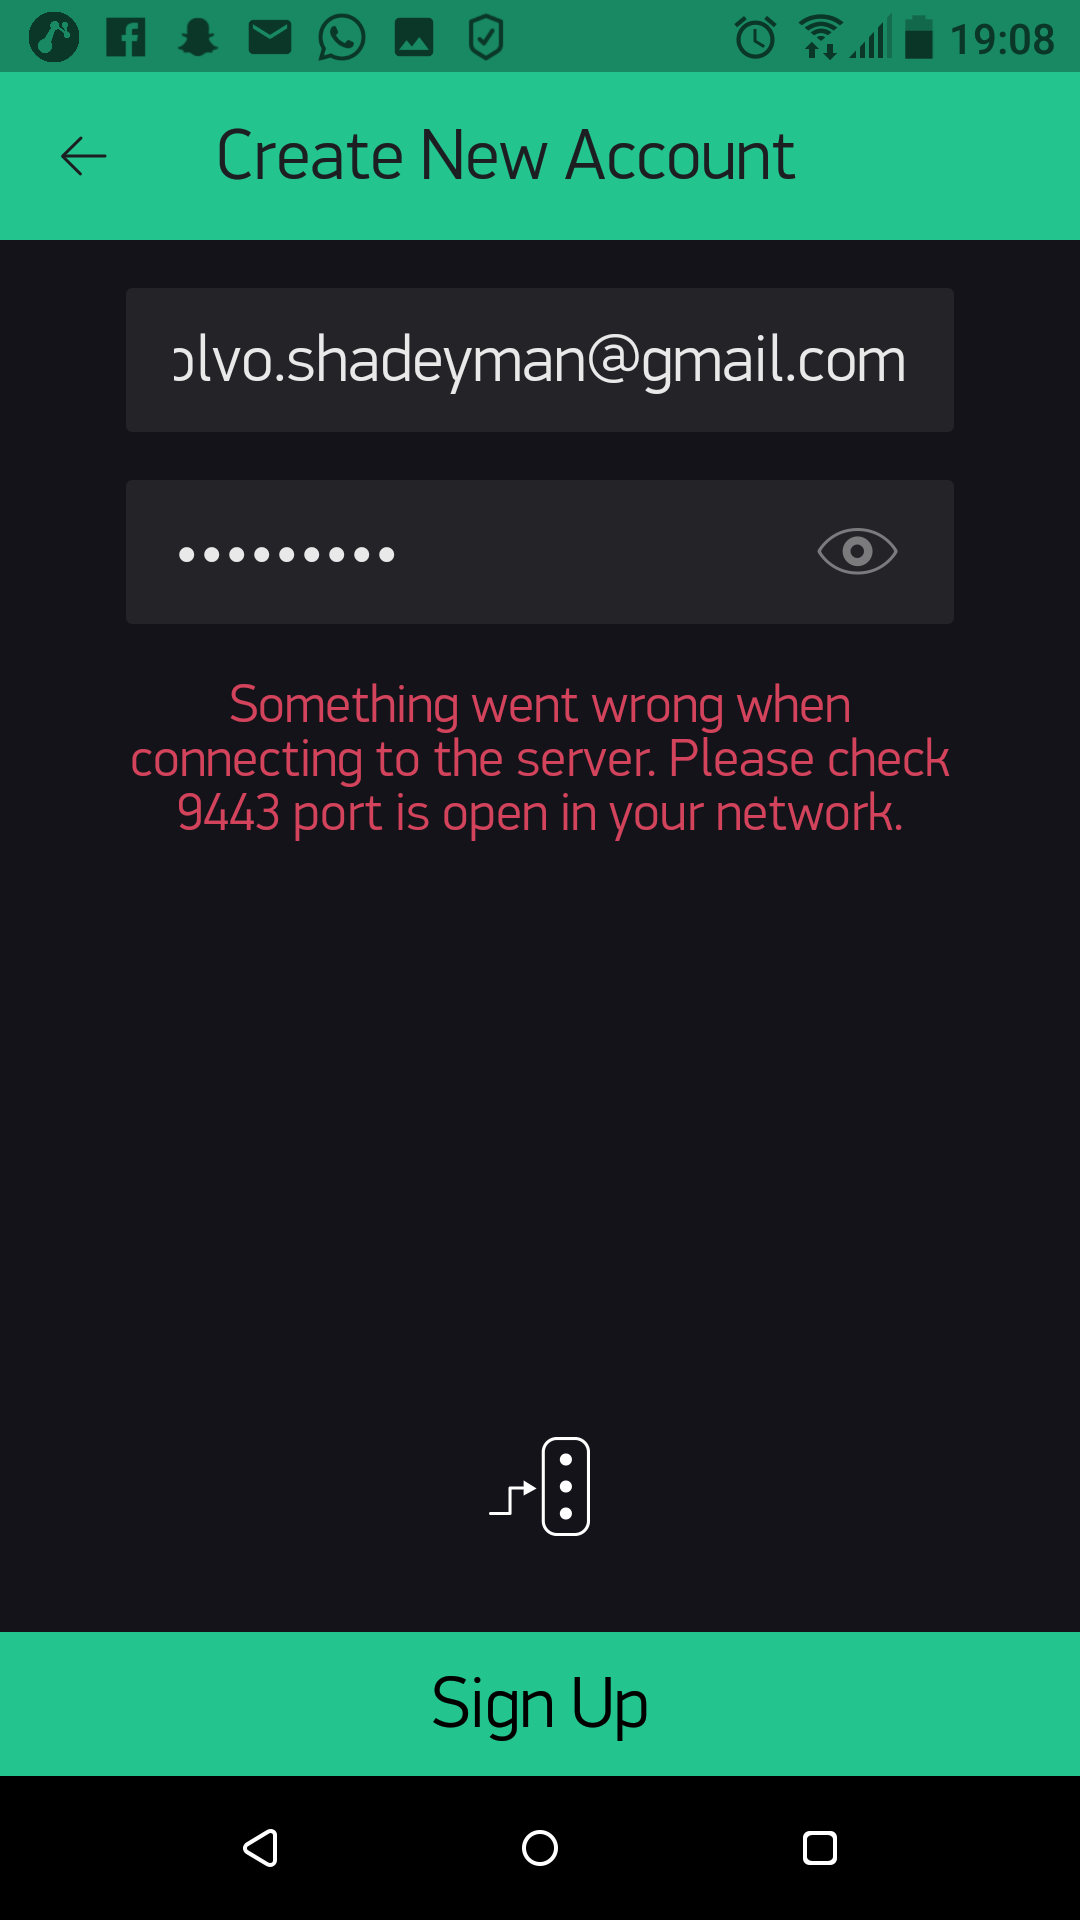
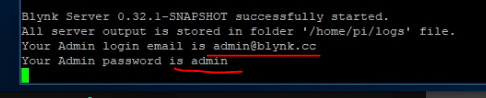
OPPs… that is for your admin login 
But for your App login, did you create an account first?
Or… did you create the alternate IP connection?

Remember is it 9443 now, NOT 8443
1 Like
I though the adim@blynk stuff was for access to the log files?
Create an account/alternate connection for what? Remember this is all new to me, I’m just doing my best to follow the tutorial.
And yes, tried 8443 and 9443.
Yes, I was mixing up two issues…
You first need to create an account on your server, from the app… but in-order to do that you need to be sure your phone is connected to the same router and you are properly connecting, the App, to the IP of your RPi and port 9443
1 Like
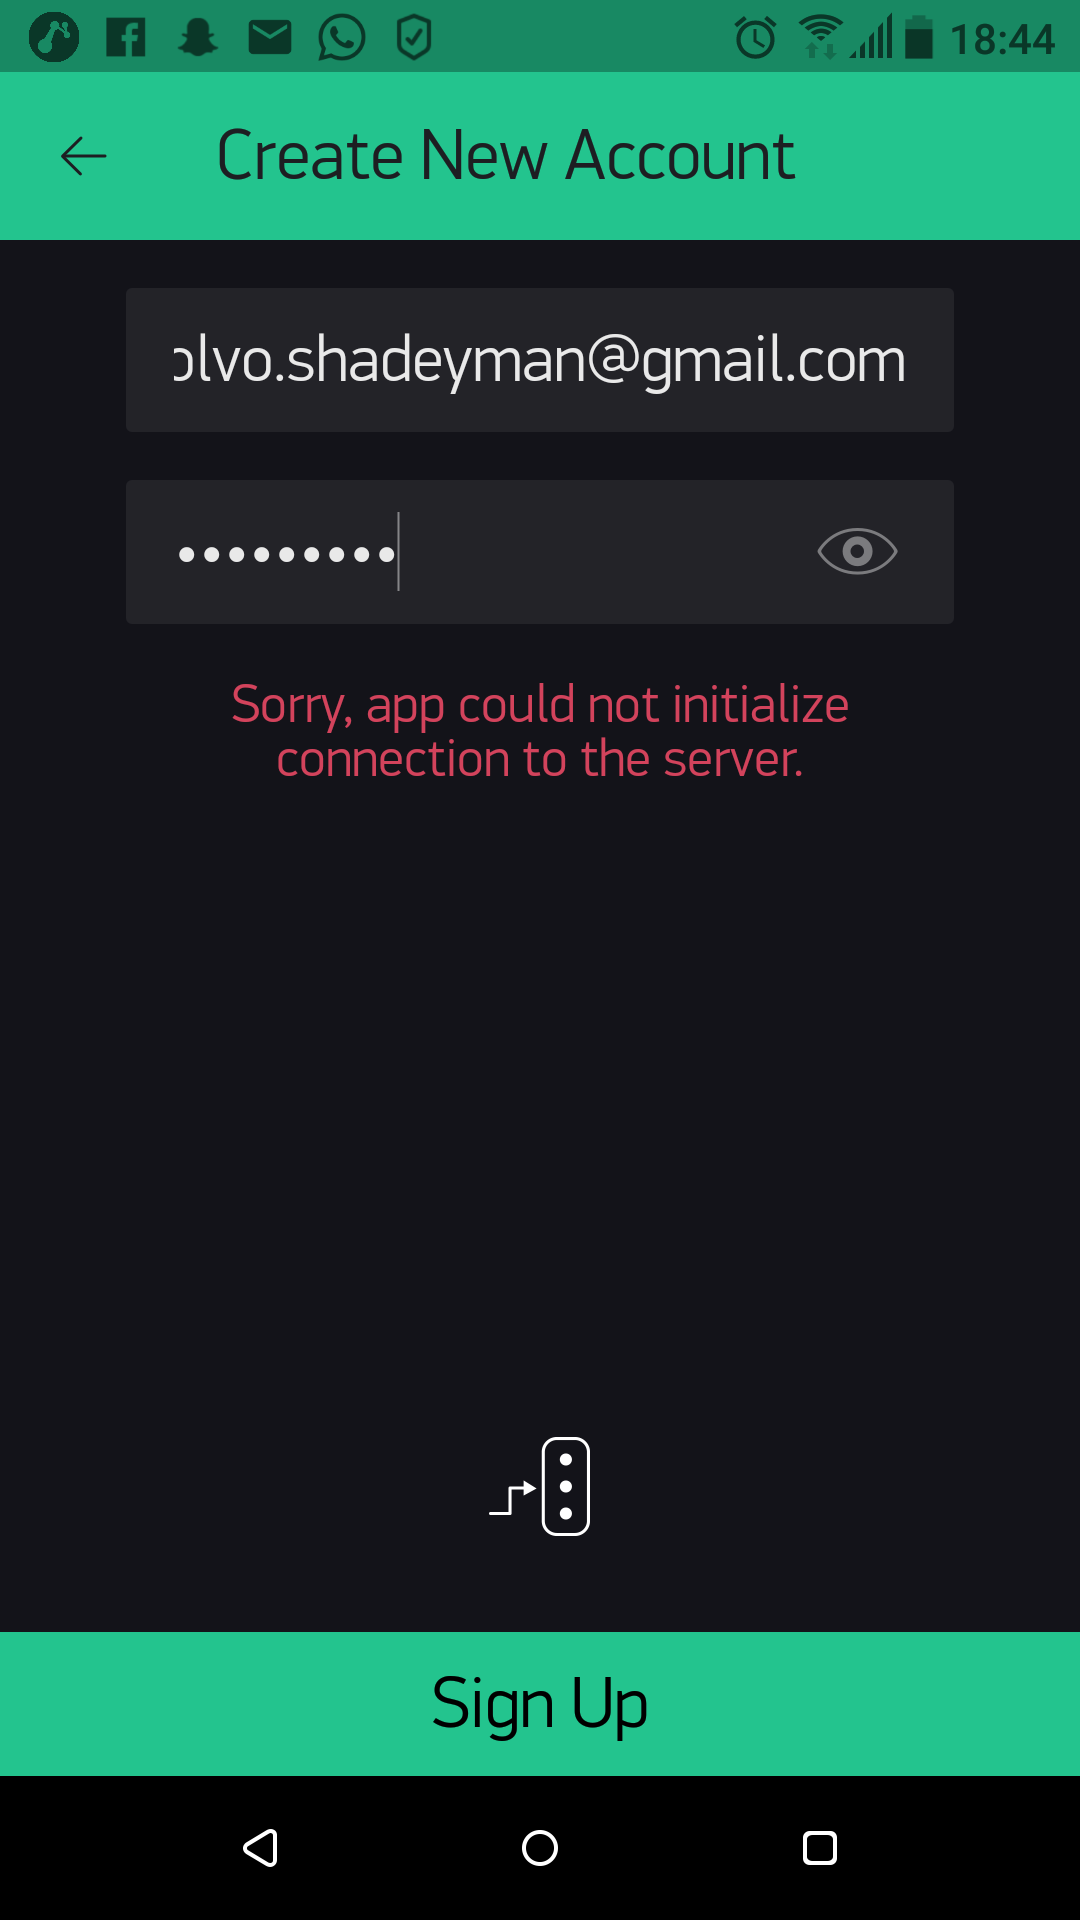
Did your Pi reboot after the Raspbian upgrade as the Blynk server will not be running if it did, unless you have specifically set up the server to start on boot up?
Definitely connected to the same router(BT Smart Hub).
But no idea if that’s happening. I’m guessing not as it wont let me create an account …
It did reboot and I did the “crontab -e” thing in the tutorial so its supposed to start after a reboot …
Do you know what the IP of your RPi is? Is that what you are entering in the Custom screen?
The tutorial told me to use http://www.whatismypublicip.com to find the IP of my Pi so that’s what I did, I think.
I used the browser on the Pi to go to http://www.whatismypublicip.com and used that IP address.