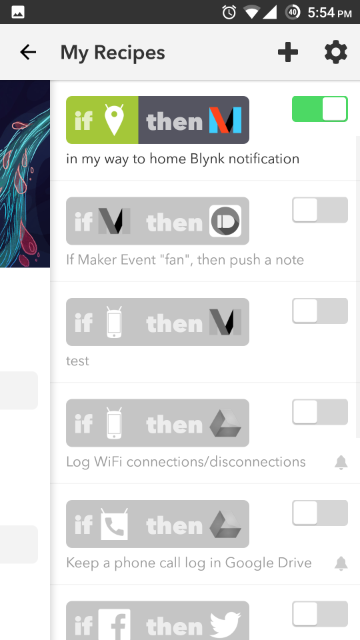
hello Blynkers
as the great Blynk team is working on many new features and widgets , and they already promise to provide the push button trigger “as set an icon on your home screen to activate an GPIO on your board” but i think this maybe will take them some time, so tried to use IFTTT to be integrated with Blynk.
also you can use IFTTT to do some Automation based on other service -IFTTT call it channels - you have and that will actuate and change the values of your hardware running Blynk .
examples will be demonstrated.
-
that can be used for many thing but here i will go for the basic tasks like click the icon to make your
D4GPIO high and that will actuate a relay that will switch on your fan or light. -
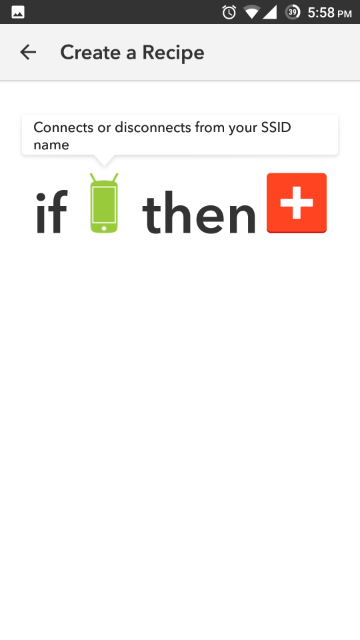
when your Mobile connect to your home WIFI the entrance light will switch on - assuming you have a MCU board connected to Blynk and has a relay that’s connected to your entrance lights.
-
please post your ideas in the comments.
that can be used for many thing but here i will go for the basic tasks like click the icon to make your D4 GPIO high and that will actuate a relay that will switch on your fan or light
Requirement:
- any exist board that already have Blynk sketch running on it.
- IFTTT account
- DO Button by IFTTT app installed IOS and Android
- Mobile phone with IFTTT app installed IOS or Android.
that’s all
–
here we will try the DO Button
- open your Blynk dashboard that will be connected to IFTTT and write down the token also you need to Know which GPIO or PIN you need to control eather it’s actuall PIN or Virtual.
Please note that token is has to be kept private as any body have your
token can control your Hardware.
- Open DO App in your phone.
- Click on the
+bar in the top middle.
- type in the search bar
Maker.
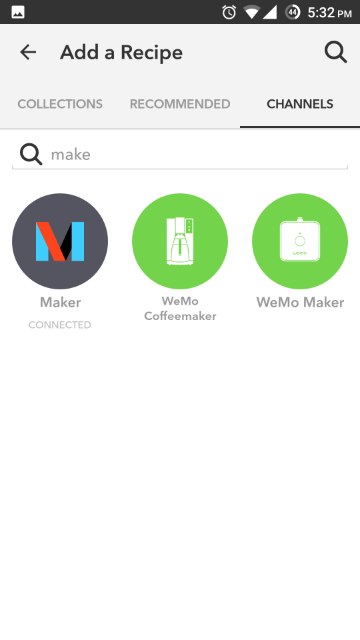
-
select the Maker channel and connect it.
-
from Maker channel select
make a Web Request.
- -
Type Recipe Title like
turn Fan ON
-
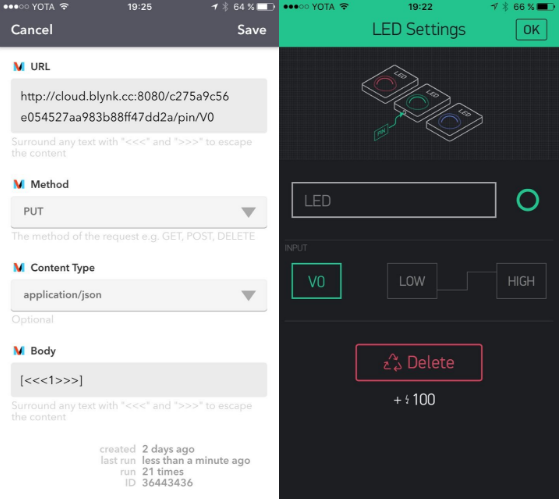
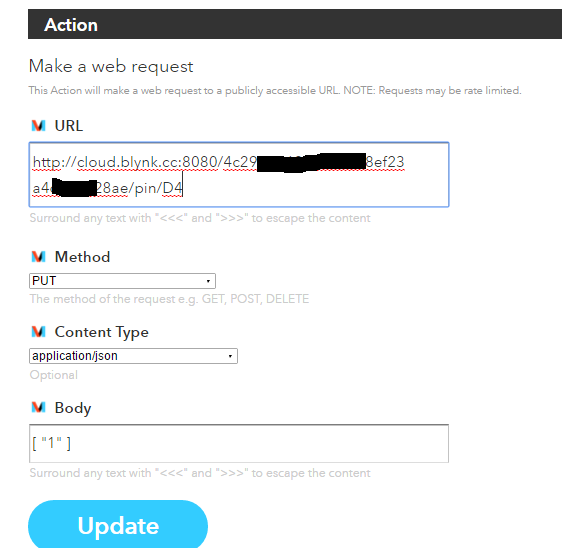
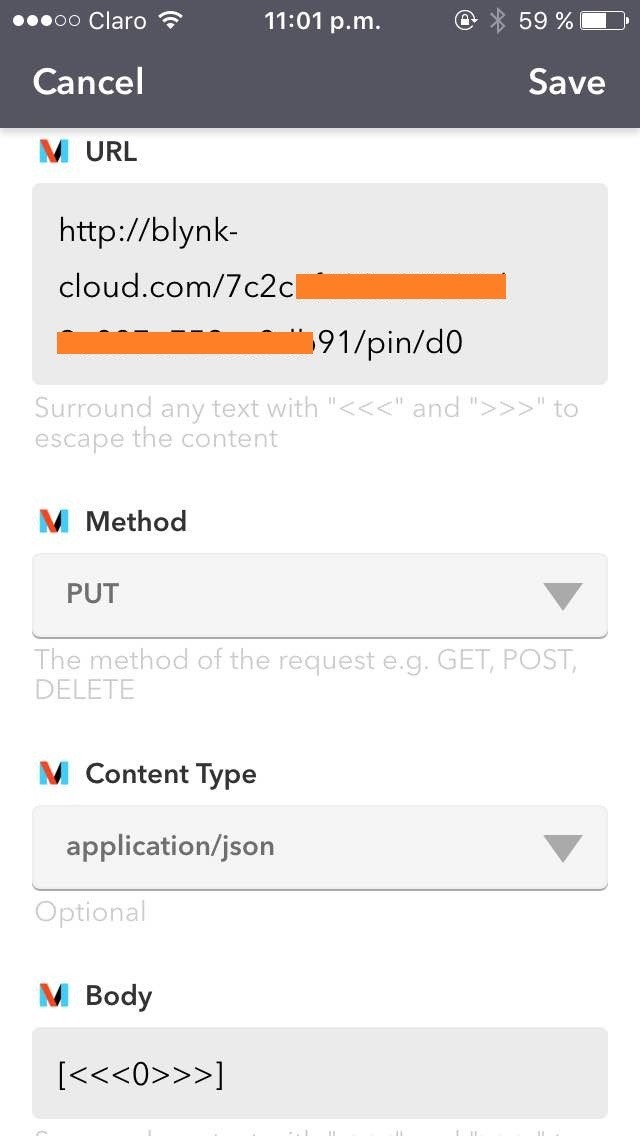
In URL enter
http://cloud.blynk.cc:8080/XXXX your TOKEN XXXX/pin/ZZZ -
and replace
XXXX your TOKEN XXXXwith your actual token andZZZwith the PIN number , for Digital PIN use DX like D1, D5 etc. and for Virtual PIN use VX like V1 ,V5 etc.

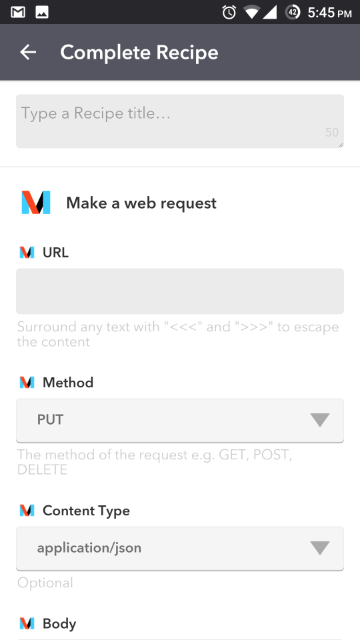
note that if you are using any variant of ESP8266 the pin number here
should match the actual GPIO number not as per the board manufacturer
numbering .
-
in Method select
PUTto WRITE a value to that PIN. -
in Content Type select
application-json. -
in body write
["1"]to make the PIN High or["0"]to set the PIN Low. -
then click Add button.
-
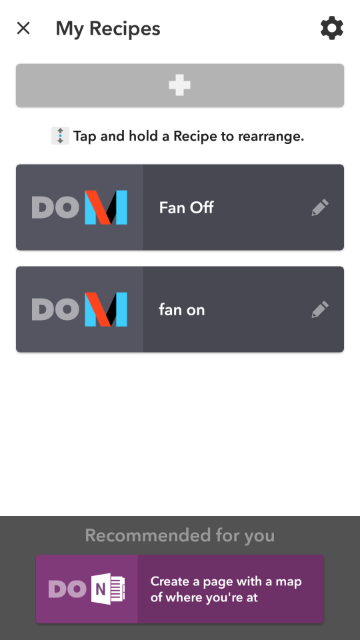
Now for android go to your home screen and try to add widget and search for DO Button and drag it to the selected place and then select the desire recipe name that you Just configured.
-
test it and enjoy.
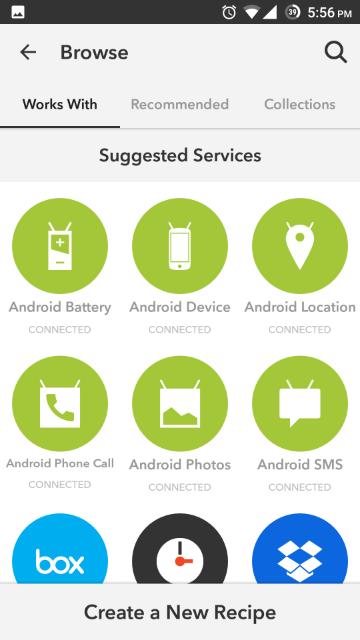
Action based on other IFTTT channels.
connect to a specific WIFI SSID will change a PIN level to High or Low
- open IFTTT App in you Mobile.
- click on the top right icon.
- and click on the
+icon on the Top right. - Search on for
Android device, and select it .
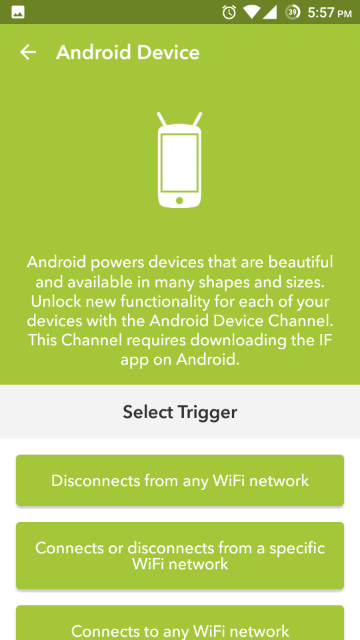
- scroll down to
Connect to a specific WiFi networkand click on it.
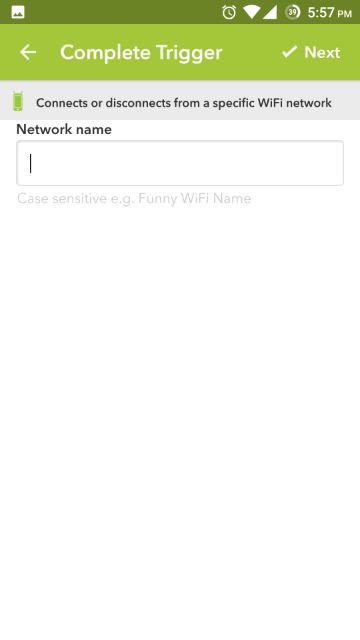
- Enter the WiFi Network Name that will trigger your Blynk GPIO High or Low.
- after that click on the second red
+icon.
- search for
Maker.
- - select
Make a Web Request.
- - In URL enter
http://cloud.blynk.cc:8080/XXXX your TOKEN XXXX/pin/ZZZ
- and replace
XXXX your TOKEN XXXXwith your actual token andZZZwith the PIN number , for Digital PIN use DX like D1, D5 etc. and for Virtual PIN use VX like V1 ,V5 etc.

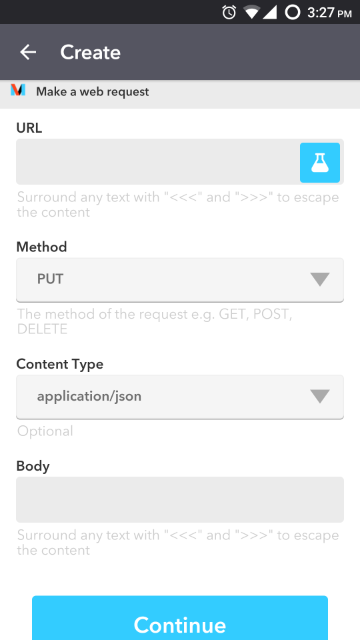
note that if you are using any variant of ESP8266 the pin number here
should match the actual GPIO number not as per the board manufacturer
numbering .
- in Method select
PUTto WRITE a value to that PIN. - in Content Type select
application-json. - in body write
["1"]to make the PIN High or["0"]to set the PIN Low. - then click continue , after that click on finish button.
enjoy Blynking and please leave any notes , comments , new ideas others can do using the great Blynk and IFTTT
 Thanks for such a detailed tutorial!