I am a beginner to blynk and iot. I wanted to spend my leave days useful. Please someone help me with the problem I’m facing.
Actually I uploaded the code to esp8266 and set up the connection.
Blynk Legacy or Blynk IoT?
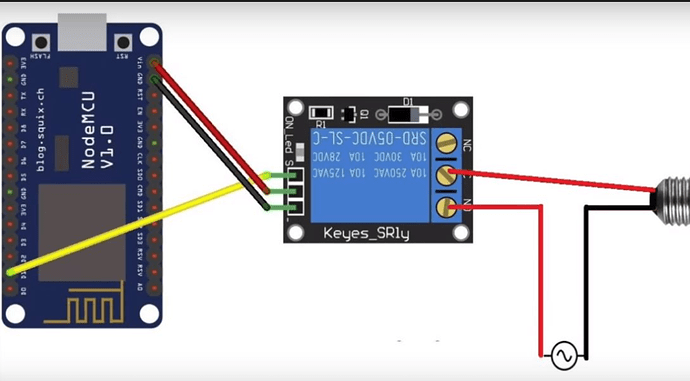
Exactly what device and what code are you using, and how is your relay connected?
Pete.
1 Like
I’m using Blynk IoT sir Uploading: 1645717405401905584607263388884.jpg…
Your image upload hasn’t worked, and you’ve not provided the code you are using.
When you do post the code, copy and paste it from your IDE and put triple backticks at the beginning and end of the code.
Pete.
1 Like
#include <ESP8266WiFi.h>
#include <BlynkSimpleEsp8266.h> // include BlynkSimpleEsp8266 in this folder "Docunment > Arduino > Library"
// You should get Auth Token in the Blynk App.
// Go to the Project Settings (nut icon).
char auth[] = "a7a91cda22f144de92748ba0c9a4674a"; // replace yout auth token here.
// Your WiFi credentials.
// Set password to "" for open networks.
char ssid[] = "Parth"; //Wifi SSID Name
char pass[] = "12345678";  //Wifi Password
void setup()
{
  // Debug console
  Serial.begin(9600);
  pinMode(D1,OUTPUT);
  pinMode(D2,OUTPUT);
  pinMode(D3,OUTPUT);
  pinMode(D4,OUTPUT);
  digitalWrite(D1,HIGH);
  digitalWrite(D2,HIGH);
  digitalWrite(D3,HIGH);
  digitalWrite(D4,HIGH);


  Blynk.begin(auth, ssid, pass);
  // You can also specify server:
  //Blynk.begin(auth, ssid, pass, "blynk-cloud.com", 8442);
  //Blynk.begin(auth, ssid, pass, IPAddress(192,168,1,100), 8442);
}
void loop()
{
  Blynk.run();
}```
The made the required changes ( ssid , password and auth )in the code and uploaded sir
John93
February 24, 2022, 4:51pm
8
Add BLYNK_TEMPLATE_ID and BLYNK_DEVICE_NAME on top of your sketch, before anything.
also, you are connecting the relay + to the nodemcu Vin pin, you should connect it to the 3.3v pin or use external power source.
John93
February 24, 2022, 5:16pm
9
This is a good example
How to control a pin using blynk app and physical button.
The relay being used is a 5v relay. So Vin should work fine for now as the USB line and Vin are same.
Connecting it to a 3v3 pin will not turn the relay on.
1 Like
Actually sir , i added all those lines too
So what should I do now to make it work sir?
Did you go through this link that @John93 provided ? What have you got so far ? What does your serial monitor show ?
Post your updated code, and the output from your serial monitor when you reset the device.
Pete.
1 Like
#define BLYNK_TEMPLATE_ID "TMPL5nMj0-9i"
#define BLYNK_DEVICE_NAME "HOME AUTOMATION1"
#define BLYNK_AUTH_TOKEN "HhUchmI4bmQRx6acE6TBTLtpoiSElSIa"
#define BLYNK_PRINT Serial
#include <ESP8266WiFi.h>
#include <BlynkSimpleEsp8266.h> // include BlynkSimpleEsp8266 in this folder "Docunment > Arduino > Library"
// You should get Auth Token in the Blynk App.
// Go to the Project Settings (nut icon).
char auth[] = "HhUchmI4bmQRx6acE6TBTLtpoiSElSIa";
// Your WiFi credentials.
// Set password to "" for open networks.
char ssid[] = "***********"; //Wifi SSID Name
char pass[] = "**********";  //Wifi Password
void setup()
{
  // Debug console
  Serial.begin(9600);
  pinMode(D1,OUTPUT);
  pinMode(D2,OUTPUT);
  pinMode(D3,OUTPUT);
  pinMode(D4,OUTPUT);
  digitalWrite(D1,HIGH);
  digitalWrite(D2,HIGH);
  digitalWrite(D3,HIGH);
  digitalWrite(D4,HIGH);


  Blynk.begin(auth, ssid, pass);
  // You can also specify server:
  //Blynk.begin(auth, ssid, pass, "blynk-cloud.com", 8442);
  //Blynk.begin(auth, ssid, pass, IPAddress(192,168,1,100), 8442);
}
void loop()
{
  Blynk.run();
}
I’ve provided the wifi credentials in the code on the IDE
So you don’t want to share your serial monitor output then?
Pete.
I’m so sorry , i had a power cut here.
When you post serial monitor output you scouts copy and paste the text, and use triple backticks as I asked you to.
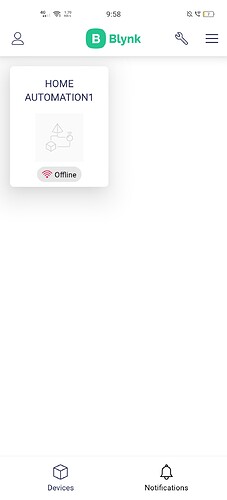
What widgets have you set-up in the app or the web console?
What datastreams have you set up?
What data streams have you assigned to your widgets?
What do you have connected to pins D2, D4 and D4 of your NodeMCU?
Pete.
A single button widget
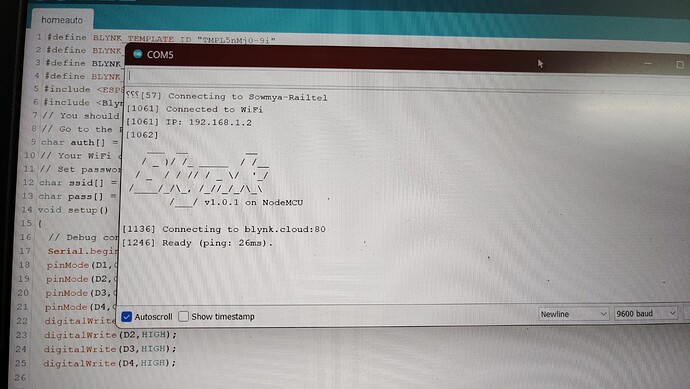
H$⸮[58] Connecting to Sowmya-Railtel
[562] Connected to WiFi
[562] IP: 192.168.1.2
[562]
    ___
   / _ )/ /_ _____  / /__
  / _  / / // / _ \/  '_/
 /____/_/\_, /_//_/_/\_\
        /___/ v1.0.1 on NodeMCU

[634] Connecting to blynk.cloud:80
[738] Ready (ping: 25ms).


