Web dashbord and app not coming up online

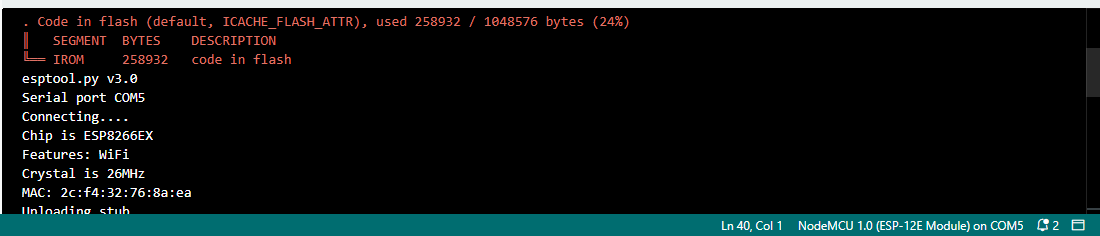
Good day house, i am having issue with my blynk app not coming up online, i try using it for measuring of temperature, soil moisture, humidity and motion but my dashboard decide not to come up, whereas i create another mini project for humidity and temperature that(humidity and temperature) dashboard comes online but refuse to send accurate readings from what i notice, neither is my lcd monitor coming up have try increasing the brightness also but still same. though my sketch/code for temperature ,humidity, soil moisture and motion sensor is running perfectly from what i see here, do not know the reasons it fails to comes online. I will really appreciate any help i can get from here to make my project running well and fine. THANKS.

Below is my code/sketch


#define BLYNK_TEMPLATE_ID "TMPL2CodlxVce"
#define BLYNK_TEMPLATE_NAME "Smart Plant Monitoring"

#include <DHT.h>
#include <DHT_U.h>

#include <DHT.h>
#include <DHT118266.h>
#include <DHT_U.h>
#include <esp826611.h>
#include <GDBStub.h>

// Blynk IOT Smart Plant Monitoring System
/* Connections
Relay. D3
Btn.   D7
Soil.  A0
PIR.   D5
SDA.   D2
SCL.   D1
Temp.  D4
*/

//Include the library files
#include <LiquidCrystal_I2C.h>
#define BLYNK_PRINT Serial
#include <ESP8266WiFi.h>
#include <BlynkSimpleEsp8266.h>
#include <DHT.h>

//Initialize the LCD display
LiquidCrystal_I2C lcd(0x3F, 16, 2);


char auth[] = "0dCUeEtDgQQ58zXkXMCgn5aHNjXtWAwD";  //Enter your Blynk Auth token
char ssid[] =  "RedmiNote11pro+5G";  //Enter your WIFI SSID
char pass[] = "Jaybee124";   //Enter your WIFI Password

DHT dht(D4, DHT11);//(DHT sensor pin,sensor type)  D4 DHT11 Temperature Sensor
BlynkTimer timer;
#include <Blynk.h>

//Define component pins
#define soil A0     //A0 Soil Moisture Sensor
#define PIR D5      //D5 PIR Motion Sensor
int PIR_ToggleValue;

void checkPhysicalButton();
int relay1State = LOW;
int pushButton1State = HIGH;
#define RELAY_PIN_1       D3   //D3 Relay
#define PUSH_BUTTON_1     D7   //D7 Button
#define VPIN_BUTTON_1    V12 

//Create three variables for pressure
double T, P;
char status;

void setup() {
  Serial.begin(9600);
  lcd.begin();
  lcd.backlight();
  pinMode(PIR, INPUT);

 pinMode(RELAY_PIN_1, OUTPUT);
 digitalWrite(RELAY_PIN_1, LOW);
  pinMode(PUSH_BUTTON_1, INPUT_PULLUP);
  digitalWrite(RELAY_PIN_1, relay1State);


  Blynk.begin(auth, ssid, pass, "blynk.cloud", 80);
  dht.begin();

  lcd.setCursor(0, 0);
  lcd.print("  Initializing  ");
  for (int a = 5; a <= 10; a++) {
    lcd.setCursor(a, 1);
    lcd.print(".");
    delay(500);
  }
  lcd.clear();
  lcd.setCursor(11, 1);
  lcd.print("W:OFF");
  //Call the function
  timer.setInterval(100L, soilMoistureSensor);
  timer.setInterval(100L, DHT11sensor);
  timer.setInterval(500L, checkPhysicalButton);
}


//Get the DHT11 sensor values
void DHT11sensor() {
  float h = dht.readHumidity();
  float t = dht.readTemperature();

  if (isnan(h) || isnan(t)) {
    Serial.println("Failed to read from DHT sensor!");
    return;
  }
  Blynk.virtualWrite(V0, t);
  Blynk.virtualWrite(V1, h);

  lcd.setCursor(0, 0);
  lcd.print("T:");
  lcd.print(t);

  lcd.setCursor(8, 0);
  lcd.print("H:");
  lcd.print(h);

}


//Get the soil moisture values
void soilMoistureSensor() {
  int value = analogRead(soil);
  value = map(value, 0, 1024, 0, 100);
  value = (value - 100) * -1;

  Blynk.virtualWrite(V3, value);
  lcd.setCursor(0, 1);
  lcd.print("S:");
  lcd.print(value);
  lcd.print(" ");

}

//Get the PIR sensor values
void PIRsensor() {
  bool value = digitalRead(PIR);
  if (value) {
    Blynk.logEvent("pirmotion","WARNNG! Motion Detected!"); //Enter your Event Name
    WidgetLED LED(V5);
    LED.on();
  } else {
    WidgetLED LED(V5);
    LED.off();
  }  
  }

BLYNK_WRITE(V6)
{
 PIR_ToggleValue = param.asInt();  
}


BLYNK_CONNECTED() {
  // Request the latest state from the server
  Blynk.syncVirtual(VPIN_BUTTON_1);
}

BLYNK_WRITE(VPIN_BUTTON_1) {
  relay1State = param.asInt();
  digitalWrite(RELAY_PIN_1, relay1State);
}

void checkPhysicalButton()
{
  if (digitalRead(PUSH_BUTTON_1) == LOW) {
    // pushButton1State is used to avoid sequential toggles
    if (pushButton1State != LOW) {

      // Toggle Relay state
      relay1State = !relay1State;
      digitalWrite(RELAY_PIN_1, relay1State);

      // Update Button Widget
      Blynk.virtualWrite(VPIN_BUTTON_1, relay1State);
    }
    pushButton1State = LOW;
  } else {
    pushButton1State = HIGH;
  }
}


void loop() {
    if (PIR_ToggleValue == 1)
    {
    lcd.setCursor(5, 1);
    lcd.print("M:ON ");
      PIRsensor();
      }
     else
     {
    lcd.setCursor(5, 1);
    lcd.print("M:OFF");
    WidgetLED LED(V5);
    LED.off();
     }

if (relay1State == HIGH)
{
  lcd.setCursor(11, 1);
  lcd.print("W:ON ");
  }
  else if (relay1State == LOW)
  {
    lcd.setCursor(11, 1);
    lcd.print("W:OFF");
    }
     
      
  Blynk.run();//Run the Blynk library
  timer.run();//Run the Blynk timer

  }```

@Jayb Please edit your post, using the pencil icon at the bottom, and add triple backticks at the beginning and end of your code so that it displays correctly.
Triple backticks look like this:
```

Copy and paste these if you can’t find the correct symbol on your keyboard.

If you want to post compiler messages, serial output etc then please don’t post screenshots. Copy and paste the text and use triple backticks with this text too, but the compiler output screenshot you posted tells us nothing.

What does your serial monitor show?

Pete.

my serial monitor is not showing any output sir.

Thanks, have edited the post also too.

You need to fix that if you want to work-out why your device isn’t connecting to Blynk.
I’d start by removing all the connections to your board (apart from the USB lead).
I would also change this:

74880

to Serial.begin(74880);

and set your serial monitor to teg same baud rate. That way, when you press the reset button on your board you should see the boot data from your board(which is outputted at 74880 by default for most ESP8266 boards) along with the debug output from Blynk.

You also need to remove the duplicate #includes from your sketch.

Why do you need to read the values of your DHT sensor and solid moisture 10 times each second?…

DHT sensors don’t respond well to being read this often, I’d recommend once very 2 seconds as that minimum period between samples, but in reality once every 10 seconds is probably going to be more than frequent enough.

Pete.

if i could get you right my serial monitor is not coming up because of my baud being set to 9600? i am on it right away, then the duplicate #include i do not get that part please.

Your lack of serial output is most likely being caused by something connected to a strapping pin, putting your device into programming mod rather than code execution mode, which is why I said…

Pete.

okay, i do not get the part of you saying i should put my device to programming mode, but i get the part of me disconnecting all my component from the board. so i only need to leave my nodemcu8266 only on the board(because it is from it i connect the usb cable) and upload the exact code to it to check if my serial monitor will work right?

I didn’t say that you should put your device into programming mode. I said that one or more of the peripherals connected to your device may be putting it into programming mode, which stops it executing your code.

You can learn more about the strapping pins that prevent the device from booting into code execution mode here…

In the table under the “Best Pins to Use – ESP8266 section”, where it says “boot fails if pulled LOW” or “boot fails if pulled HIGH” these are the strapping pins that can put your device into programming mode.

I’d fix the duplicated #includes first.

Pete.

Have removed all device aside my nodemcu and i upload the code only for my serial monitor to keep saying connecting to my hotspot but it is not connecting


freq trace enable 0

rf[112] : 0�[1147] Connecting to RedmiNote11pro+5G

Ln 1, Col 1

NodeMCU 1.0 (ESP-12E Module)

on COM10

2```

ESP8266 devices can only use the 2.4GHz WiFi network.
I assume from the SSID that you’re trying to connect to a 5GHz network?

Pete.

yeah, it support 5GHz but i changed it to 2.4GHz but my network is on 5g where as have change the hotspot to 2,4GHz and that is what is showing.

currently change my hotspot servicing device and the web dashbord is now online, thanks pete, but i am having issues now with my serial monitor concerning my DHT sensor it keeps saying


Failed to read from DHT sensor!```

An update from you about the code and hardware changes you’ve made would be a good start in trying to help you resolve that issue.

Pete.

okay i make no changes on the hardware as it is now i am only connecting my nodemcu to upload the code/sketch but on the software, i deletes those duplicate and also change the serving hotspot device, below is the new code

#define BLYNK_TEMPLATE_ID "TMPL2CodlxVce"
#define BLYNK_TEMPLATE_NAME "Smart Plant Monitoring"

#include <DHT.h>
#include <DHT_U.h>
#include <DHT118266.h>
#include <esp826611.h>
#include <GDBStub.h>

// Blynk IOT Smart Plant Monitoring System
/* Connections
Relay. D3
Btn.   D7
Soil.  A0
PIR.   D5
SDA.   D2
SCL.   D1
Temp.  D4
*/

//Include the library files
#include <LiquidCrystal_I2C.h>
#define BLYNK_PRINT Serial
#include <ESP8266WiFi.h>
#include <BlynkSimpleEsp8266.h>

//Initialize the LCD display
LiquidCrystal_I2C lcd(0x3F, 16, 2);


char auth[] = "0dCUeEtDgQQ58zXkXMCgn5aHNjXtWAwD";  //Enter your Blynk Auth token
char ssid[] =  "jay";  //Enter your WIFI SSID
char pass[] = "Jibson001";   //Enter your WIFI Password

DHT dht(D4, DHT11);//(DHT sensor pin,sensor type)  D4 DHT11 Temperature Sensor
BlynkTimer timer;
#include <Blynk.h>

//Define component pins
#define soil A0     //A0 Soil Moisture Sensor
#define PIR D5      //D5 PIR Motion Sensor
int PIR_ToggleValue;

void checkPhysicalButton();
int relay1State = LOW;
int pushButton1State = HIGH;
#define RELAY_PIN_1       D3   //D3 Relay
#define PUSH_BUTTON_1     D7   //D7 Button
#define VPIN_BUTTON_1    V12 

//Create three variables for pressure
double T, P;
char status;

void setup() {
  Serial.begin(74880);
  lcd.begin();
  lcd.backlight();
  pinMode(PIR, INPUT);

 pinMode(RELAY_PIN_1, OUTPUT);
 digitalWrite(RELAY_PIN_1, LOW);
  pinMode(PUSH_BUTTON_1, INPUT_PULLUP);
  digitalWrite(RELAY_PIN_1, relay1State);


  Blynk.begin(auth, ssid, pass, "blynk.cloud", 80);
  dht.begin();

  lcd.setCursor(0, 0);
  lcd.print("  Initializing  ");
  for (int a = 5; a <= 10; a++) {
    lcd.setCursor(a, 1);
    lcd.print(".");
    delay(500);
  }
  lcd.clear();
  lcd.setCursor(11, 1);
  lcd.print("W:OFF");
  //Call the function
  timer.setInterval(100L, soilMoistureSensor);
  timer.setInterval(100L, DHT11sensor);
  timer.setInterval(500L, checkPhysicalButton);
}


//Get the DHT11 sensor values
void DHT11sensor() {
  float h = dht.readHumidity();
  float t = dht.readTemperature();

  if (isnan(h) || isnan(t)) {
    Serial.println("Failed to read from DHT sensor!");
    return;
  }
  Blynk.virtualWrite(V0, t);
  Blynk.virtualWrite(V1, h);

  lcd.setCursor(0, 0);
  lcd.print("T:");
  lcd.print(t);

  lcd.setCursor(8, 0);
  lcd.print("H:");
  lcd.print(h);

}


//Get the soil moisture values
void soilMoistureSensor() {
  int value = analogRead(soil);
  value = map(value, 0, 1024, 0, 100);
  value = (value - 100) * -1;

  Blynk.virtualWrite(V3, value);
  lcd.setCursor(0, 1);
  lcd.print("S:");
  lcd.print(value);
  lcd.print(" ");

}

//Get the PIR sensor values
void PIRsensor() {
  bool value = digitalRead(PIR);
  if (value) {
    Blynk.logEvent("pirmotion","WARNNG! Motion Detected!"); //Enter your Event Name
    WidgetLED LED(V5);
    LED.on();
  } else {
    WidgetLED LED(V5);
    LED.off();
  }  
  }

BLYNK_WRITE(V6)
{
 PIR_ToggleValue = param.asInt();  
}


BLYNK_CONNECTED() {
  // Request the latest state from the server
  Blynk.syncVirtual(VPIN_BUTTON_1);
}

BLYNK_WRITE(VPIN_BUTTON_1) {
  relay1State = param.asInt();
  digitalWrite(RELAY_PIN_1, relay1State);
}

void checkPhysicalButton()
{
  if (digitalRead(PUSH_BUTTON_1) == LOW) {
    // pushButton1State is used to avoid sequential toggles
    if (pushButton1State != LOW) {

      // Toggle Relay state
      relay1State = !relay1State;
      digitalWrite(RELAY_PIN_1, relay1State);

      // Update Button Widget
      Blynk.virtualWrite(VPIN_BUTTON_1, relay1State);
    }
    pushButton1State = LOW;
  } else {
    pushButton1State = HIGH;
  }
}


void loop() {
    if (PIR_ToggleValue == 1)
    {
    lcd.setCursor(5, 1);
    lcd.print("M:ON ");
      PIRsensor();
      }
     else
     {
    lcd.setCursor(5, 1);
    lcd.print("M:OFF");
    WidgetLED LED(V5);
    LED.off();
     }

if (relay1State == HIGH)
{
  lcd.setCursor(11, 1);
  lcd.print("W:ON ");
  }
  else if (relay1State == LOW)
  {
    lcd.setCursor(11, 1);
    lcd.print("W:OFF");
    }
     
      
  Blynk.run();//Run the Blynk library
  timer.run();//Run the Blynk timer

  }

I’m not really clear what this means.
I previously suggested that you disconnected everything except your USB cable. Does what you said above mean that you now only have the USB cable attached, or that you’ve re-connected all of your hardware?

You have t taken onboard my comments about your timers…

How are each of your peripherals connected to your board, and how is everything powered?

Pete.

yeah, i only have the usb cord attach, changed the timer but i am still getting same error from my serial monitor here is the changes i made with the code bellow

    timer.setInterval(2000L, DHT11sensor);

and here is still the error from my serial monitor


Failed to read from DHT sensor!

Thanks pete

Well, to be able to read the DHT sensor you’re going to have to re-attach it to the board aren’t you?

Does your temperature really vary significantly over a period of two seconds?

Pete.

yeah, thanks so much.