Hi Everyone,
I want to control a stepper motor via the Blynk app.
Press button 1 it rotates clockwise (const int stepsPerRevolution = 32 for full rotation)
Press button 2 it rotates anti clockwise.
I am using a TTGO T-Beam but only using the wifi functionso its basically an ESP32 Dev.
I am looking to adapt some existing code to get my project working and have googled/tried my hardest to get it working.
I have the below code working so everything is turning but I just want control via the app.
All help is GREATLY appreciated!
/*
 Stepper Motor Control - one revolution

 This program drives a unipolar or bipolar stepper motor.
 The motor is attached to digital pins 8 - 11 of the Arduino.

 The motor should revolve one revolution in one direction, then
 one revolution in the other direction.


 Created 11 Mar. 2007
 Modified 30 Nov. 2009
 by Tom Igoe

 */

#include <Stepper.h>

const int stepsPerRevolution = 32;  // change this to fit the number of steps per revolution
const int stepsPerGearedRev = 32*64;  // change this to fit the number of steps per revolution

// for your motor

// initialize the stepper library on pins 8 through 11:
Stepper myStepper(stepsPerRevolution, 2, 14, 13, 25);

void setup() {
  // set the speed at 120 rpm:
  myStepper.setSpeed(120);
  // initialize the serial port:
  Serial.begin(9600);
}

void loop() {
  // step one revolution  in one direction:
  Serial.println("clockwise");
  myStepper.step(stepsPerGearedRev);
  delay(500);

  // step one revolution in the other direction:
  Serial.println("counterclockwise");
  myStepper.step(-stepsPerGearedRev);
  delay(500);
}
I’d suggest that you restructure your code to clean-up your void loop and use timers, and get rid of all the delays before you think about adding any Blynk functionality.
Hey Gunner,
I have my stepper still rotating so I know the pins are ok but I am not able to get the app working still.
Code compiles, device comes online but not moving.
Any ideas?
App is setup as per your instructions
#define BLYNK_PRINT Serial // This prints to Serial Monitor

#include <WiFi.h>  // for ESP32
#include <WiFiClient.h>  // for ESP32
#include <BlynkSimpleEsp32.h>  // for ESP32
#include <ESPmDNS.h>  // For OTA w/ ESP32
#include <WiFiUdp.h>  // For OTA
#include <ArduinoOTA.h>  // For OTA

char auth[] = "xxx";
char ssid[] = "xxx";
char pass[] = "xxx";
char server[] = "blynk-cloud.com";  // URL for Blynk Cloud Server
int port = 8080;

BlynkTimer timer;

#include <Stepper.h>
const int stepsPerRevolution = 8;  // change this to fit the number of steps per revolution for your motor

// ESP8266 use GPIO pin designation, not silk-screened labeling
// Stepper myStepper(stepsPerRevolution, 5, 4, 0, 2); // ESP8266 - initialize the stepper library for IN1, IN2, IN3, IN4

// ESP32 GPIO/Silk-screened pin designation
Stepper myStepper(stepsPerRevolution, 2, 14, 13, 25); // ESP32 - initialize the stepper library for IN1, IN2, IN3, IN4

int motorSpeed;
int motorDirection;


void setup() {
  Serial.begin(9600);

  timer.setInterval(10, stepperControl);  // This here is all the fancy timing part... it just updates the stepper control every 5ms

  WiFi.begin(ssid, pass);
  Blynk.config(auth, server, port);
  Blynk.connect();
}


void loop() {
  Blynk.run();
  timer.run();
  ArduinoOTA.handle();  // For OTA
}

BLYNK_CONNECTED() {
  Blynk.syncVirtual(V0, V1);
}

BLYNK_WRITE(V0) {  // Motor Speed - Slider set with 0-100 and Send On Relese OFF
  motorSpeed = param.asInt();
  myStepper.setSpeed(motorSpeed);
}

BLYNK_WRITE(V1) {  // Motor Direction - Button set as Switch with 0-1
  motorDirection = param.asInt();
}

void stepperControl() {
  if (motorSpeed > 0) {
    if (motorDirection == 0) {  // Rotate Clockwise
      myStepper.step(stepsPerRevolution / 100);
    } else {  // Rotate CounterClockwise
      myStepper.step(-stepsPerRevolution / 100);
    }
  }
}
Sorry, I do not do private consulting, nor have the time/energy for much more work in this forum at this time, so I moved your question back here for others to assist with.
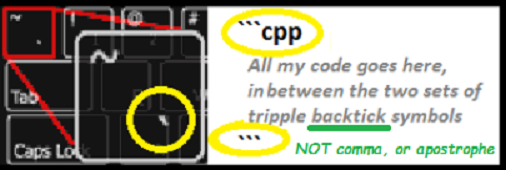
Also, formatting code is done with three backticks, not commas I fixed yours.
PS, change you AUTH code and don’t show the new one… else others will try to spin your stepper
 I fixed yours.