Okay, halfway through cutting the hedge the good old B&D trimmer died on me. Turned out to be a broken wire inside, which was a fairly easy fix. Then it rained, then the wind picked-up and blew my clippings everywhere, but finally got it done and everything tided-away. Now back to the interesting stuff…
I’ve been doing some work on my ‘basic’ MQTT sketch, but it’s now got a bit out of hand. I worked on the principal that it’s easier to add-in all the bells and whistles and get them working, then delete/comment them out if I didn’t need them. Unfortunately that’s left me with a sketch that’s a bit unwieldy to share, so I need to spend some time making a simpler version.
In the meantime, here are a few pointers that you can use if you wish…
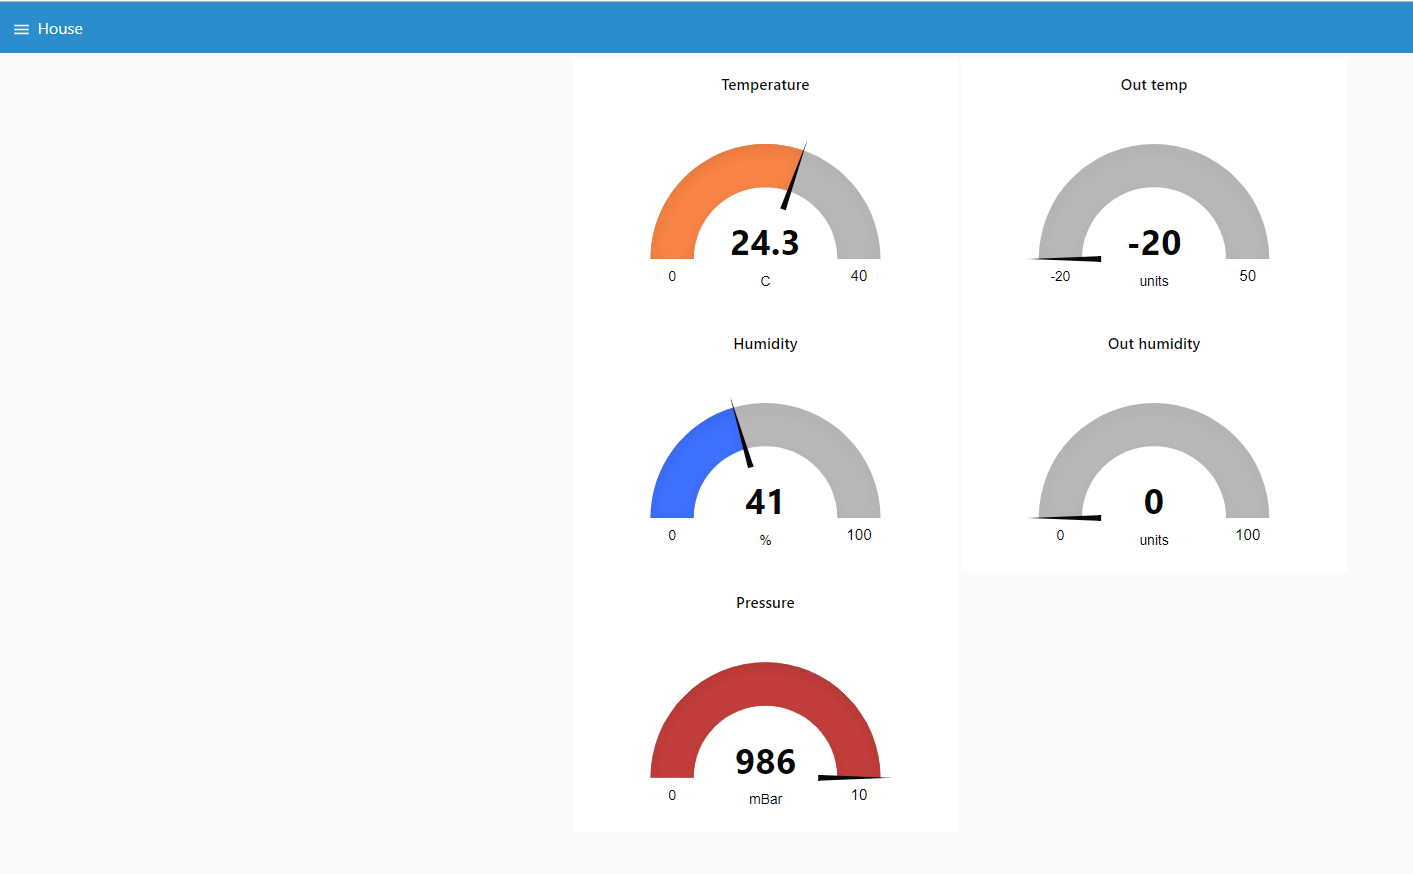
I’ve adopted a similar naming convention to you with MQTT topics. after a while I decided that I didn’t want to keep repeating the first part of the topic in multiple places in the sketch (the “house/lounge/sensor/” part in your example). So, I’ve defined a variable to hold that, like this:
String base_mqtt_topic = "house/lounge/sensor"; // Start of the MQTT Topic name used by this device
This is a String variable type for a reason. PubSubClient requires the topic to be a char variable type, but you cant do string concatenations on chars. So, I do my concatenation with String variables, then turn the result into a char.
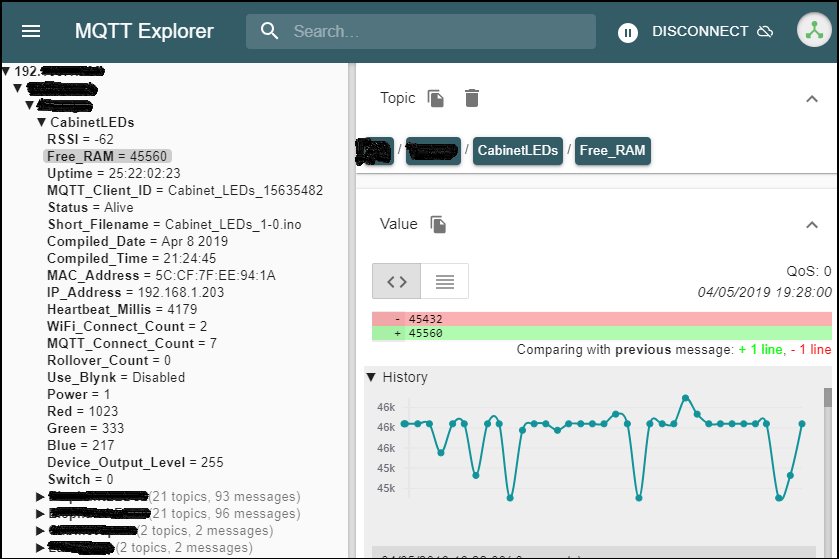
So, my heartbeat function contains these lines of code:
  MQTTclient.publish((base_mqtt_topic + "/RSSI").c_str(),String(WiFi.RSSI()).c_str(),true);
  MQTTclient.publish((base_mqtt_topic + "/Free_RAM").c_str(),String(ESP.getFreeHeap()).c_str(),true);
  MQTTclient.publish((base_mqtt_topic + "/Uptime").c_str(),uptime_dd_hh_mm_ss,true);
The uptime is created in a similar way to what you were doing in the thread about printing serial output to Blynk terminal widget:
void FormatUptime()
{
uptime = millis();
int systemUpTimeSec = int((uptime / (1000)) % 60);
  int systemUpTimeMin = int((uptime / (1000 * 60)) % 60);
  int systemUpTimeHr = int((uptime / (1000 * 60 * 60)) % 24);
  int systemUpTimeDay = int((uptime / (1000 * 60 * 60 * 24)) % 365);
  sprintf (uptime_dd_hh_mm_ss, "%02d:%02d:%02d:%02d", systemUpTimeDay, systemUpTimeHr, systemUpTimeMin,systemUpTimeSec);
} //End of void FormatUptime
This also needs a global variable to be declared like this:
char uptime_dd_hh_mm_ss [12]; // Character array to hold the uptime in Day:Hour:Minute:Second format
The other thing you might not have realised is that each device (ESP8266 etc) must have its own MQTT client ID. If you have two devices with the same client ID then you won’t get any errors or warnings, but everything will stop working.
You’ve hard-coded your MQTT Client ID into your connection string, “ESP8266Client” in this case:
if (client.connect("ESP8266Client", mqtt_user, mqtt_password)) {
I prefer to use a variable to hold the MQTT Client ID, and I use the same ID for the MQTT Hostname:
Global variable:
char *client_id = "Wemos_no_3_MQTT_Lounge_weather"; // Used for OTA hostname and MQTT Client ID
Modified MQTT connection string:
if (client.connect(client_id, mqtt_user, mqtt_password)) {
Modified OTA command:
ArduinoOTA.setHostname(client_id);
Obviously none of this stuff is essential, but it can make life much easier and cut out a lot of head-scratching when it all stops working.
Pete.
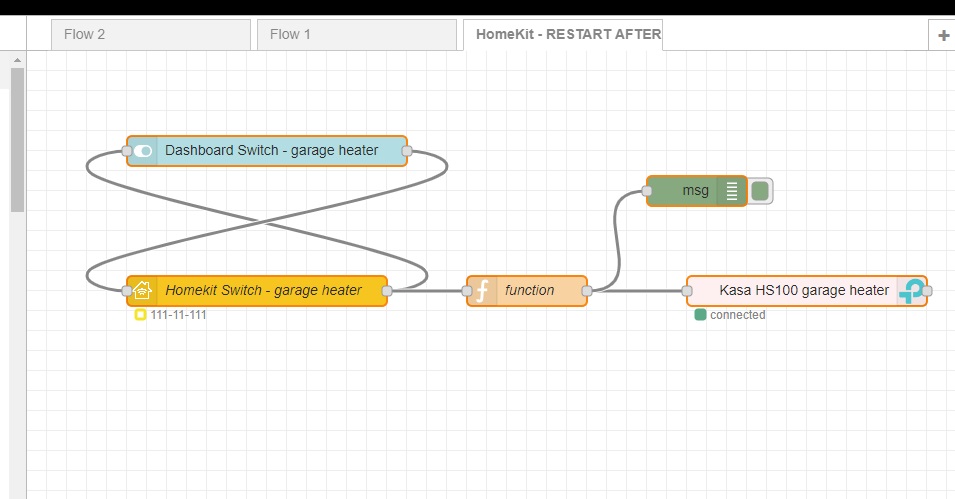
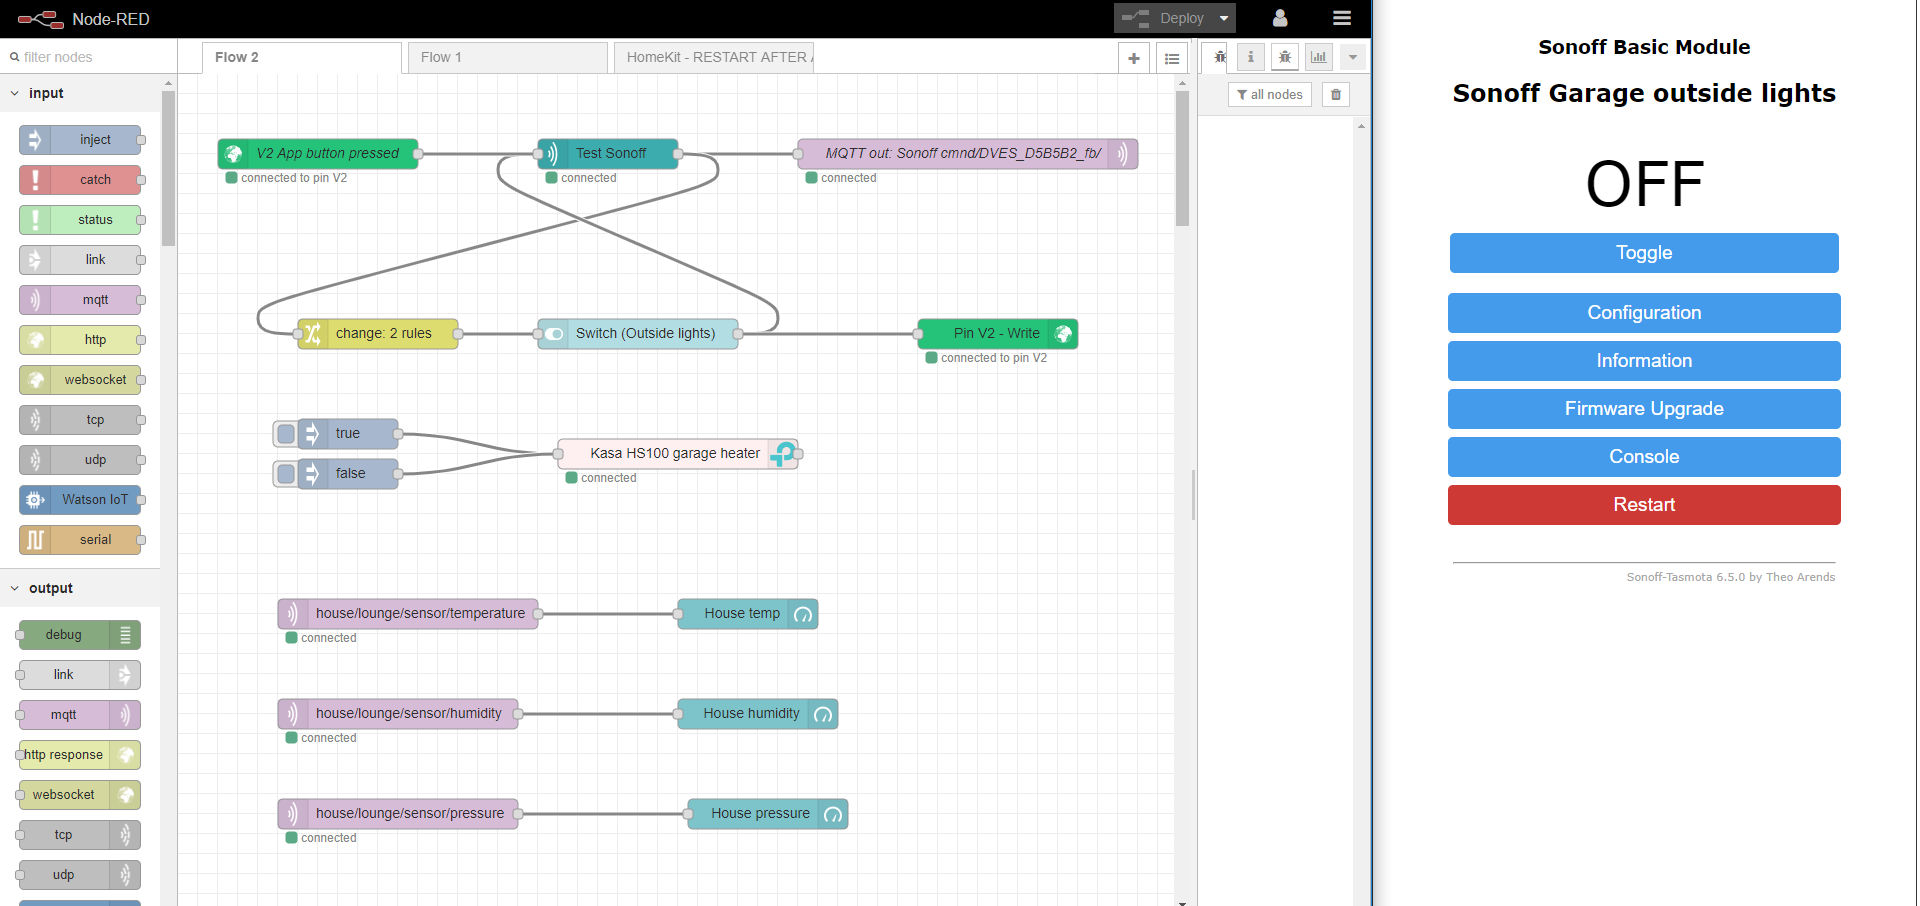
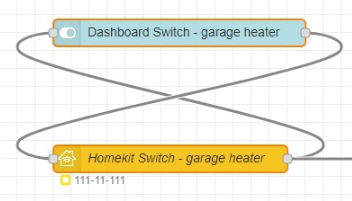
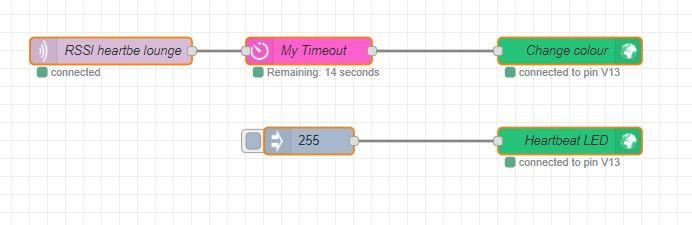
 After reading his posts I am not addicted to Node Red and spending far too much time looking at it!