@Gunner it’s a long time since I have used USB but that’s what I thought you saw when you connected.
Is there actually some other details shown on screen with a USB connection?
@Gunner it’s a long time since I have used USB but that’s what I thought you saw when you connected.
Is there actually some other details shown on screen with a USB connection?
I’m just trying to get the examples to work for now…
Serial USB or Software Serial, neither will work for me.
No it just keeps repeating the auth token on the same line.
Software serial gets timeout.
[0]
___ __ __
/ _ )/ /_ _____ / /__
/ _ / / // / _ / '/
///_, /////_
/__/ v0.4.4 on Arduino Uno
[5001] Connecting…
[10041] Connecting…
[12081] Login timeout
[15081] Connecting…
[17121] Login timeout
[20121] Connecting…
@tbarritt does the server respond with a json file with the following url in a browser (enter your token in the url)
{“id”:2,“name”:“New Project”,“createdAt”:1485625992613,“updatedAt”:1485626241209,“devices”:[{“id”:0,“name”:“New Device”,“boardType”:“Arduino UNO”,“token”:"****************************************",“connectionType”:“USB”,“status”:“OFFLINE”,“disconnectTime”:0}],“theme”:“Blynk”,“keepScreenOn”:false,“isAppConnectedOn”:false,“isShared”:false,“isActive”:false}
Ok that confirms you are using a valid token.
You might have some ports blocked.
Try the following from dos command / console to see if it connects for a short duration before disconnecting you
telnet blynk-cloud.com 8443
Edit: You should concentrate on the regular USB sketch not the SoftwareSerial one.

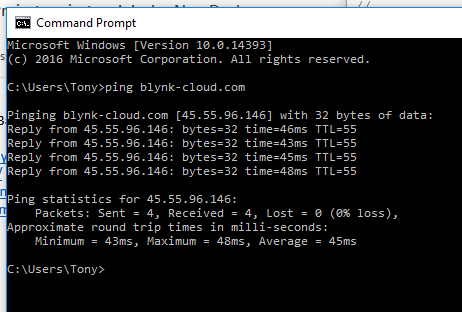
I even did a ping.

Try telnet to the correct port number.
Try commenting out this line… and any other Serial.print() lines that might use the same serial connection as the USB link
Tried that, no help…
#include <SoftwareSerial.h>
SoftwareSerial DebugSerial(2, 3); // RX, TX

//  #define BLYNK_PRINT DebugSerial
#include <BlynkSimpleStream.h>

// You should get Auth Token in the Blynk App.
// Go to the Project Settings (nut icon).
char auth[] = "b90131baf3b24c87906023a1e5f8937d";

void setup()
{
  // Debug console
  DebugSerial.begin(9600);

  // Blynk will work through Serial
  // Do not read or write this serial manually in your sketch
  Serial.begin(9600);
  Blynk.begin(Serial, auth);
}

void loop()
{
  Blynk.run();
}
Well, I used the code provided above, and after a few attempts was able to get it to connect… however I did need to move #include <BlynkSimpleStream.h> to the top before it would connect… strangely, after that initial link, it didn’t matter if it was the first or 2nd include (probably just coincidental?.. but try it).
That didn’t work either…
Well, it isn’t the code… I am out of valid ideas.

OK, I rigged up my Mega to test dual port options. I can connect just fine using the standard USB port.
So as a test - to closely simulate what you might be doing, I set up blynk.begin on the 2nd serial port for the server connection (hardware serial via USB-TTL adapter on my Arduino Mega), and left BLYNK_PRINT set to the built in port to monitor.
It would try to connect, and occasionally say ready, but wouldn’t complete connection. I suspect that something just doesn’t like connecting to the server using anything but the primary port.
Solution?.. just use the built-in USB for the server connection and use softserial and a terminal program for whatever else you needed the 2nd serial port for.
Oh, wait… as I dug further back in your post here, I realised that you may have already tried that… if so, then sorry, there are a couple of similar USB-server issue posts and I am getting a bit mixed up as to which is which 
Thanks for trying, I am giving up for now…
Is it that bad? do you have a final code? and is it still a nano? can I please have a shot at it.
Just trying to the Blynk serial usb basic code to work with UNO.
i Have a sample code that I edited for my purposes do you want to give it a shot? I can put it in ubuntu pastebin and you can have it.
And I think the problem might not be with the code in itself but the execution. Could you please elaborate how you connected yourself to the internet.