Hello, i’ma new in blynk community and i trying to display value temperature on my blynk app with a DS18B20 BRICK temperature sensor and arduino uno. I use the exemple sketch arduino ethernet and my relays work just fine but value temperature show HIGH, i have to add something on this cod? i found on this forum 2 sketch but i don’t work for me. if someone meet with the same problem and he knows the answer…
**#define BLYNK_PRINT Serial    // Comment this out to disable prints and save space**
**#include <SPI.h>**
**#include <Ethernet.h>**
**#include <BlynkSimpleEthernet.h>**

// You should get Auth Token in the Blynk App.
// Go to the Project Settings (nut icon).
char auth[] = "YourAuthToken";

void setup()
{
  Serial.begin(9600);
  Blynk.begin(auth);
  // You can also specify server.
  // For more options, see BoardsAndShields/Arduino_Ethernet_Manual example
  //Blynk.begin(auth, "your_server.com", 8442);
  //Blynk.begin(auth, IPAddress(192,168,1,100), 8888);
}

void loop()
{
  Blynk.run();
}
#include <OneWire.h>

// OneWire DS18S20, DS18B20, DS1822 Temperature Example
//
// http://www.pjrc.com/teensy/td_libs_OneWire.html
//
// The DallasTemperature library can do all this work for you!
// http://milesburton.com/Dallas_Temperature_Control_Library

OneWire  ds(10);  // on pin 10 (a 4.7K resistor is necessary)

void setup(void) {
  Serial.begin(9600);
}

void loop(void) {
  byte i;
  byte present = 0;
  byte type_s;
  byte data[12];
  byte addr[8];
  float celsius, fahrenheit;

  if ( !ds.search(addr)) {
    Serial.println("No more addresses.");
    Serial.println();
    ds.reset_search();
    delay(250);
    return;
  }

  Serial.print("ROM =");
  for( i = 0; i < 8; i++) {
    Serial.write(' ');
    Serial.print(addr[i], HEX);
  }

  if (OneWire::crc8(addr, 7) != addr[7]) {
      Serial.println("CRC is not valid!");
      return;
  }
  Serial.println();

  // the first ROM byte indicates which chip
  switch (addr[0]) {
    case 0x10:
      Serial.println("  Chip = DS18S20");  // or old DS1820
      type_s = 1;
      break;
    case 0x28:
      Serial.println("  Chip = DS18B20");
      type_s = 0;
      break;
    case 0x22:
      Serial.println("  Chip = DS1822");
      type_s = 0;
      break;
    default:
      Serial.println("Device is not a DS18x20 family device.");
      return;
  }

  ds.reset();
  ds.select(addr);
  ds.write(0x44, 1);        // start conversion, with parasite power on at the end

  delay(1000);     // maybe 750ms is enough, maybe not
  // we might do a ds.depower() here, but the reset will take care of it.

  present = ds.reset();
  ds.select(addr);
  ds.write(0xBE);         // Read Scratchpad

  Serial.print("  Data = ");
  Serial.print(present, HEX);
  Serial.print(" ");
  for ( i = 0; i < 9; i++) {           // we need 9 bytes
    data[i] = ds.read();
    Serial.print(data[i], HEX);
    Serial.print(" ");
  }
  Serial.print(" CRC=");
  Serial.print(OneWire::crc8(data, 8), HEX);
  Serial.println();

  // Convert the data to actual temperature
  // because the result is a 16 bit signed integer, it should
  // be stored to an "int16_t" type, which is always 16 bits
  // even when compiled on a 32 bit processor.
  int16_t raw = (data[1] << 8) | data[0];
  if (type_s) {
    raw = raw << 3; // 9 bit resolution default
    if (data[7] == 0x10) {
      // "count remain" gives full 12 bit resolution
      raw = (raw & 0xFFF0) + 12 - data[6];
    }
  } else {
    byte cfg = (data[4] & 0x60);
    // at lower res, the low bits are undefined, so let's zero them
    if (cfg == 0x00) raw = raw & ~7;  // 9 bit resolution, 93.75 ms
    else if (cfg == 0x20) raw = raw & ~3; // 10 bit res, 187.5 ms
    else if (cfg == 0x40) raw = raw & ~1; // 11 bit res, 375 ms
    //// default is 12 bit resolution, 750 ms conversion time
  }
  celsius = (float)raw / 16.0;
  fahrenheit = celsius * 1.8 + 32.0;
  Serial.print("  Temperature = ");
  Serial.print(celsius);
  Serial.print(" Celsius, ");
  Serial.print(fahrenheit);
  Serial.println(" Fahrenheit");
}
#define BLYNK_PRINT Serial    // Comment this out to disable prints and save space
#include <SPI.h>
#include <Ethernet.h>
#include <BlynkSimpleEthernet.h>
#include <OneWire.h>
#include <DallasTemperature.h>

char auth[] = "54d4d7f98bae43bc8c3c21a488d5b36d";
int DS18S20_Pin = 2; //DS18B20 -> D2
OneWire ds(DS18S20_Pin);

float temperature;
//DallasTemperature sensors(&ds);
//DeviceAddress Probe01 = { 0x28, 0x72, 0xCF, 0x29, 0x05, 0x00, 0x00, 0x73 };

void setup()
{
//Serial.begin(9600); // See the connection status in Serial Monitor
Blynk.begin(auth);

// sensors.begin();
// sensors.setResolution(Probe01, 9);
// Setup function to be called each 5000 milliseconds
//timer.setInterval(5000, sendUptime);
}

// This function sends Arduino's up time every second to 0rtual Pin (5).
// In the app, Widget's reading frequency should be set to PUSH. This means
// that you define how often to send data to Blynk App.
void sendUptime()
{
float temperature = getTemp();

// You can send any value at any time.
// Please don't send more that 10 values per second.
Blynk.virtualWrite(0, temperature); // Virtual 0
delay(5000);
}

void loop()
{
int temperature =getTemp(); //float is too big for sketch frowning

Blynk.run(); // Initiates Blynk
Blynk.virtualWrite(0, temperature); // Virtual 0
delay(1000);
// timer.run(); // Initiates SimpleTimer
}

float getTemp(){
//returns the temperature from one DS18B20 in DEG Celsius

byte data[12];
byte addr[8];

if ( !ds.search(addr)) {
//no more sensors on chain, reset search
ds.reset_search();
return 100; //+100C
}

if ( OneWire::crc8( addr, 7) != addr[7]) {
Serial.println("CRC is not valid!");
return 100; //+100C
}

if ( addr[0] != 0x10 && addr[0] != 0x28) {
Serial.print("Device is not recognized");
return 100; //+100C
}

ds.reset();
ds.select(addr);

ds.write(0x44,1); // start conversion, with parasite power on at the end

byte present = ds.reset();
ds.select(addr);
ds.write(0xBE); // Read Scratchpad

for (int i = 0; i < 9; i++) { // we need 9 bytes
data[i] = ds.read();
}

ds.reset_search();

byte MSB = data[1];
byte LSB = data[0];

float tempRead = ((MSB << 8) | LSB); //using two's compliment
float TemperatureSum = tempRead / 16;

return TemperatureSum;
}
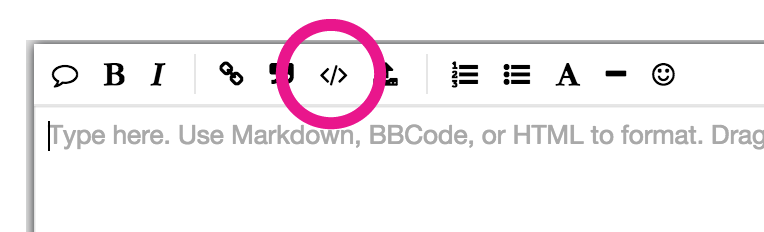
Please edit all your posts in this topic. Code should be formatted.
Wrap the code by pressing this magic button (Backtick`) 3 times (before the code and after it):**
Example:
 ``` <--- insert this
 Paste your code here
 ``` <--- insert this
This makes your code beautiful with highlighted syntax, like this:
#define BLYNK_PRINT Serial    // Comment this out to disable prints and save space
#include <SPI.h>
#include <Ethernet.h>
#include <BlynkSimpleEthernet.h>
#include <OneWire.h>
#include <DallasTemperature.h>

char auth[] = "54d4d7f98bae43bc8c3c21a488d5b36d";
int DS18S20_Pin = 2; //DS18B20 -> D2
OneWire ds(DS18S20_Pin);

float temperature;
//DallasTemperature sensors(&ds);
//DeviceAddress Probe01 = { 0x28, 0x72, 0xCF, 0x29, 0x05, 0x00, 0x00, 0x73 };

void setup()
{
//Serial.begin(9600); // See the connection status in Serial Monitor
Blynk.begin(auth);

// sensors.begin();
// sensors.setResolution(Probe01, 9);
// Setup function to be called each 5000 milliseconds
//timer.setInterval(5000, sendUptime);
}

// This function sends Arduino's up time every second to 0rtual Pin (5).
// In the app, Widget's reading frequency should be set to PUSH. This means
// that you define how often to send data to Blynk App.
void sendUptime()
{
float temperature = getTemp();

// You can send any value at any time.
// Please don't send more that 10 values per second.
Blynk.virtualWrite(0, temperature); // Virtual 0
delay(5000);
}

void loop()
{
int temperature =getTemp(); //float is too big for sketch frowning

Blynk.run(); // Initiates Blynk
Blynk.virtualWrite(0, temperature); // Virtual 0
delay(1000);
// timer.run(); // Initiates SimpleTimer
}

float getTemp(){
//returns the temperature from one DS18B20 in DEG Celsius

byte data[12];
byte addr[8];

if ( !ds.search(addr)) {
//no more sensors on chain, reset search
ds.reset_search();
return 100; //+100C
}

if ( OneWire::crc8( addr, 7) != addr[7]) {
Serial.println("CRC is not valid!");
return 100; //+100C
}

if ( addr[0] != 0x10 && addr[0] != 0x28) {
Serial.print("Device is not recognized");
return 100; //+100C
}

ds.reset();
ds.select(addr);

ds.write(0x44,1); // start conversion, with parasite power on at the end

byte present = ds.reset();
ds.select(addr);
ds.write(0xBE); // Read Scratchpad

for (int i = 0; i < 9; i++) { // we need 9 bytes
data[i] = ds.read();
}

ds.reset_search();

byte MSB = data[1];
byte LSB = data[0];

float tempRead = ((MSB << 8) | LSB); //using two's compliment
float TemperatureSum = tempRead / 16;

return TemperatureSum;
}
Second thing is, that I’m not sure what code do you use, you posted here 4 different codes, a lot of parts are commented out which also creates some confusions.
Start with the example, make sure it is running and you can see in blynk the correct runtime value at V0, then add your function float getTemp() to the code and in the loop try printing out to serial monitor the value (Serial.println(temperature)). If thats correct, then pass the temperature value to the Blynk.virtualWrite function.
Hi Blynkers,
I played with the DS18b20 using a library and it worked easily, I can tell you the one I used (I’m not at home right now). Let me know and I’ll share with you all the information.
Hi guys,
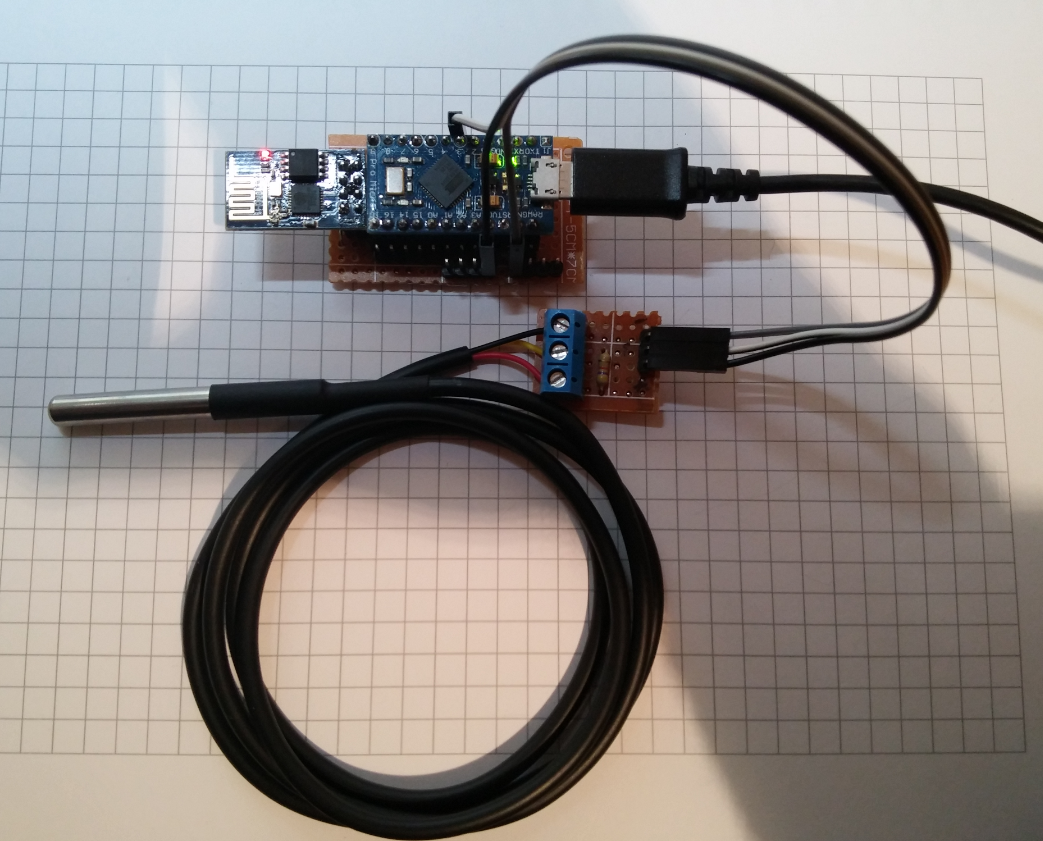
I’m brand new to Blynk and very limited in my circuits knowledge, but I have a project that is very similar to this one. My project’s goal is to use two DS18b20 and a 4.7k resistor connected to one of the DS18b20. The object is that the DS18b20 connected to the 4.7k resistor will show a higher temperature than the DS18b20 that is not connected to the resistor, and then I can use the difference in temperature because I need delta T for another part of my project.
I would like to design a PCB in eagle that could do this. I am also brand new to eagle. What would the schematic look like in eagle?
Thanks!
@psoro can you please try the DS18B20 temperature probe on your WeMos and let me know if it works.
Not sure what it is with the ESP’s but a 4.7K pull-up doesn’t work even though the probes are rated from 3 to 5V. They will actually work on an Arduino down to about 1.9V.
 ) because a 4.7k pull-up resistor must be connected to the 1-wire bus.