Simple home automation project with Blynk, Sonoff and NodeMCU power strips

Hi Pete,

Thanks for your answer. However, your route is the one I’m trying to avoid, I like Blynk because it’s dirt simple to use, and because of high level of integration with esp8266 based boards. Timer function is not thinked over enough, and it’s not dealing with it’s primary task - set start and stop time with days of a week in a simple way for every button you have. Even being separated from button function is bad enough, and not being able to control it simply from the other widget which is called timer just makes no any sense. I don’t look at timer widget as a finished product, as many others in Blynk are.

Blynk’s scheduling of events at specified times and days works just fine.

Hi Costas,

Happy to hear from you! And many thanks for your answer, but I’m not completely sure what you are thinking off. The closest I can come to it is to use eventor+timer as an author, it’s complicated and I don’t need it. What I do need is to put simple timer on a socket, ie start/stop time per week day that can be edited by all users and not only in author editing mode, I saw it working hundreds of times in various applications, and I can’t set similar one in Blynk. This one is perfect example, it does what it’s meant for, it’s associated with on/off switch button and available for all users all the time:

Is there a way to do this in Blynk?

Blynk is the best so of course it can do that.
You use Time Input widget and a bit of code as shown at RF 433 Mhz on virtual pin doesn't want to send (with scheduling) - #5 by Costas

There is also a 1 to 2 character library hack that you should implement so no days selected actually does what you would expect it to do.

Thank you Costas, I will try your code. Can you please post some screenshots from the app, preferably from user perspective. I’m still struggling thinking of my kids trying to set eventor value on V1, not to mention that I’m only one in control of the project, they have copies, not cloned project. Just take a look on a simple and user friendly timer from EWElink in my previous post, I think it’s the by far the best part of their application. Associated with on/off button, same look and feel like setting alarm on your mobile. And there is a wife factor included as well. While we were using sonoff basic setup she was able to use timer on dish and clothes washing machines. I’m not able to set Blynk to do the same for her, so those two places are still controled by basic sonoff sw.

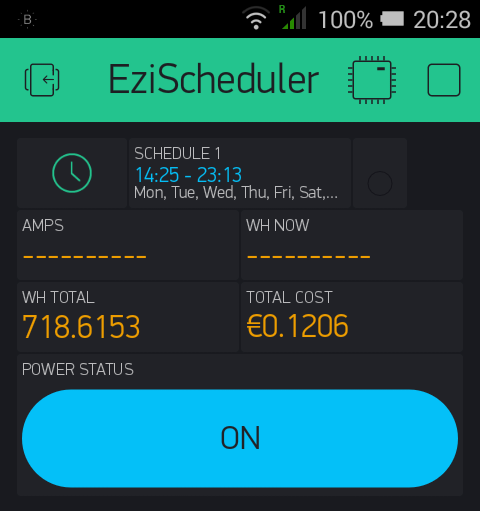
Just press the widget whilst the project is running (shown as SCHEDULE 1 in this first screenshot)

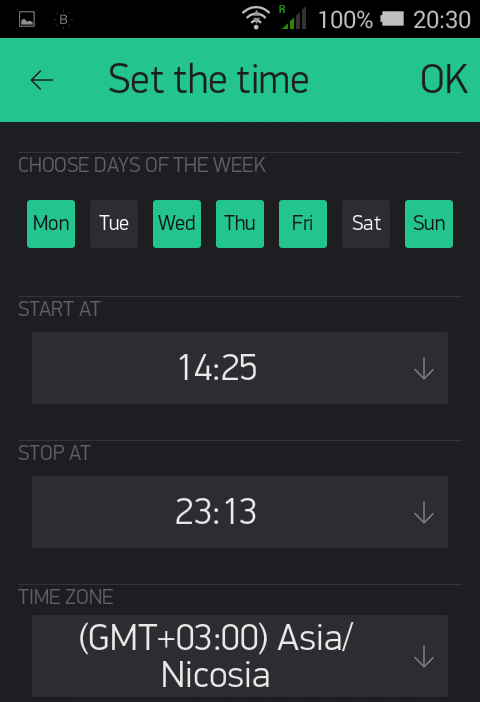
Select the days of the week you want the scheduler to operate on:

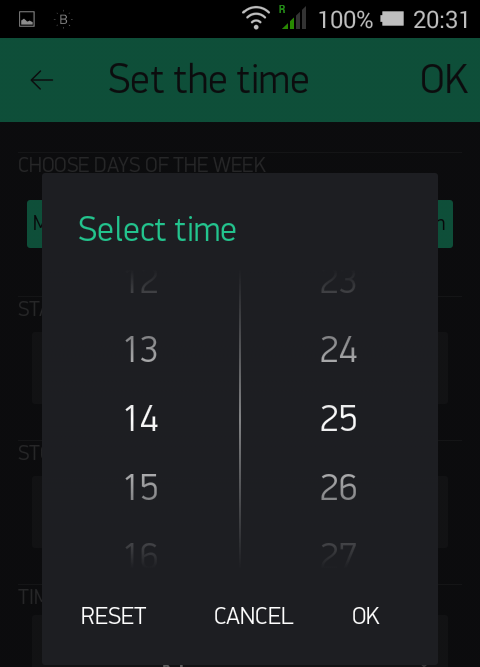
Select the ON and OFF times (all set):

1 Like

Nothing to do with Eventor and personally I’m not a huge fan of the widget.

1 Like

That’s what I;ve been looking for, perfect! Thanks, Costas.

The library hack is covered at TimeInput Widget delivers ALL days selected when no day is selected

Without the hack disabling all the days means events will trigger every day. As long as you have one real day selected you don’t need the hack but for me no days selected means there should be no triggers. You can also disable the triggers by pressing RESET for ON / OFF time without the library hack.

Just read this topic, thanks Costas. It’s strange that you still need to ‘hack’ the library, although obvious bug was reported more than a year ago, solution was found more than a year ago, it makes no sense.

It’s not a bug it’s a feature :slight_smile:
Yes Time Input widget is over a year old now. We pointed out the limitations of the Timer widget and even provided screenshots of scheduling in commercial products. In no time at all Time Input became available.

Why haven’t you been using it :slight_smile:

Maybe because I’ve been using Blynk for almost 2 months now, having only solid hardware background and no programming skills at all? I have gone through agony installing all the tools, libraries, flashers etc, then I faced unfamiliar C code, it was not a simple journey for me at all. So I missed Time input somehow, but I will learn, I promise :slight_smile:

And this feature still looks like a bug to me…

1 Like

@zodiac, I wish I was as confident with playing with AC mains power as you are! I would love to have one of those 8-way power splitters in my home!

Great work! I hope you can find a way to work the timer widget and time input widgets. Both are super powerful but the Time Input widget does take a while to get your head around it.

Just ask the community for help anytime… we’re all huge fans of Blynk (hence why we come here and help) so don’t take our passion of the system like we’re talking down to you :wink:

I also really want to see your final code for this project… as I’m more a code guy than hardware… so I’d be happy to help in that area. :slight_smile:

Well, AC power is very simple, yet it lefts very little space for mistakes, and you’re right about this - there is no try and error method applicable when it comes to AC, you should know exactly what you’re doing. That’s where we hardware guys have some advantages over coders, you can play with code, but not with AC mains. Bad code will not kill you for sure :slight_smile:

In this particular case it’s quite simple - you just have to cut the phase at five places in power strip and connect it to relay board. You can see how it’s done in my first post, if any clarification is needed, I would be happy to help. I’m in contact with Parkel owner (producer of industry grade power strip I’ve used) who happens to have facility in my neighborhood and I will get few latest samples of their market new-comers on Monday to work on, so I will take a detailed pictures of whole process and upload it here. Just do the same on any power strip with not to narrow base and enjoy. I’m also waiting for BME280 I’ve ordered some 15 days ago to come, I’m planing to use it instead of DHT-22 in the future, so my code will be finished then.

As for the code: if you’re using NodeMCU to run 4-way relay board, there is none, Blynk handles it all, just create buttons and assign pins to it (D2, D5, D6 and D7 to avoid power-up chatter). If you’re using 8-way relay board, you have to set pin state if you don’t want your relays to chatter when first on, and you should avoid connecting D3 and D8 to relay board, but that’s all. Of course, if you’re using sensors like me, you will have to add a code and library, but if we are speaking of just basic on/off relay function, Blynk does it all for you. And this is really an incredible way to communicate with MCU; that’s why I fell in love with Blynk. My wife is not convinced yet, but I’m sure that Time input will sort this out. Thanks guys!

3 Likes

Wow, thanks for bringing the Sonoff to my attention. Have just ordered 2 of the basic units.

Much cheaper than the $100 ZWave units I was going to buy.

Will reflash them and program them with the Arduino IDE and use the spare pin on the header to act as a switch input so you can still use the normal switches to switch it on/off (obviously I will connect them to ground/3.3v instead of the AC power :stuck_out_tongue: ) but then do it over wifi.

There is already a button on GPIO0 which you can use for the same purpose. No need to add anything.

But can I wire my existing household light switches to it?

If you have phase and neutral wires in your wall socket, then yes. Otherwise you will have to do what I did, break the power circuit at light spot with Sonoff and keep wall switch always on. There are some tutorials suggesting that you can use ground wire to connect Sonoff if you don’t have neutral at disposal in your wall socket, I find this very dangerous thing to do and I would not recommend this wiring method at all. So check out what’s behind your light switch first.

I’m going to have a live and neutral going to the sonoff input, connecting to the light on the output. Then connect the ground pin on the header used for programming (or 3.3v, haven’t decided) to one side of the wall switch, then the other side to the gpio pin.

If you have live and neutral in your socket, not just switch broken live wires, then just follow Sonoff schematics, you will have no trouble. You can even use it as a parallel switch to existing wall switch and keep wall switch functionality. And again, there is no need to make something that’s already on-board feature - there is a button which sets GPIO0 high when pressed.