Simple home automation project with Blynk, Sonoff and NodeMCU power strips

Hi all,

After discovering Blynk as by far most suitable application for my needs, I’ve started some projects on my own. I live in a rented appartment, so there is not much space to work on house electrics, therefore I had to go with restricted setup and control only basic things, First I have run Blynk server on my Raspberry Pi Zero W, then I reflashed 6 Sonoff TH-10 devices in order to put my main lights under control. I’ve added DHT-22 to four of them, so I have temperature and humidity report from every room as well:

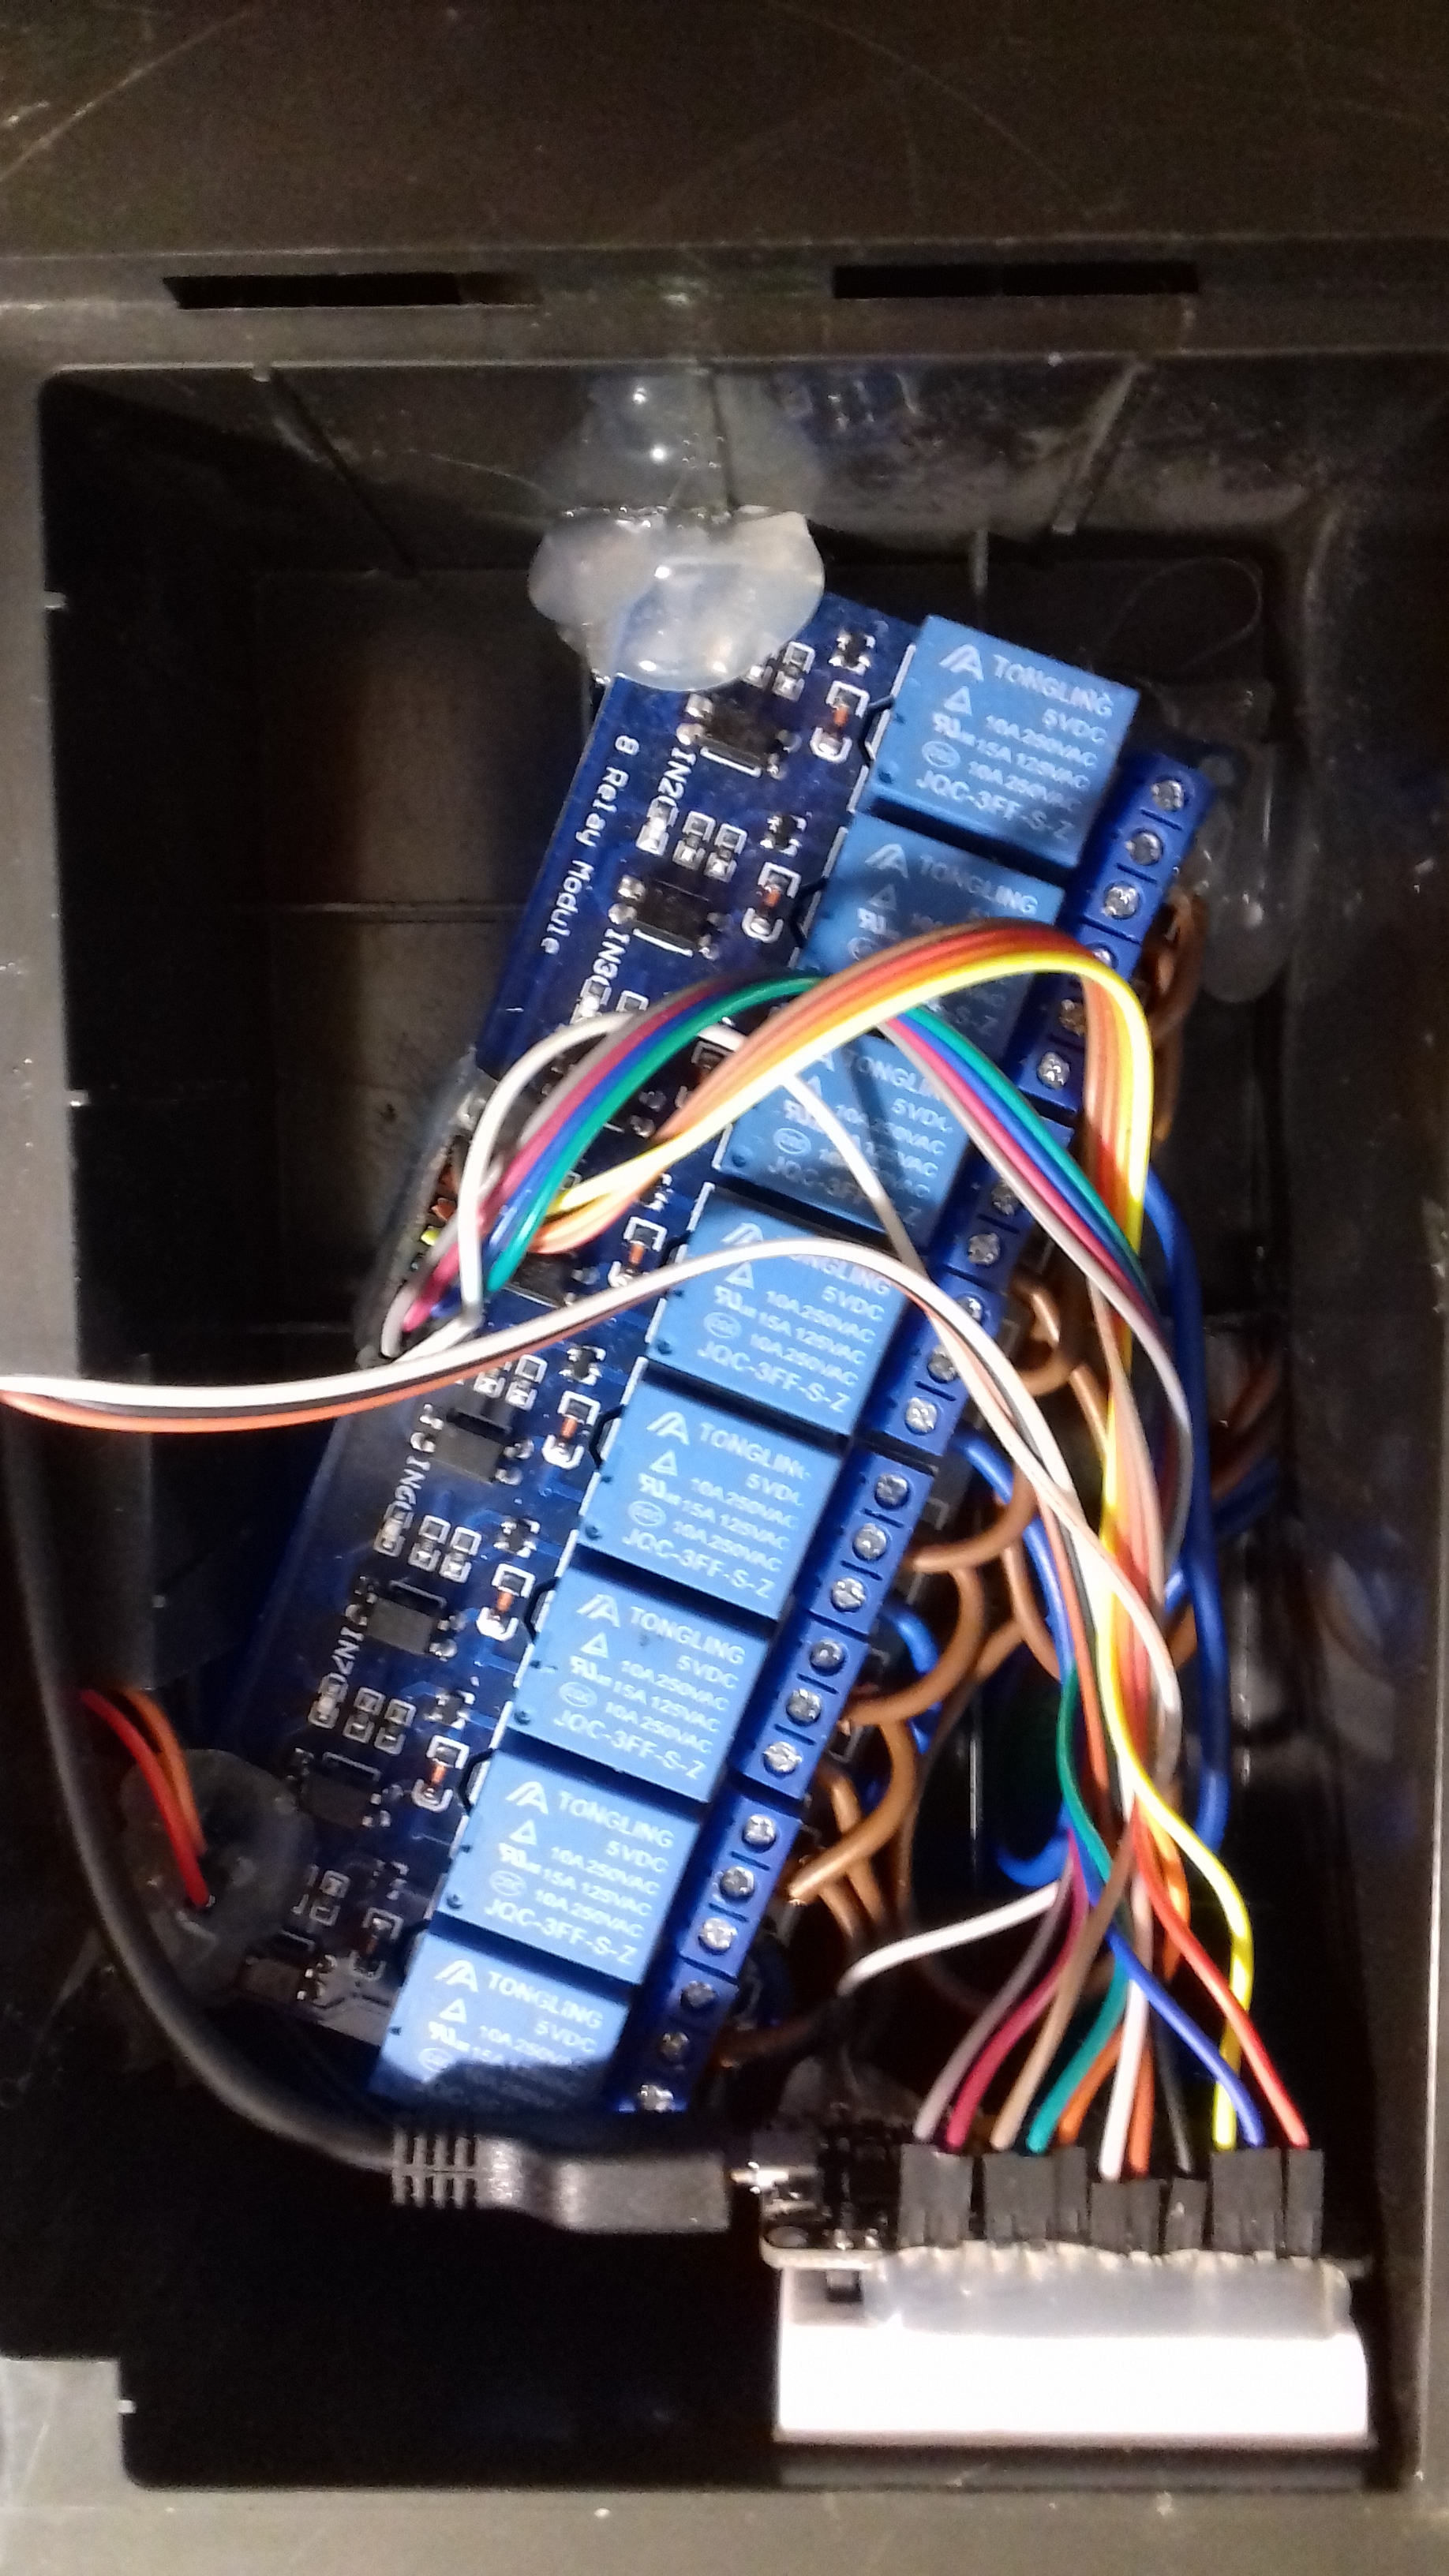
Then I started to work on power stripes. I had old and broken APC BE400 with 8 sockets and plenty of space to experiment. I’ve used my favorite and most loving NodeMCU with 8-way relay and two 5V 1A power supplies in order to run both NodeMCU and relay board without issues, and to enable optocoupler isolation feature (gnd on NodeMCU and relay board are not connected). Of course, I’ve added DHT as well, in the meantime I’ve changed this 11 for much better 22:

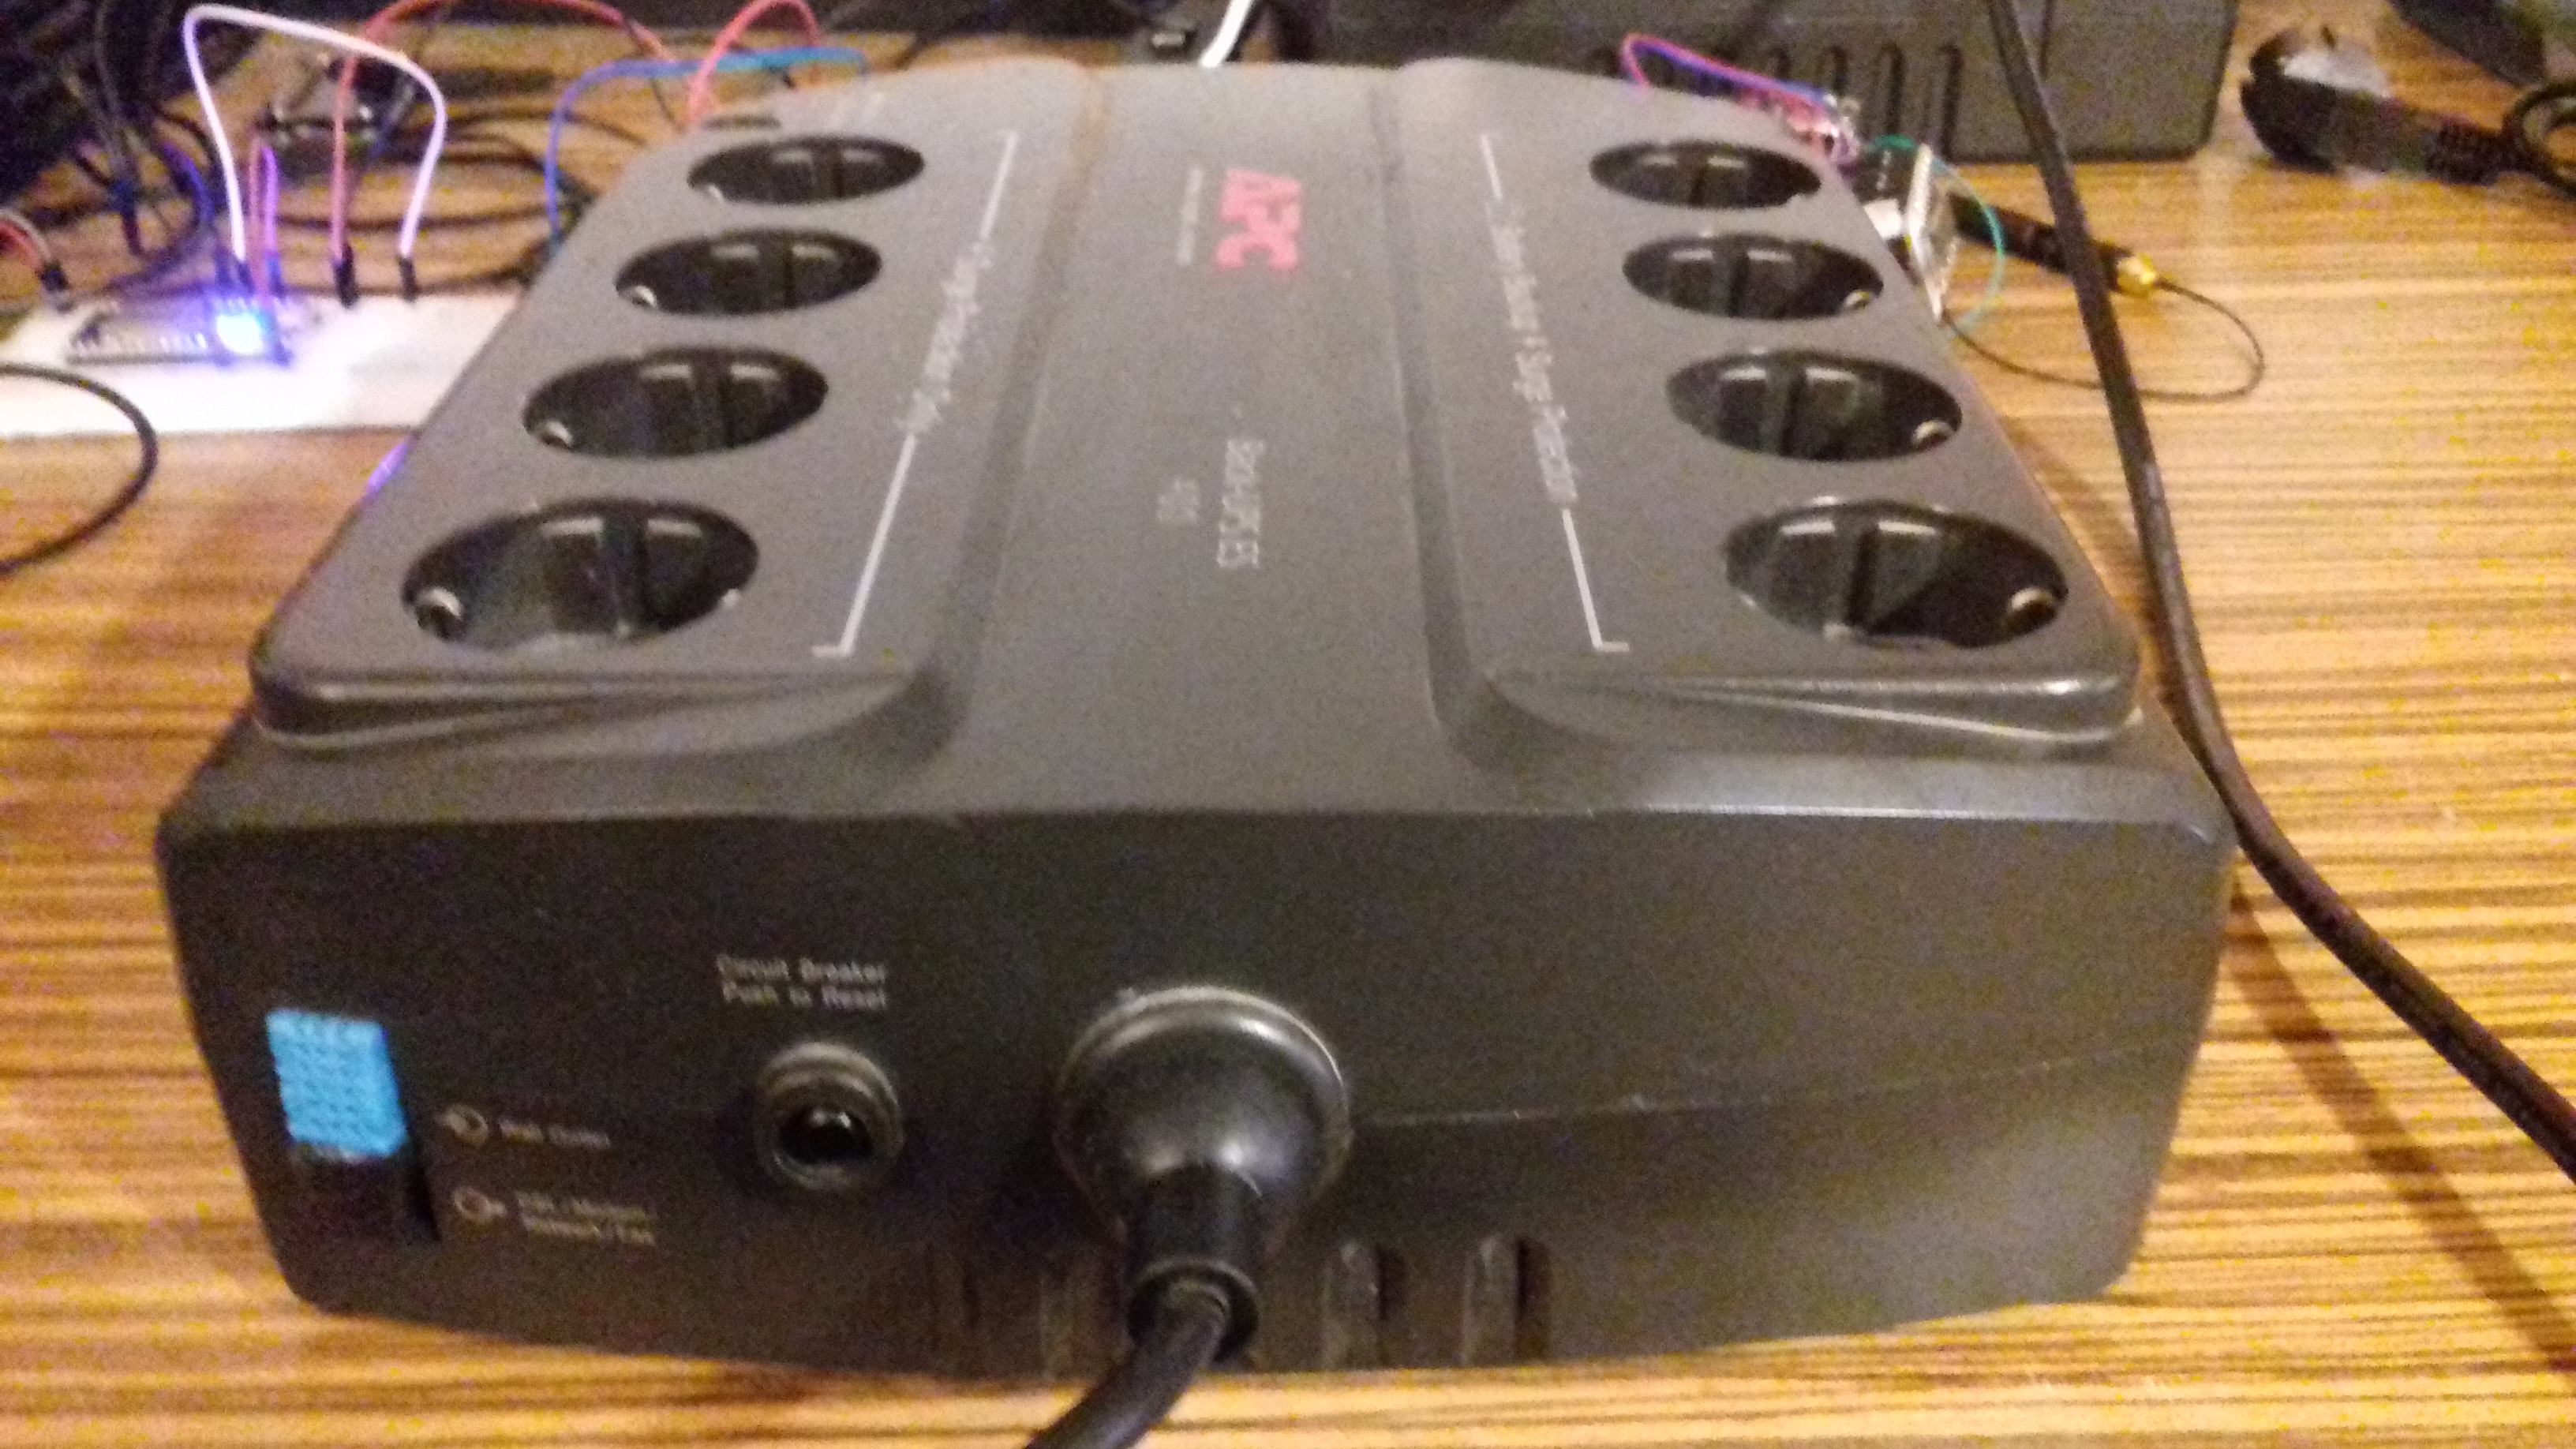
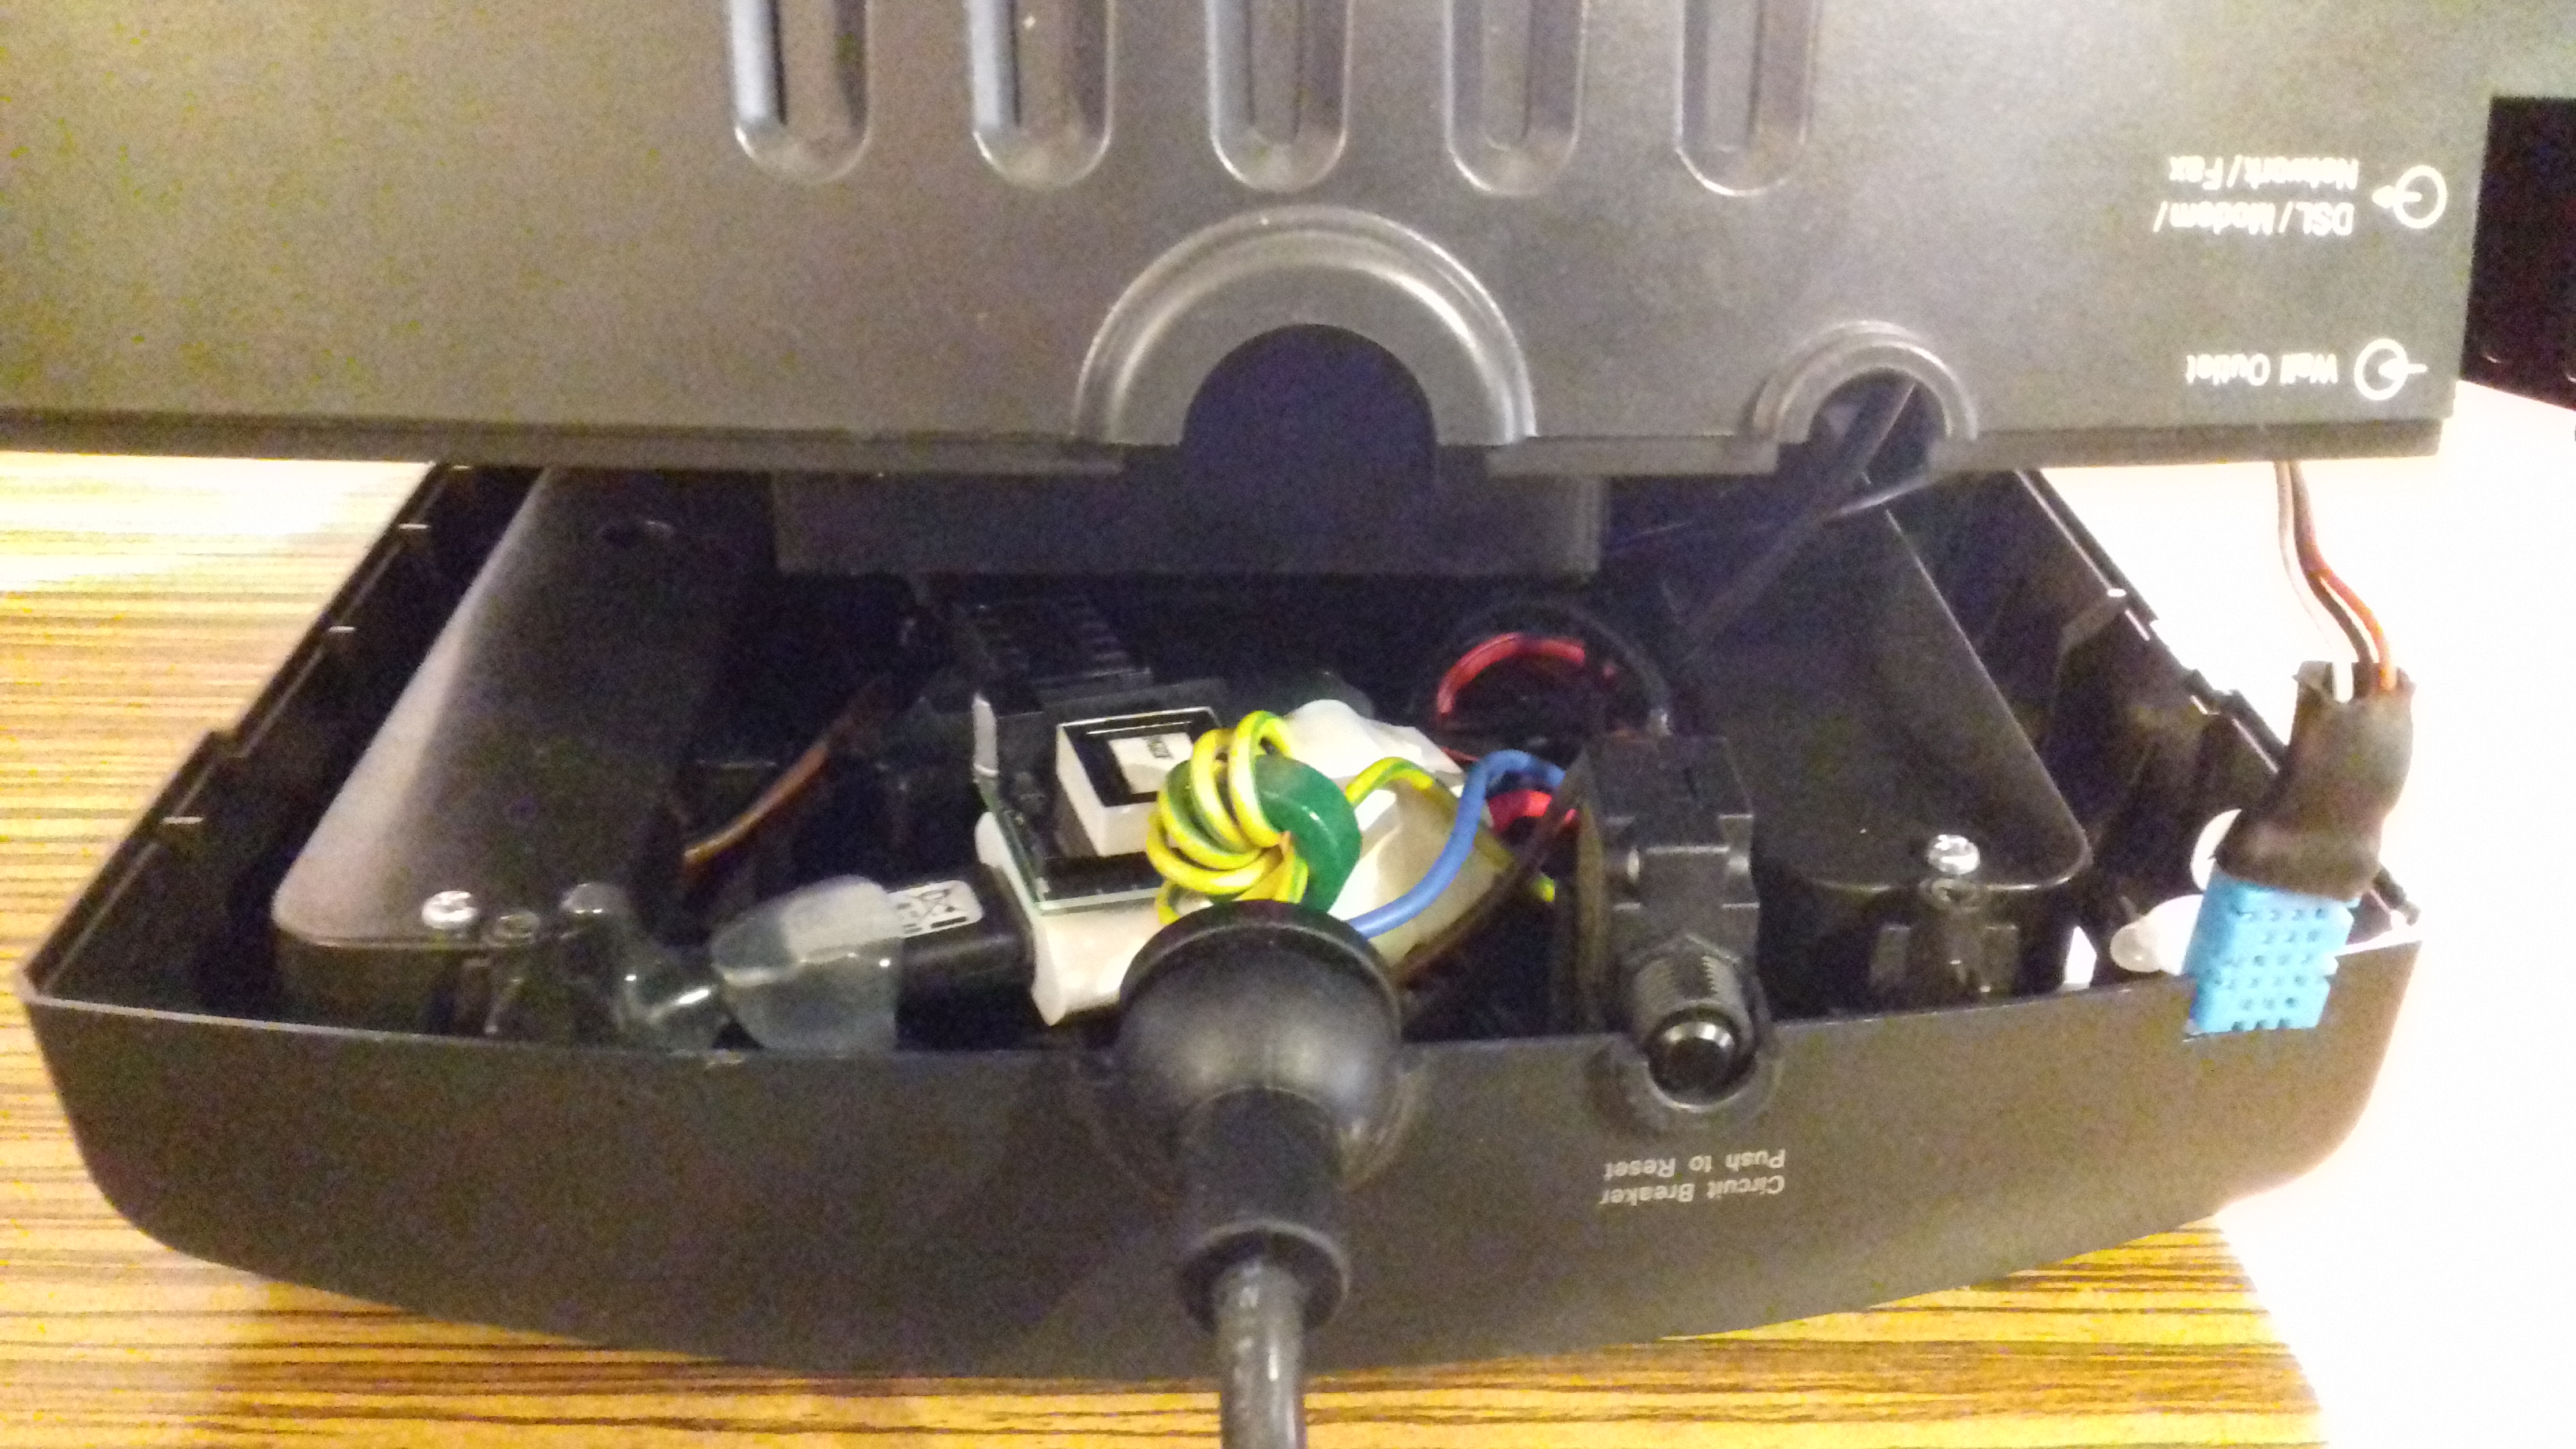
I have put it in my child room and it works without any issues. It runs two lamps, fan and hifi receiver and still has four sockets available for various purposes.

I tried to implement the same solution in some other power strips without success, because I was facing spacing issues all the time. Then I got this beautiful modular industry grade 6 socket power strip, and it was just perfect fit for my next project:

multip-produzni-kablovi-586

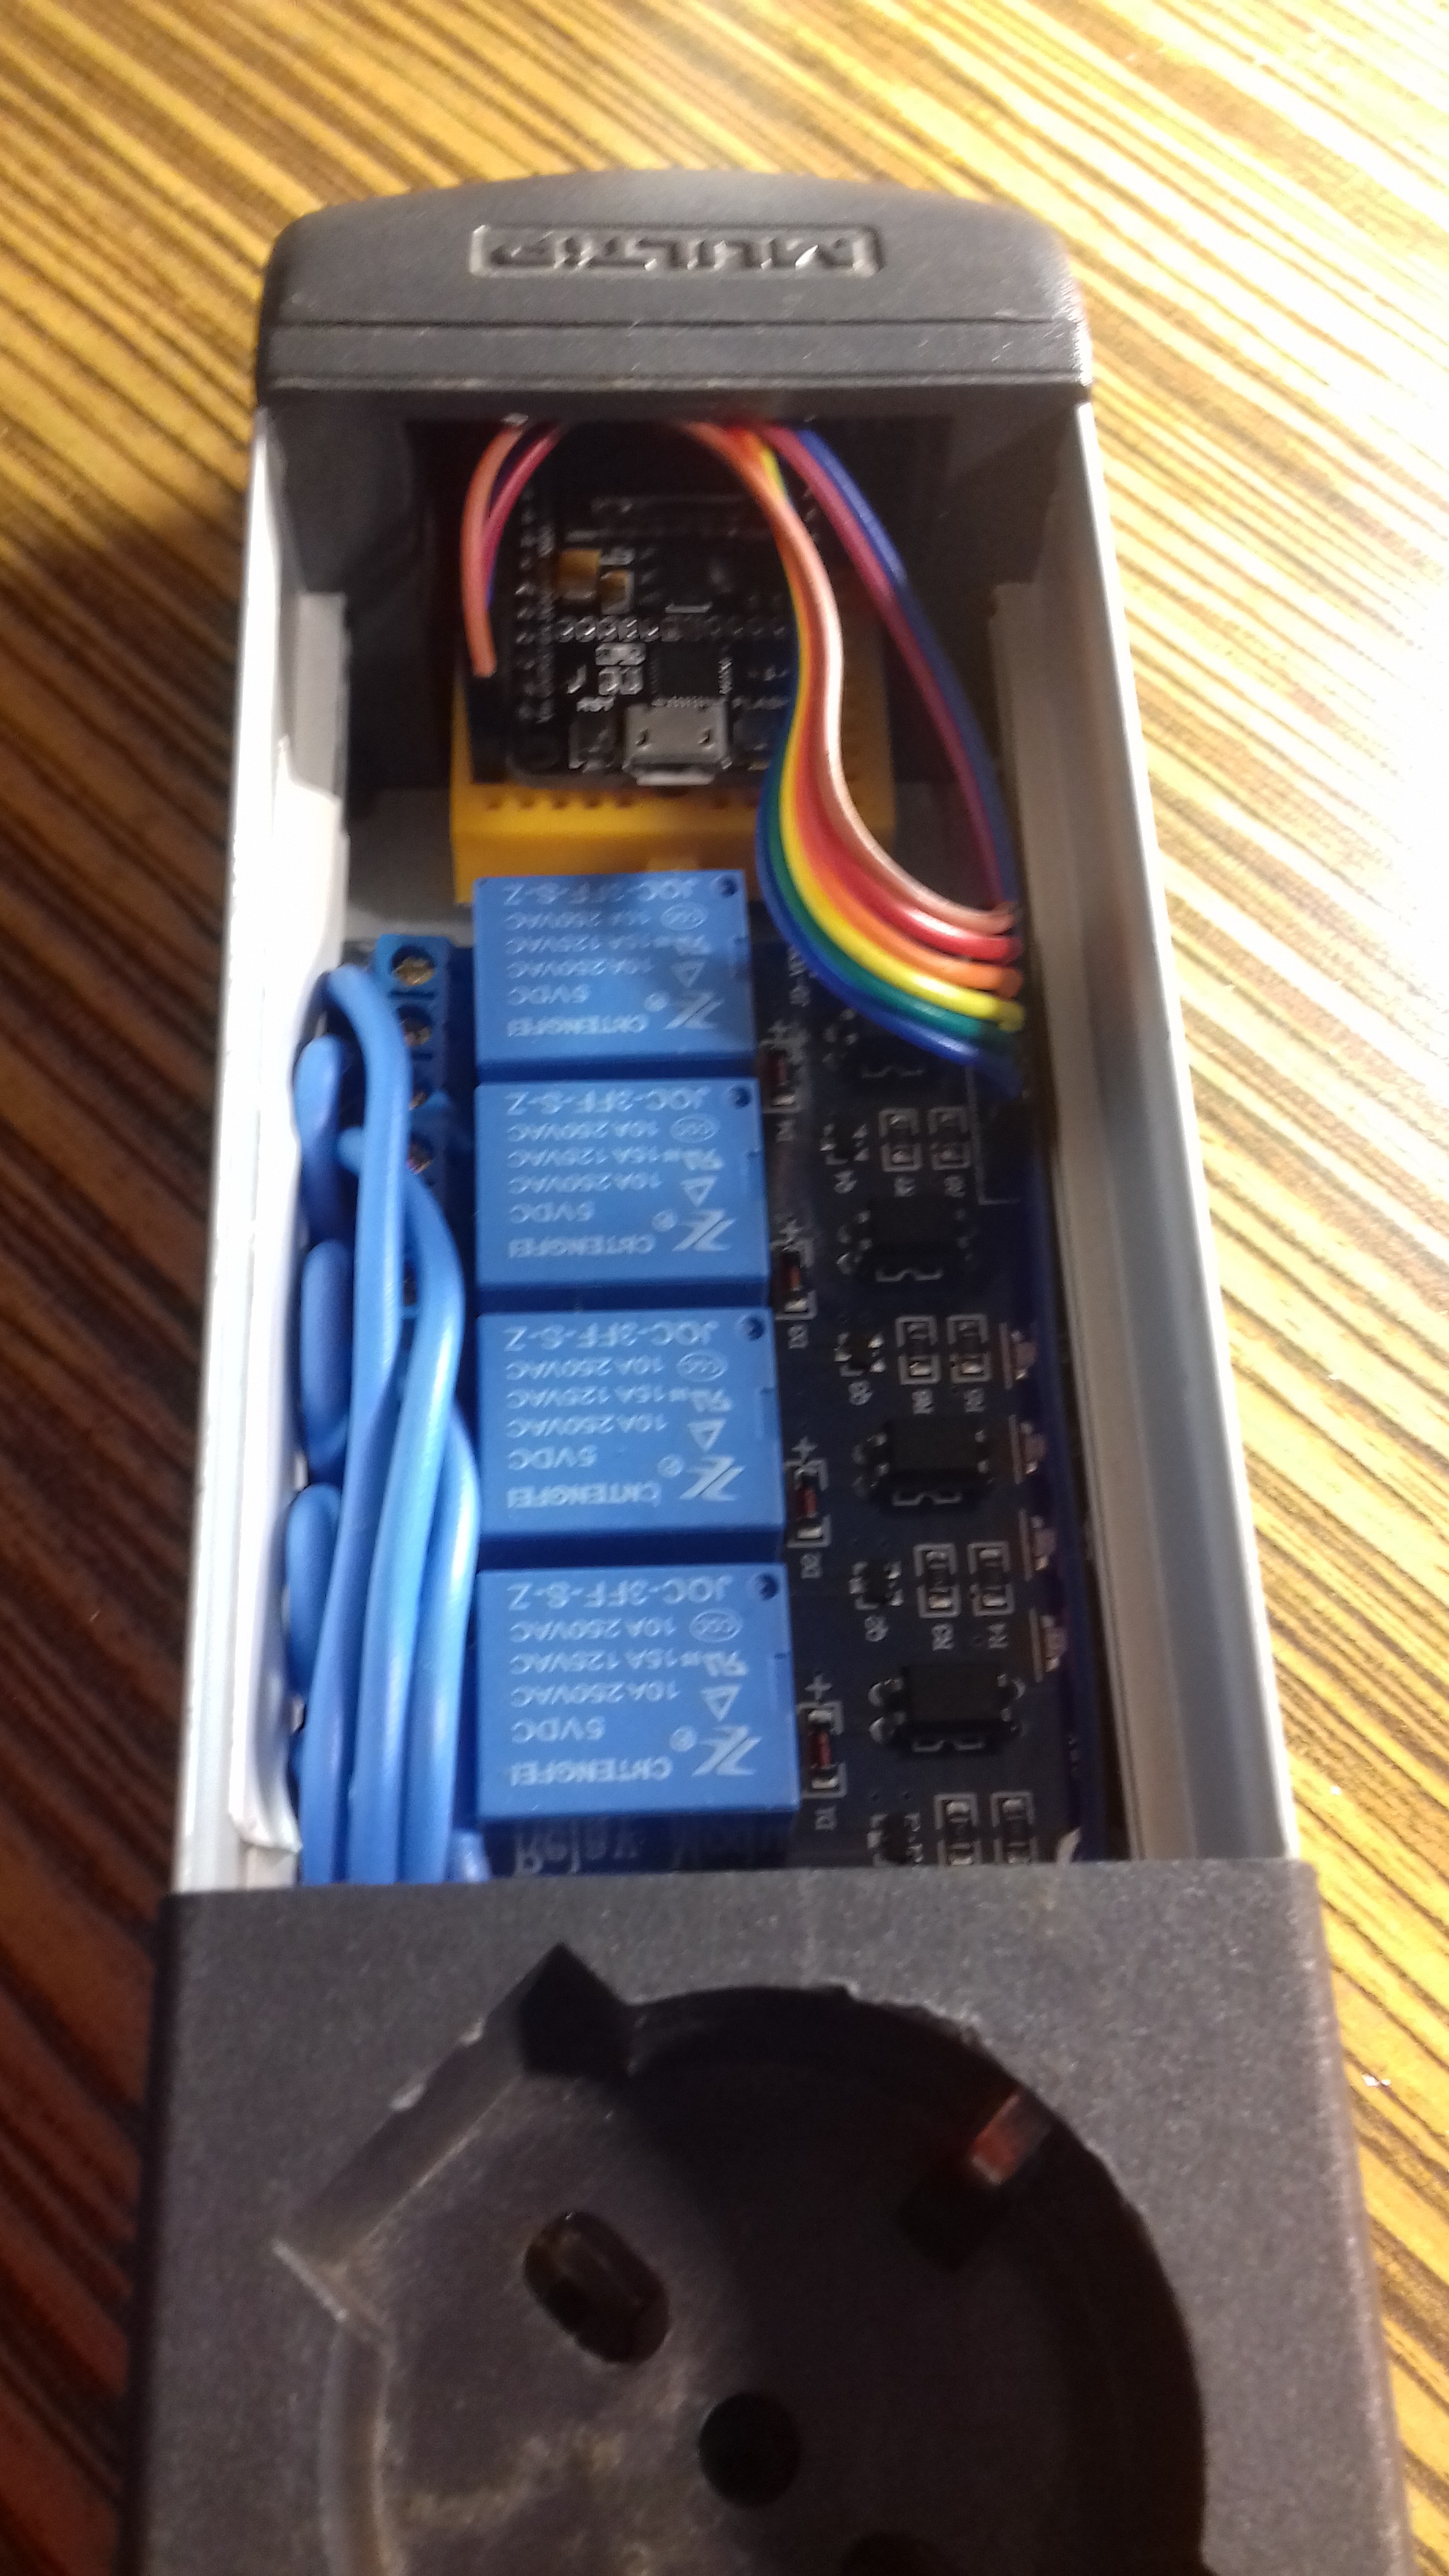
I have used two socket spaces to fit 4-way relay and NodeMCU, and I have put one 1.25A power supply under cable cover, so no optoisolation unfortunately, both devices are running on a single power supply. It’s on my desk now, serving a lamp, glue gun and soldering iron, with one free socket. Short video on finalized product is here:

https://www.youtube.com/watch?v=PoKR6QWPwX0

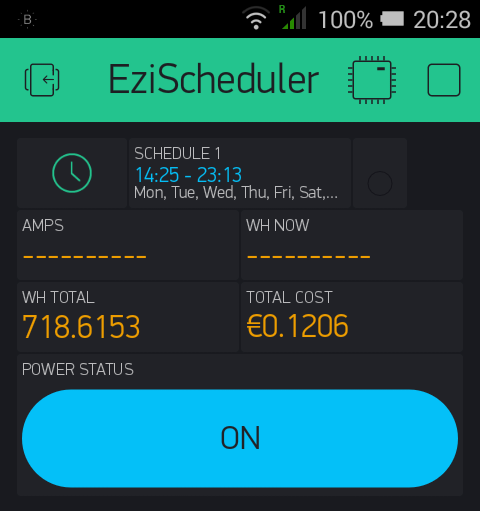
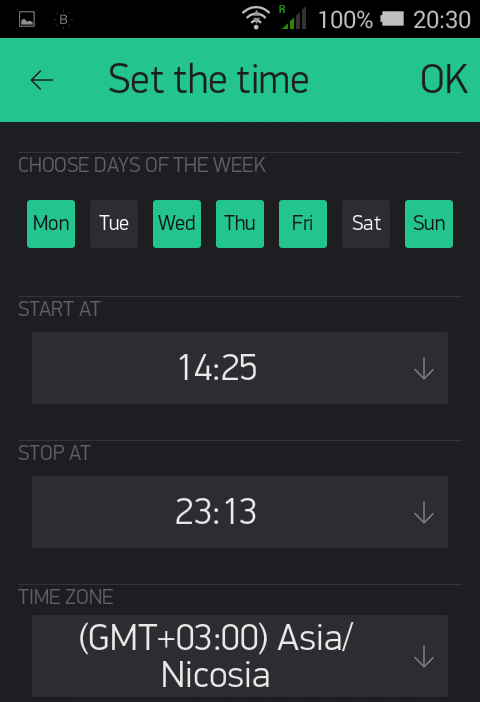
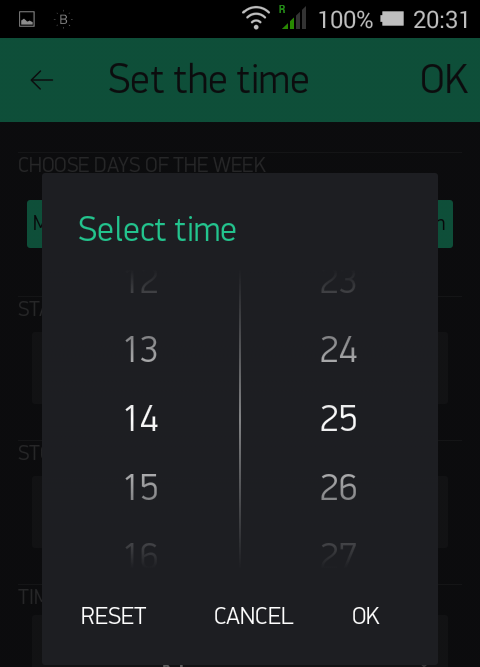
And here’s a screenshot of app, it’s simillar for every room, and rooms are divided with tabs:

After one month use, I can say that I’m quite happy with this setup. I have learned a lot about relays and their behaviour, and two most important things about them are: don’t be fooled by the specs telling you that board draws 20-25mA per closed relay, it’s more like you will be fine if you triple that value; the other one is that you’re going to need optocoupling isolation sometime, especially if you use inductive sources. It’s highly recommended to use it anyway, so you should go with two separate power supplies, first one for the mcu board, second one for relay board, without connecting gnd between boards. Next thing I’m going to build is socket with 40A SSR, and one for 3-phase source graded 80A. This would be ultimate solution to control heating devices and oven.

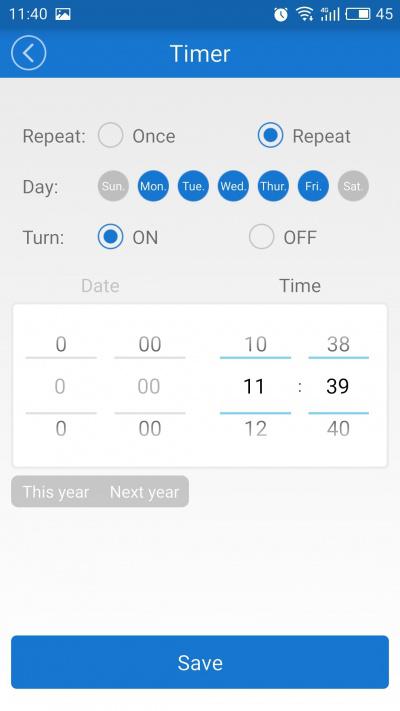
However, as much as I’m fond of Blynk, I find Blynk timer function pretty annoying and unusable. There is no way to set timer on socket in a simple way, especially if somebody uses copy of your project as it’s available for the author only.

I have searched community, because some other users also noticed that timer function should be associated with on/off button for most of the projects, but I didn’t find any suitable solution between answers. Blynk guys should really take care on this, as all other solutions has this as embedded feature. For example, using Blynk instead of EWLink that comes with Sonoff means that you will practically lose timer capabilities. You can use timer and eventor, but it looks really complicated and it’s not suitable for other users, my wife and my kids, for example. Button timer association would be the right solution.

5 Likes

When I first started looking at home automation I decided to go down the MQTT route, using Node-Red running on a Raspberry Pi server.
This allows you to easily control lots of devices and make changes to the way that each device works without having to re-flash the device.
Peter Scargill developed a great timer (called Big Timer) for Node-Red and I use that for all of my home automation timer needs.
I then added Blynk to Node-Red to give me the app control, but also have the Node-Red web HTML dashboard as a fallback in case the Blynk webserver happens to be down (which happens much less nowadays).

I’ve since added OTA updates to my devices, so the re-flashing of devices is much simpler than it was, and I think more has been done recently within Blynk to allow timer control, but if I was starting again I think I’d go down the same route.

I’m currently implementing a heating/air conditioning controller that has internal and external temperature and humidity sensors. The external sensors have developed into a weather station and I’ll the use wind speed data to close external sun blinds via 433Mhz wireless commands if it gets too windy, or deploy the blinds to keep the internal temperature down if it’s sunny and getting to warm inside. The primary control point is a Nextion touch screen, but I’ll use Blynk to give me easy remote access so I can turn the heating/aircon on when I’m on my way home, or operate devices when the Nextion panel isn’t within easy reach.
Using sensor data for multiple purposes is really easy with MQTT, and I’m not sure that I’d achieve the same level of integration if I was just using Blynk on its own - especially as I use the iOS version and we’re still waiting for it to catch up with some of the Android features.

I don’t know if you could run mosquito MQTT and Node-Red on the same Raspberry Pi that you use for your local Blynk server. Maybe someone could share their experience of doing that.

Pete.

Hi Pete,

Thanks for your answer. However, your route is the one I’m trying to avoid, I like Blynk because it’s dirt simple to use, and because of high level of integration with esp8266 based boards. Timer function is not thinked over enough, and it’s not dealing with it’s primary task - set start and stop time with days of a week in a simple way for every button you have. Even being separated from button function is bad enough, and not being able to control it simply from the other widget which is called timer just makes no any sense. I don’t look at timer widget as a finished product, as many others in Blynk are.

Blynk’s scheduling of events at specified times and days works just fine.

Hi Costas,

Happy to hear from you! And many thanks for your answer, but I’m not completely sure what you are thinking off. The closest I can come to it is to use eventor+timer as an author, it’s complicated and I don’t need it. What I do need is to put simple timer on a socket, ie start/stop time per week day that can be edited by all users and not only in author editing mode, I saw it working hundreds of times in various applications, and I can’t set similar one in Blynk. This one is perfect example, it does what it’s meant for, it’s associated with on/off switch button and available for all users all the time:

Is there a way to do this in Blynk?

Blynk is the best so of course it can do that.
You use Time Input widget and a bit of code as shown at RF 433 Mhz on virtual pin doesn't want to send (with scheduling) - #5 by Costas

There is also a 1 to 2 character library hack that you should implement so no days selected actually does what you would expect it to do.

Thank you Costas, I will try your code. Can you please post some screenshots from the app, preferably from user perspective. I’m still struggling thinking of my kids trying to set eventor value on V1, not to mention that I’m only one in control of the project, they have copies, not cloned project. Just take a look on a simple and user friendly timer from EWElink in my previous post, I think it’s the by far the best part of their application. Associated with on/off button, same look and feel like setting alarm on your mobile. And there is a wife factor included as well. While we were using sonoff basic setup she was able to use timer on dish and clothes washing machines. I’m not able to set Blynk to do the same for her, so those two places are still controled by basic sonoff sw.

Just press the widget whilst the project is running (shown as SCHEDULE 1 in this first screenshot)

Select the days of the week you want the scheduler to operate on:

Select the ON and OFF times (all set):

1 Like

Nothing to do with Eventor and personally I’m not a huge fan of the widget.

1 Like

That’s what I;ve been looking for, perfect! Thanks, Costas.

The library hack is covered at TimeInput Widget delivers ALL days selected when no day is selected

Without the hack disabling all the days means events will trigger every day. As long as you have one real day selected you don’t need the hack but for me no days selected means there should be no triggers. You can also disable the triggers by pressing RESET for ON / OFF time without the library hack.

Just read this topic, thanks Costas. It’s strange that you still need to ‘hack’ the library, although obvious bug was reported more than a year ago, solution was found more than a year ago, it makes no sense.

It’s not a bug it’s a feature :slight_smile:
Yes Time Input widget is over a year old now. We pointed out the limitations of the Timer widget and even provided screenshots of scheduling in commercial products. In no time at all Time Input became available.

Why haven’t you been using it :slight_smile:

Maybe because I’ve been using Blynk for almost 2 months now, having only solid hardware background and no programming skills at all? I have gone through agony installing all the tools, libraries, flashers etc, then I faced unfamiliar C code, it was not a simple journey for me at all. So I missed Time input somehow, but I will learn, I promise :slight_smile:

And this feature still looks like a bug to me…

1 Like

@zodiac, I wish I was as confident with playing with AC mains power as you are! I would love to have one of those 8-way power splitters in my home!

Great work! I hope you can find a way to work the timer widget and time input widgets. Both are super powerful but the Time Input widget does take a while to get your head around it.

Just ask the community for help anytime… we’re all huge fans of Blynk (hence why we come here and help) so don’t take our passion of the system like we’re talking down to you :wink:

I also really want to see your final code for this project… as I’m more a code guy than hardware… so I’d be happy to help in that area. :slight_smile:

Well, AC power is very simple, yet it lefts very little space for mistakes, and you’re right about this - there is no try and error method applicable when it comes to AC, you should know exactly what you’re doing. That’s where we hardware guys have some advantages over coders, you can play with code, but not with AC mains. Bad code will not kill you for sure :slight_smile:

In this particular case it’s quite simple - you just have to cut the phase at five places in power strip and connect it to relay board. You can see how it’s done in my first post, if any clarification is needed, I would be happy to help. I’m in contact with Parkel owner (producer of industry grade power strip I’ve used) who happens to have facility in my neighborhood and I will get few latest samples of their market new-comers on Monday to work on, so I will take a detailed pictures of whole process and upload it here. Just do the same on any power strip with not to narrow base and enjoy. I’m also waiting for BME280 I’ve ordered some 15 days ago to come, I’m planing to use it instead of DHT-22 in the future, so my code will be finished then.

As for the code: if you’re using NodeMCU to run 4-way relay board, there is none, Blynk handles it all, just create buttons and assign pins to it (D2, D5, D6 and D7 to avoid power-up chatter). If you’re using 8-way relay board, you have to set pin state if you don’t want your relays to chatter when first on, and you should avoid connecting D3 and D8 to relay board, but that’s all. Of course, if you’re using sensors like me, you will have to add a code and library, but if we are speaking of just basic on/off relay function, Blynk does it all for you. And this is really an incredible way to communicate with MCU; that’s why I fell in love with Blynk. My wife is not convinced yet, but I’m sure that Time input will sort this out. Thanks guys!

3 Likes

Wow, thanks for bringing the Sonoff to my attention. Have just ordered 2 of the basic units.

Much cheaper than the $100 ZWave units I was going to buy.

Will reflash them and program them with the Arduino IDE and use the spare pin on the header to act as a switch input so you can still use the normal switches to switch it on/off (obviously I will connect them to ground/3.3v instead of the AC power :stuck_out_tongue: ) but then do it over wifi.

There is already a button on GPIO0 which you can use for the same purpose. No need to add anything.

But can I wire my existing household light switches to it?

If you have phase and neutral wires in your wall socket, then yes. Otherwise you will have to do what I did, break the power circuit at light spot with Sonoff and keep wall switch always on. There are some tutorials suggesting that you can use ground wire to connect Sonoff if you don’t have neutral at disposal in your wall socket, I find this very dangerous thing to do and I would not recommend this wiring method at all. So check out what’s behind your light switch first.