Very god catch @Costas !!! By the way, how are you Sir?
Thanks I just came to exact same conclusion 

Signed up just to say thanks! This works perfectly!
I have modified it slightly,
- To run the update when I write a specific value to a virtual pin,
- Static URL for the update file since we only update when necessary.
- Turn on a LED (on another virtual pin) that confirms that the update started, this resets itself on boot.
Requirements,
- Add a button widget for virtual pin 25 and set on value to 100 - Used to initiate the update
- Add a LED widget for virtual pin 30 - Used to show confirmation that the update started
This would not be possible without OP’s code so all credits go to OP.
Posting the code below for anyone who needs something similar.
#define BLYNK_PRINT Serial

#include <ESP8266WiFi.h>
#include <BlynkSimpleEsp8266.h>
#include <ESP8266HTTPClient.h>
#include <ESP8266httpUpdate.h>

char auth[] = "xxxxxxxxxxxxxxx";

char ssid[] = "xxxxxxxxxxxxxxx";
char pass[] = "xxxxxxxxxxxxxxx";

// OTA URL
const char* fwImageURL = "xxxxxxxxxxxxxxx";

// Update when virtual pin 25's value is set to 100 - just add a button widget and configure the on value of virtual pin 25 to 100.
BLYNK_WRITE(V25)
{
	int pinValue = param.asInt();

	if (pinValue == 100) {
		InstallUpdates();
	}

}

void InstallUpdates() {
	Serial.println( "OTA Update Request Received" );
	Serial.print( "Firmware URL: " );
	Serial.println( fwImageURL );

	HTTPClient httpClient;
	httpClient.begin( fwImageURL );
	int httpCode = httpClient.GET();
	if( httpCode == 200 ) {

		Serial.println( "Update file found, starting update" );
		// Set virtual pin to 1023 so the LED widget in the Blynk app lights up to show that the upgrade started
		Blynk.virtualWrite(V30, 1023);

		t_httpUpdate_return ret = ESPhttpUpdate.update( fwImageURL );

		switch(ret) {
			case HTTP_UPDATE_FAILED:
				Serial.printf("HTTP_UPDATE_FAILD Error (%d): %s", ESPhttpUpdate.getLastError(), ESPhttpUpdate.getLastErrorString().c_str());
				break;
			}
		}
	else {
		Serial.print( "Firmware check failed, got HTTP response code " );
		Serial.println( httpCode );
	}
	httpClient.end();
}

void setup()
{
	Serial.begin(9600);
	Blynk.begin(auth, ssid, pass);

	// Reset virtual pin 30 to 0 so update LED turns off on boot
	Blynk.virtualWrite(V30, 0);
}

void loop()
{
	Blynk.run();
}
2 Likes
@langtupt from your screenshot I see that the OTA URL comment starts on line 3, so I can only assume that you are missing a few lines of code before it ie library includes, wifi info etc. Please copy/paste the code as is and modify the auth code, wifi info and OTA URL.
If it doesnt work please paste your full code.
Dear @samad909,
The my code below, can you help me check.
Thank you very much.
#define BLYNK_PRINT Serial
#include <ESP8266WiFi.h>
#include <BlynkSimpleEsp8266.h>
#include <ESP8266HTTPClient.h>
#include <ESP8266httpUpdate.h>
char auth[] = "be03315a10f14e23a386ca85faf99c138c";
char ssid[] = "WIFI_DEM";
char pass[] = "";
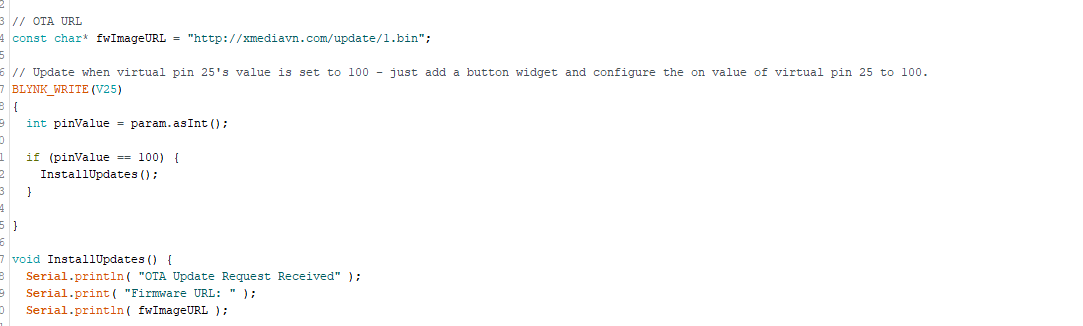
// OTA URL
const char* fwImageURL = "http://xmediavn.com/update/1.bin";
// Update when virtual pin 25's value is set to 100 - just add a button widget and configure the on value of virtual pin 25 to 100.
BLYNK_WRITE(V25)
{
int pinValue = param.asInt();
if (pinValue == 100) {
InstallUpdates();
}
}
void InstallUpdates() {
Serial.println( "OTA Update Request Received" );
Serial.print( "Firmware URL: " );
Serial.println( fwImageURL );
HTTPClient httpClient;
httpClient.begin( fwImageURL );
int httpCode = httpClient.GET();
if( httpCode == 200 ) {
Serial.println( "Update file found, starting update" );
// Set virtual pin to 1023 so the LED widget in the Blynk app lights up to show that the upgrade started
Blynk.virtualWrite(V30, 1023);
t_httpUpdate_return ret = ESPhttpUpdate.update( fwImageURL );
switch(ret) {
case HTTP_UPDATE_FAILED:
Serial.printf("HTTP_UPDATE_FAILD Error (%d): %s", ESPhttpUpdate.getLastError(), ESPhttpUpdate.getLastErrorString().c_str());
break;
}
}
else {
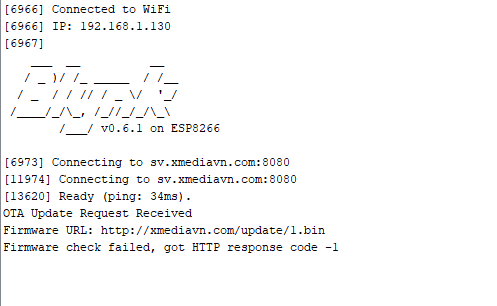
Serial.print( "Firmware check failed, got HTTP response code " );
Serial.println( httpCode );
}
httpClient.end();
}
void setup()
{
Serial.begin(115200);
Blynk.begin(auth, ssid, pass);
// Reset virtual pin 30 to 0 so update LED turns off on boot
Blynk.virtualWrite(V30, 0);
}
void loop()
{
Blynk.run();
}@langtupt Please edit your post and remove the auth code. I have checked your code and it seems alright so I am not sure why it doesnt work for you. I am using a NodeMCU ESP-12 chip, what are you using?
Yes, i have edit auth code, i using Wemos D1 Mini.
@langtupt I am not sure what is wrong, can you check if all your libraries are updated (inside Arduino IDE)?
A few mins back I checked your OTA URL and the web server was throwing 500 errors, can you try hosting the bin file somewhere else (maybe sign up for a free hosting to test)?
@langtupt HTTP Return Code of -1 is defined as a connection refused error in the ESP8266HTTPClient.h library - https://github.com/esp8266/Arduino/blob/master/libraries/ESP8266HTTPClient/src/ESP8266HTTPClient.h
#define HTTPC_ERROR_CONNECTION_REFUSED (-1)
This means that the ESP8266 is unable to reach that server from its location, try hosting the file elsewhere and make sure that you can access the URL from a PC that is on the same network as the ESP8266.
1 Like
Hi mikekgr
You help me last time with the OTA and it work fine at my ESP8266 and ESP32 on WiFi  Thanks
I like to upgraded my ESP32 WiFi to a ESP32 WiFi + SIM800 modem at hardware port 16/17 so the unit will work when its on a WiFi, it know or use SIM800 to use the GSM net. Or just SIM800…
The routines for interfacing the SIM800 is easy and run perfect but make the combination with your routine make my hear gray I fight with WiFiClient client; right now off and on, but that’s maybe not the only conflicts, can you please again help me out here ? Thanks in advance…
This is the working code fon SIM800 …
[Unformatted code removed by moderator]
use backticks else your sketch will be deleted ```
1 Like
And backticks is ?
Pete.
1 Like
Sorry, Preben
you replied, but didn’t add backticks !!
1 Like
Dear friend,
I have zero experiences in SIM800 so I can’t help you I am afraid…
Best Regards,
Mike Kranidis