Offline Script Before Edgent Running

Hello guys !
I’m finally committing to migrate all my projects to the new blynk 2.0. I’m very sad moving away from my local servers as they have been up and running on tiny NanoPis for over 5 years now with not a single hiccup. (the one i use at home running blynkserver and many other services has over 2 years of uptime).

Hopefully one of you can help me with this new venture.
I’m trying to side load some very simple scripts that can run wether or not the device connects to blynk 2.0 server or even has an active wifi connection.
I’m using blynk.edgent and i can’t figure out how make a physical button trigger a function without being connected to blynk’s server.

Because of the constant power and internet outages here my devices can’t depend on an active internet connection or even a wifi connection as they mostly monitor power systems. they need up and ready kick back power when there’s an outtage.

I’ve look in the community without any luck I’ve looked into Connection Management, but haven’t found the solution yet.

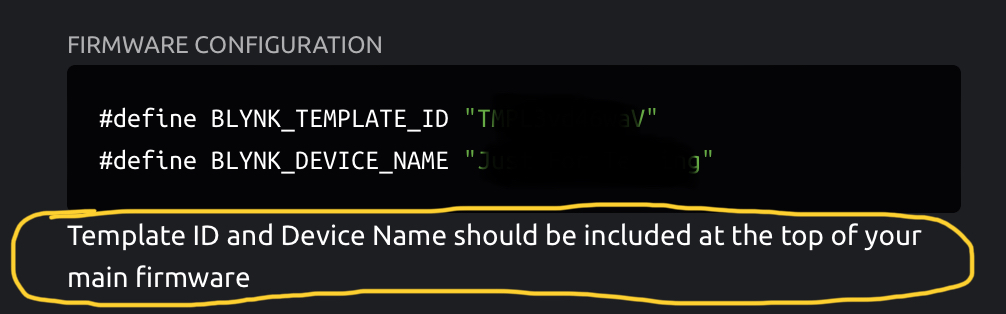
#define BLYNK_DEVICE_NAME "”
#define BLYNK_FIRMWARE_VERSION “V2.01b”
#define BLYNK_PRINT Serial
//#define BLYNK_DEBUG
#define APP_DEBUG

#include <ezButton.h>

const int StartSwitch = D7; // SWITCH CONTACT
const int RunRelay = D1; // GENSET ON/RUN
const int CrankRelay = D2; // GENSET START
const int AcRelay = D5; // AC ATS Relay

ezButton toggleSwitch1(StartSwitch);
int Relay1State = HIGH;
int Relay3State = HIGH;

#define USE_WEMOS_D1_MINI
#include “BlynkEdgent.h”
BlynkTimer timer;

void GenSetStart(){
timer.setTimeout(100L, {
digitalWrite(AcRelay, HIGH);
});

timer.setTimeout(3000L, {
digitalWrite(RunRelay, HIGH);
Relay1State = !Relay1State;
Serial.println (digitalRead (RunRelay), DEC);
Serial.println(“AC ON - SUCCESSFUL START”);
});

}

void GenSetStop(){
timer.setTimeout(5000L, {
digitalWrite(AcRelay, HIGH);
Serial.println(“AC OFF - 15s COOLING DOWN”);
Serial.println(“RELAY RELEASED”);
});

}

void setup()
{
Serial.begin(115200);
pinMode(RunRelay, OUTPUT);
pinMode(CrankRelay, OUTPUT);
pinMode(AcRelay, OUTPUT);

digitalWrite(RunRelay, LOW);
digitalWrite(CrankRelay, LOW);
digitalWrite(AcRelay, LOW);

toggleSwitch1.setDebounceTime(3000);
delay(100);
BlynkEdgent.begin();
}

void loop() {
timer.run();
toggleSwitch1.loop();

if (toggleSwitch1.isPressed()) {
Serial.println("----------------Button is pressed!");
GenSetStart();
Relay1State = !Relay1State;
}
if (toggleSwitch1.isReleased()){
Serial.println("----------------The button is released");
GenSetStop();
}
BlynkEdgent.run();
}
1 Like

Why have you chosen to use Edgent?
What Edgent features and functionality does your project require?

Why aren’t you simply using your old sketches and adding the Template ID information and making any other necessary changes then re-compiling using the 1.x.x library?

Pete.

I’m choosing Edgent for the dynamic provisioning I intend on having multiple devices like that in different locations, setting up is easier.
I’m not using the old sketches simply because i want to once and for all move along with blynk.

Is it a possibility, i’ve actually never done it with the 1.x.x library as I was using a local server.
Thank you for your input.

You will need to put your switching part of the code inside ISR. This way your switches will continue to function even though there is no router connected or internet connection.

Search for ESP8266 ITimer in search bar. You will find what you are looking for.

1 Like

THANK YOU !
What does ISR stand for ?
This seems to be exactly what I need. I’m currently going through all the documentation trying to grasp how it works.

Interrupt Service Routine.

1 Like

Edgent is a complex example sketch which provides out of the box demonstrations of dynamic provisioning and Blynk.Air OTA.
Both are valuable and powerful features, but I can guarantee that hard-coding the credentials and re-flashing the code to each device as you deploy them is going to be much easier, unless you’re planning on making a product that isn’t just for personal use.

You seem to be saying that you think Edgent = Blynk IoT and that anything else = Blynk Legacy. This is far from the case, it’s just that Edgent has introduced some new available features to the IoT product, but you aren’t obliged to use them.

Also, I’m not convinced that your description of your problem/requirement is actually accurate.
You may initially want to ensure that the physical buttons on your boards work if a Blynk connection can’t be established at startup, but I’m guessing that you’ll also want your boards to keep on running if the connection to the internet/Blynk cloud server is dropped at some point?
I’d also expect that you’d want your devices to re-connect when the cloud server connection is available again and begin working in ‘smart’ mode again?

Pete.

After looking up ESP8266 ITimer I believe I found how to set this up correctly. I spent a good while reading about ISR and Arduino Timers. Going to try it out and will return with an updated sketch once completed.

I found this thread which seems to be exactly what i need to do:
Mission-Critical functions where Blynk really serves simply as a GUI.
That is how I have been using blynk for the past years; mostly for charts and data logging and device parameters setup.

With the new Blynk Pro plans I am thinking of manufacturing devices that eventually I can sell to customers something that wasn’t allowed to do before per Blynk’s regulations. So to answer your question:

That’s the plan.

That is exactly what I want to do.
Again thank you.

Then ISR is your best friend.

But there many things that you need to keep in mind while using ISR.

Like
Keeping it short is possible.
There should be no serial.print inside ISR

If you have large code inside ISR which takes too much time then your board will crash.

1 Like

So I figured it out. Of course with the help of the community.
The idea of the ISR sent me in the right direction but very much complicated. Instead, I used the Ticker which is not implemented in the Blynk library. My very few functions run independently and simultaneously as Blynk without any interferences.

Here’s a exemple of the script if this can be useful for anyone here:

// D1 = Generator ON Key V16
// D2 = Generator Crank Key
// V25 - Reset ESP
// V16 - Virtual Start Key

#include <Ticker.h>
#include <ezButton.h>
#define BLYNK_TEMPLATE_ID "XXXXXX"
#define BLYNK_DEVICE_NAME "XXXXXX"
#define BLYNK_FIRMWARE_VERSION "0.0.0"
#define BLYNK_PRINT Serial
#define APP_DEBUG
//

Ticker dryContactTimer;
Ticker holdTimer2;
Ticker holdTimer3;
Ticker crankTimer;

int RunRelay = D1; //  genset ON/OFF key
int CrankRelay = D2; // genset crank 
int drySwitch1PIN = D7; // dry contact button

ezButton drySwitch1(drySwitch1PIN);  // create object that attach to pin 7;

int drySwitchState = LOW;   // set GENSET KEY state to OFF

#define USE_WEMOS_D1_MINI
#include "BlynkEdgent.h"
BlynkTimer timer;


BLYNK_WRITE(V25) {
  ESP.restart();
}

//-- Generator Start Logic independent of blynk or wifi connection --//

void GenSetKey() {
    drySwitch1.loop();

  if (drySwitch1.isPressed() && drySwitchState == LOW) // making sure pressing physical contact doesn't do anything when virtual contact is made
  {
Serial.println("-- Button is pressed --");           // helps with debugging
    drySwitchState = HIGH;                                    // set GENSET KEY state to ON
    Blynk.virtualWrite(V16, HIGH);                            

holdTimer2.attach(0.5, [](){ digitalWrite(RunRelay, HIGH);});     //  genset on in 500ms
holdTimer3.attach(2.5, [](){ digitalWrite(CrankRelay, HIGH);});   // start cranking in after
crankTimer.attach(6, crankRelease);                         // call function to stop cranking in 6 seconds 
  }
  
  if (drySwitch1.isReleased() && drySwitchState == HIGH) // making sure pressing physical contact doesn't do anything when virtual contact is made
  {
Serial.println("-- Button is released --");     // helps with debugging
        drySwitchState = LOW;               // set GENSET KEY state to ON
        Blynk.virtualWrite(V16, LOW);         // Tell blynk change of state
holdTimer2.attach(10, runRelease);          // call function to release Genset ON/OFF KEY in 10
  }

  else {
    // do nothing
  }
}


void runRelease() {
  digitalWrite(RunRelay, LOW);  
  holdTimer2.detach();
}

void crankRelease() {
  digitalWrite(CrankRelay, LOW);
  holdTimer3.detach();
}

//-- BLYNK Generator Start Logic  --//

 BLYNK_WRITE(V16) {
   if (param.asInt() == 1 && drySwitchState == LOW)  // making sure pressing physical contact doesn't do anything when virtual contact is made
    { 
    drySwitchState = HIGH;
    Blynk.virtualWrite(V16, HIGH);

holdTimer2.attach(0.5, [](){ digitalWrite(RunRelay, HIGH);});     //  genset on in 500ms
holdTimer3.attach(2.5, [](){ digitalWrite(CrankRelay, HIGH);});   // start cranking in 3s
crankTimer.attach(6, crankRelease);                         // call function to stop cranking in 6 seconds
    };
 
    if (param.asInt() == 0 && drySwitchState == HIGH) // making sure pressing physical contact doesn't do anything when virtual contact is made 
      {
    drySwitchState = LOW;
    Blynk.virtualWrite(V16, LOW);

        drySwitchState = LOW;               // set GENSET KEY state to ON
        Blynk.virtualWrite(V16, LOW);         // Tell blynk change of state
holdTimer2.attach(10, runRelease);          // call function to release Genset ON/OFF KEY in 10

    }
    
}


void setup()
{
  Serial.begin(115200);
  dryContactTimer.attach_ms(100, GenSetKey);
  drySwitch1.setDebounceTime(3000); // set debounce time to 50 milliseconds

  pinMode(RunRelay, OUTPUT); 
  pinMode(CrankRelay, OUTPUT); 
  
  digitalWrite(RunRelay, LOW);
  digitalWrite(CrankRelay, LOW);
  
  delay(100);
  BlynkEdgent.begin();

}


void loop() {
    BlynkEdgent.run();

}

I’m confused by your example sketch, as it appears to be missing any ticker_object_name.update() calls in the void loop.

It also doesn’t have these lines:

as the first two lines of the sketch, which will almost certainly result in the Blynk library compiling the sketch as though it is a legacy sketch.

Also, you’re declaring a BlynkTimer object…

that isn’t being used or serviced in your void loop.

I occasionally use the Ticker library, mostly to flash physical indicator LEDs at a given frequency. However, I don’t see a real use for the Ticker library in your sketch, if it was me who was writing this I’d use BlynkTimer instead of Ticker (actually no, I’d use interrupts, but if I wasn’t doing that I’d use BlynkTimer).

There is also an issue with the Ticker library in conjunction with Blynk Edgent, which is documented here:

Pete.

1 Like

Everything I did on this script was based on what I believe I understood after reading hundreds of posts and counless arduino timers and interrupts lessons over the last 5 days. PLEASE CORRECT ME IF I’M WRONG but I’ve tested this and it works perfectly… so far.

As Ticker is a Timer1 in arduino core you don’t neet to run it in the loop function. It runs as soon as the device is powered up just like the millis() function.

void setup()
{
  Serial.begin(115200);
  dryContactTimer.attach_ms(100, GenSetKey);

I simply call my function in the setup and it runs as i tell it to every 100ms.

I have not noticed any problems or anything different wether it’s the first two lines or 3rd and 4th. Maybe i’m missing something.

I forgot to remove this, as it was here along with other functions to test if i would have any interference or problems sending data at defined intervals to the blynk platform as usual while having my functions and ticker timers running. I confirm everything works fine.

That’s exactly why I picked it.

See the Indicator.h file.
If I understand correctly Blynk Edgent itselft uses the ticker library to control the onboard LEDs on most ESPs before and after establishing a wifi connection and with blynk server. I figured that was a safe way to go.

I think you’re missing the point of this post, the idea was to be able to run a function on a button press wether or not the device establish a connection with wifi or with the server. That function also requires some timing event’s (not intervals)

holdTimer2.attach(0.5, [](){ digitalWrite(RunRelay, HIGH);}); //  genset on in 500ms
holdTimer3.attach(2.5, [](){ digitalWrite(CrankRelay, HIGH);});// start cranking in 3s
crankTimer.attach(6, crankRelease); // call function to stop cranking in 6 seconds

Normally i use the BlynkTimer to do such timing logic, but the BlynkTimer only runs after setup and connection is established, hence why i used Ticker instead to attach and detach timers in order to avoid using delay().

I’ve been looking around for a solution, I’m not more then an amateur beginner at this, if you think there’s a more efficient way of doing such actions, please do share.
After all Im here reading everything posted on this community forum to learn as much as I can, and i’m very grateful for all of you.

Hello @PeteKnight

Actually i use ISR for all my button read and few other functions. And it works perfect.

Recently i used the indicator feature of the edgent example. When i enable the led( led pin not used anywhere else in the code), the ISR seems to hang. It doesn’t work anymore.

As soon as I disable the indicator led, ISR starts to work again.

So i used TICKER to call the function that was previously called by the ISR.

So TICKER can be used as an alternative for ISR.

Can we use TICKER as an alternative for BlynkTimer? What is your opinion on this ?

Can you link to the documentation for that please?
I ask because the “How to use” section of this documentation states:

In your loop(), add:

tickerObject.update(); //it will check the Ticker and if necessary, it will run the callback function.

If you examine the Blynk library code you’ll see that if it parses then sketch and finds a #define BLYNK_TEMPLATE_ID at the very top of the sketch then it uses blynk.cloud as the server url, otherwise it uses blynk-cloud.com instead. You’re probably getting away with it at the moment because you provisioned the device before making teg changes and the server url is stored in EEPROM. If you clear the provisioned data then you’ll probably see the issue.

Yes, but there is a conflict with the delay() command when using Ticker as I pointed-out in the link. Delays in Blynk should generally be avoided, but the Edgent library itself uses delays and these don’t actually function as expected.

No, to do it as suggested it requires an interrupt to be attached to the pin that the switch is connected to, and an Interrupt Service Routine that is triggered when the pin meets the criteria defined in the interrupt definition (CHANGE, RISING, FALLING).

That statement is 100% false.
BlynkTimer, and the SimpleTimer library that it’s based upon, do not require a connection to the Blynk server, or even a WiFi connection to work.

I already have, but it appears that you find interrupts to difficult to work with.

My comments on your latest piece of code are primarily for the benefit of others who come here later and think that they’ve found a working solution to their requirement for offline functionality. I’ve not tested your sketch, but simply pointed-out inconsistencies that I can see when viewing the sketch on a tablet. Others need to be aware of these potential issues so that they don’t trip them up. They also need to be aware of your incorrect statements about BlynkTimer, as if this type of statement isn’t challenged then it will be repeated and people will believe it to be true.

Pete.