Thank you for your patience.
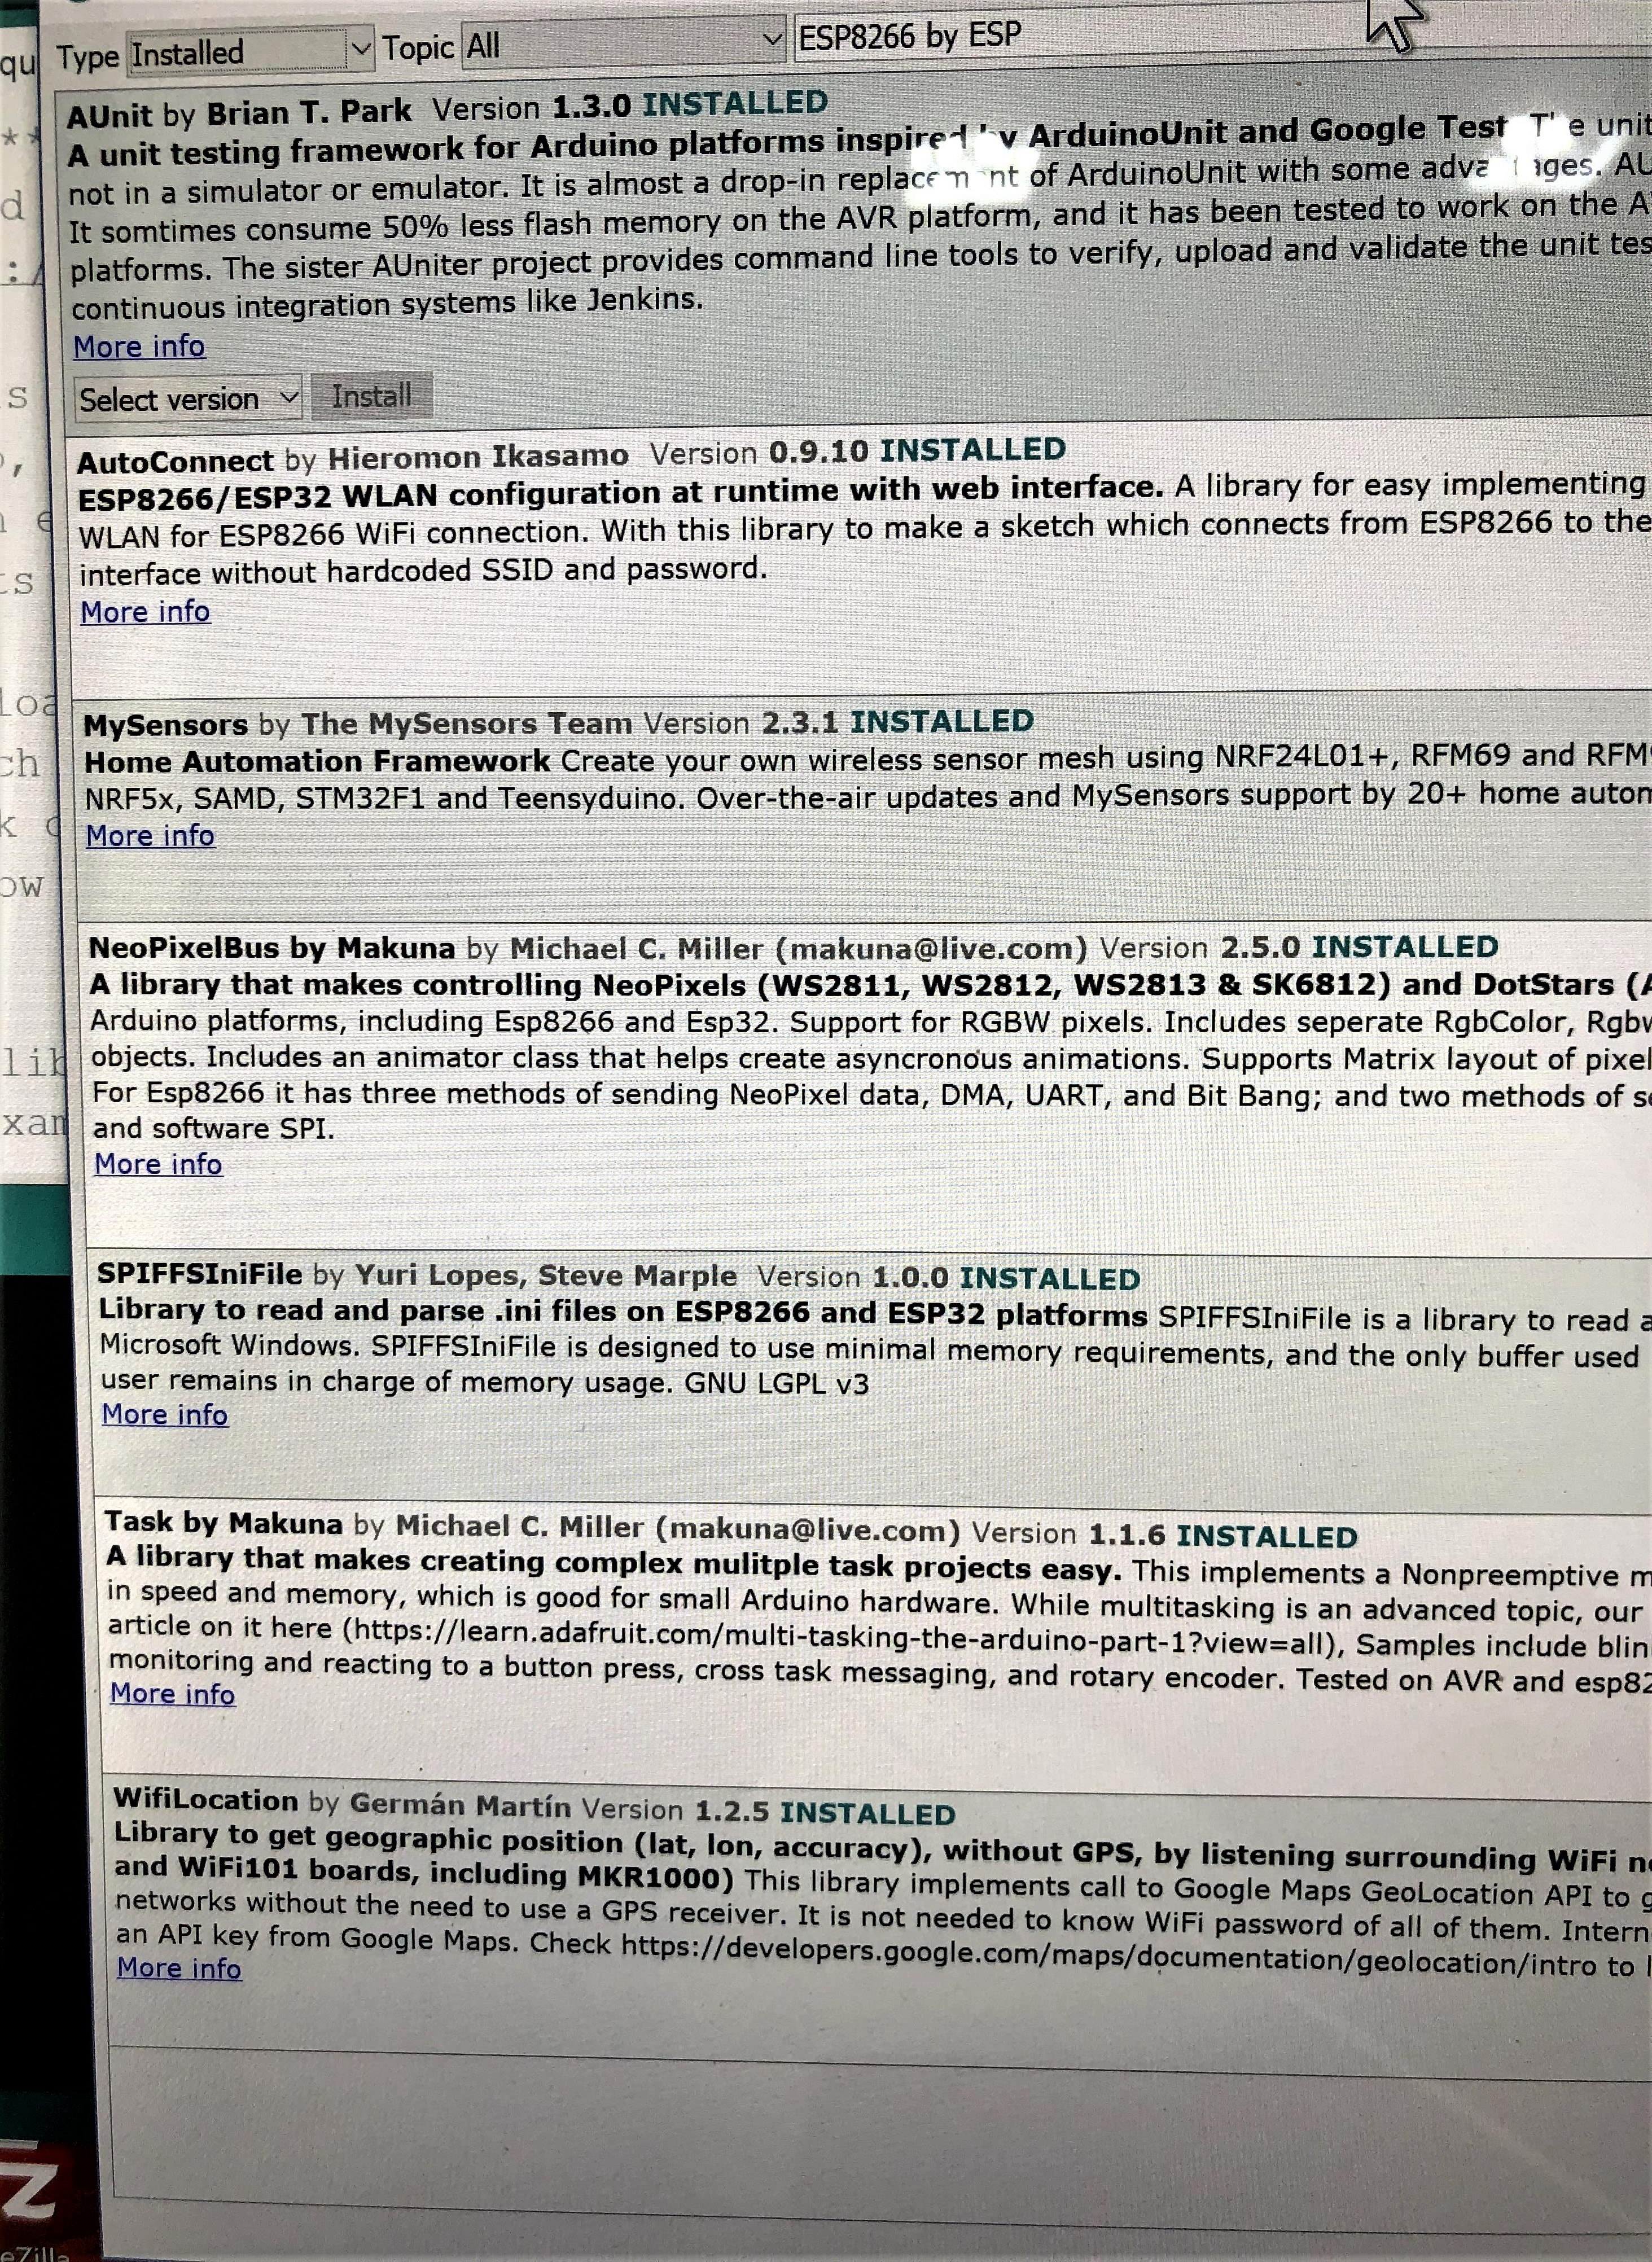
1-I did the search with you sent “ESP8266 by ESP Community” and found nothing. So I did the search like this: “ESP8266 by ESP” I found what is in the photo below.
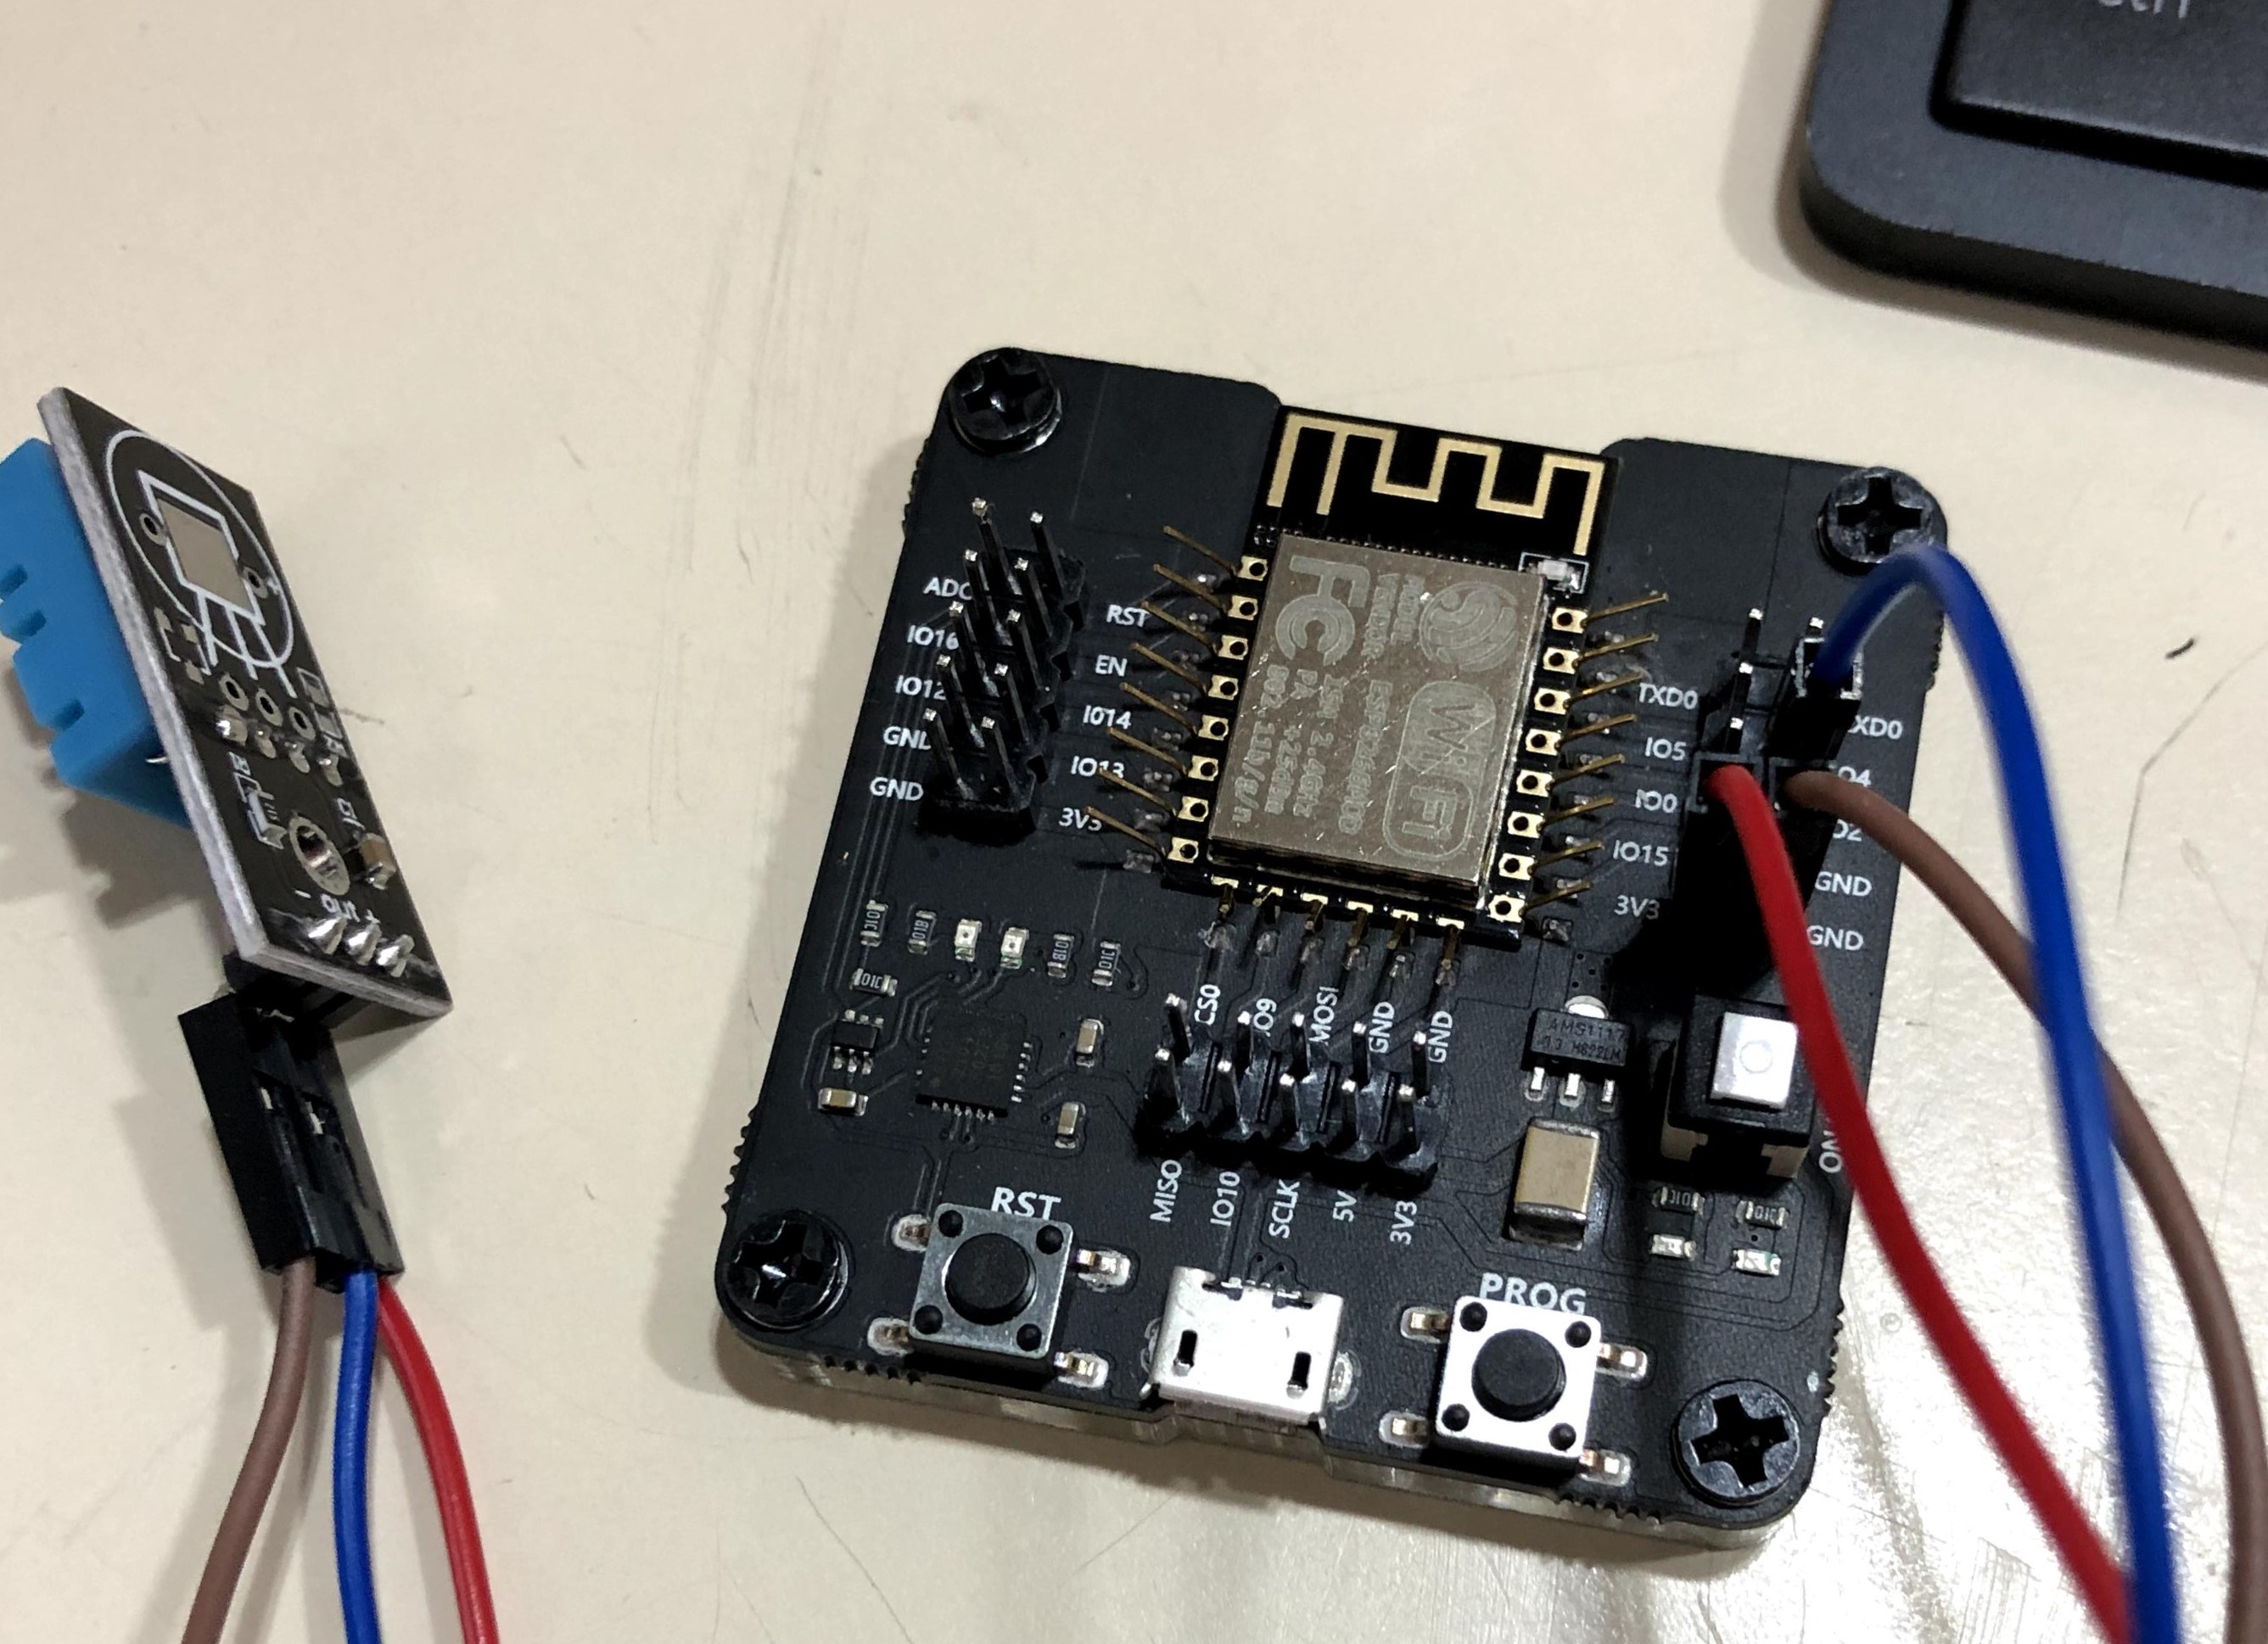
2 and 3-I have an adapter that makes programming easy… See in the photo.
What am I supposed to do now?
Pete
I think I did not say, that I had already made the code and had worked, so I took to monitor a deposit that I have and after a few days ceased to work, or rather left to send the data of temperature and humidity, thought he had frozen , brought home and reboot and did not work, so the suite on/off-this was in a ESP8266. So I thought it was the sign, that’s when I switched to MKR1000 and the same thing happening to her…
In my view I think this is some interruption in the shipping phase for the Temp app. or Humi. Because when I withdraw the sensor the esp8266 accuses that it is not reading… So I conclude. He reads, but does not send, or if he sends something this interrupting…
Don’t search, scroll down to the bottom of the list.
I assume that at some point you’ve followed these instructions ?:
https://arduino-esp8266.readthedocs.io/en/2.5.2/installing.html
I’d start by soldering that module the board, otherwise you’ll never get reliable results once you start uploading and running code.
Pete.
Hi Pete,
I tried everything and I could not, solve, already tried to a plate ESP32, but the same thing happens. I think the problem is in the data transmissions…
Could you suggest to me another service similar to that of Blynk so I can try?
Thanks very much.
Ary Figueira
Well, you’ve come to the wrong place to get advice on alternatives to Blynk 
We can’t really help you if you keep jumping from one board to another, and don’t answer straightforward questions when we ask them.
The last clear piece of information we had from you was that you couldn’t get the code to compile because if didn’t like the reference to pin D2. Since then your responses have jumped all over the place and I have no idea what version of the ESP core, or now ESP32 core you are using, and what changes you’ve made to code, hardware connections and MCUs.
If you want help then you have to help us to help you.
Pete.
1 Like
I’m sorry if I offended you with any questions. I didn’t mean to.
I believe that my English does not help much for I apologize too…
I told you I had already tried on the ESP32 board.
I haven’t stopped using the ESP8266 I keep testing her. We can concentrate in the ESP8266.
Thanks
Ary
so does the code compile on the Arduino IDE? Or is it still giving errors?
Post latest version of code.
The DHT has been used successfully by many BLYNK users, so i suspect something is going wrong on your end.
1 Like
Okay, what version of the ESP core do you have installed?
What code are you using?
Does your code compile?
What board type are you using when you compile the code?
How is your DHT device connected?
What do you have set-up in your app?
If your code runs, what do you see in the serial monitor?
Does your device show as being online?
Pete.
Thank you
No, it does not give error when compiling or when uploading.
Here’s the code:
  Download latest Blynk library here:
    https://github.com/blynkkk/blynk-library/releases/latest

  Blynk is a platform with iOS and Android apps to control
  Arduino, Raspberry Pi and the likes over the Internet.
  You can easily build graphic interfaces for all your
  projects by simply dragging and dropping widgets.

    Downloads, docs, tutorials: http://www.blynk.cc
    Sketch generator:           http://examples.blynk.cc
    Blynk community:            http://community.blynk.cc
    Follow us:                  http://www.fb.com/blynkapp
                                http://twitter.com/blynk_app

  Blynk library is licensed under MIT license
  This example code is in public domain.

 *************************************************************

  This example shows how value can be pushed from Arduino to
  the Blynk App.

  WARNING :
  For this example you'll need Adafruit DHT sensor libraries:
    https://github.com/adafruit/Adafruit_Sensor
    https://github.com/adafruit/DHT-sensor-library

  App project setup:
    Value Display widget attached to V5
    Value Display widget attached to V6
 *************************************************************/

/* Comment this out to disable prints and save space */
#define BLYNK_PRINT Serial


#include <ESP8266WiFi.h>
#include <BlynkSimpleEsp8266_SSL.h>
#include <DHT.h>

// You should get Auth Token in the Blynk App.
// Go to the Project Settings (nut icon).
char auth[] = "xxxxxxxxxxxxxxxxxx";

// Your WiFi credentials.
// Set password to "" for open networks.
char ssid[] = "xxxxxxxx";
char pass[] = "xxxxxxxxxxx";

#define DHTPIN 2          // What digital pin we're connected to

// Uncomment whatever type you're using!
#define DHTTYPE DHT11     // DHT 11
//#define DHTTYPE DHT22   // DHT 22, AM2302, AM2321
//#define DHTTYPE DHT21   // DHT 21, AM2301

DHT dht(DHTPIN, DHTTYPE);
BlynkTimer timer;

// This function sends Arduino's up time every second to Virtual Pin (5).
// In the app, Widget's reading frequency should be set to PUSH. This means
// that you define how often to send data to Blynk App.
void sendSensor()
{
  float h = dht.readHumidity();
  float t = dht.readTemperature(); // or dht.readTemperature(true) for Fahrenheit

  if (isnan(h) || isnan(t)) {
    Serial.println("Failed to read from DHT sensor!");
    return;
  }
  // You can send any value at any time.
  // Please don't send more that 10 values per second.
  Blynk.virtualWrite(V5, h);
  Blynk.virtualWrite(V6, t);
}

void setup()
{
  // Debug console
  Serial.begin(9600);

  Blynk.begin(auth, ssid, pass);
  // You can also specify server:
  //Blynk.begin(auth, ssid, pass, "blynk-cloud.com", 80);
  //Blynk.begin(auth, ssid, pass, IPAddress(192,168,1,100), 8080);

  dht.begin();

  // Setup a function to be called every second
  timer.setInterval(1000L, sendSensor);
}

void loop()
{
  Blynk.run();
  timer.run();
}```
So, I asked you eight questions and you’ve just provided answers to two of them.
I’ll sit back and wait until you answer the other six questions before I say any more.
Pete.
Friend, if you had paid attention, I still haven’t responded to you… I replied to the friend “Toro Blanco”.
I’m picking up your answers as soon as I have I will post.
Thank you
After you asked me, which version was using ESP Core. I came to the conclusion that there were many labraries open in my IDE. I decided unistall all and to install only I needed in this code. And what was my surprise. IT’S WORKING…
Thank you Pete and everyone who tried to help me… And I’m sorry about something…
Health and peace for all…
2 Likes
Glad you got it working.
#define DHTPIN 2 // What digital pin we're connected to
GPIO 2 is not an ideal pin to use. It requires special attention so as not to cause issues when booting/loading code. You may want to switch it to GPIO 4, and rewire the sensor.
That’s quite a strange description of the issue. The Arduino IDE doesn’t actually ‘open’ libraries. Libraries are installed, usually in the Libraries folder, and are used by the code when those libraries are specified by a #Include statement in the sketch.
The only time that “too many installed libraries” can be an issue is when there are multiple versions of the same library installed.
You’ll be made aware of this issue when you compile your code and see a “Multiple versions of xxxxxx.h were found” message.
It’s always best to turn on verbose compilation messages, and study the messages for warnings or other oddities - especially if you’re having issues with the code or the functionality.
On the subject of the ESP Core (still not sure which version you’re using), recent releases of the core caused multiple problems with connectivity. I still refuse to use any of the 2.5.x versions as they’ve proved far too unstable for the code that I run.
I’ve marked this topic as Solved.
Pete.
Thanks Toro_Blanco. I did and work well.