Try this (warning, this has all been quickly cut and pasted… I have installed this before, but I might have made a typo here):
Start with running these commands, one after another, in a terminal window of your RPi - if one fails, then precede it with sudo
sudo apt-get update
sudo apt-get install git-core
git clone git://git.drogon.net/wiringPi
cd wiringPi
./build
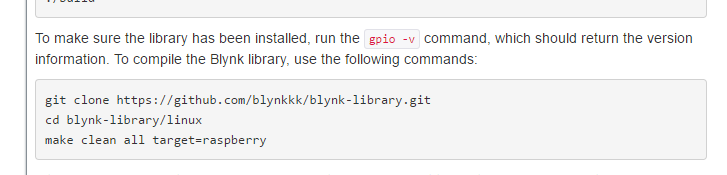
To make sure the library has been installed, run the gpio -v command, which should return the version information.
----------------- for visual example -----------------
pi@raspberrypi:/blynk-library/linux $ gpio -v
gpio version: 2.25
Copyright (c) 2012-2015 Gordon Henderson
This is free software with ABSOLUTELY NO WARRANTY.
For details type: gpio -warranty

Raspberry Pi Details:
  Type: Model B, Revision: 2, Memory: 512MB, Maker: Egoman
----------------- end visual example -----------------
To compile the Blynk library, use the following commands:
git clone https://github.com/blynkkk/blynk-library.git
cd blynk-library/linux
make clean all target=raspberry
Then In a Terminal window on your Raspberry Pi, switch to the blynk-library/linux directory
cd/ blynk-library/linux
and start the server using the command below (replace AuthToken with the actual token generated by the Blynk app):
sudo ./blynk --token=AuthToken
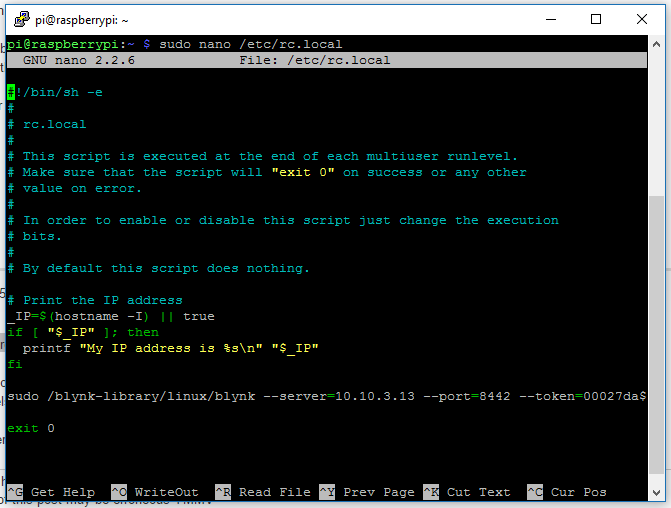
That command connects to Blynk’s default Cloud Server, so if you are running your own Local Server, you need to specify its address and port manually; for example:
sudo ./blynk --server=192.168.1.101 --port=8555 --token=AuthToken
If the connection has been established successfully, you should see the Blynk logo (in ASCII) and Ready! message.


 But thank you for pointing it out… sooo much to learn…