Hello, my name is Roberto Miguel and I need help to develop an app with is an alert system which when the flame sensor triggers the blynk app will send a notification to my phone and email. But I’m having some issues connecting the app to my arduino, and my arduino is UNO+WiFi R3 ATmega328P+ESP8266 from robotdyn and I don’t know if I am suppost to put a connection code of blynk to my ESP8266 and to put the code himself to the uno or just to put the code in uno, aswell I need help to associate the analogic pin A0 to a virtual pin V5
Here is my Uno code
#include <ESP8266_Lib.h>
#include <Blynk.h>
#define BLYNK_PRINT Serial


int led=10;
int wifi=11;
int sensorValue = A0;

BLYNK_WRITE(V5)
{
  sensorValue = analogRead(A0);
  Blynk.virtualWrite(V5, sensorValue);
}
void setup()
{

  pinMode(led,OUTPUT);
  pinMode(A0,INPUT);
  pinMode(wifi,OUTPUT);

}

void loop()
{
   sensorValue = analogRead(A0);
    wifi = Serial.write(wifi);
Serial.println(sensorValue);
if (sensorValue < 100)
  {
    digitalWrite(led,HIGH);
    digitalWrite(wifi,5);
  }
  else {
    digitalWrite(led,LOW);
    digitalWrite(wifi,10);
  }
 Blynk.run();
 }

And here is my ESP8266 code


#define BLYNK_PRINT Serial
#include <ESP8266WiFi.h>
#include <BlynkSimpleEsp8266.h>

char auth[] = "**************";

void setup()
{
  Serial.begin(115200);
  Blynk.begin(auth, "*****", "******");
   pinMode(11,OUTPUT);
   pinMode(13,OUTPUT);

 delay(500);

  Serial.println("AT+CIPMUX=1");

  delay(2000);

  Serial.println("AT+CIPSERVER=1,5000");

  delay(2000);

  Serial.println("AT+CIPSTO=3600");

  delay(2000); }

void loop() {
  Blynk.run();
  while(Serial.available()) {

  int Rdata;

    Rdata=Serial.read();

    if(Rdata==5) {
      digitalWrite(13,HIGH);
    } else if(Rdata==10) {
      digitalWrite(13,LOW);
    }
   }
 }
So I want to know how to connect properly the blynk app with the Uno and how to associate the A0 to V5.
Thanks for the attention!!
Just follow the documentation and examples, along with a bit of deductive reasoning…
Blynk.virtualWrite(V5, analogRead(A0)); // Send analog pin value to display Widget
Generally used with a timer or a BLYNK_WRITE() function: For example, a Button…
BLYNK_WRITE(V0) // Button Widget
{
  if (param.asInt() == 1) {  // When button pressed
  Blynk.virtualWrite(V5, analogRead(A0));  // Send analog pin value to display Widget set to PUSH mode
  }
}
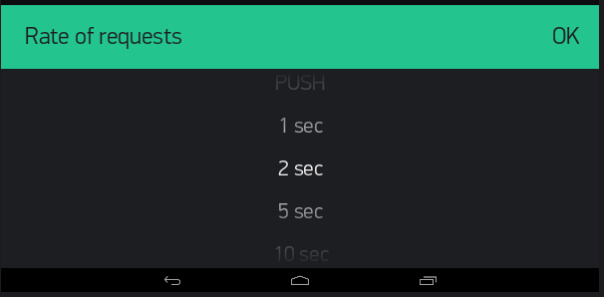
You can also have the Display widget, by itself, determine the frequency of the data read (but only works when the App/Project is active).
BLYNK_READ(V5)  // Display Widget set to reading rate frequency
{
  Blynk.virtualWrite(V5, analogRead(A0));  // Send analog pin value to display Widget at set frequency
}
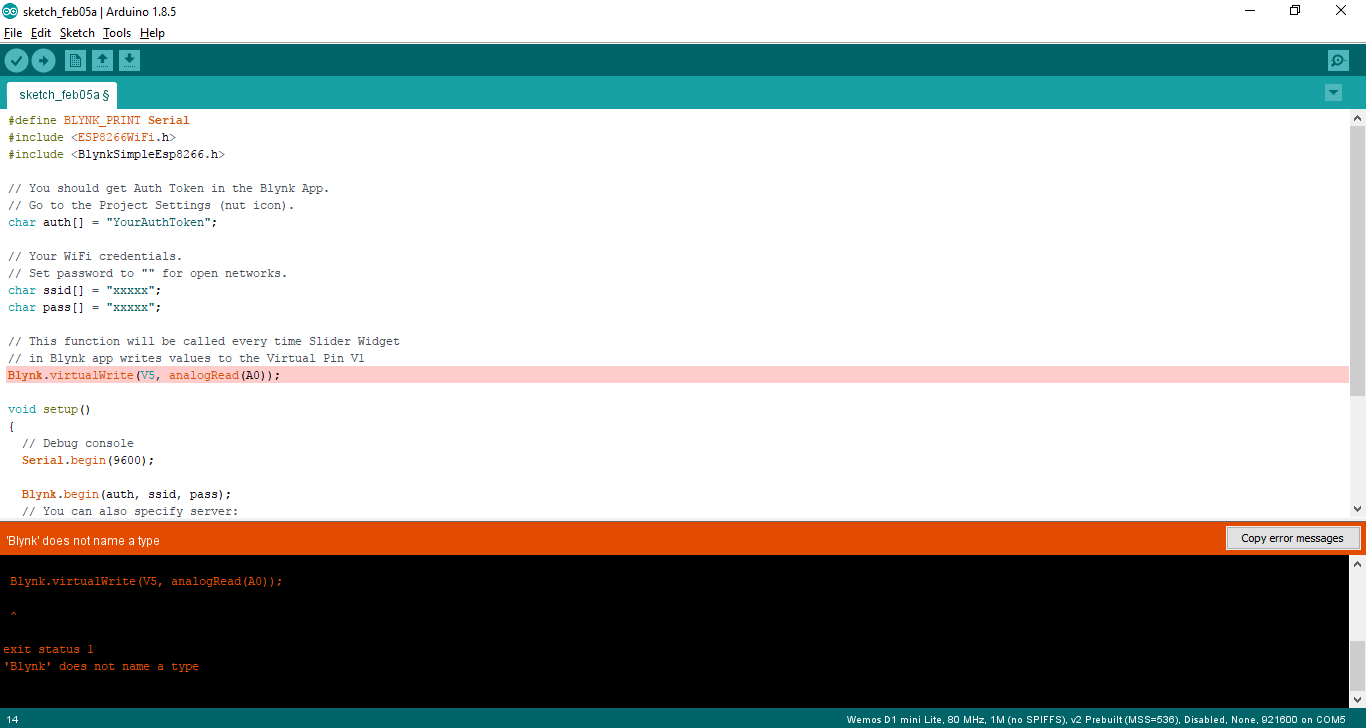
Thanks a lot! Just one more thing wich one do I use for the eventor? because when I use the
Blynk.virtualWrite(V5, analogRead(A0)); it sends me an error wich is the blynk was not declared on this scope.
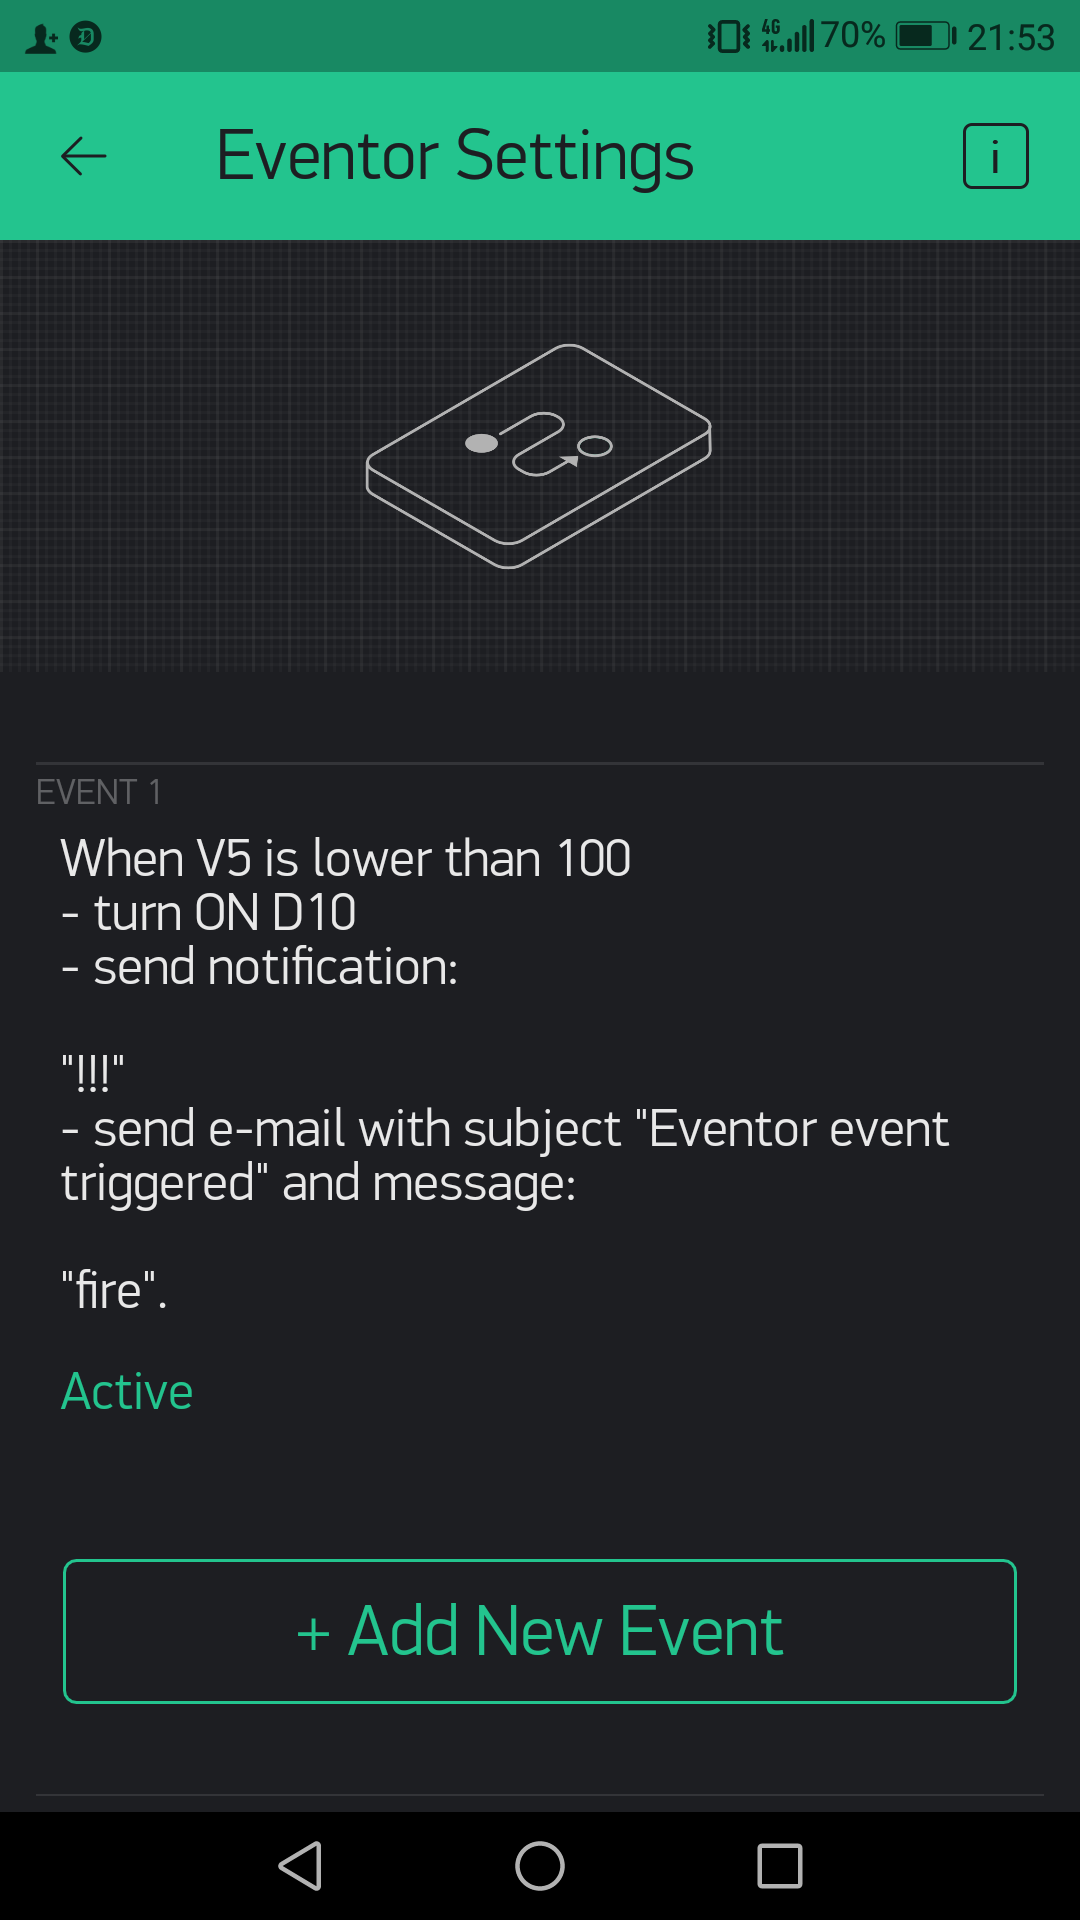
Hello, I need help transforming this code into the blynk application using the eventor, I don’t know how to make this into te blynk app. I search a lot of tutorials but they all are examples of your work and not an original project. I tried to make an app but it didn’t work.
My issue is when I want the eventor to read the value from A0 wich is where the flame sensor is connected to send me a notification and to send me an email. But the eventor doesn’t work so I guess its the code.
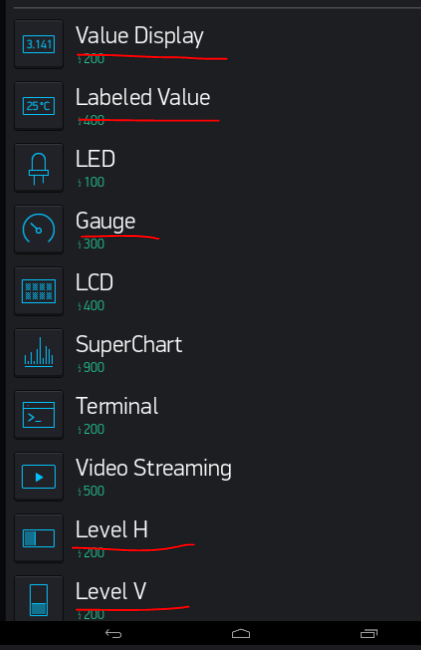
Do you have a Display Widget of some type already setup on V5 and have the frequency reading set to whatever you are needing? If not, you need to first, then the Eventor should be able to see it and you can set an event for it.
That’s not the point… you need a Display widget, with a set reading rate, in order to trigger the BLYNK_READ command that then gets whatever data that sensor sends to your analog pin, so pick one