Part 2 – Door Entry System
If you’ve not read Part 1 yet then I’d suggest that you do, before going any further.
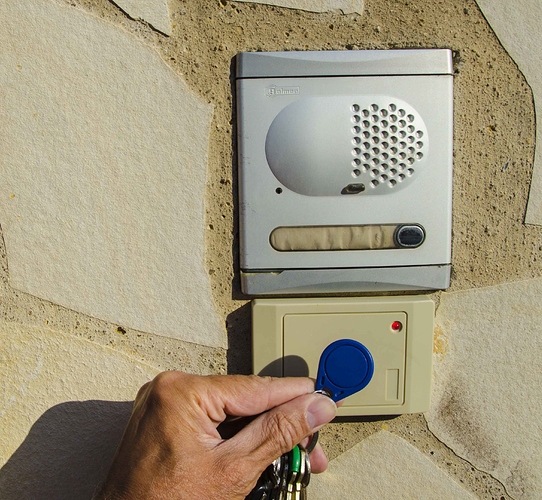
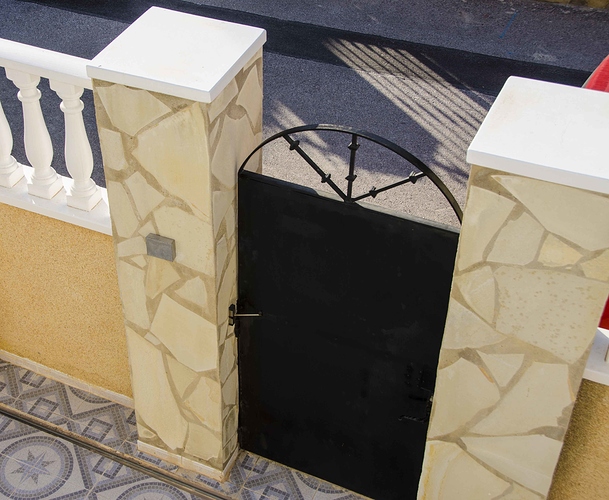
Our home in Spain has gate to the street which has a conventional speech-only door entry system that allows us to talk to people at the gate and release the lock if we wish. The gate also has a lock that can be opened using a conventional key, but getting the key in the lock and opening the gate can be a bit fiddly, especially in the dark after a few beers!
Our community swimming pool has a door entry system controlled by RFID key fobs, where each house on the urbanisation has a fob with a different code. I decided that adding a similar RFID system to the gate of our house would be a nice improvement, and having just one key fob that opened both the pool and the house gate would be the most sensible approach.
After a few false starts, I eventually managed to work out that the key fob for the community pool is a Mifare 1k system. I bought a Wiegand protocol waterproof reader that can read the Mifare fobs and initially built a stand-alone reader using an Arduino Mini. This worked okay, but I realised that I really wanted more functionality, such as the ability to release the gate remotely (more about the thinking behind that later) and to know when the gate had been opened (handy to monitor when our keyholder does his property checks when we’re not there).
Copying the pool entry fob proved trickier than I thought, as a random code is embedded into most fobs when they are made, but I needed more fobs with the same User ID code as our original one. I eventually managed to source fobs with a re-writeable block zero (which is where the User ID is stored) at a sensible price so I ordered some and a writer to be able to clone my existing fob.
I recently replaced the Arduino Mini with a Wemos D1 Mini Pro (chosen because I needed an external antenna) and “Blynkified” the gate.
This worked well gave the ability to release the gate via the app and to keep a log (using a Table widget) of when the gate has been released and what method has been used to release it (Blynk app, RFID fob or 433MHz button – more on that later). It also logs the User ID code from any unidentified RFID fobs so I can see if someone has tried their fob against my reader.
Having done this, the door entry for the gate still didn’t really give all the functionality we wanted it to. The gate is at the front of the property and the door entry intercom is in a room at the rear of the property. We have a window at the front that overlooks the gate, and in practice we find that it’s easier to go to the window and look out, and often open the window and speak to the person at the gate. This works better because you can see who you’re talking to, and also because if the visitor is Spanish then the language barrier seems less problematic when you’re speaking face to face rather than over the intercom. The disadvantage to this approach is that if you then decide that you want to let the person in, you either have to walk to the intercom handset and release the gate (then usually go back to check that they entered okay) or rummage around and find your phone, open the Blynk app and then release the gate.
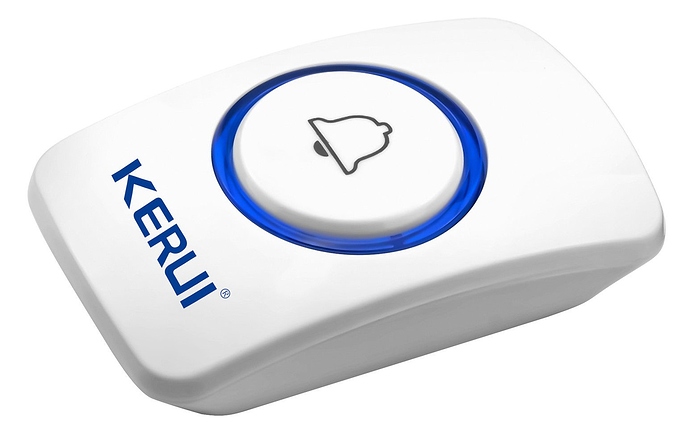
Obviously a video Entryphone would solve some of these issues, but installation could prove problematic and I wanted a cheaper and simpler solution. I eventually settled on a 433MHz battery powered button located near the window, and a 433MHz receiver attached to a Wemos D1 Mini to act as 433 to MQTT gateway. This allows the button to be pressed to release the gate whilst standing at the window and it’s much quicker and easier than either of the other two options.
The button transmits a preset code on the 433MHz frequency, and when the MQTT gateway receives that specific code it sends an MQTT instruction via the server to the gate to release the lock.
The final enhancement (for the time being at least) was to change the system so that it turns on the security lights at the front of the house for 2 minutes when the gate is released, provided it’s dark outside. This uses a Sonoff switch wired into the PIR lighting and the Node-Red “Big Timer” node from @scargill to calculate if it’s dark or not. The outside lighting is actually divided into four zones, each of which is controlled by a separate Sonoff and I’ll talk a bit more about that in a later installment.
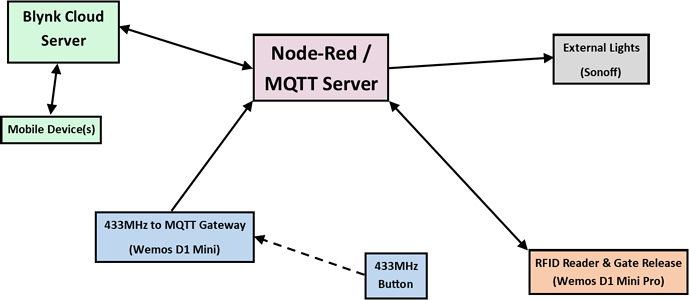
So, this is a diagram showing how various devices talk to each other…
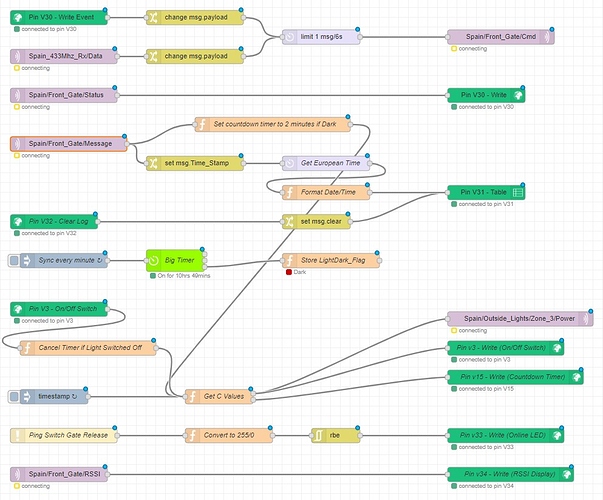
And this is what the Node-Red flow looks like:
The flow actually has a couple of features I’ve not yet mentioned: RSSI data from the Wemos Pro on the gate, via an MQTT message that’s sent every 5 seconds and pushed out to the app; an online/offline LED in the app to tell me if the Wemos Pro is connected to the network and; feedback to the “Open Gate” button widget in the Blynk app so that it turns on momentarily when the gate is released via either the RFID tag or the 433MHz button.
Being able to release the gate via the RFID tag is my most important priority, so my code running on the Wemos Pro that’s connected to the RFID reader is written so that it continues to work in stand-alone mode if the Wemos can’t connect to either the Wi-Fi or the MQTT server. It tries briefly to re-connect every 60 seconds if it’s in stand-alone mode, so it goes back to IoT mode when the Wi-Fi etc. is back up and running - without affecting the operation of the RFID system.
I’m currently kicking around a few more enhancements:
-
I’d like to install a microswitch to tell me when the gate is closed. That’s easy from a software point of view, but not so easy from a practicality and reliability angle. I’d probably set-up a Blynk alert if the gate is left open for a certain duration.
-
I also plan to install a CCTV camera that will show me an area that includes the gate, and I might be able to integrate this into the Blynk app, and possibly add a tablet near the door entry intercom to display the CCTV image like a video Entryphone. The CCTV will primarily be to allow me to monitor activity while I’m away, but it could make the door entry system more flexible as well.
-
A system that will send a Blynk alert to tell me when the call button on the door entry system has been pressed. This should be easy to achieve with a simple opto-isolator from the door entry call button. Having this facility will be useful when we have visitors but we’re out of earshot of the door entry system.
Thanks for taking the time to read this, but please don’t ask me for code or for the Node-Red flows.
My setup is very specific to what I’m doing and if you already have the skills then you’d be better starting from scratch to create your own system that meets your specific needs. If you don’t have the skills then I don’t really want to spend my time trying to explain the details and guide you through editing the code and flows to suit your own requirements.
This series of posts are intended to show people what can be achieved quite easily with a Node-Red/MQTT/Blynk setup and to maybe give people inspiration and a few ideas for their own projects.
In future posts I’ll try to explain my outside lighting, heating controller, indoor lights, power cut monitor, blinds controller and weather station projects.
Pete.
