Hello,
I just finish my prototype about use a motion sensor as a surveillance system from my home. the idea is create a box with arduino and several sensors and actuators like:
- 2 LED with intensity control
- 1 Humidity and temperature sensor (DHT11)
- photoresistor
- Motion sensor
with this hardware setup I want to reach the follow Items:
- detect movement when I activate a bottom, If not activated motion sensor disabled.
- to know when the alarm is activated
- control both LEDS independently with ligth regulator
- To know in which luminosoty state are the LEDS
- see the temperature
- see the humidity
- see the thermal feeling (feature of the DHT11 library)
- see the luminosity
- see how many time my device is ON
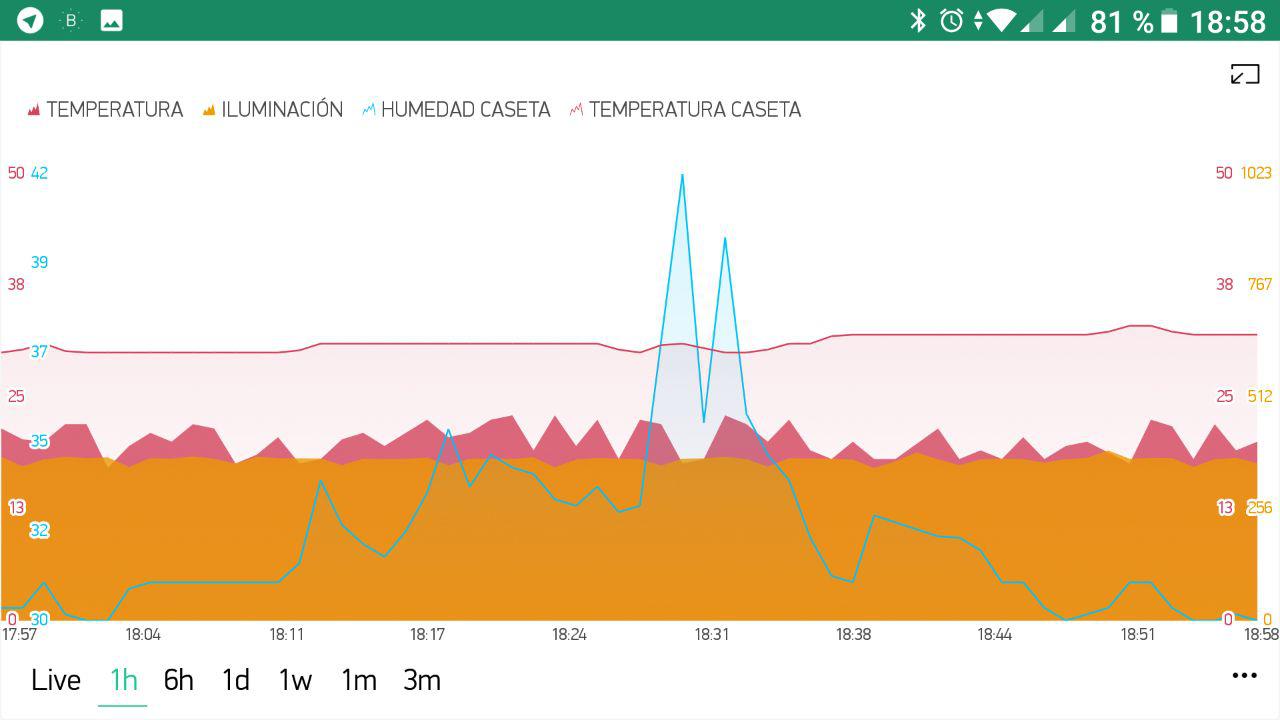
- see the values on a graph
- locate my device on a map
- notify when temperature is high
- notify when humidity is high
- notify when luminosity is high
- NOTIFY ME WHEN ALARM IS ON AND DETECT MOVEMENT
- launch a sound through a lodspeakes
- send control parameters by serial port to control the variable states.
On the begining my hardware was an Arduino UNO + ESP8266-01 as a wifi shield but the ESP8266 on this behavior is too slow and the Arduino get freeze too often.
So I decide to use an Ethernet shield instead the ESP8266 and the performance looks great¡¡
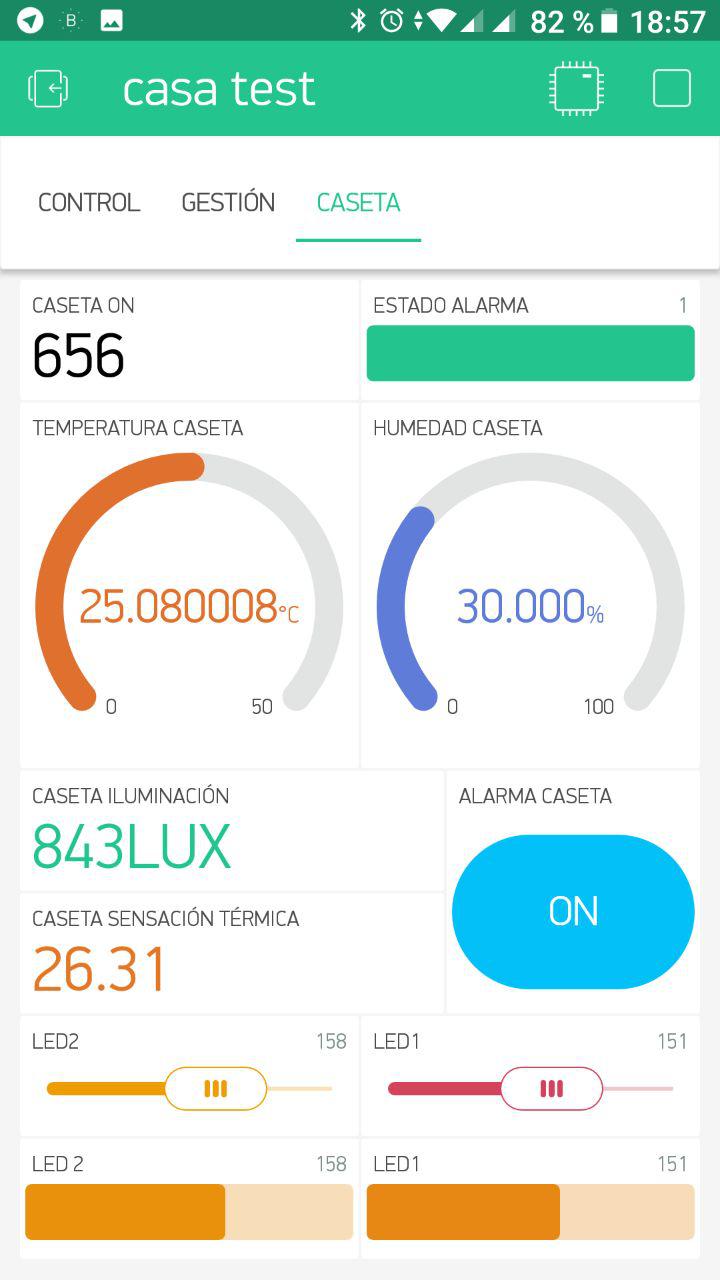
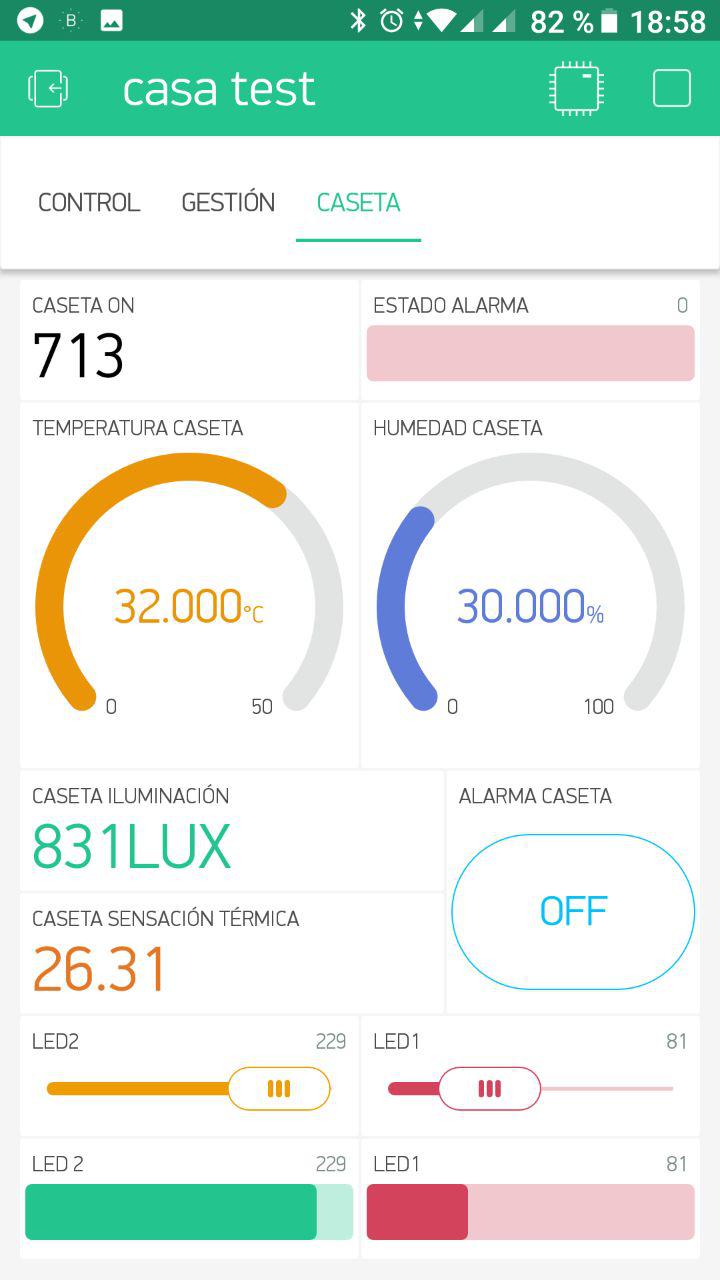
here some screens about the dashboard:

here my code that I use:
/* Comment this out to disable prints and save space */
#define BLYNK_PRINT Serial


#include <SPI.h>
#include <Ethernet.h>
#include <BlynkSimpleEthernet.h>


char auth[] = "ooooooo";

#define W5100_CS  10
#define SDCARD_CS 4
#include <DHT.h>

int LDR = A1;
const int LEDPin = 13;        // pin para el LED
const int PIRPin = 8;         // pin de entrada (for PIR sensor)
int val = LOW;                  // estado del pin
int lux;
int alarma = 0;
int ultalarma = 0;
int led1 = 5;
int led2 = 6;
int estled1 = 0;
int estled2 = 0;
float t;
float h;
float hif;


#define DHTPIN 7          // What digital pin we're connected to
#define DHTTYPE DHT11     // DHT 11
DHT dht(DHTPIN, DHTTYPE);

BlynkTimer timer;
WidgetMap myMap(V1);
void setup()
{
  pinMode(PIRPin, INPUT);
  pinMode (9, OUTPUT);
  pinMode(led1, OUTPUT);
  pinMode(led2, OUTPUT);
  pinMode(LEDPin, OUTPUT);

  // Debug console
  Serial.begin(9600);


  pinMode(SDCARD_CS, OUTPUT);
  digitalWrite(SDCARD_CS, HIGH); // Deselect the SD card

  Blynk.begin(auth);

  dht.begin();


  timer.setInterval(700L, notis);
  timer.setInterval(1000L, sensores);
  timer.setInterval(10000L, sensores2);
  timer.setInterval(3000L, sensores3);
  myMap.location(2, ******, -********, "caseta");
  myMap.location(1, ********, ******, "casa");

}

void loop()
{
  Blynk.run();
  timer.run();
  movimiento();
}


void movimiento() {
  if (alarma==HIGH){
      val = digitalRead(PIRPin);
  if (val == HIGH) {
    digitalWrite(LEDPin, HIGH);
    tone(9, 659.26, 100);
  }
  else {
    digitalWrite(LEDPin, LOW);
    val = LOW;
  }
 }
}
void sensores2() {
  Blynk.virtualWrite(V5, h);
  Blynk.virtualWrite(V6, t);

  Serial.print(h);
  Serial.println(" humedad");
  Serial.print(t);
  Serial.println(" temp");

}

void sensores3() {
  Blynk.virtualWrite(V7, millis() / 1000);
  Blynk.virtualWrite(V16, hif);
  Blynk.virtualWrite(V8, lux);
  Serial.print( millis() / 1000);
  Serial.println(" segundos");
  Serial.print(hif);
  Serial.println(" sensacion termica");
  Serial.print(lux);
  Serial.println(" lux");
}
void sensores() {
  Blynk.virtualWrite(V10, estled1);
  Blynk.virtualWrite(V12, estled2);
  Blynk.virtualWrite(V15, alarma);

  Serial.print(estled1);
  Serial.println(" led1");
  Serial.print(estled2);
  Serial.println(" led2");
  Serial.print(val);
  Serial.print(alarma);
  Serial.println(" 1 +1  alarma ON");
}
void notis() {
  h = dht.readHumidity();
  t = dht.readTemperature();
  hif = dht.computeHeatIndex(t, h);
  lux = analogRead(LDR);
  if (val == HIGH) {
    Blynk.notify("caseta MOVIMIENTO!");
  }
  if (t >= 33) {
    Blynk.notify("caseta alta temperatura!");
  }
  if (h >= 80) {
    Blynk.notify("caseta alta humedad!");
  }
  if (lux >= 980) {
    Blynk.notify("caseta iluminacion");
  }
  Serial.println(" notis");
}


BLYNK_WRITE(V9)
{
  estled1 = param.asInt();
  analogWrite(led1, estled1);
}
BLYNK_WRITE(V11)
{
  estled2 = param.asInt();
  analogWrite(led2, estled2);
}

BLYNK_WRITE(V14)
{
  alarma = param.asInt(); // assigning incoming value from pin V14 to a variable

}
The project works very nice and only remains to put all hardware on a plastic box and conect close to the main gate of my home to get control of the intruders when I will be out of home¡¡¡