Local Server with Freenas

HI,

I wanted to run a local blynk server using my Freenas server.

I managed to run the “server-0.41.14-java8.jar” file without an issue.
Also created a new user using the app and even the administration panel worked without an issue when I logged into it.

But my Nodemcu won’t connect to the server.
I even double checked the token.
When I check the serial monitor it says it has connected to my wifi but it’s not connecting to the IP address of my local server. It repeatedly says " Connecting to (IP address) ".

Hope someone can help me.

Thank You.

I’d suggest you start by explaining b what steps you’ve taken with the app in terms of custom server settings, creating an account, adding a project and a device and obtaining a Auth token related to that project/device.

Then, share at least the part of your sketch which shows that you’ve added that Auth code to the sketch and what connection parameters you are using in either your Blynk.begin or Blynk.config command.

Pete.

Thank you for replying,
These are the steps I followed.

1.Created a new jail in Freenas

2.Installed Java inside the jail using the command = " pkg install openjdk8 "

3.Installed the wget package using the command = " pkg install wget "

4.Downloaded the jar file using the command =
wget “https://github.com/blynkkk/blynk-server/releases/download/v0.41.14/server-0.41.14-java8.jar” --no-check-certificate

(When I tried step 4 without “–no-check-certificate” it gave a certification error)

5.Created a new directory to use as the dataFolder (blynkLocal is the created directory).

6.Executed the jar file using the command
java -jar server-0.41.14-java8.jar -dataFolder blynkLocal &


In Arduino IDE

1.I commented out " Blynk.begin(auth, ssid, pass); "

2.Un commented " Blynk.begin(auth, ssid, pass, IPAddress(192,168,1,7)); "

I was following the tutorial from this video to setup my arduino code :- https://youtu.be/33ynNkvfvWU

3.Filled out other details like my wifi ssid and password.

4.copied the auth token from the project and filled that too.

5.Uploaded the sketch


On APP

1.Changed server settings to Custom and created a new user .

2.Created a simple button to turn on and off the onboard LED.


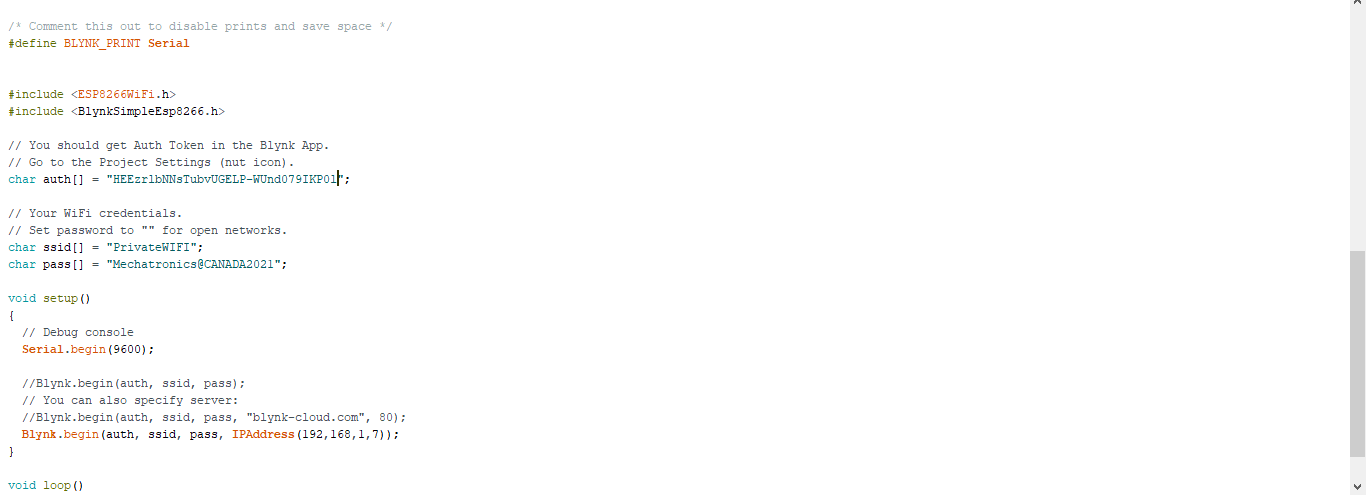
I’ll attach a screenshot of my Arduino code too.

I’d have expected…

Blynk.begin(auth, ssid, pass, IPAddress(192,168,1,7),8080);

It’s not clear from the sequence of your steps whether the Auth code you are using is from your local server or not.

Pete.

1 Like

Thank you sir,
:sweat_smile: After I added the port ‘8080’ it connected without an issue.

But for some reason in that video it says to remove the port. But anyway now its working.

:smiling_face_with_three_hearts: :blush:

Is it an official Blynk video?

Pete?

yup
It’s from the blynks official youtube channel. But maybe it’s a problem caused by something I did, or to work like that I may have to tweak my network settings on my freenas server some more. Because I didn’t see anyone complaining in the comments section. Anyway now it works fine and again thank you so much for the help.