Okay thanks for the input.
Is this the right place to post code and see if people can give a solution/recommendation or do I have to go to a different website. I can post the code I have currently.
Okay thanks for the input.
Is this the right place to post code and see if people can give a solution/recommendation or do I have to go to a different website. I can post the code I have currently.
Yes, just make sure its properly formatted
Alright heres my code.
> #include <Blynk.h>
> #include <Adafruit_DotStar.h>
> #include <SPI.h>
> #include <ESP8266WiFi.h>
> #include <BlynkSimpleEsp8266.h>
> #include <ESP8266WiFiMulti.h>
> // constants
> #define NUMPIXELS 60 // number LEDs on the strip
> #define ESP8266_LED 5 // ESP8266 on-board LED on port 5
> #define MINIBAR_LEN_TREB 7 // len of small bar in mode 3
> #define MINIBAR_LEN_BASS 30 // len of mid bar in mode 3
> #define MINIBAR_LEN_MIDL 15 // len of mid bar in mode 3
>
> #define DATAPIN 2 // GPIO2 - MOSI
> #define CLOCKPIN 4 // GPIO4 - CLK
>
> #define IP_ADDR "173.56.98.227" // IP address of pc running Processing app
> #define SSID_NAME "584N6" // SSID of the network in use
> #define SSID_PW "JX7TFN36GRPKXVCH" // password to the network in use
> // WiFi
> ESP8266WiFiMulti WiFiMulti;
>
> // Use above defined pins for DATA and CLK
> Adafruit_DotStar strip = Adafruit_DotStar(NUMPIXELS, DATAPIN, CLOCKPIN);
>
> // Use hardware SPI (DATA-13, SCLK-SCL)
> //Adafruit_DotStar strip = Adafruit_DotStar(NUMPIXELS);
> // You should get Auth Token in the Blynk App. // Go to the Project Settings (nut icon).
> char auth[] = "41ca952815c3452481585b2b8ef6f0bc";
> // global variables
> bool setupFailed = false; // flag for WiFi setup. if failed, blink onboard LED
> WiFiClient client; // create TCP connection
> byte val = 0; // val received from Processing app (beat in val bin)
>
> // LED controlling variables
> unsigned int r[NUMPIXELS] = {0}; // each index holds the R, G, or B value
> unsigned int g[NUMPIXELS] = {0}; // of the LED with that index ranging
> unsigned int b[NUMPIXELS] = {0}; // from 0 - 255
>
> int heads[NUMPIXELS] = {-1}; // array holding the heads and tails values
> int tails[NUMPIXELS] = {-1}; // of the "beams" that go across the LED strip
> int beamCnt = 0;
> int beamDelay = 0; // counter that increments and every...
> int beamPropDelay = 4; // ...beamPropDelay it updates the beam
> int beamLen = -7; // length of beam in LEDs
>
> // Blynk variables
> int customize, modeSel; // flags
> int blynk_r, blynk_g, blynk_b; // r,g,b
> void setup()
> {
> // set up onboard LED mode
> pinMode(ESP8266_LED, OUTPUT);
>
> // set up Blynk
> Blynk.begin(auth, SSID_NAME, SSID_PW);
>
> // set up WiFi connection to PC
> const uint16_t port = 5204;
> const char * host = IP_ADDR; // ip or dns
>
> Serial.begin(115200);
> delay(10);
>
> // We start by connecting to a WiFi network
> WiFiMulti.addAP(SSID_NAME, IP_ADDR);
> Serial.println();
> Serial.println();
> Serial.print("Wait for WiFi... ");
>
> while(WiFiMulti.run() != WL_CONNECTED) {
>   Serial.print(".");
>   delay(500);
> }
> Serial.println("");
> Serial.println("WiFi connected");
> Serial.println("IP address: ");
> Serial.println(WiFi.localIP());
>
> delay(500);
>
> Serial.print("connecting to ");
> Serial.println(host);
>
> if (!client.connect(host, port)) {
>   Serial.println("connection failed, restart system");
>   setupFailed = true;;
> }
>
> strip.begin();
>
>   strip.show();
>   // random seed
>   randomSeed(0);
> }
>
> // Blynk functions for virtual pins
> BLYNK_WRITE(V0)
> {
>   modeSel = 0;
> }
> BLYNK_WRITE(V1)
> {
>   modeSel = 1;
> }
> BLYNK_WRITE(V2)
> {
>   modeSel = 2;
> }
> BLYNK_WRITE(V3)
> {
>   modeSel = 3;
> }
> BLYNK_WRITE(V4)
> {
>   customize = param.asInt();
> }
> BLYNK_WRITE(V5)
> {
>   blynk_r = param.asInt();
> }
> BLYNK_WRITE(V6)
> {
>   blynk_g = param.asInt();
> }
> BLYNK_WRITE(V7)
> {
>   blynk_b = param.asInt();
> }
> BLYNK_WRITE(V8)
> {
>   beamPropDelay = param.asInt();
> }
> BLYNK_READ(V9)
> {
>   Blynk.virtualWrite(9, modeSel);
> }
>
> void loop()
> {
>   int i; // counter used for misc purposes
>   int gVal, rVal, bVal; // temporary holder variables for RGB values
>
>   // blink onboard LED if wifi failed
>   if (setupFailed == true)
>   {
>     digitalWrite(ESP8266_LED, HIGH);
>     delay(1000);
>     digitalWrite(ESP8266_LED, LOW);
>     delay(1000);
>     return;
>    }
>
> Blynk.run(); // Initiates Blynk
>
> if (client.available())
> { // if data is availble to read
>     val = client.read();
> //////////////////// mode 0 ////////////////////
> if ( modeSel == 0) // bar flash mode
> {
>   if (!customize) // custom colors
>   {
>     gVal = random(0x100);
>     rVal = random(0x100);
>     bVal = random(0x100);
>   }
>   else // use sliders on Blynk app to determine color
>   {
>     gVal = blynk_g;
>     rVal = blynk_r;
>     bVal = blynk_b;
>   }
>
>   if (val == 10) // detecting == bin2 (71 < val < 86 Hz )
>   {
>     for ( i = 0; i < NUMPIXELS; i++)
>     {
>       r[i] = rVal;
>       g[i] = gVal;
>       b[i] = bVal;
>     }
>   }
> }
> //////////////////// mode 1 ////////////////////
> else if ( modeSel == 1 )
> { // spectrum mode (sub bass, bass, midrange, high mids, high freq)
>   if (customize)
>   {
>     r[val] = blynk_r;
>     g[val] = blynk_g;
>     b[val] = blynk_b;
>   }
>   else
>   {
>     if (val < 5)
>     { // red
>       r[val] = 0xFF;
>       g[val] = 0;
>       b[val] = 0;
>     }
>     else if (val < 10)
>     { // orange
>       r[val] = 0xFF;
>       g[val] = 0xA5;
>       b[val] = 0;
>     }
>     else if (val < 15)
>     { // yellow
>       r[val] = 0xFF;
>       g[val] = 0xFF;
>       b[val] = 0;
>     }
>     else if (val < 20)
>     { // chartreuse
>       r[val] = 0x7F;
>       g[val] = 0xFF;
>       b[val] = 0;
>     }
>     else if (val < 25)
>     { // green
>       r[val] = 0;
>       g[val] = 0x80;
>       b[val] = 0;
>     }
>     else if (val < 30)
>     { // spring
>     r[val] = 0;
>     g[val] = 0xE6;
>     b[val] = 0x73;
>   }
>   else if (val < 35)
>   { // cyan
>     r[val] = 0;
>     g[val] = 0xFF;
>     b[val] = 0xFF;
>   }
>   else if (val < 40)
>   { // azure
>     r[val] = 0xF0;
>     g[val] = 0xFF;
>     b[val] = 0xFF;
>   }
>   else if (val < 45)
>   { // blue
>     r[val] = 0;
>     g[val] = 0;
>     b[val] = 0xFF;
>   }
>   else if (val < 50)
>   { // violet
>     r[val] = 0xEE;
>     g[val] = 0x82;
>     b[val] = 0xEE;
>   }
>   else if (val < 55)
>   { // magenta
>     r[val] = 0xFF;
>     g[val] = 0x00;
>     b[val] = 0xFF;
>   }
>   else
>   { // rose
>     r[val] = 0xFF;
>     g[val] = 0;
>     b[val] = 0xFF;
>    }
>   }
> }
> //////////////////// mode 2 ////////////////////
> else if ( modeSel == 2 )
> {
>   if (val == 17 )
>   { // trigger the beam
>     if (beamCnt >= NUMPIXELS)
>       beamCnt = 0;
>     heads[beamCnt] = 0;
>     tails[beamCnt] = beamLen;
>
>     if (!customize) // every beam gets a random color
>     {
>       r[beamCnt] = random(0x100);
>       g[beamCnt] = random(0x100);
>       b[beamCnt] = random(0x100);
>     }
>     else
>     { // using zeRGBa on Blynk app to determine color
>       g[beamCnt] = blynk_g;
>       r[beamCnt] = blynk_r;
>       b[beamCnt] = blynk_b;
>     }
>     beamCnt++;
>    }
> }
>
> //////////////////// mode 3 ////////////////////
> else if ( modeSel == 3 )
> { // random small bars (bass, mid, treble)
> // random colors if custom button not pressed on Blynk app
> if (!customize)
> {
>     gVal = random(0x100);
>     rVal = random(0x100);
>     bVal = random(0x100);
> }
> // determine location of bass bar
> i = random(60 - MINIBAR_LEN_BASS);
> if (val == 10)
> {
>     if (customize)
>     {
>       gVal = blynk_g;
>       rVal = blynk_r;
>       bVal = blynk_b;
>     }
>     for (int j = i ; j < i + MINIBAR_LEN_BASS; j++)
>     {
>       r[j] = rVal;
>       g[j] = gVal;
>       b[j] = bVal;
>     }
> }
> // determine location of mid bar
> i = random(60 - MINIBAR_LEN_MIDL);
> if (val == 17)
> {
>     if (customize)
>     {
>       gVal = blynk_r;
>       rVal = blynk_b;
>       bVal = blynk_g;
>     }
>     for (int j = i ; j < i + MINIBAR_LEN_MIDL; j++)
>     {
>       r[j] = rVal;
>       g[j] = gVal;
>       b[j] = bVal;
>     }
> }
> // determine location of treble bar
> i = random(60 - MINIBAR_LEN_TREB);
> if (val == 54)
> {
>     if (customize)
>     {
>       gVal = blynk_b;
>       rVal = blynk_g;
>       bVal = blynk_r;
>     }
>     for (int j = i ; j < i + MINIBAR_LEN_TREB; j++)
>     {
>       r[j] = rVal;
>       g[j] = gVal;
>       b[j] = bVal;
>      }
>   }
> }
> else if ( modeSel == 4 )
> {
>   for (i = 0; i < NUMPIXELS; i++)
>   {
>
>       r[i] = val;
>       g[i] = val;
>       b[i] = val;
>       strip.setPixelColor(i, g[i], r[i], b[i]);
>     }
>   }
> }
> // mode 2 - beam propagation
> // update head location every beamPropDelay // to control beam propagation speed
> if (beamDelay++ % beamPropDelay == 0)
> {
>   for (i = 0; i < NUMPIXELS; i++)
>   {
>     strip.setPixelColor(heads[i], g[i], r[i], b[i]);
>     strip.setPixelColor(tails[i], 0);
>
>     if (heads[i] >= 0)
>     {
>      if ( ++heads[i] >= NUMPIXELS) // reset head
>       heads[i] = -1;
>     }
>     if (tails[i] >= beamLen)
>     {
>       if ( ++tails[i] >= NUMPIXELS ) // reset tail
>         tails[i] = beamLen - 1;
>     }
>   }
> }
> // dimming, all modes except beam (mode 2)
> if ( modeSel == 0 || modeSel == 1 || modeSel == 3 )
> {
>   for ( i = 0; i < NUMPIXELS; i++ )
>   {
>       if (g[i] > 0)
>         g[i] /= 1.04;
>       if (r[i] > 0)
>         r[i] /= 1.04;
>       if (b[i] > 0)
>         b[i] /= 1.04;
>
>        strip.setPixelColor(i, g[i], r[i], b[i]);
>      }
>   }
>   strip.show();
>
>   delay(5); // give uController time to maintain behind the scenes tasks
> }
You didn’t!

Pete.
Ok I edited the post and got it now
Take a look at this post…
Pete.
biggest issue I see is that your void loop contains more than just
blynk.run
timer.run
thats the first fail. Initiate a timer and rework your code with that. Many examples on this forum.
Then get back here if it still fails.
What do you mean by “initiate a timer”? You mean add another delay (maybe after Blynk.run?) or create a whole new method with a Timer class?
I see this is the void loop method that was used in the link that Pete posted
> void loop() {
>       Blynk.run();
>       if(!Blynk.connected()) {
>         Serial.println(F("Resetting in loop"));
>         ESP.restart();
>       }
>       WDTCount = 0;
>       timer.run();
>       ArduinoOTA.handle();
>       activity(current_activity);
>     }
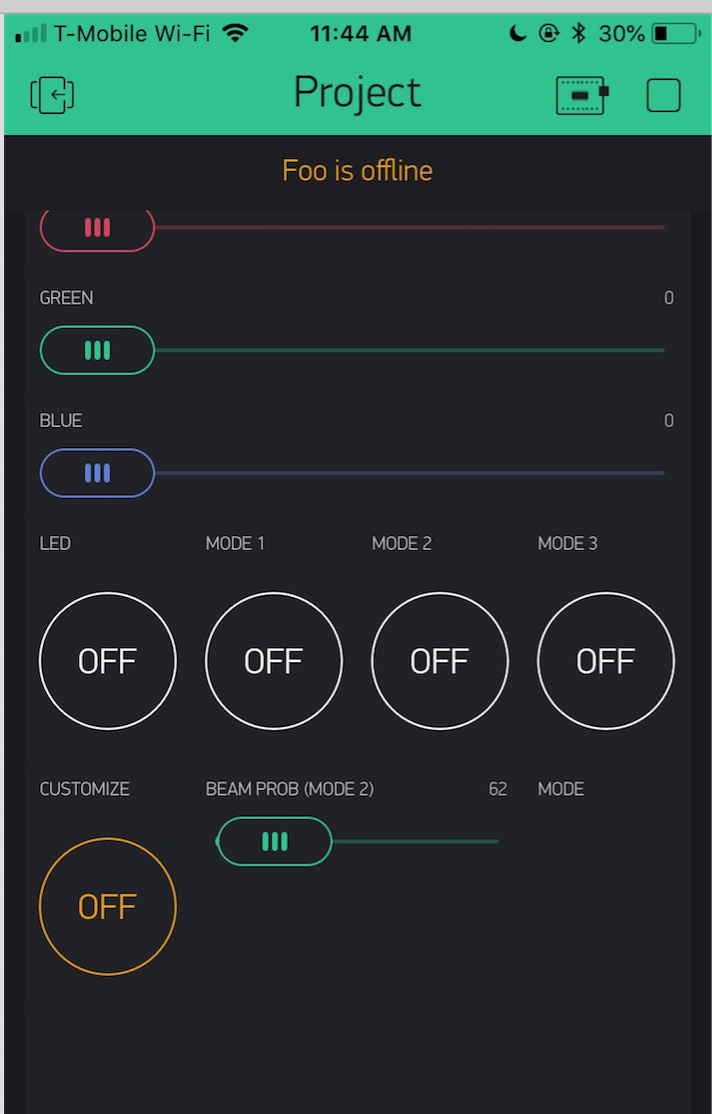
Still can’t find a solution after I initiated a timer. I also tried taking out all the regular delays (stuff like delay(500)). Still doesn’t work. And this code is pretty long because it has to do a lot of stuff. This is what my Blynk screen looks like. Maybe it will help some of you guys to see what I’m working with
You should post your new code (correctly formatted this time) and full details of the results your getting. Does the device connect correctly then go off line when you perform a certain action in the app. What results are you seeing in the serial monitor? (Don’t post screenshots copy the results and paste them with the same formatting as you use when posting code).
Pete.
Ok heres an update. It doesn’t say “offline” anymore when I run the project in Blynk, which is progress. Thats a plus. Basically what I did was removed all the delays and moved the “Blynk.run()” command directly under the void loop.
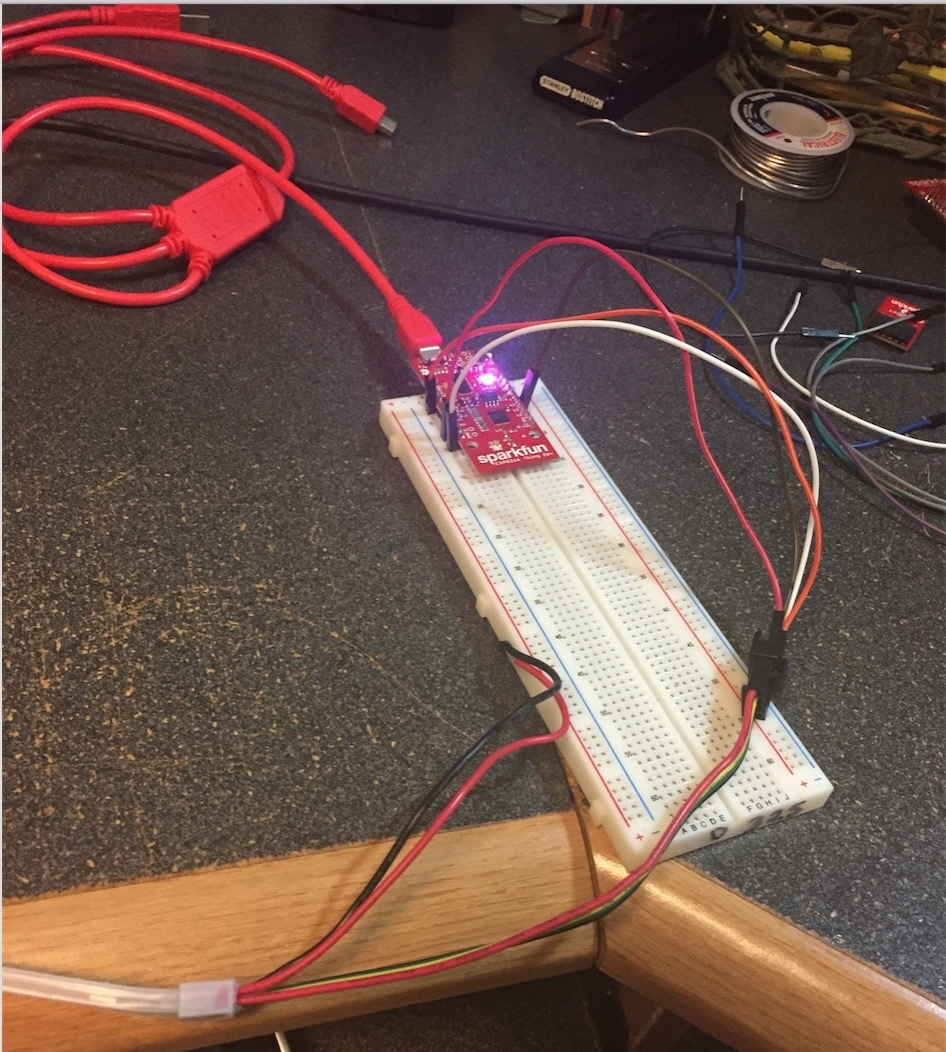
But another issue. My LED (Adafruit Dotstar) isn’t lighting up (or doing anything) when I mess with the sliders in Blynk. Everything is wired up good and goes in sync with the code. GND on the LED strip is connected to GND. VCC (on LED strip) connected to 5V. Clock connected to pin 2. Data input connected to pin 4.
How are you powering your LED?
Pete.
I figured it would happen through the board. I have the LED connected to the Thing, which is being powered up from my computer. That should power the LEDs too right?
I’m not familiar with your board, or the LED strip that you’re using, but your code defines 60 LEDs in the strip and I would doubt that the board could provide the necessary current via the GPIOs to supply that many LEDs.
Pete.
Not even close!.. I have ran up to 15, with the strip feeding off the 5v pin, which is directly tied to the USB, but even then it struggled with brownouts if getting close to full intensity (AKA White) on all LEDs
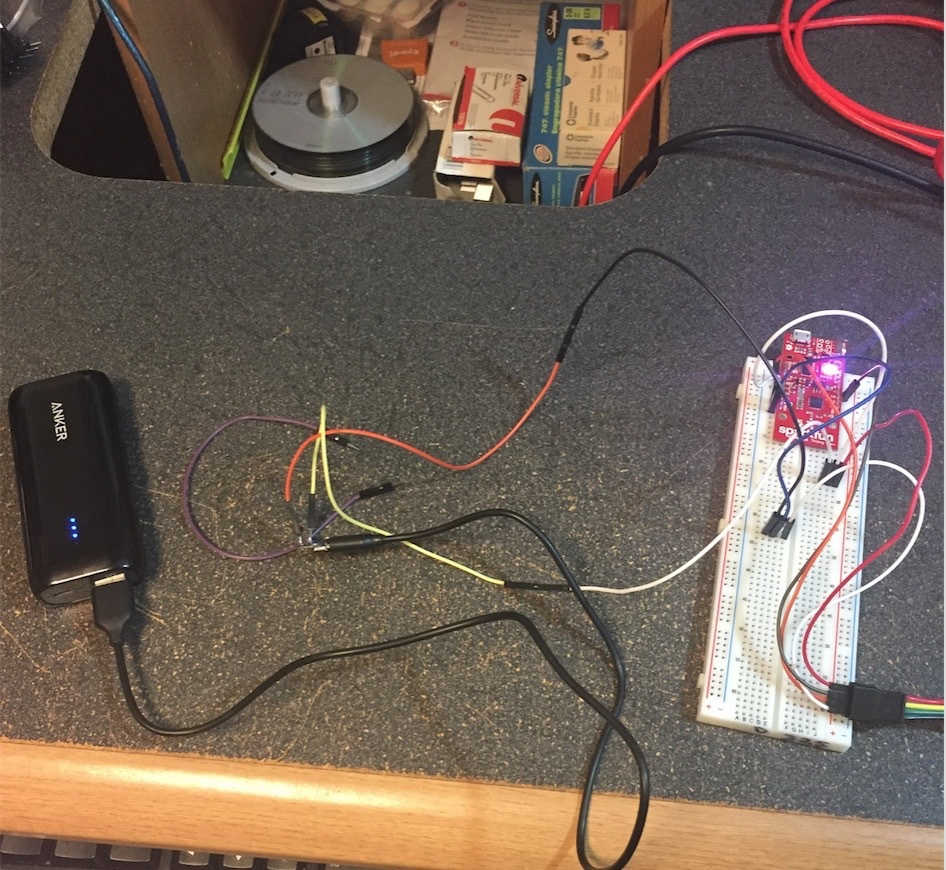
I hooked up a battery to mine. Still the same issue. Blynk works. It doesn’t go offline when I hit play and the board is on. But the LEDs are still unresponsive. Do you think its because I didn’t do any processing? I only used Arduino IDE. I don’t know if thats required but would anyone know? Heres what my board looks like with the battery
You are trying to duplicate an older demo… but this is the GitHub page for it… and yes, I think it needs Processing for the music interface.
However after a few years, libraries changs, so you may not be able to simply duplicate it without lots of learning about what and how to change.
So I was watching a video demonstration of Blynk. Can someone tell me the name of the button on the bottom right “mode”. And how did he sync it with the other 4 “modes” so it shows which number mode the LEDs are in? Does it do that automatically?
There are 5 standard buttons, 4 sliders and 1 display (probably what you are referring to in the lower right) shown in the app. It will be the code that makes them do and display different things, not the widget itself.
PS, I am merging all your seperate topics as they are all about the same thing. Please do not keep creating new topics on this project of yours… use this one. Thanks.