i wanted an autoconnect blynk program which is made and is working like a gem but the problem i face now is when my devices are out of charge or i am away from them , then i wish that i have a physical button to switch it on. is there any who can help me out by making few changes with my current program and enabling it to have a push button to have a physical switch?
this is my current code
//#define BLYNK_PRINT Serial    // Comment this out to disable prints and save space
#include <ESP8266WiFi.h>
#include <BlynkSimpleEsp8266.h>
#include <DNSServer.h>
#include <ESP8266WebServer.h>
#include <WiFiManager.h>         //https://github.com/tzapu/WiFiManager
#include <EEPROM.h>

// You should get Auth Token in the Blynk App.
// Go to the Project Settings (nut icon).
char auth[] = "d363310885e24c8db24acbdf24240d21";

void setup()
{
  EEPROM.begin(512);
  Serial.begin(115200);
  WiFiManager wifiManager;
  //wifiManager.resetSettings();    //Uncomment this to wipe WiFi settings from EEPROM on boot.  Comment out and recompile/upload after 1 boot cycle.
  wifiManager.autoConnect("NodeMCU");
  //if you get here you have connected to the WiFi
  Serial.println("connected...yeey :)");
  pinMode(BUILTIN_LED, OUTPUT);     // Initialize the BUILTIN_LED pin as an output, I like blinkies.
  Blynk.begin(auth, WiFi.SSID().c_str(), WiFi.psk().c_str());
}

void loop()
{
  Blynk.run();  // Commented out for a short time.
}
is there any way to fix a physical button with my relay ,with this code
//#define BLYNK_PRINT Serial    // Comment this out to disable prints and save space
#include <ESP8266WiFi.h>
#include <BlynkSimpleEsp8266.h>
#include <DNSServer.h>
#include <ESP8266WebServer.h>
#include <WiFiManager.h>         //https://github.com/tzapu/WiFiManager
#include <EEPROM.h>

// You should get Auth Token in the Blynk App.
// Go to the Project Settings (nut icon).
char auth[] = "d363310885e24c8db24acbdf24240d21";

void setup()
{
  EEPROM.begin(512);
  Serial.begin(115200);
  WiFiManager wifiManager;
  //wifiManager.resetSettings();    //Uncomment this to wipe WiFi settings from EEPROM on boot.  Comment out and recompile/upload after 1 boot cycle.
  wifiManager.autoConnect("NodeMCU");
  //if you get here you have connected to the WiFi
  Serial.println("connected...yeey :)");
  pinMode(BUILTIN_LED, OUTPUT);     // Initialize the BUILTIN_LED pin as an output, I like blinkies.
  Blynk.begin(auth, WiFi.SSID().c_str(), WiFi.psk().c_str());
}

void loop()
{
  Blynk.run();  // Commented out for a short time.
}
@Rick_Maity I’ve made your PM public, appended it to your other post on the same subject and fixed your code by adding triple back-ticks.
You should take a look at this example:
https://examples.blynk.cc/?board=ESP8266&shield=ESP8266%20WiFi&example=More%2FSync%2FSyncPhysicalButton
Also, if you’re using Wi-Fi manager with an ESP8266 you’re better using SPIFFS rather than EEPROM.
Pete.
first of all thanks for valuable help! the qustion i want to ask is doe it work the same way now how it used to before ? and a another question how to fix the push buttons or where to fix ?@PeteKnight
should i just have paste the code like this to my source code ?
(Removed unformatted code - Moderator)
please do help me with the errors it gives as i am just a noob to rectify the errors what is happening !! the things what i want to controll is my tube light and not a led so pls consider that!
You would be better attaching an interrupt routine. Google Arduino interrupt to figure it out and which pins work for interrupts on your device.
Also please move the back ticks to the START and END of your code above.
@daveblynk can u please help me out by doing it as i am a noob to understand all this things ?
it will be a great help !
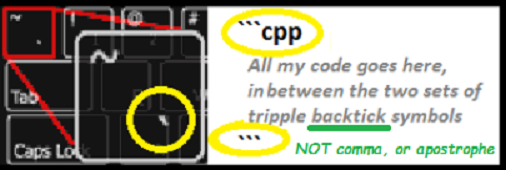
Edit your post with 2 sets of three back ticks. Google it if you can’t find on your keyboard. Or copy these ``` and place at the beginning and ending of your block of code.
@daveblynk how should i use the given example above by @PeteKnight to my code code above @Rick_Maity?
MR.@daveblynk can u pls help me ?
how should i use the given example above by @PeteKnight to my code code above @Rick_Maity?
I cannot see your code. Pete’s link has the pertinent info.
so can u help me with the thing using this code:
[Unformatted code removed by moderator]
can u help me do the thing by you adding the code into it as i dont verywell know how to do it ?
When you post code into the forum it needs to have three backticks at the beginning and end.
Three backticks look like this:
```
If you can’t find the backtick symbol on your keyboard you can copy and paste the ones that I’ve provided above.
Also, posting “please help me” all the time won’t get the response you’re looking for. We will help you to help yourself. You’ve already been provided with a code example from me. If you read that example you’ll see that it’s fairly self explanatory about how to wire-up your physical button. If you’re not prepared to try this out and do a little experimentation then you won’t get very far with this project.
Pete.
@PeteKnight as I am new to this I do not know what to do and what not to do, as a beginner point of view I asked an help from a teacher to be honest !!
As a teacher @PeteKnight IS the best! (Hey Pete you missed your calling  ) He has tutored me… maybe teachers now a days give answers but they sure didn’t used to. Believe me take Pete’s link and add the stuff from yours that it is missing and it will work!!!
2 Likes
that is the whole point as i am im not able to do i told one of you guys to fix the problem for and i will be greatful for your help. i hope tne the source code of mine is posted on the question area … so please help me fix brother…please!@daveblynk
i tried it in a lot of ways but not able to finish the required outcome…that is the reason i need a support from an expert by helping me putting in the required lines of code to make it as i want…i hope you understand this time …@daveblynk @PeteKnight