Hello, I’m new to ESP8266 and Blynk.
I’m using a NodeMCU_1 (ESP8266) to open a gate (gate 1) in my house. And I’m using the Blynk app on my smartphone. The control is simple, only one on / off button which in turn is connected to a system that opens the gate.
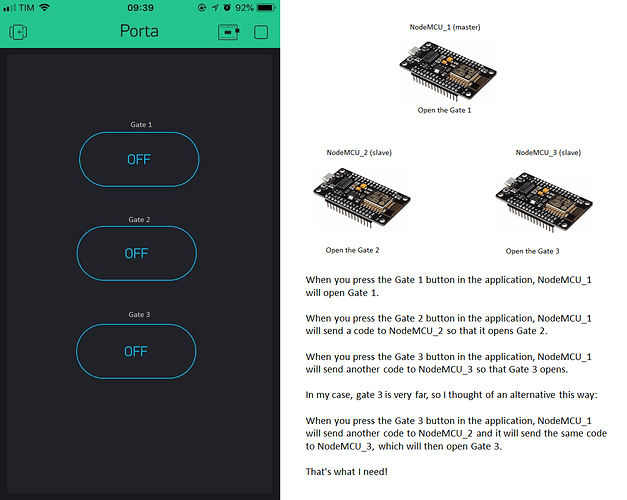
I need to open two more gates (Gate 2 and Gate 3). I want to put another NodeMCU (NodeMCU_2 and NodeMCU_3) on each of these gates (gate 2 and 3) but I want NodeMCU_1 to send a code to the other NodeMCU (NodeMCU_2 and NodeMCU_3) which will in turn open the other gates (2 and 3) respectively.
I have no idea how to solve and I’m very, very weak in programming.
can anybody help me?
What you’re asking for is achievable, in a variety of different ways (some of which depend on whether you’re using the Android or iOS version of the App).
However, I’m not convinced about the logic of what you’re trying to achieve. Why do you want one of the gate release MCU’s to act as the master? Is there some timing delay required between gates 1, 2 & 3 opening, or do they all need to open simultaneously?
Does the opposite need to happen in reverse when a person is leaving?
Users of this forum will normally be happy to point you in the right direction and help you overcome programming issues that you’ve encountered, but we won’t write your code for you, so you need to become a much stronger programmer along the way (we’ve all been on that journey ourselves).
Pete.
What you’re asking for is achievable, in a variety of different ways (some of which depend on whether you’re using the Android or iOS version of the App).
I will use the app for iOS and also for Android! This is important!
Why do you want one of the gate release MCU’s to act as the master?
Because I want to open the gates using the Blynk application just by pressing a power button for each gate. I thought it would be easier to focus the drive on one NodeMCU and send code to the others to open the other gates.
Is there some timing delay required between gates 1, 2 & 3 opening, or do they all need to open simultaneously?
I want to open the doors individually.
Does the opposite need to happen in reverse when a person is leaving?
No. There is no need to close the door. This will be closed by the person himself.
Users of this forum will normally be happy to point you in the right direction and help you overcome programming issues that you’ve encountered, but we won’t write your code for you, so you need to become a much stronger programmer along the way (we’ve all been on that journey ourselves).
Thank you! All I want is an orientation so that I can seek these myself and add to my knowledge.
I tried to summarize in a figure and a small text what I would like to do here in my house.
When I refer to opening a gate I mean that a pin of NodeMCU will be triggered.
Okay, I think I understand what you want to achieve, and it’s the same as what I imagined when I first read your post. The thing that confused me was wanting to have the MCU on one gate control the others - that’s not the best way to go.
Each MCU should be created in Blynk as a separate device, with its own Auth code, but all linked to the same project This way, the Online status indicator in your project will show the on/offline status for each device.
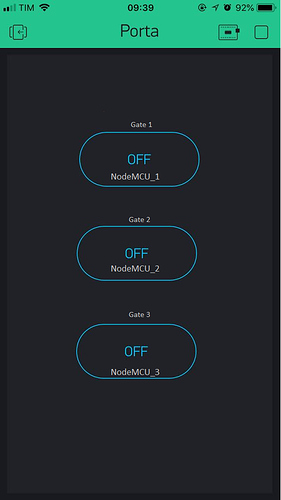
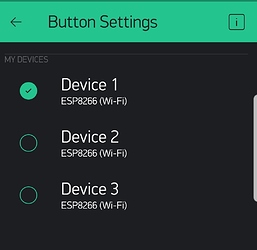
When you set-up the buttons in your app, choose the correct device for each button.
Each MCU will connect to a relay, and that relay will be controlled by making a pin go High or Low, depending on the type of relay you use.
I use the Wemos D1 Mini and the Wemos relay ‘shield’. these can stack one on top of the other or sit side by side on a doubler/tripler base.
My setup controls just one gate, but I also have an RFID reader attached to it, so that I can open the gate with an RFID tag, or the Blynk app (or a 433MHz button to release the gates when visitors arrive).
I trigger the electronic lock release for 5 seconds once the signal from Blynk/RFID/433Mhz is received.
My gate release is a 12v AC device and I found that I had to put a 220uf capacitor across the relay terminals to prevent interference with the MCU.
This thread shows a shot of the MCU, Relay and PSU/level shifter needed interface with the RFID reader, on a Wemos triple base, but the 220uf capacitor isn’t shown here::
Please dont ask me for my code, as I use Blyunk in a very different way to most people and it wont work in your infrastructure unless you have a Raspeberry Pi acting as an MQTT and Nod-Red server.
Each MCU should be created in Blynk as a separate device, with its own Auth code, but all linked to the same project This way, the Online status indicator in your project will show the on/offline status for each device.
When you set-up the buttons in your app, choose the correct device for each button.
@PeteKnight Thank you! I think I understood. But I just do not know how to do it. Add, in a single project, buttons for each NodeMCU. If you can guide me, I would appreciate it.
Please dont ask me for my code, as I use Blyunk in a very different way to most people and it wont work in your infrastructure unless you have a Raspeberry Pi acting as an MQTT and Nod-Red server.
Relax, my friend! I do not want source code, but guidance. Stay calm!![]()
![]()
Each MCU will connect to a relay, and that relay will be controlled by making a pin go High or Low, depending on the type of relay you use.
Particularly I do not use relay but MOSFET, it works very well and so far, in my project, it has not caused any interference.![]()
Stop the project (press the square on the top right hand corner).
You will then get a “Nut” icon, press that to go into Project Settings.
Scroll down to Devices.
Add devices called Gate1, Gate2 and Gate3 then email the Auth codes to yourself.
Edit your Gate 1 button and link it to Gate1 device etc.
Your sketch for your Gate 1 MCU will use the Gate1 Auth code etc.
Pete.
Hi all, I have seen the button is not able to link to more than one device at the same time… I guess the fact to be able to link one Button to multiple devices would be useful.
What do you think? Am I missing that option somewhere?
Regards!
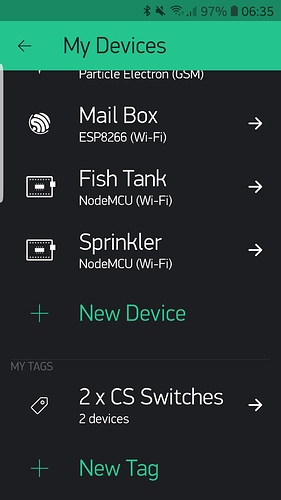
Yes, you can. For that purpose you need to create a “tag” first and then assign button to that tag. More info: Introduction - Blynk Documentation
Hi @Eugene,
I must be sleepy but I can’t find the way to create that “tag”…
Could you please elaborate a little bit further??
Thanks in advance
Thanks, works!!!


