Failed to Read from DHT Sensor

hello Everyone

kindly Assist I have been trying DHT11 using Wemos D1 R1 but the serial monitor keeps indicating Failed to read from DHT sensor

i got the code from example.blynk.cc

code

#define BLYNK_PRINT Serial    // Comment this out to disable prints and save space
#include <SPI.h>
#include <ESP8266WiFi.h>
#include <BlynkSimpleEsp8266.h>

#include <DHT.h>

// You should get Auth Token in the Blynk App.
// Go to the Project Settings (nut icon).
char auth[] = " "; //Enter the Auth code which was send by Blink

// Your WiFi credentials.
// Set password to "" for open networks.
char ssid[] = "";  //Enter your WIFI Name
char pass[] = "";  //Enter your WIFI Password

#define DHTPIN 2          // Digital pin 2

// Uncomment whatever type you're using!
#define DHTTYPE DHT11     // DHT 11
//#define DHTTYPE DHT22   // DHT 22, AM2302, AM2321
//#define DHTTYPE DHT21   // DHT 21, AM2301

DHT dht(DHTPIN, DHTTYPE);
BlynkTimer timer;


// This function sends Arduino's up time every second to Virtual Pin (5).
// In the app, Widget's reading frequency should be set to PUSH. This means
// that you define how often to send data to Blynk App.
void sendSensor()
{
  float h = dht.readHumidity();
  float t = dht.readTemperature(); // or dht.readTemperature(true) for Fahrenheit

  if (isnan(h) || isnan(t)) {
    Serial.println("Failed to read from DHT sensor!");
    return;
  }
  // You can send any value at any time.
  // Please don't send more that 10 values per second.
  Blynk.virtualWrite(V5, h);  //V5 is for Humidity
  Blynk.virtualWrite(V6, t);  //V6 is for Temperature
}

void setup()
{
  Serial.begin(9600); // See the connection status in Serial Monitor
  Blynk.begin(auth, ssid, pass);

  dht.begin();

  // Setup a function to be called every second
  timer.setInterval(1000L, sendSensor);
}

void loop()
{
  Blynk.run(); // Initiates Blynk
  timer.run(); // Initiates SimpleTimer
}"
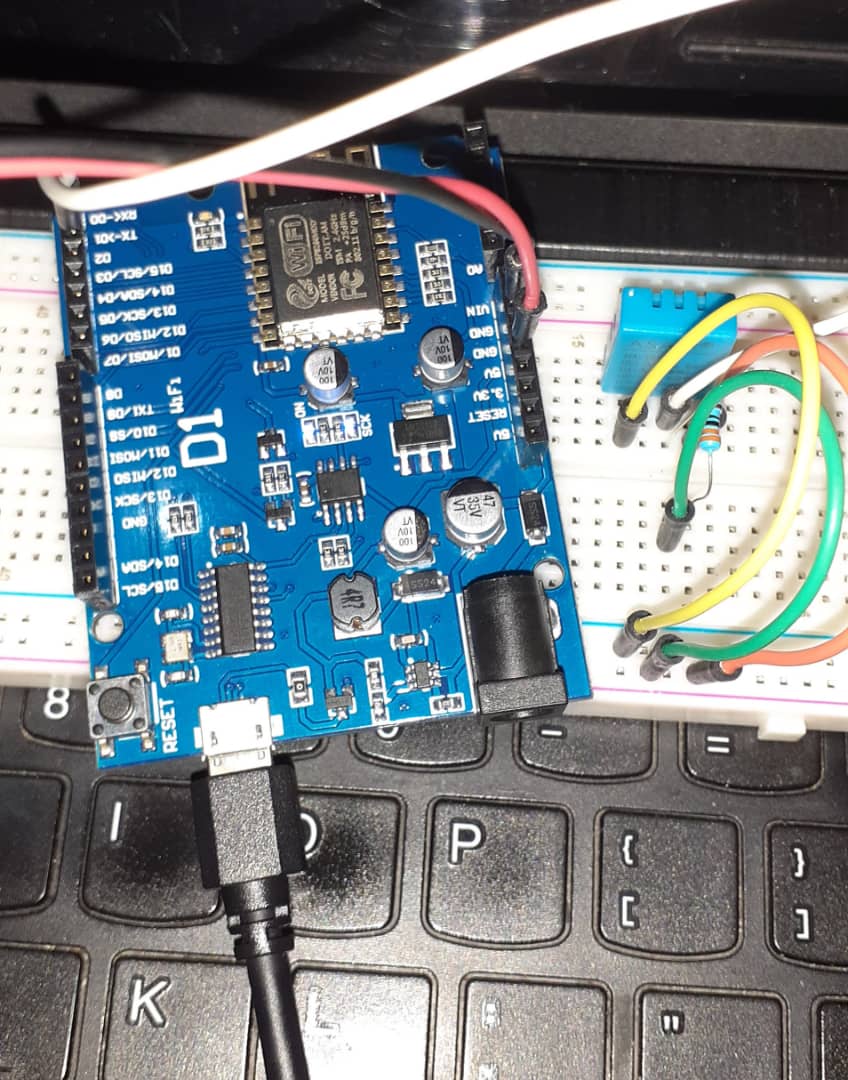
#define DHTPIN 2 // Digital pin 2

The wire for the DHT should be connected to GPIO 2 (the socket labeled D2 I believe in this case).

@Cardinalray1 please edit your post, using the pencil icon at the bottom, and add triple backticks at the beginning and end of your code so that it displays correctly.
Triple backticks look like this:
```

Pete.

@Toro_Blanco I have been trying D2 but no avail, i first thought it was the DHT11 connection i tried it with Arduino Uno and it did work so im kind of lost where the error could be

Hey @PeteKnight Thank You i have edited the code

Hmm. The only other suggestion I would have is to increase the interval you are reading the sensor. The dht11 typically needs about 2 seconds. So I would go with that as a minimum.

timer.setInterval(2500L, sendSensor);//read sensor every 2.5 seconds

Maybe double check the wiring, and make sure all of the connections are good. Sometimes when using a breadboard, giving things a wiggle may help.

I believe that GPIO2 is labelled D9 on the D1 R1

Pete.

2 Likes

@PeteKnight Youre A Hero D9 it is , finally working

@Toro_Blanco thank You so much had to also double check

1 Like

The WEMOS boards are pretty good, I use a lot of them, but as you’ve discovered the D1R1 has different GPIO pin assignment to the other WEMOS boards (D1R2 and Mini). I made this table as a quick reference, saves a lot of time . . .

GPIO UNO WEMOS D1R2 & Mini WEMOS D1R1 (Rertired)
00 D0 D3 D8
01 D1 D1
02 D2 D4 - BUILTIN D9 - BUILTIN
03 D3 D0
04 D4 D2 - SDA D4 - SDA
05 D5 D1 - SCL D3 - SCL
06 D6
07 D7
08 D8
09 D9
10 D10
11 D11
12 D12 D6 D6
13 D13 - BUILTIN D7 D7
14 A0 D5 D5
15 A1 D8 D10
16 A2 D0 D2
17 A3
18 A4 - SDA
19 A5 - SCL
A0 - 3V3 A0 - 3V3

cul
billd

2 Likes

@Bill_Donnelly
was really looking for this Chart Thank You o much making work way easier

1 Like