I would crash too, seeing that meathook grasping at me
That print statement comes before the Blynk.begin() command to connect to the server… so it actually connects just fine and crashes later in the code…
Adding in #define BLYNK_PRINT Serial at the beginning of your sketch will give a bit more info in the serial monitor.
I loaded your sketch and tested, and it is crashing when it actually tries to read the sensor… I suspect it is either not seeing the sensor (as in my case) or that there is a problem with the pin choices for that board (both kinda related actually).
Commenting out these lines allow the sketch to run. You can try commenting out only one at a time to see if it makes any difference on your side.
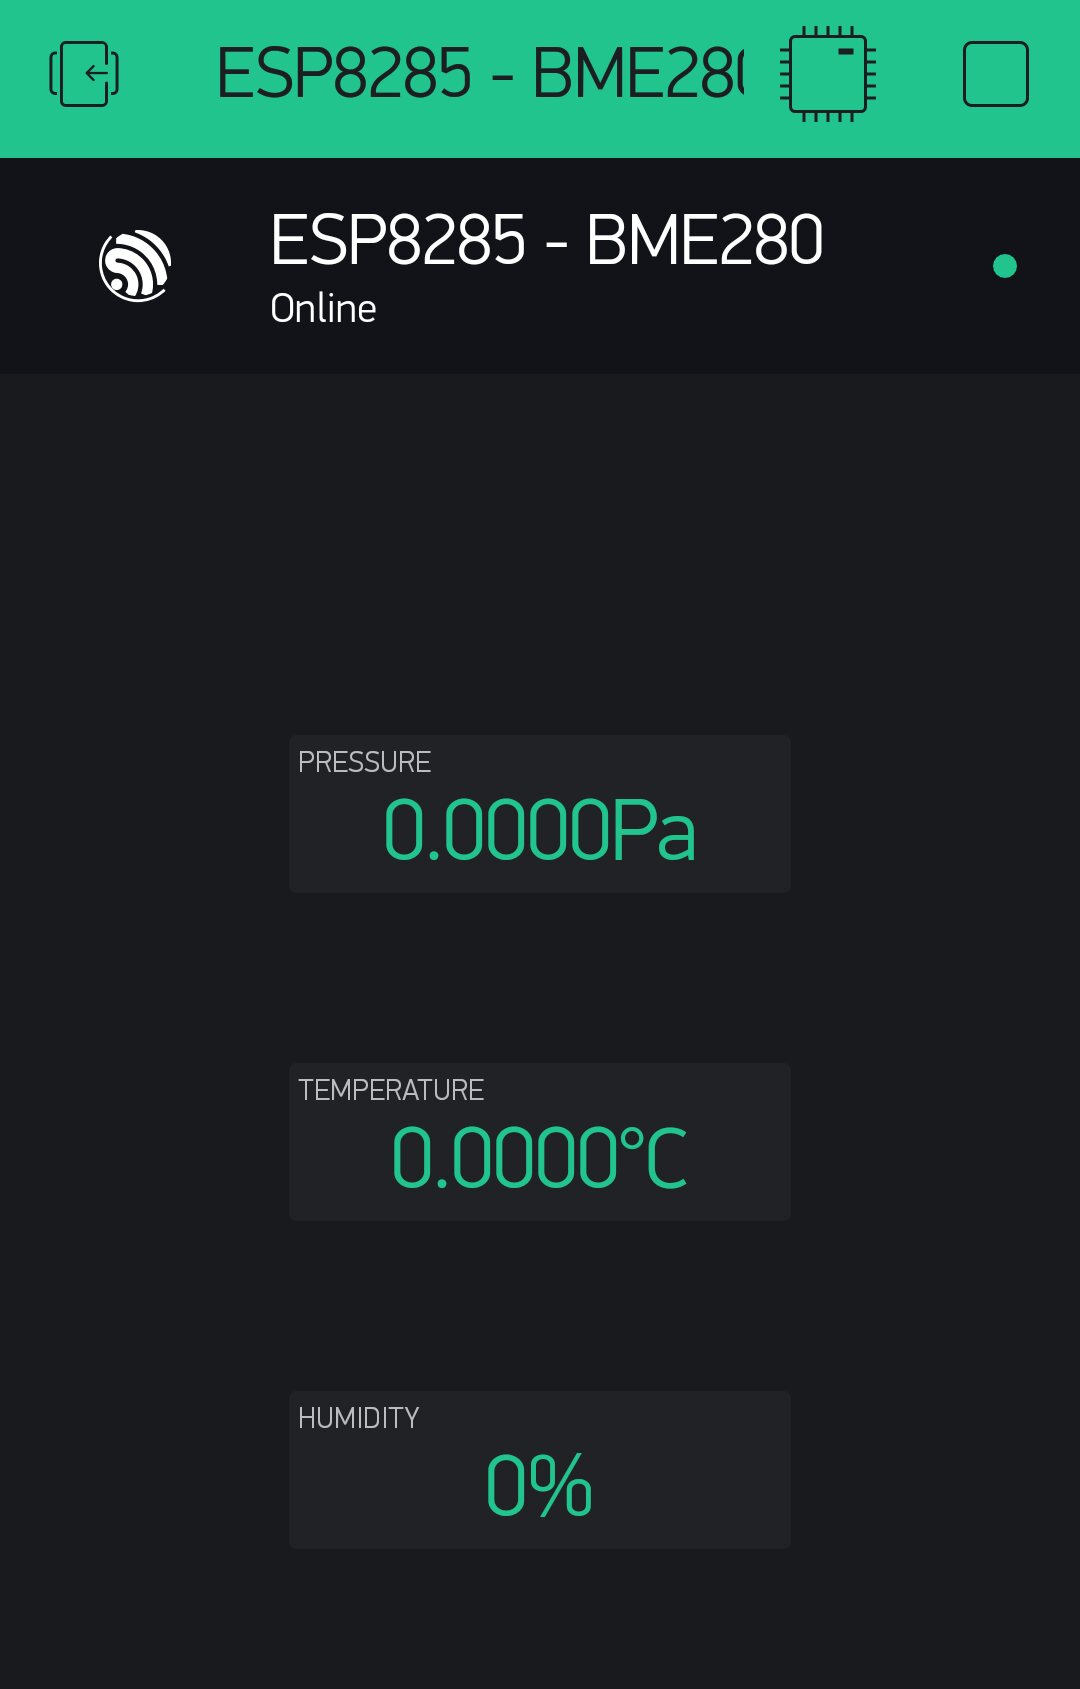
So the original NodeMCU code works on the ESP8285 but you get no readings (because you don’t know where to connect your sensor).
If you add this line:
then re-run the code (without any sensor connected) then it crashes - is that correct?
It looks like you’re in the UK (BT Hub in your Wi-Fi credentials) in which case it’s gone 2am. Maybe time to sleep on it and have a fresh look at it tomorrow?
I’ll try commenting out those lines and see what happens.
Yes
Yes.
I’m not at work until Monday, site is flooded, bad weather and a burst water main. So i’ll be up late to night and sleep in tomorrow ready for a late night down the pub with a few of the lads. Plus I find it hard to stop messing with these things, my brain wont turn off.
The NodeMCU sketch works fine except no sensor data.
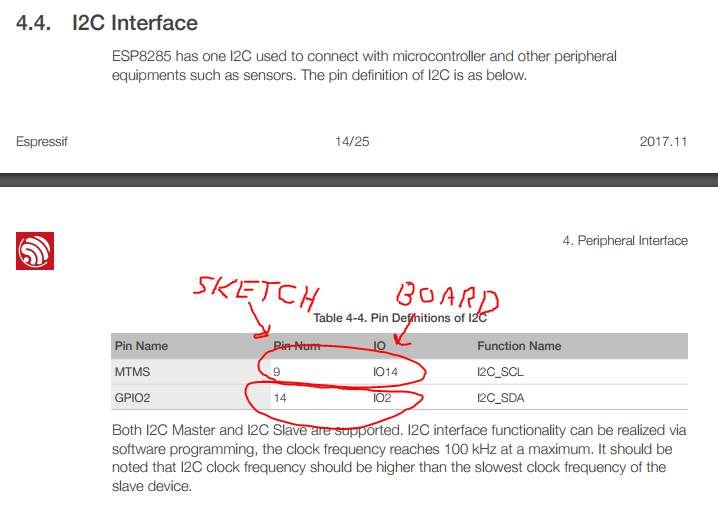
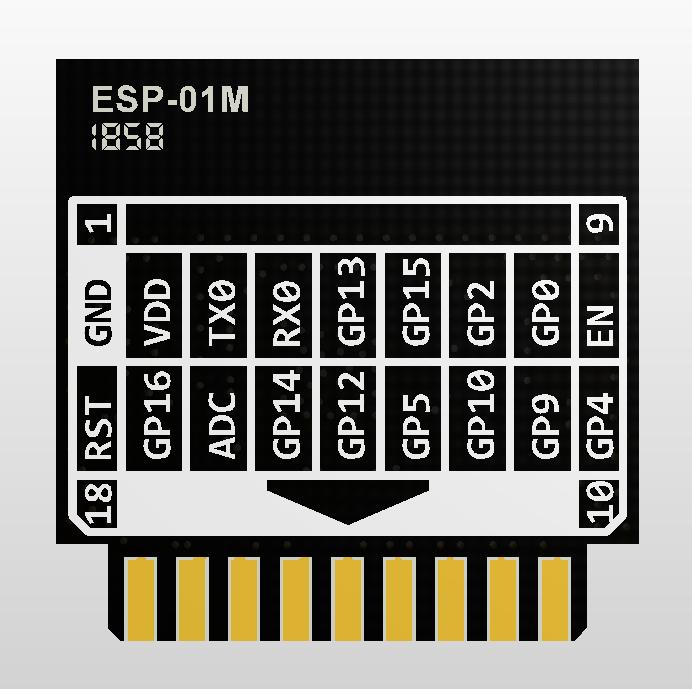
@Gunner I don’t see how those pin numbers and GPIO’s relate to one another. Do the pin numbers start at Ground because I’m presuming its pin 1? 9 pin each side, 18 in total. So pin 9 would be EN and pin14 would be GPIO12 ?
    #define BLYNK_PRINT Serial
    #include <Blynk.h>
    #include <ESP8266WiFi.h>
    #include <Wire.h>
    #include <BlynkSimpleEsp8266.h>
    #include <Adafruit_Sensor.h>
    #include <Adafruit_BME280.h>
    #define SEALEVELPRESSURE_HPA (1013.25)
    //Setup connection of the sensor
    Adafruit_BME280 bme; // I2C

    char auth[] = "3efa4091d9xxxxx3fe454a58ca";
    char ssid[] = "xxxxx";
    char pass[] = "xxxxx";

    BlynkTimer timer;

    float pressure;     //To store the barometric pressure (Pa)
    float temperature;  //To store the temperature (°C)
    int humidity;      //To store the humidity (%) (you can also use it as a float variable)

    void setup() {
      //Wire.begin(int sda, int scl)
      Wire.begin(14, 9);    //Begin the sensor
      Serial.begin(9600); //Begin serial communication at 9600bps
      Serial.println("Adafruit BME280 test:");
      Blynk.begin(auth, ssid, pass);
      timer.setInterval(2000L, ReadSensors);   // read sensor every 2s

    }

    void ReadSensors(){
      //Read values from the sensor:
      pressure = bme.readPressure();
      temperature = bme.readTemperature();
      humidity = bme.readHumidity ();

      Blynk.virtualWrite(V1, pressure/100);     // write pressure to V1 value display widget
      Blynk.virtualWrite(V2, temperature);  // write temperature to V2 value display widget
      Blynk.virtualWrite(V3, humidity);    // write altimeter to V3 value display widget

      //Print values to serial monitor:
      Serial.print(F("Pressure: "));
      Serial.print(pressure);
      Serial.print(" Mb");
      Serial.print("\t");
      Serial.print(("Temp: "));
      Serial.print(temperature);
      Serial.print(" °C");
      Serial.print("\t");
      Serial.print("Humidity: ");
      Serial.print(humidity); // this should be adjusted to your local forcase
      Serial.println(" %");
      //delay(2000); //Update every 2 sec
    }

    void loop() {
      Blynk.run();
      timer.run();
    }
It seems there is enough difference with the ESP8285 and that example sketch… I tried some googling for others, and while I found some they seemed much more complex and utilising other sensors as well.
Basically this is more a sensor 101 issue, rather than Blynk and I have ran out of ideas without having the same sensor and board to test on.
I’m unable to establish which are the i2c pins so used “Wire.begin(14, 9);” instead of “bme.begin();” in the hope it would solve that issue. However, I think replacing the “bme.begin();” is the way forward as it runs perfectly, just need to solve the i2c pin problem.