Can anyone copy paste some code for controlling the speed and direction of a dc motor with a joystick(Horizontal)
thanks in advance.
Can anyone copy paste some code for controlling the speed and direction of a dc motor with a joystick(Horizontal)
thanks in advance.
Can you do that without Blynk?
Well I think so?
maybe not the two at the same time?
First of all, you should make it work without Blynk. Then decide on the communication (wifi, ethernet…etc)
Then add Blynk on top of it, which is really easy.
Well I don’t have a joystick but i did do it with 2 buttons (forwards and backwards)
How does your internet connection look like?
Check out documentation on how to use virtual pins and you should be good to go.
Ah thanks that helps
I’m basically doing the same with an old stepper motor of a printer. You should get a motor driver as not to overload your Arduino (or other hardware). But as @Pavel said, it should be done in about no time with Blynk.
Can you post your current Sketch/code of what you made so far? I’d be happy to take a look as how to incorporate Blynk for you 
Here is what I have so far. I had great success with this method on a romeo ble but not so much on NodeMCU (ESP8266) with Blynk Standalone and Merged Joystick.
    /**************************************************************
     * Blynk is a platform with iOS and Android apps to control
     * Arduino, Raspberry Pi and the likes over the Internet.
     * You can easily build graphic interfaces for all your
     * projects by simply dragging and dropping widgets.
     *
     *   Downloads, docs, tutorials: http://www.blynk.cc
     *   Blynk community:            http://community.blynk.cc
     *   Social networks:            http://www.fb.com/blynkapp
     *                               http://twitter.com/blynk_app
     *
     * Blynk library is licensed under MIT license
     * This example code is in public domain.
     *
     **************************************************************
     * This example runs directly on ESP8266 chip.
     *
     * You need to install this for ESP8266 development:
     *   https://github.com/esp8266/Arduino
     *
     * Please be sure to select hte right ESP8266 module
     * in the Tools -> Board menu!
     *
     * Change WiFi ssid, pass, and Blynk auth token to run :)
     *
     **************************************************************/

    #define BLYNK_PRINT Serial    // Comment this out to disable prints and save space
    #include <ESP8266WiFi.h>
    #include <BlynkSimpleEsp8266.h>

    // You should get Auth Token in the Blynk App.
    // Go to the Project Settings (nut icon).
    char auth[] = "************";

    //Standard PWM DC control
    int E1 = 5;     //M1 Speed Control D1 Motor A
    int E2 = 4;     //M2 Speed Control D2 Motor B
    int M1 = 0;    //M1 Direction Control D3 Motor A
    int M2 = 2;    //M2  Direction Control D4 Motor B


    /* --GPIO Define
    2     function initGPIO()
    3     --1,2EN     D1 GPIO5
    4     --3,4EN     D2 GPIO4
    5     --1A  ~2A   D3 GPIO0
    6     --3A  ~4A   D4 GPIO2
    */

    void setup()
    {
       pinMode(5, OUTPUT);//power to motor
       pinMode(4, OUTPUT);//power to motor
       pinMode(0, OUTPUT);//Reverse Motor Direction
       pinMode(2, OUTPUT);//Reverse Motor Direction

      Serial.begin(9600);
      Blynk.begin(auth, "********", "*******");
    }
    // This function will be called every time
    // when App writes value to Virtual Pin 1


      BLYNK_WRITE(V1) {
      int x = param[0].asInt();
      int y = param[1].asInt();

      // Do something with x and y
      Serial.print("X = ");
      Serial.print(x);
      Serial.print("; Y = ");
      Serial.println(y);


       if (y > 30){
      analogWrite (E1,-y);      //PWM Speed Control 4
      digitalWrite(M1,LOW);
      analogWrite (E2,-y+abs(x/2));    //5
      digitalWrite(M2,HIGH);
      }

       else if (y < -30){
      analogWrite (E1,y+abs(x/2));      //PWM Speed Control 4
      digitalWrite(M1,HIGH);
      analogWrite (E2,y);    //5
      digitalWrite(M2,LOW);
      }

    /*  if (y > 30 && x < -30){
      analogWrite (E1,1-(y+abs(x)));      //PWM Speed Control
      digitalWrite(M1,LOW);
      analogWrite (E2,1-(y-abs(x)));
      digitalWrite(M2,HIGH);
      }

       if (y > 30 && x > 30){
       analogWrite (E1,1-(y-abs(x)));      //PWM Speed Control
      digitalWrite(M1,LOW);
      analogWrite (E2,1-y+abs(x));
      digitalWrite(M2,HIGH);
      }*/

     /* else if (x < -30 && y > 0){
     // analogWrite (E1,1+(y-abs(x)));      //PWM Speed Control
     analogWrite (E1,-y-abs(x));
      digitalWrite(M1,LOW);
      analogWrite (E2,-y+abs(x));
      digitalWrite(M2,HIGH);
      }

      else if (x > 30 && y > 0){
      analogWrite  (E1,-y+abs(x));       //PWM Speed Control
      digitalWrite(M1,LOW);
      analogWrite (E2,-y-abs(x));
      digitalWrite(M2,HIGH);
      }*/


       else {
       analogWrite (E1,0);
       analogWrite (E2,0);
      }
    }


    void loop()
    {
      Blynk.run();

}What i have now is pretty simple, it uses 4 button widgets for controlling the rc
include "blynk/blynk.h"

#include "blynk/blynk.h"

const int motorIn1 = D6;
const int motorIn2 = D5;
const int motorIn3 = D4;
const int motorIn4 = D3;

char auth[] = "xxxxxxxxxxxxxxxxxxxxxxxxxxxxxxxxxxx";

void setup()
{
  pinMode(motorIn1,OUTPUT);
  pinMode(motorIn2,OUTPUT);
  pinMode(motorIn3,OUTPUT);
  pinMode(motorIn4,OUTPUT);
  Serial.begin(9600);
  delay(5000);
  Blynk.begin(auth);
}

void loop()
{
  Blynk.run();
}

void Clockwise(int Speed)
{
  digitalWrite(motorIn1,Speed);
  digitalWrite(motorIn2,0);
}

void Counterclockwise(int Speed)
{
  analogWrite(motorIn1,0);
  analogWrite(motorIn2,Speed);
}

void Clockwise(int Speed)
{
  digitalWrite(motorIn3,Speed);
  digitalWrite(motorIn4,0);
}

void Counterclockwise(int Speed)
{
  analogWrite(motorIn3,0);
  analogWrite(motorIn4,Speed);
}

BLYNK_WRITE(10)
{
  if (param.asInt())
  {
    Clockwise(255);
  }
  else
  {
    digitalWrite(motorIn1,LOW);
  }
}
(I am using a Spark core)
This looks pretty awesome did you have to include any specific libraries for the spark core to work with this code besides Blynk? Are all these variables local to the sketch?
Only The Blynk Library Was included
I just realised i did a redefenition of "Clockwise" and "Counterclockwise" here's the working code
   #include "blynk/blynk.h"

    const int motorIn1 = D6;
    const int motorIn2 = D5;
    const int motorIn3 = D4;
    const int motorIn4 = D3;

    char auth[] = "xxxxxxxxxxxxxxxxxxxxxxxxxxxxx";

    void setup()
    {
      pinMode(motorIn1,OUTPUT);
      pinMode(motorIn2,OUTPUT);
      pinMode(motorIn3,OUTPUT);
      pinMode(motorIn4,OUTPUT);
      Serial.begin(9600);
      delay(5000);
      Blynk.begin(auth);
    }

    void loop()
    {
      Blynk.run();
    }

    void Clockwise(int Speed)
    {
      digitalWrite(motorIn1,Speed);
      digitalWrite(motorIn2,0);
    }

    void Counterclockwise(int Speed)
    {
      analogWrite(motorIn1,0);
      analogWrite(motorIn2,Speed);
    }

    void ClockWise(int Speed)
    {
      digitalWrite(motorIn3,Speed);
      digitalWrite(motorIn4,0);
    }

    void CounterclockWise(int Speed)
    {
      analogWrite(motorIn3,0);
      analogWrite(motorIn4,Speed);
    }

    BLYNK_WRITE(10)
    {
      if (param.asInt())
      {
        Clockwise(255);
      }
      else
      {
        digitalWrite(motorIn1,LOW);
      }
    }
Please edit your post. Code should be formatted.
Wrap the code by pressing this magic button (Backtick`) 3 times (before the code and after it):**
![]()
![]()
![]()
Example:
 ``` <--- insert this
 Paste your code here
 ``` <--- insert this
This makes your code beautiful with highlighted syntax, like this:
//comment goes here
void helloWorld() {
   String message =  "hello" + "world";
}
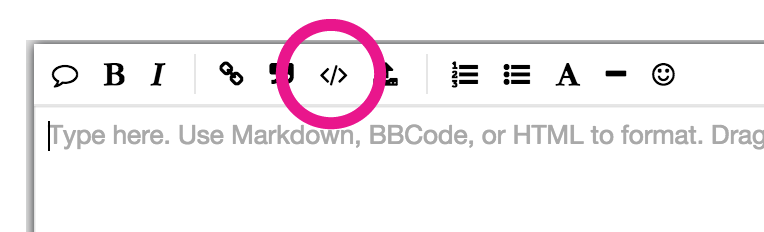
You can also select the code and press </> button in the top menu:
I changed it, thanks
Hi! I am making a project like this one! Using 4 buttons for controls I had trouble in using the blynk buttons. Could you please help me? :’( pleassse
Get it working with physical buttons first… then convert them to Blynk buttons.
Working forward instead of backwards will eliminate problems
do you know the flow chart of this?