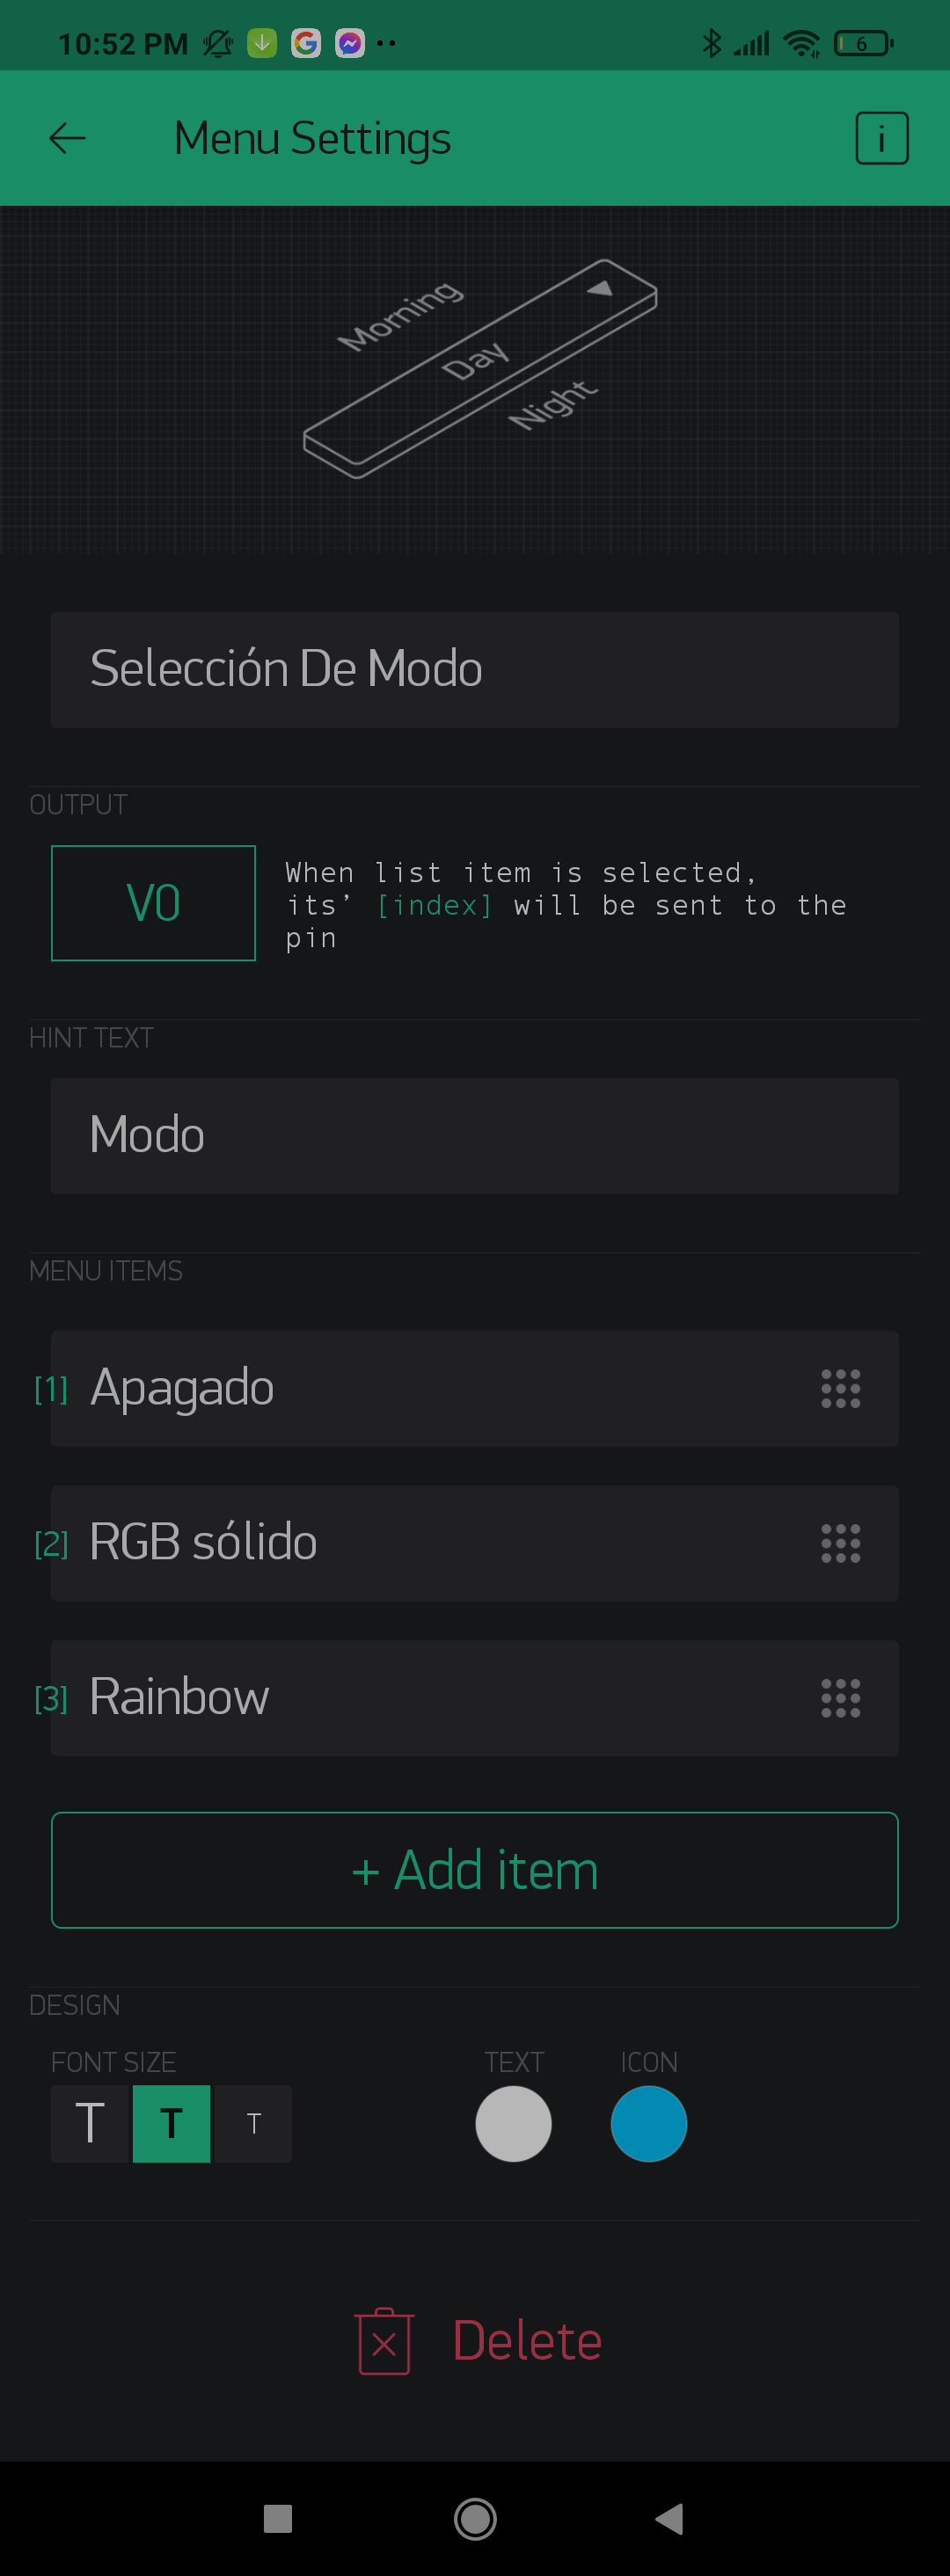
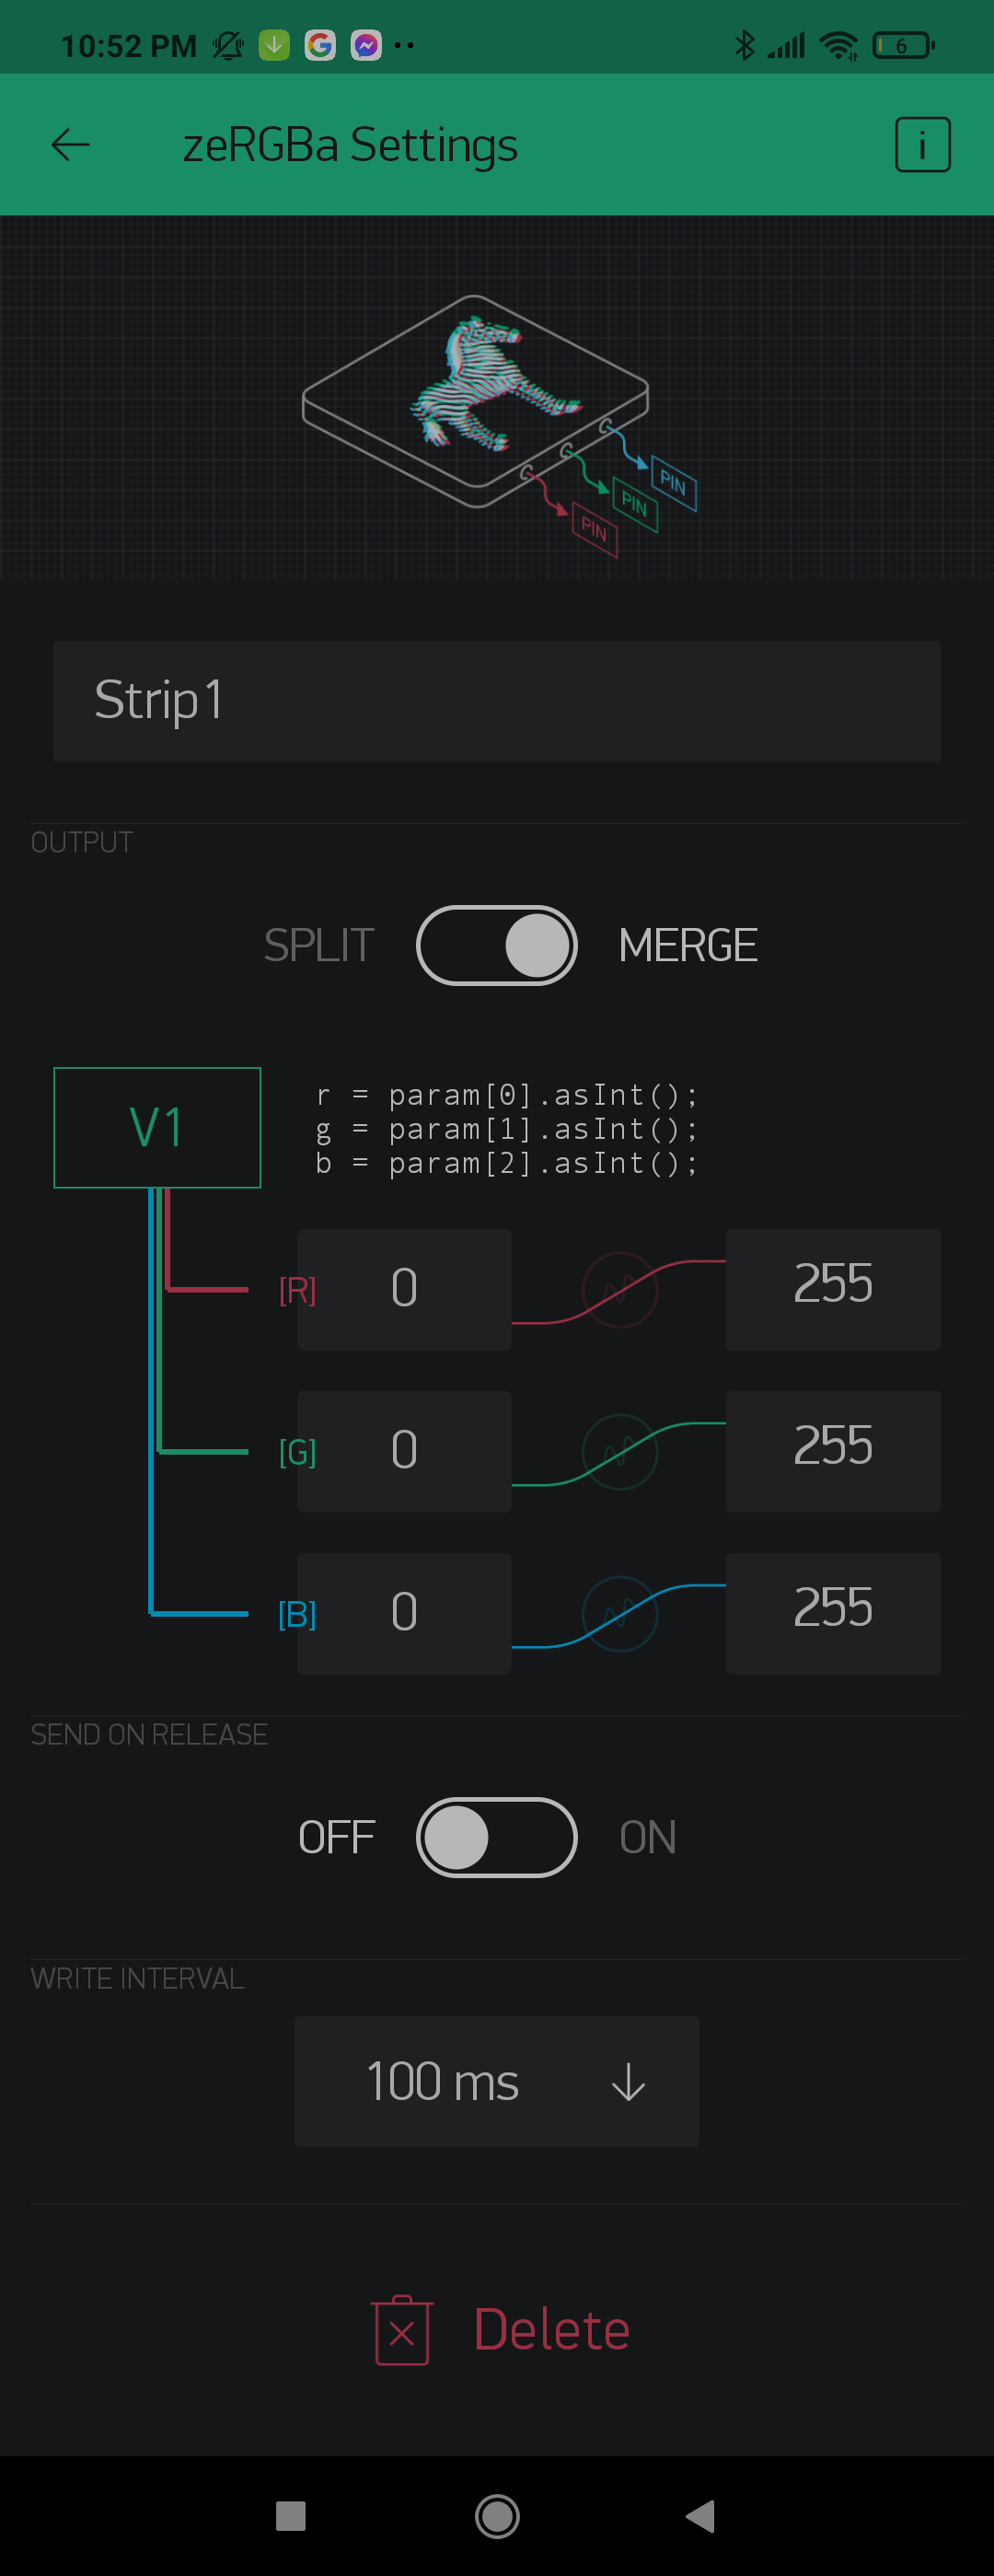
I was recently working on a project in wich I control a Neopixel strip with the zeRGBa controller, I used the example and works just fine, so I wanted to add a menu so I can choose between turning the strip off, using the zeRGBa or doing a rainbowCycle, I kinda managed to do so in a way when I select off it turns off, but when selecting zeRGBa it only updates once and no longer reads the values I send tough I deactivated send on realase, I want to have the posibility of constantly sending the rgb values when I select zeRGBa, here’s my code:
I’ll update with screenshots of my blynk app so you can see how its set up.
#include <Adafruit_NeoPixel.h>

#define PIN 8 //Pin NeoPixel
#define NUMLEDS 34 //Numero de LEDs
Adafruit_NeoPixel pixels = Adafruit_NeoPixel(NUMLEDS, PIN, NEO_BRG  + NEO_KHZ800);

int R, G, B;

unsigned long Intervalo = 20;
unsigned long prevMillis = 0;
unsigned long currentMillis;
int cycles = 0;

#define BLYNK_PRINT Serial
#include <SoftwareSerial.h>
#include <BlynkSimpleSerialBLE.h>

char auth[] = "I do have my auth key here";

SoftwareSerial SerialBLE(10, 11); //Pines de comunacion BT
SoftwareSerial SwSerial(10, 11); // RX, TX

void setup() {

  Serial.begin(9600);

  SerialBLE.begin(9600);
  Blynk.begin(SerialBLE, auth);

  Serial.println("Waiting for connections...");


  pixels.begin();
  pixels.setBrightness(255);
}

BLYNK_WRITE(V0) {
  switch(param.asInt()) {

    case 1:
    wipe();
    pixels.show();
    break;

    case 2:
      for(int i=0; i<NUMLEDS; i++) {

        pixels.setPixelColor(i, pixels.Color(R,G,B));

        pixels.show();
      }
    break;
  }
}

BLYNK_WRITE(V1) {

  R = param[0].asInt();
  G = param[1].asInt();
  B = param[2].asInt();

  Serial.println(R);
  Serial.println(G);
  Serial.println(B);
}

void loop() {

  Blynk.run();
}

void wipe(){ // clear all LEDs
  for(int i=0;i<NUMLEDS;i++){
    pixels.setPixelColor(i, pixels.Color(0,0,0));
    }
 }
BLYNK_WRITE(Vx) is a type of callback function which triggers ONCE when the value of the widget attached to pin Vx changes.
So, your code appears to be working correctly.
If you want a piece of code to loop continuously until another virtual pin input occurs then you’ll need to structure your code differently.
This is actually quite difficult using Blynk, as the Blynk.run command needs to be executed very frequently, as this is how the hardware sees the change in state of the virtual pins, and is s as lid needed to prevent the device as being listed as “missing in action” by the Blynk server.
Hi, Pete, thanks for the quick reply, my approach was to make a code every certain interval updates the selection so I could constatntly send zeRGBa data, but that would be too much instructions for the BLE module and I’ll get a “Packet too big”, so right now I can only think not to nest the zRGBa output to the menu, but this will need me to not use it when another option is selected. The fact is I’m really new at Blynk and programming itself, so I don’t really have an idea on how can I receive constant updates from the menu.
That’s the wrong approach to use.
You need to use the input from the app to trigger a process that repeats, either using a timeout timer or an interval timer.
Hi, it’s me again, so I tried to write a code that triggers a repeating process using an interval timer as you suggested, but somehow it doesn’t work yet, which is strange because the blynk app says when an option its selected its [index] is sent to the pin, I’m sure I’m missing something really important, I’ll appreciate if you take a look, thanks in advance.
#include <Adafruit_NeoPixel.h>

#define PIN 8 //Pin NeoPixel
#define NUMLEDS 34 //Numero de LEDs
Adafruit_NeoPixel pixels = Adafruit_NeoPixel(NUMLEDS, PIN, NEO_BRG  + NEO_KHZ800);

int R, G, B;

unsigned long Intervalo = 20;
unsigned long prevMillis = 0;
unsigned long currentMillis;
int cycles = 0;

#define BLYNK_PRINT Serial
#include <SoftwareSerial.h>
#include <BlynkSimpleSerialBLE.h>

char auth[] = "Auth";

SoftwareSerial SerialBLE(10, 11); //Pines de comunacion BT
SoftwareSerial SwSerial(10, 11); // RX, TX

BlynkTimer timer;

void modeSelect() {
  switch(V0) {
    case 1:
    wipe();
    pixels.show();

    Serial.println(V0);
    break;

    case 2:
    for(int i = 0; i<NUMLEDS; i++) {

      pixels.setPixelColor(i, pixels.Color(R, G, B));

      pixels.show();

      Serial.println(V0);
    }
  }

}

void setup() {

  Serial.begin(9600);

  SerialBLE.begin(9600);
  Blynk.begin(SerialBLE, auth);

  Serial.println("Waiting for connections...");


  pixels.begin();
  pixels.setBrightness(255);

  timer.setInterval(20L, modeSelect);
}

BLYNK_WRITE(V1) {

  R = param[0].asInt();
  G = param[1].asInt();
  B = param[2].asInt();

  Serial.println(R);
  Serial.println(G);
  Serial.println(B);
}

void loop() {

  Blynk.run();
  timer.run();
}

void wipe(){ // clear all LEDs
  for(int i=0;i<NUMLEDS;i++){
    pixels.setPixelColor(i, pixels.Color(0,0,0));
    }
 } ```
Yes, but you’ve now removed the BLYNK_WRITE(V0) callback from your sketch, so you’ll never know what that index value is.
The timer that you’ve created runs every 20ms. That means you’ll be re-triggering the selected sequence (once you start capturing that selection again) every 20ms.
The process of disabling timers, re-enabling them again once the selected sequence has been completed, or triggering timeout timers to create a self perpetuating loop isn’t easy. That’s why I suggested looking at the many examples of LED strip animations that had already been written.
Yup, I added it and created a varaible that gets the index value from V0, I managed to make it kinda work but sometimes I get a packet too big message in serial monitor, here’s my code, I used timer before but got the same result with my current code using millis()
#include <Adafruit_NeoPixel.h>

#define PIN 8 //Pin NeoPixel
#define NUMLEDS 34 //Nummer of LEDs in the strip
Adafruit_NeoPixel pixels = Adafruit_NeoPixel(NUMLEDS, PIN, NEO_BRG  + NEO_KHZ800);

int R, G, B;

int selection;

unsigned long modeInterval = 100;
unsigned long Intervals [] = {100, 100, 20};
unsigned long prevMillis = 0;
unsigned long currentMillis;
int cycles = 0;

#define BLYNK_PRINT Serial
#include <SoftwareSerial.h>
#include <BlynkSimpleSerialBLE.h>

char auth[] = "Auth";

SoftwareSerial SerialBLE(10, 11); //Pines de comunacion BT
SoftwareSerial SwSerial(10, 11); // RX, TX


BLYNK_WRITE(V0) {
  selection = param.asInt();
}

void modeSelect() {
  switch(selection) {
    case 1:
    wipe();
    pixels.show();

    Serial.println(selection);
    break;

    case 2:
    for(int i = 0; i<NUMLEDS; i++) {

      pixels.setPixelColor(i, pixels.Color(R, G, B));

      pixels.show();

      Serial.println(selection);
    }
  }

}

void setup() {

  Serial.begin(9600);

  SerialBLE.begin(9600);
  Blynk.begin(SerialBLE, auth);

  Serial.println("Waiting for connections...");


  pixels.begin();
  pixels.setBrightness(255);

}

BLYNK_WRITE(V1) {

  R = param[0].asInt();
  G = param[1].asInt();
  B = param[2].asInt();

  Serial.println(R);
  Serial.println(G);
  Serial.println(B);
}

void loop() {

  Blynk.run();

  modeInterval = Intervals[selection];

  if( millis() - prevMillis > modeInterval) modeSelect();
  prevMillis = millis();
}

void wipe(){ // clear all LEDs
  for(int i=0;i<NUMLEDS;i++){
    pixels.setPixelColor(i, pixels.Color(0,0,0));
    }
 } ```
I read the neopixel example in the Blynk examples page but I coudn’t determine what kind of widget is in V1
  Download latest Blynk library here:
    https://github.com/blynkkk/blynk-library/releases/latest

  Blynk is a platform with iOS and Android apps to control
  Arduino, Raspberry Pi and the likes over the Internet.
  You can easily build graphic interfaces for all your
  projects by simply dragging and dropping widgets.

    Downloads, docs, tutorials: http://www.blynk.cc
    Sketch generator:           http://examples.blynk.cc
    Blynk community:            http://community.blynk.cc
    Follow us:                  http://www.fb.com/blynkapp
                                http://twitter.com/blynk_app

  Blynk library is licensed under MIT license
  This example code is in public domain.

 *************************************************************
  Warning: Bluetooth support is in beta!

  Control a color gradient on NeoPixel strip using a slider!

  For this example you need NeoPixel library:
    https://github.com/adafruit/Adafruit_NeoPixel

  App project setup:
    Slider widget (0...500) on V1
 *************************************************************/

/* Comment this out to disable prints and save space */
#define BLYNK_PRINT Serial


#include <SoftwareSerial.h>
SoftwareSerial SwSerial(10, 11); // RX, TX

#include <BlynkSimpleSerialBLE.h>
#include <Adafruit_NeoPixel.h>

// You should get Auth Token in the Blynk App.
// Go to the Project Settings (nut icon).
char auth[] = "YourAuthToken";

#define PIN 8

Adafruit_NeoPixel strip = Adafruit_NeoPixel(30, PIN, NEO_GRB + NEO_KHZ800);

// Input a value 0 to 255 to get a color value.
// The colours are a transition r - g - b - back to r.
uint32_t Wheel(byte WheelPos) {
  if (WheelPos < 85) {
    return strip.Color(WheelPos * 3, 255 - WheelPos * 3, 0);
  } else if (WheelPos < 170) {
    WheelPos -= 85;
    return strip.Color(255 - WheelPos * 3, 0, WheelPos * 3);
  } else {
    WheelPos -= 170;
    return strip.Color(0, WheelPos * 3, 255 - WheelPos * 3);
  }
}

BLYNK_WRITE(V1)
{
  int shift = param.asInt();
  for (int i = 0; i < strip.numPixels(); i++)
  {
    strip.setPixelColor(i, Wheel(shift & 255));
    // OR: strip.setPixelColor(i, Wheel(((i * 256 / strip.numPixels()) + shift) & 255));
  }
  strip.show();
}

void setup()
{
  // Debug console
  Serial.begin(9600);

  SerialBLE.begin(9600);
  Blynk.begin(SerialBLE, auth);

  Serial.println("Waiting for connections...");

  strip.begin();
  strip.show();
}

void loop()
{
  Blynk.run();
}
I tried using do…while function to trigger constant actions when the selection int is at a determined value but sitll get a packet too big in serial, how could I approach the problem instead? I would appreciate any ideas
I found in youtube a video where they control the strip similarly like I want, I’ll try to adapt it to my needs, thanks for the help and patience, Pete.