I would like to Connect my Pi Pico Wifi (in microPython) with Blynk but i didn’t found how to do that. I looked in the Quickstart guide but the Pi Pico Wifi is not represented and Thonny IDE too. I am lost, please help me…
I have already Connect en esp8266 with Blynk. It was very easy with the Quickstart but with the Pi Pico Wifi in microPython i’m totally lost.
Hello, i have installed the new library but now i would like to connect my Pi Pico Wifi with Blynk and my template. I found this code on Internet but it doesn’t work. Any idea please ? thank you
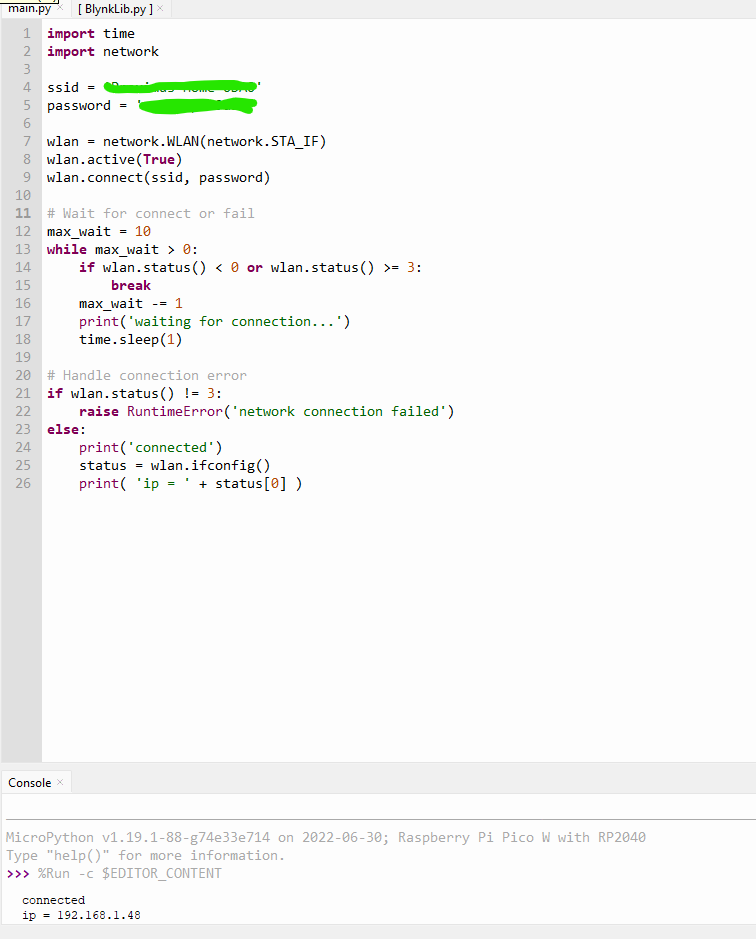
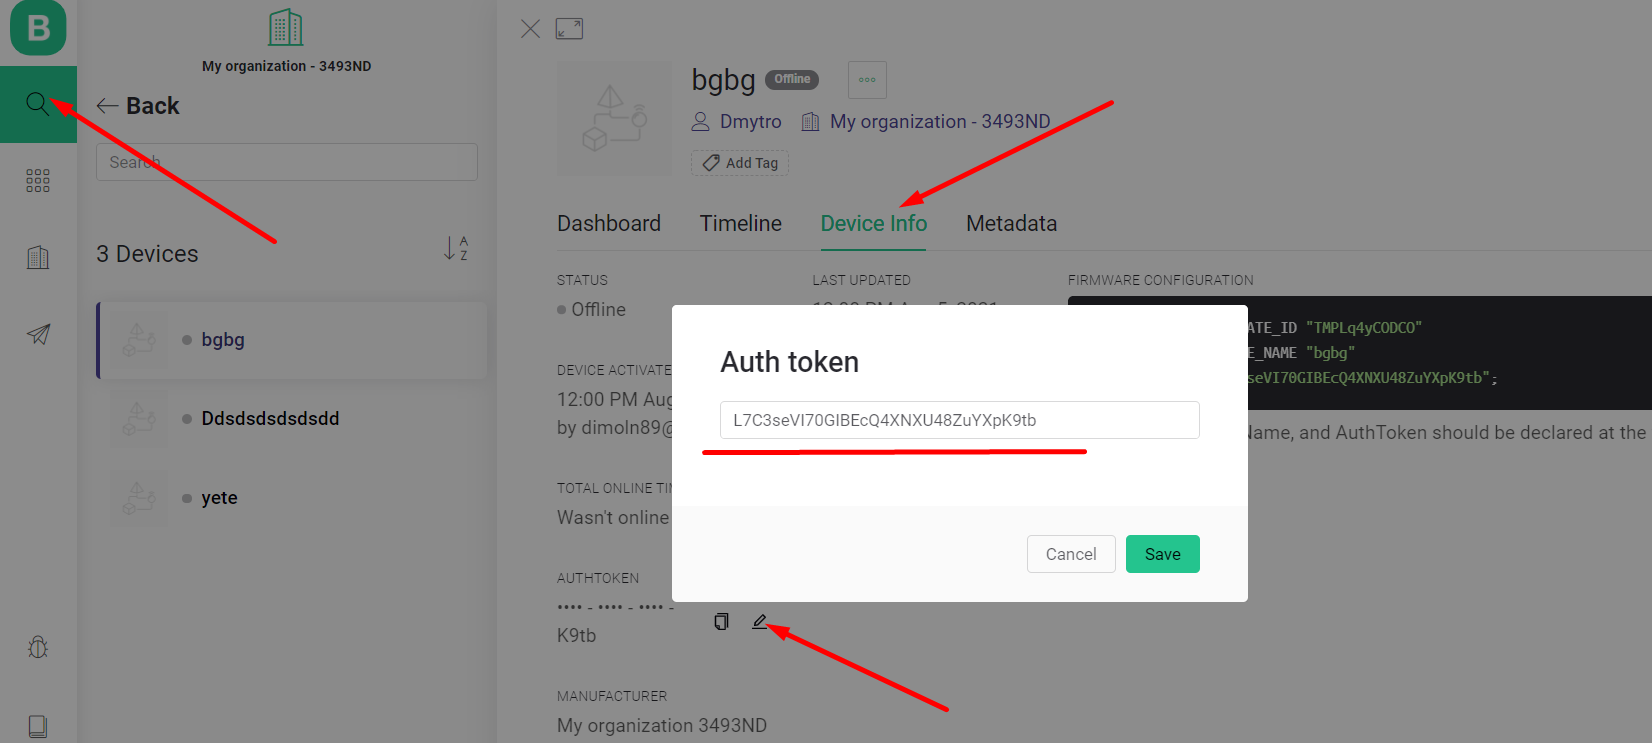
Hello, because on the code on GitHub, i didn’t understand how this code can Connect my Pi Pico to Blynk AND to the Wifi. In this code, there is no « SSID » and no « Password ». And normaly I also need an Auth Token but when i created my template and that i saved it, i received nothing. Any idea ?
"""
Blynk is a platform with iOS and Android apps to control
Arduino, Raspberry Pi and the likes over the Internet.
You can easily build graphic interfaces for all your
projects by simply dragging and dropping widgets.
  Downloads, docs, tutorials: http://www.blynk.cc
  Sketch generator:           http://examples.blynk.cc
  Blynk community:            http://community.blynk.cc
  Social networks:            http://www.fb.com/blynkapp
                              http://twitter.com/blynk_app
"""

import BlynkLib
import time

BLYNK_AUTH = 'YourAuthToken'

# initialize Blynk
blynk = BlynkLib.Blynk(BLYNK_AUTH)

tmr_start_time = time.time()
while True:
    blynk.run()

    t = time.time()
    if t - tmr_start_time > 1:
        print("1 sec elapsed, sending data to the server...")
        blynk.virtual_write(0, "time:" + str(t))
        tmr_start_time += 1
Thank you, now i found the token. But is the code that i send correct ? I just want to turn a light on with my phone to start. It seems very easy….but not for me.
The examples assume that you’re using a device that already has an internet connection - such as a Pi running RaspberryOS and the network connection has already been created.
In your case you’ll need to add the network connection code into the example sketch, but use the example as your starting point, not some random non-Blynk code that you’ve found.
To achieve that, you should use the correct script. You should add a virtual pin handler, which will be called every time the device gets an update of the virtual pin value from the server or app.
Additionally, in order to control the GPIOS, you should import the machine module, which has classes for various microcontroller peripherals such as GPIO, ADC, PWM, I2C, SPI, etc.
You create an internet connection, in your case via WiFi.
Then, you talk to the Blynk server across that internet connection. The Auth token is your “password” into the Blynk system for that device, in just the same way as when using any other device with Blynk.
I have to question why you’re using the Pi Pico and uPython rather than your NodeMCU and C++
I use the Pi Pico W because it’s for school and we have to use a Pi Pico W with µPython. I think it’s easier with a NodeMCU or an ESP32 but we can’t. I try to connect that and if there is a problem, I come back here.