My latest Blynk project is a weight based smart grinder with the following features.
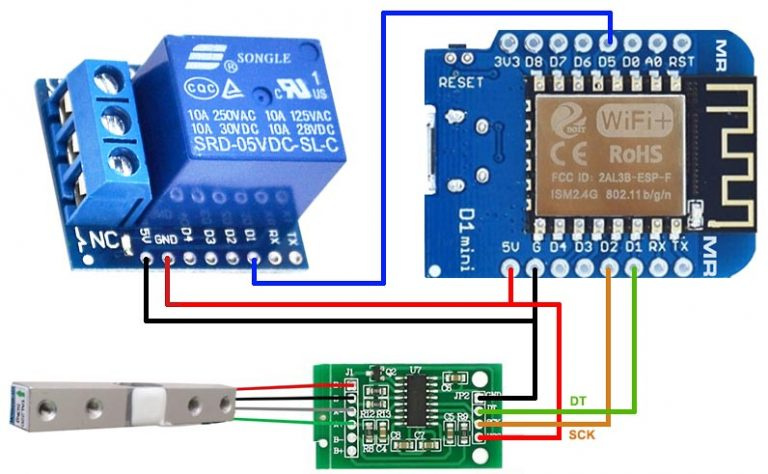
ESP8266 + HX711 and a strain sensor (I have used a cheap 500g “fleebay” digital scale).
The sketch contains calibration data for the strain sensor and a way to calibrate for possible overrun of the grinder (adjust turnoff offset if grinder overrun to make final weight to correspond to preset).
I run this on a personal server.
Blynk app features
- Preset with “Slider widget” in grams.
- Readout off preset and live weight “Labeled value”+ “Level V” to animate grinding progress.
- Tare function to zero the scale “Styled button Virtual pin”.
- Grind button “Styled button Virtual pin”.
- Off button for emergency/regret situations “Styled button Virtual pin”.
Upcoming features
- Stepper motor to change grain size, steps or step less with saveable presets (Slider widget again maybe vertical this time.
- App settings for the over grind adjustment (On separate “Settings tab”).
- Maybe OTA Update feature.
- Maybe physical buttons and Oled display.
Sketch right now 25 Mar 2019 (All help/suggestion are welcome I’m not rely a coder 
	//#define BLYNK_PRINT Serial
	#include <ESP8266WiFi.h>
	#include <BlynkSimpleEsp8266.h>
	#include "HX711.h"
	BlynkTimer timer;
	int relayPin = D5;  // Change to suit your board.

	// HX711 circuit wiring
	const int LOADCELL_DOUT_PIN = D2; // Change to suit your board.
	const int LOADCELL_SCK_PIN = D1; // Change to suit your board.

	HX711 scale;
	//Blynk project auth.
	char auth[] = "b4c24e6436914425a93f2633c1668576";
	// Your WiFi credentials.
	// Set password to "" for open networks.
	char ssid[] = "Your SSID";
	char pass[] = "Your Passwd";

	BLYNK_WRITE(V0) { scale.tare(); // Strain sensor tare
	}
	BLYNK_WRITE(V2){
	if (param.asInt()) {
	digitalWrite(relayPin, HIGH);  // Relay ON.
	} else {
	digitalWrite(relayPin, LOW);   // Relay OFF.
	}
	}
	BLYNK_WRITE(V3) {
	Blynk.virtualWrite(V2, 0);
	digitalWrite (relayPin, LOW);   // Grinder interupt (Emergecy stop), Relay OFF.
	}
	int slider;
	BLYNK_WRITE(V11)
	{
	slider = param.asInt(); // Assigning incoming value from pin V11 (Slider value) to a global variable.
	}

	void setup() {

	Serial.begin(57600);
	Blynk.begin(auth, ssid, pass, "192.168.254.110", 8080); // Change to your IP and Port.
	scale.begin(LOADCELL_DOUT_PIN, LOADCELL_SCK_PIN);
	scale.set_scale(1040.f);
	timer.setInterval(500L, HX711data);  // .5 sek delay to unstress the server and stabalize readout on numeric widget @ V1.
	timer.setInterval(60L, HX711relay);  // 60ms delay ono to keep fast stop grinder response and not overshoot grinding to much.
	digitalWrite(relayPin, LOW); // To make sure grinder doesn't start running during boot.
	pinMode(relayPin, OUTPUT);
	BLYNK_CONNECTED();
	Blynk.syncAll();
	}
	void HX711data()
	{
	Blynk.virtualWrite(V1, scale.get_units(20));  // sending calibrated strain sensor value to Blynk value widget.
	}
	void HX711relay()
	{
	if (scale.get_units(20) >= (slider-20)) {
	Blynk.virtualWrite(V2, 0);
	digitalWrite(relayPin, LOW); //Relay OFF (slider-10) to compensate if grinder overshoot "Grinder calibration".
	}
	}
	void loop()
	{
	Blynk.run();
	timer.run();
	}
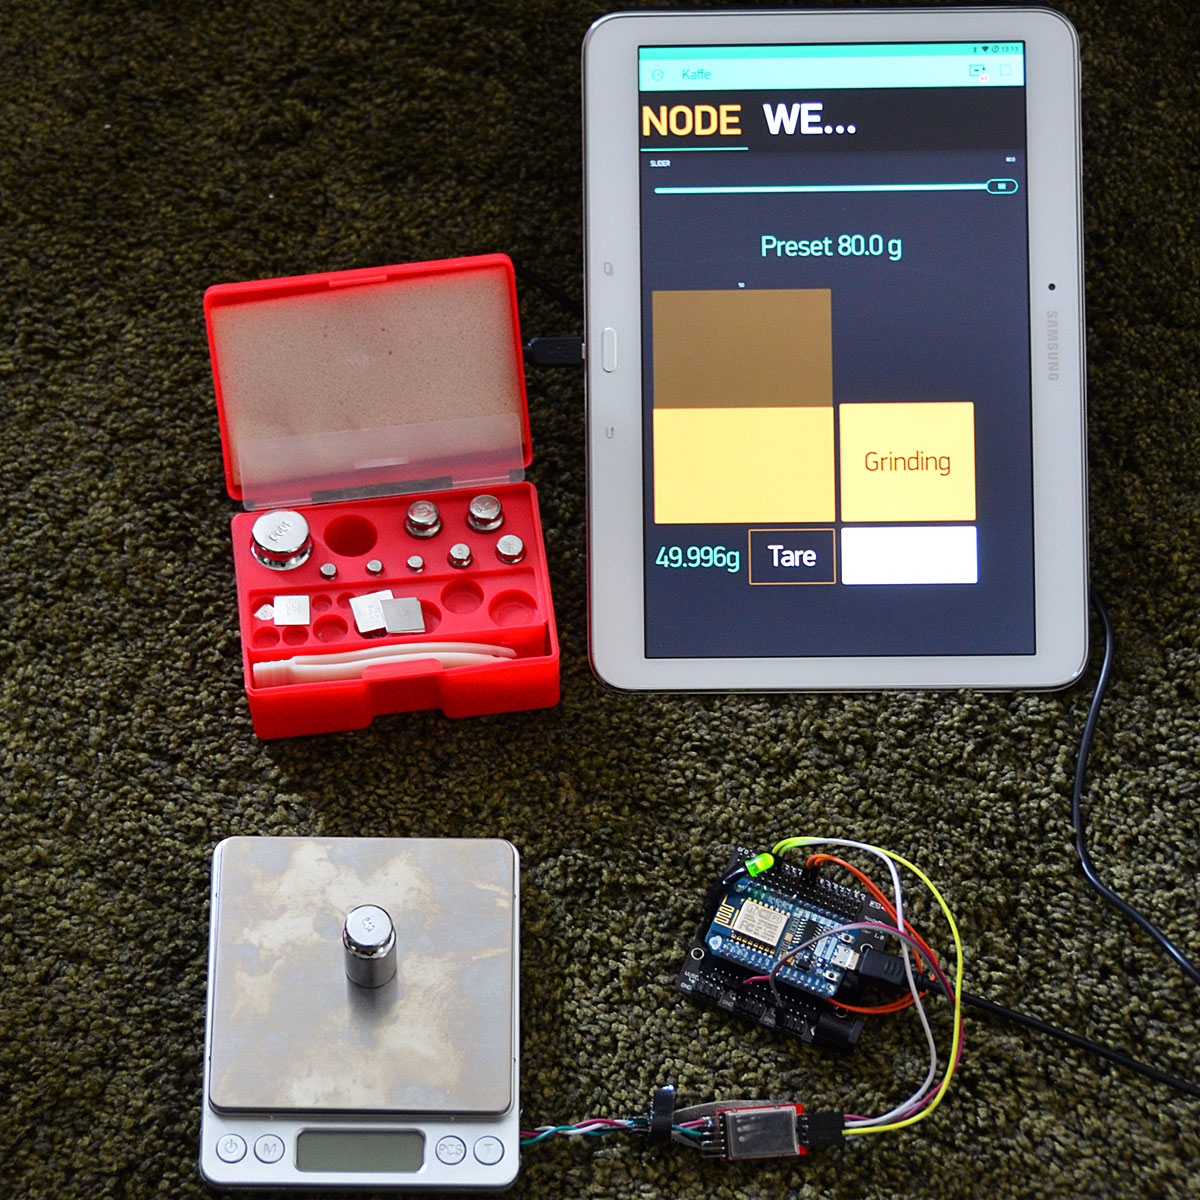
The hardware and app
Using a green led on relay pin for testing. In real world project I will use a 5A WeMos D1 mini relay module or simmular.