thanks for the pointers @Gunner. I seem to have the Blynk.begin(auth); in the wrong spot. I’ll fix this up and test when I get home from work.
code below for reference:
#include <WS2812FX.h>
#include "/home/jason/Arduino/libraries/WS2812FX/examples/ws2812fx_esp32/ESP32_RMT_Driver.h"
#include <AceButton.h>
#define BLYNK_PRINT Serial
#define BLYNK_USE_DIRECT_CONNECT
#define BLYNK_MAX_SENDBYTES 256 // Default is 128
#include <BlynkSimpleEsp32_BLE.h>
#include <BLEDevice.h>
#include <BLEServer.h>
// You should get Auth Token in the Blynk App.
// Go to the Project Settings (nut icon).
char auth[] = "redacted";
using namespace ace_button;
const int BUTTON_PIN = 35;
#define LED_COUNT 40
#define LED_PIN 25
#define TIMER_MS 5000
// Parameter 1 = number of pixels in strip
// Parameter 2 = Arduino pin number (most are valid)
// Parameter 3 = pixel type flags, add together as needed:
// NEO_KHZ800 800 KHz bitstream (most NeoPixel products w/WS2812 LEDs)
// NEO_KHZ400 400 KHz (classic 'v1' (not v2) FLORA pixels, WS2811 drivers)
// NEO_GRB Pixels are wired for GRB bitstream (most NeoPixel products)
// NEO_RGB Pixels are wired for RGB bitstream (v1 FLORA pixels, not v2)
// NEO_RGBW Pixels are wired for RGBW bitstream (NeoPixel RGBW products)
WS2812FX ws2812fx = WS2812FX(LED_COUNT, LED_PIN, NEO_RGB + NEO_KHZ800);
// set up LCD
WidgetLCD lcd(V4);
unsigned long last_change = 0;
unsigned long now = 0;
//int inPin = 35;
//int val = 0;
AceButton button(BUTTON_PIN);
void handleEvent(AceButton*, uint8_t, uint8_t);
BLYNK_WRITE(V0)
{
int value = param.asInt(); // Get value as integer
if (value == 1) {
Serial.println("button on");
// turn LED strip on
ws2812fx.start();
} else {
Serial.println("button off");
// turn LED strip off
ws2812fx.stop();
}
}
BLYNK_WRITE(V1)
{
int brightness = param.asInt();
ws2812fx.setBrightness(brightness);
}
BLYNK_WRITE(V2)
{
int speed = param.asInt();
ws2812fx.setSpeed(speed);
}
BLYNK_WRITE(V5)
{
int mode = param.asInt() -1; // Get value as integer, subtract 1 for offset
ws2812fx.setMode(mode);
Serial.printf("mode: %d\n",mode);
}
void setupDropdown() {
BlynkParamAllocated items(ws2812fx.getModeCount());
for (int i = 0; i < ws2812fx.getModeCount(); i++){
Serial.println(ws2812fx.getModeName(i));
items.add(ws2812fx.getModeName(i));
}
//Blynk.setProperty(V5,"labels",items);
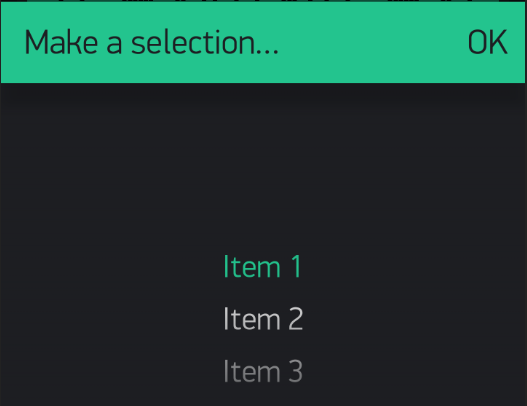
Blynk.setProperty(V5, "labels", "item 1", "item 2", "item 3");
Blynk.setProperty(V6, "labels", "item 1", "item 2", "item 3");
}
void setup() {
Serial.begin(115200);
Serial.print("initialising\n");
ws2812fx.init();
ws2812fx.setBrightness(100);
rmt_tx_int(RMT_CHANNEL_0, ws2812fx.getPin()); // assign ws2812fx1 to RMT channel 0
ws2812fx.setCustomShow(myCustomShow);
ws2812fx.setSpeed(200);
ws2812fx.setColor(0x007BFF);
ws2812fx.setMode(FX_MODE_STATIC);
ws2812fx.start();
Blynk.virtualWrite(V0,HIGH);
//pinMode(inPin, INPUT); // sets the digital pin 7 as input
pinMode(BUTTON_PIN, INPUT_PULLUP);
button.setEventHandler(handleEvent);
Blynk.setDeviceName("LED Hat");
// Blynk.begin(auth, ssid, pass);
Blynk.begin(auth);
Blynk.setProperty(V1,"min",BRIGHTNESS_MIN);
Blynk.setProperty(V1,"max",BRIGHTNESS_MAX);
Blynk.setProperty(V2,"min",SPEED_MIN);
Blynk.setProperty(V2,"max",SPEED_MAX);
Blynk.virtualWrite(V1,ws2812fx.getBrightness());
Blynk.virtualWrite(V2,ws2812fx.getSpeed());
// lcd.clear();
// lcd.print(0,0,"12345678901234567890");
// lcd.print(0,1,"11111111111111111111");
// lcd.print(0,0,ws2812fx.getModeName(ws2812fx.getMode()));
setupDropdown();
}
void loop() {
now = millis();
ws2812fx.service();
button.check();
Blynk.run();
// Blynk.virtualWrite(V1,ws2812fx.getBrightness());
// Blynk.virtualWrite(V2,ws2812fx.getSpeed());
}
// Custom show functions which will use the RMT hardware to drive the LEDs.
// Need a separate function for each ws2812fx instance.
void myCustomShow(void) {
uint8_t *pixels = ws2812fx.getPixels();
// numBytes is one more then the size of the ws2812fx's *pixels array.
// the extra byte is used by the driver to insert the LED reset pulse at the end.
uint16_t numBytes = ws2812fx.getNumBytes() + 1;
rmt_write_sample(RMT_CHANNEL_0, pixels, numBytes, false); // channel 0
}
void handleEvent(AceButton* /* button */, uint8_t eventType,
uint8_t /* buttonState */) {
switch (eventType) {
case AceButton::kEventPressed:
ws2812fx.setMode((ws2812fx.getMode() + 1) % ws2812fx.getModeCount());
last_change = now;
Serial.printf("button pressed");
Serial.printf("mode: %d ", ws2812fx.getMode());
Serial.print(ws2812fx.getModeName(ws2812fx.getMode()));
Serial.printf("\n");
//lcd.clear();
//lcd.print(0,0,ws2812fx.getModeName(ws2812fx.getMode()));
lcd.clear();
lcd.print(0,0,"12345678901234567890");
lcd.print(0,1,"11111111111111111111");
break;
case AceButton::kEventReleased:
// digitalWrite(LED_BUILTIN, LED_OFF);
break;
}
}