Hi,
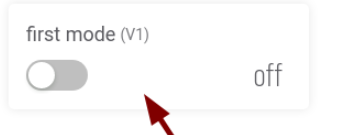
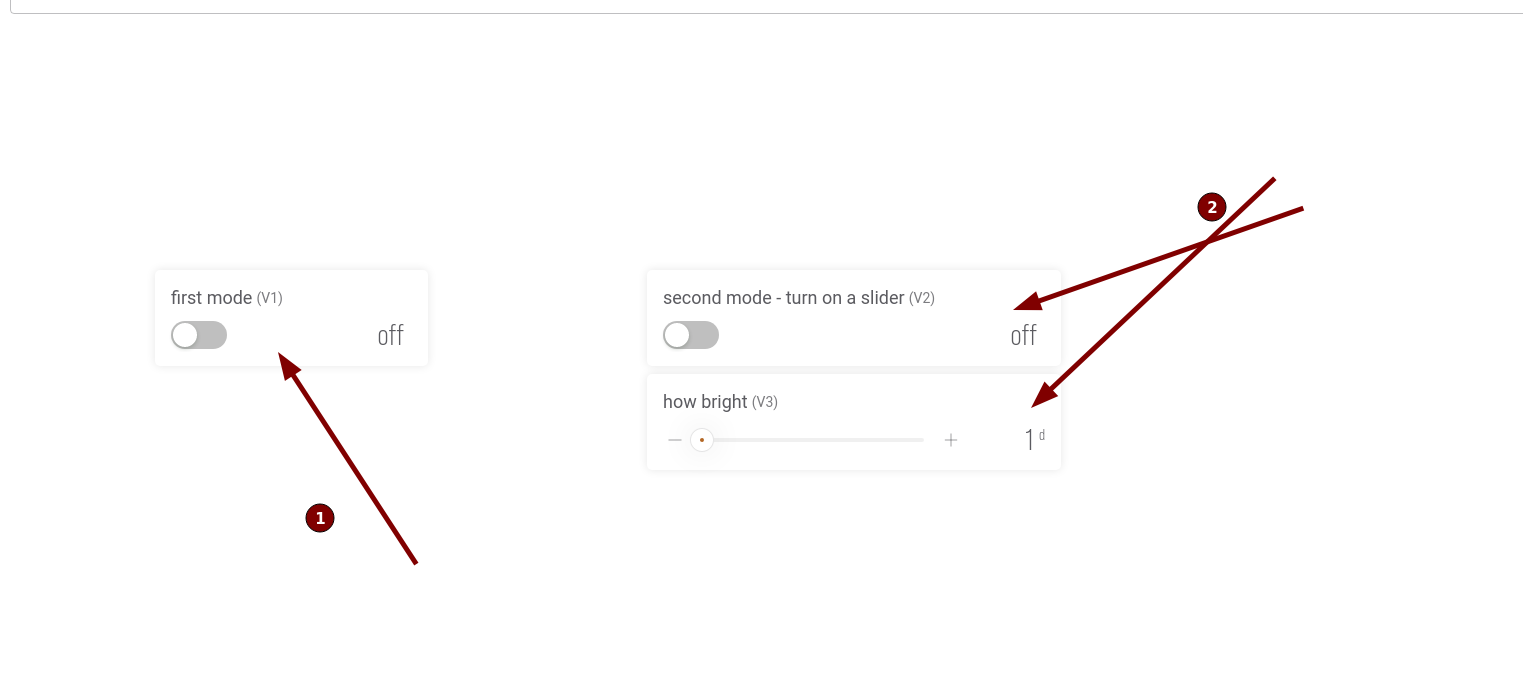
I making a project on esp32 in arduino where i want to control diode on two mode by wifi. first mode
where i just on/off it by button (on virtual pin V1) - BLYNK_WRITE(V1)
and second mode where i control brightness by slider but , I want to in second mode so that the slider control is possible when I activate the button that allows it . - BLYNK_WTRITE(V2)
If someone could help me with that I wolud be very greatful
*************************************************************/

// Template ID, Device Name and Auth Token are provided by the Blynk.Cloud
// See the Device Info tab, or Template settings
#define BLYNK_TEMPLATE_ID           "TMPLxxxxxx"
#define BLYNK_DEVICE_NAME           "Device"
#define BLYNK_AUTH_TOKEN            "YourAuthToken"


// Comment this out to disable prints and save space
#define BLYNK_PRINT Serial


#include <WiFi.h>
#include <WiFiClient.h>
#include <BlynkSimpleEsp32.h>

char auth[] = BLYNK_AUTH_TOKEN;

// Your WiFi credentials.
// Set password to "" for open networks.
char ssid[] = "YourNetworkName";
char pass[] = "YourPassword";


Blynk_Write(V1) // first mode where i just switch on/off diode
{
 int pinValue = param.asInt()'
digital(13, pinValue);
}


BLYNK_WRITE(V2) // here is a second mode where i control brightness by slider

// i don't know how to add button so that the slider can only be controlled when is pressed a button

{

  int pinValue = param.asInt(); // assigning incoming value from pin V1 to a variable
  analogWrite(D1,pinValue);
  Blynk.virtualWrite(V1, pinValue); // by this line i see on gauge how bright it's
  Serial.print("V0 Slider value is: ");
  Serial.println(pinValue);

}
void setup()
{
  // Debug console
  Serial.begin(115200);

  Blynk.begin(auth, ssid, pass);
  // You can also specify server:
  //Blynk.begin(auth, ssid, pass, "blynk.cloud", 80);
  //Blynk.begin(auth, ssid, pass, IPAddress(192,168,1,100), 8080);
}

void loop()
{
  Blynk.run();
  // You can inject your own code or combine it with other sketches.
  // Check other examples on how to communicate with Blynk. Remember
  // to avoid delay() function!
}
I’ ll be very greatful if someone could help me with that. 
~ fil