Blynk 2.0 not working with different WIFI access point

Hi everyone!

I was happy to use BLYNK last 5 years and it completely fine. As regards this year we forced to use new version. I adapted my code and successfully run device, but have following issue: as I’m in Ukraine and because of russian invasion we have no any more reliable internet and electricity, my project suppose to be able work with different WIFI accesspoints. Blynk 1.0 worked just fine in such conditions using esp8266wifimulti.h library and switching automatically, but BLYNK 2.0 don’t. Device starting, running, connecting to BLYNK in run on main wifi access points, but on another not connecting to BLYNK server after short time reboot. My code is below. Please help - I’m amateur and coding it’s just hobby.

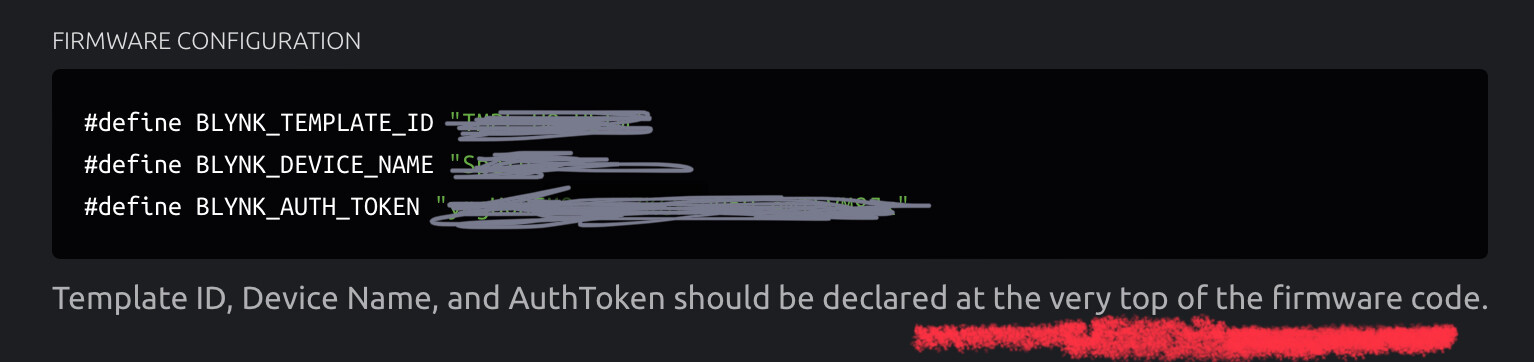
#define BLYNK_TEMPLATE_ID "TMP___________Z"
#define BLYNK_DEVICE_NAME "home"
#define BLYNK_AUTH_TOKEN "KP9-Lt2o_a____________________"
#define BLYNK_FIRMWARE_VERSION        "0.1.0"

#define BLYNK_PRINT Serial
//#define BLYNK_DEBUG

#define APP_DEBUG

// Uncomment your board, or configure a custom board in Settings.h
//#define USE_SPARKFUN_BLYNK_BOARD
#define USE_NODE_MCU_BOARD
//#define USE_WITTY_CLOUD_BOARD
//#define USE_WEMOS_D1_MINI

#include "BlynkEdgent.h"

#include <ESP8266WiFiMulti.h>
#include "GyverTimer.h"


#include <OneWire.h>
#include <DallasTemperature.h>
#define ONE_WIRE_BUS D5
OneWire oneWire (ONE_WIRE_BUS);
DallasTemperature sensors(&oneWire);


#include <SoftwareSerial.h>
#include <SPI.h>
#include <Wire.h>
#include <EEPROM.h>
#include "SSD1306Wire.h"
SSD1306Wire display(0x3c, SDA, SCL);


#include "DHT.h"
#define DHTPIN D6
#define DHTTYPE DHT11
DHT dht(DHTPIN, DHTTYPE);
#define RELEY D3
#define potent_pin A0


GTimer myTimer(MS);
GTimer myTimer2(MS, 600);
GTimer myTimer3(MS);


int valBase = 6;
int target;
int potent;
int INET;
bool valueR;
boolean value4;

int delta = 2;
int addr_targ = 101;
int addr_reley = 102;
int addr_up = 103;
int addr_Time = 104;
int pinValue;
int pinValue_up;
int tempUP;


ESP8266WiFiMulti wifiMulti;
const uint32_t connectTimeoutMs = 5000;


void WIFIconnect(){

  wifiMulti.addAP("AKTA_G****", "******");
  wifiMulti.addAP("Vill***iFi", "******");
  wifiMulti.addAP("Redmi", "r********75");
  wifiMulti.addAP("Pilot", "Pil*******");
  wifiMulti.addAP("Virus", "******2004");
  wifiMulti.addAP("TP-LINK_E10A6C", "1**********9");

    WiFi.mode(WIFI_STA);
  wifiMulti.run();

 if (wifiMulti.run(5000) == WL_CONNECTED) {
    Serial.println("");
    Serial.println("WiFi connected");
    Serial.println("IP address: ");
     Serial.println(WiFi.localIP());
      Serial.println(WiFi.SSID());
      BlynkEdgent.begin();
  }
   
if  (WiFi.status() != WL_CONNECTED) {
    unsigned long millis(120000);
    Serial.println("No Conncetion");
    WiFi.disconnect();
     Blynk.disconnect();   }
}

/*void MAINtask(){
 
}*/


BLYNK_WRITE(V11) {
  int pinValue = param.asInt();
  Serial.println("inet: " + String(pinValue));
INET = pinValue;
}


void setup()
{
  Serial.begin(115200);
  delay(100);

  display.init();
  display.flipScreenVertically();
  display.setFont(ArialMT_Plain_10);
  display.setTextAlignment(TEXT_ALIGN_LEFT);


  dht.begin();
  sensors.begin();
  pinMode (RELEY, OUTPUT);
 
  EEPROM.begin(512);
  EEPROM.put(addr_targ, valBase );

 myTimer.setInterval(30000);
 myTimer2.setInterval(21600000);  //6 годин до перезапуску
 myTimer3.setInterval(40000);
 Serial.println("BEGIN");

WIFIconnect();

//BlynkEdgent.begin();
}

void loop() {

  float TEMPin = dht.readTemperature();
  float Hymidin = dht.readHumidity();
  float TEMPout = sensors.getTempCByIndex(0);

  potent = analogRead(potent_pin);     // запомнить показания с потенциометра
  potent = map(potent, 0, 1023, 5, 30);   // перевести в диапазон 0.. 10
  potent = constrain(potent, 5, 30);
  Serial.println("Potent: "+String(potent));


  if (potent >= INET) {
    target = potent;    }
      else if (potent <= INET) {
          target = INET;    }

  Serial.println("Target: " + String(target));

  if (TEMPin <= target - delta) {
    digitalWrite(RELEY, HIGH);
    bool valueR = HIGH;
    Serial.println("STATUS: " + String(valueR));
  }

  else if (TEMPin >= target) { 
    digitalWrite(RELEY, LOW);
    bool valueR = LOW;
    Serial.println("STATUS: " + String(valueR));   }

 Blynk.virtualWrite(V6, TEMPin);
    Serial.println("tempin: " + String(TEMPin));
    Blynk.virtualWrite(V7, Hymidin);
    Blynk.virtualWrite(V8, TEMPout);
    Blynk.virtualWrite(V3, valueR);
    Blynk.syncAll();
    unsigned long millis(200);   

      
if (myTimer2.isReady())   { 
  Serial.println("RESTART ");
  ESP.restart();}

 display.clear();
  display.display();
  display.drawString(0, 0, "TEMP.inside: " + String(TEMPin)); 
  display.drawString(0, 10, "Hymid.inside:" + String(Hymidin)); 
  display.drawString(0, 20, "TEMP.outside:" + String(TEMPout)); 
  display.drawString(0, 30, "ZADANO V RUCHNU:" +String(potent)); 
  display.drawString(0, 40, "TEMP.targrt I-NET:" +String(INET)); 
  display.drawString(0, 50, "Connected:" +WiFi.SSID()); 
  display.display();
  
  BlynkEdgent.run();
   Blynk.syncAll();
} 

@Vitalii_Mamchur Please edit your post, using the pencil icon at the bottom, and add triple backticks at the beginning and end of your code so that it displays correctly.
Triple backticks look like this:
```

Copy and paste these if you can’t find the correct symbol on your keyboard.

Pete.

You’ve chosen to use the Blynk Edgent example with your WiFiMulti code. This is a bad idea.

Blynk Edgent expects you to use the Blynk app to enter the WiFi credentials, and these are stored in EEPROM.
By hard-coding the credential into the sketch and using WiFiMulti you are confusing the Edgent program logic.
In addition. you’ve hard-coded an Auth token into your sketch, and when you use Edgent these auth tokens are assigned dynamically and are also stored in EEPROM.
To make things worse, you are also writing your own data to EEPROM.

You’d be better simply creating a new Blynk template and manually creating a device from that template, then adding the three line of Firmware Configuration code from the Device Info screen to your original Legacy sketch.

There are lots of other things wrong with your sketch though, such as using 3 timer objects when one is all you need, and having a cluttered void loop instead of placing this code in a function and calling it with a timer.
Once you have your Legacy sketch working again with Blynk IoT I’d suggest that post that code and we’ll help you to fix these issues.

Pete.

Dear Pete!
thanks for you’r reply.

“You’d be better simply creating a new Blynk template and manually creating a device from that template, then adding the three line of Firmware Configuration code from the Device Info screen to your original Legacy sketch.”

I tried this way, but code didn’t worked. That was a reason to use Blynk Edgent

Give us more details about the code you used and what appeared in your serial monitor when you tried it, and we’ll help you fix it.

Pete.

in serial monitor it’s look like

WiFi connected
IP address:
192.168.1.6
AKTA_Guest
Potent: 21
Target: 21
tempin: nan

#include <BlynkSimpleEsp8266.h>
#include <ESP8266WiFiMulti.h>
#include "GyverTimer.h"

#define BLYNK_TEMPLATE_ID "TMPLZPDbse2-"
#define BLYNK_DEVICE_NAME "GAS heater"

//#define BLYNK_AUTH_TOKEN "k6qNvz1d************************y"

char auth[] = "k6qN*********************my";

//char ssid[] = "YourNetworkName";
//char pass[] = "YourPassword";


#include <OneWire.h>
#include <DallasTemperature.h>
#define ONE_WIRE_BUS D5
OneWire oneWire (ONE_WIRE_BUS);
DallasTemperature sensors(&oneWire);


#include <SoftwareSerial.h>
#include <SPI.h>
#include <Wire.h>
#include <EEPROM.h>
#include "SSD1306Wire.h"
SSD1306Wire display(0x3c, SDA, SCL);


#include "DHT.h"
#define DHTPIN D6
#define DHTTYPE DHT11
DHT dht(DHTPIN, DHTTYPE);
#define RELEY D3
#define potent_pin A0


GTimer myTimer(MS);
GTimer myTimer2(MS, 600);
//GTimer myTimer3(MS);


int valBase = 6;
int target;
int potent;
int INET;
bool valueR;
boolean value4;

int delta = 2;
int pinValue;


ESP8266WiFiMulti wifiMulti;
const uint32_t connectTimeoutMs = 5000;


void WIFIconnect(){

  wifiMulti.addAP("AKTA**********uest", "************1");
  wifiMulti.addAP("VillaWiFi", "1************9");
  wifiMulti.addAP("Redmi", "ru************975");
  wifiMulti.addAP("Pilot", "Pi************5a");
  wifiMulti.addAP("Virus", "************04");
  wifiMulti.addAP("TP-LINK_E10A6C", "19**********49");

    WiFi.mode(WIFI_STA);
  wifiMulti.run();

 if (wifiMulti.run(5000) == WL_CONNECTED) {
    Serial.println("");
    Serial.println("WiFi connected");
    Serial.println("IP address: ");
     Serial.println(WiFi.localIP());
      Serial.println(WiFi.SSID());
       Blynk.config(auth, "blynk-cloud.com", 80);
       Blynk.connect();
     //  Blynk.begin(auth, ssid, pass);  
    // Blynk.begin(auth, ssid, pass, "blynk-cloud.com", 80);
        Blynk.syncVirtual(V11);}
   
if  (WiFi.status() != WL_CONNECTED) {
    unsigned long millis(120000);
    Serial.println("No Conncetion");
    WiFi.disconnect();
         Blynk.disconnect();   }}

 BLYNK_WRITE(V11) {
  int pinValue = param.asInt();
  Serial.println("inet: " + String(pinValue));
  INET = pinValue; }


void setup(){
  Serial.begin(115200);
  delay(100);

  display.init();
  display.flipScreenVertically();
  display.setFont(ArialMT_Plain_10);
  display.setTextAlignment(TEXT_ALIGN_LEFT);


  dht.begin();
  sensors.begin();
  pinMode (RELEY, OUTPUT);
 
  /*EEPROM.begin(512);
  EEPROM.put(addr_targ, valBase );*/

 myTimer.setInterval(30000);
 myTimer2.setInterval(21600000);  //6 годин до перезапуску
 //myTimer3.setInterval(40000);
 Serial.println("BEGIN");

WIFIconnect();
}


void loop()
{
  Blynk.run();

 float TEMPin = dht.readTemperature();
 float Hymidin = dht.readHumidity();
  sensors.requestTemperatures();
  float TEMPout = sensors.getTempCByIndex(0);

  potent = analogRead(potent_pin);     // запомнить показания с потенциометра
  potent = map(potent, 0, 1023, 5, 30);   // перевести в диапазон 0.. 10
  potent = constrain(potent, 5, 30);
  Serial.println("Potent: "+String(potent));


  if (potent >= INET) { target = potent;}
      else if (potent <= INET) {target = INET; }

  Serial.println("Target: " + String(target));

  if (TEMPin <= target - delta) {
    digitalWrite(RELEY, HIGH);
    bool valueR = HIGH;
    Serial.println("STATUS: " + String(valueR));  }

  if (TEMPin >= target) { 
    digitalWrite(RELEY, LOW);
    bool valueR = LOW;
    Serial.println("STATUS: " + String(valueR));   }

 Blynk.virtualWrite(V6, TEMPin);
    Serial.println("tempin: " + String(TEMPin));
    Blynk.virtualWrite(V7, Hymidin);
    Blynk.virtualWrite(V8, TEMPout);
    Blynk.virtualWrite(V3, valueR);
    Blynk.syncVirtual(V6, V7, V8, V3);
  //  Blynk.syncAll();
    unsigned long millis(200);   

      
if (myTimer2.isReady())   { 
  Serial.println("RESTART ");
  ESP.restart();}

 display.clear();
  display.display();
  display.drawString(0, 0, "TEMP.inside: " + String(TEMPin)); 
  display.drawString(0, 10, "Hymid.inside:" + String(Hymidin)); 
  display.drawString(0, 20, "TEMP.outside:" + String(TEMPout)); 
  display.drawString(0, 30, "ZADANO V RUCHNU:" +String(potent)); 
  display.drawString(0, 40, "TEMP.targrt I-NET:" +String(INET)); 
  display.drawString(0, 50, "Connected:" +WiFi.SSID()); 
  display.display();

}```

So you didn’t do this bit…

blynk-cloud.com is the Lecacy server which is now decommissioned. You need to use blynk.cloud instead.

What version of the Blynk C++ library are you using?

Pete.

Sorry Pete, probably I’m not so good in English

could you explain what do you mean?

I replaced to blynk.cloud - result is the same.

currently used 1.0.1

When you’ve created your template and device you will have this in the Device Info screen…

These need to go at the top of your sketch.

You should update it to the latest version.

Pete.

Thanks Pete, it’s really help!

Just wandering, why in example from the library still mentioned blynk-cloud.com insted blynk.cloud? Also about credentials : In example

char auth[] = "k6qN*********************my";

but in fact just need to use

#define BLYNK_AUTH_TOKEN "k6qNvz1d************************y"

I thought that all the examples had been updated. Maybe you’re using an old version of the library?

That certainly does look like an example from the old library.

Pete.

Dear Pete! About library example Instead of words I attach screenshot


this is library installed. As you can see it’s 1.1.0.
But in example still contain

So, this problem will affect not only me, but also many another users. My code start to work only when I uncomment

#define BLYNK_AUTH_TOKEN "k6qNvz1d************************y"

and copy data to this line also

What you haven’t told me is how you’re accessing these example sketches.
I’d suggest that you look at the examples on the GitHub site…

These are the examples that should appear in File > Examples > Blynk if your Blynk library is correctly installed within the Arduino IDE.
If you are seeing different examples then I’d suggest that you delete the Blynk library folder from your PC and re-install the latest library.

Pete.

1 Like