The problem with having this conversation in Croatian, on a predominantly English language forum, is that you limit the responses you’ll get to your questions and comments.
If you go to the trouble of adding an English language translation even if it’s from Google, you’ll get more people reading it and responding.
Problem s ovim razgovorom na hrvatskom jeziku, na pretežno engleskom jeziku, jest da ograničavate odgovore na pitanja i komentare.
Ako idete na nevolje dodavanja prijevoda na engleskom jeziku, čak i ako je Google, dobit ćete više ljudi koji to čitaju i reagiraju.
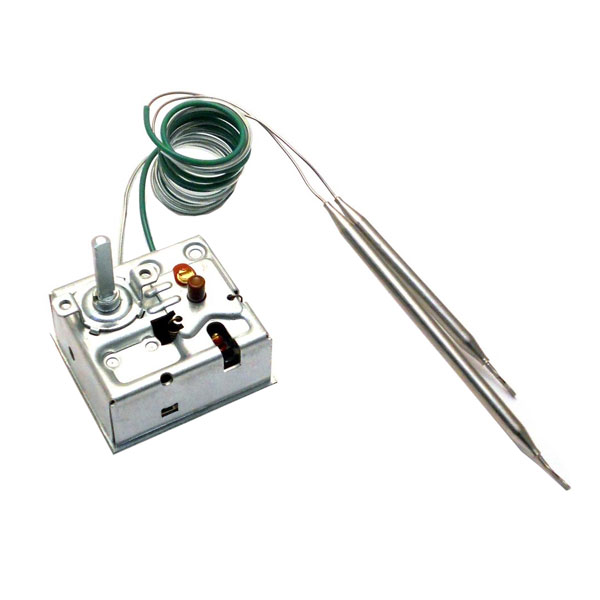
@zodiac U pravu si… to sam i ja razmišljao… a i profesoru u školi kad sam ispričao moju ideju, isto je rekao da je rizično izbacivati totalno termostat… Samo na izlaznoj cevi imam dva problema opet… prvi je to što i ako ubacim T razvodnik, kako da popunim prostor oko senzora, i kako bi to izdržalo pritisak vode…
a drugi problem je to što opet neće imati tačnu sliku o temperaturi vode, jer ja dok ne pustim vodu na slavini, tamo u onom crevu što spaja bojler i cev u zidu će se ohladiti voda, i samo kad pustim vodu na slavini, i kad prodje topla voda kroz sve to, samo onda ću imati realnu sliku o temperaturi vode… a meni to treba konstanto… @PeteKnight You are right. Since @zodiac speaks Serbian, it was easier for me to write posts in our language … but then those who do not understand Serbian, you can not get involved in the discussion …
In short… I had the idea to throw out a thermostat from the water heater, and to perform that function with a NodeMCU. But when I brought this idea to a professor at school, he told me that it was risky, and @zodiac agreed. That’s better to put the T splitter on the exit of the hot water from boiler, and I put the temperature sensor directly there.
But if I set up a T splitter and I install a sensor in it, two problems occur. The first problem is how to close the space around the sensor and splitter, and that it will withstand the pressure of water. The other problem is that it will not have an accurate picture of the temperature of the water, because until I leave the tap water, there in the hose that joins the boiler and the pipe in the wall will cool the water, and only when I leave the water on the tap, and when it passes hot water through all that, I will only have a real picture of water temperature … but I need a constant real image of temperature…
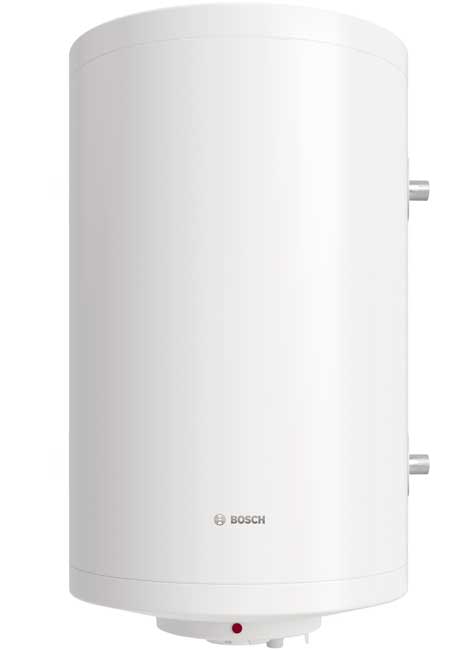
The type of water heater you showed on your original post has an insulated metal tank that holds the water and the heating elements.
If you can access the metal tank you can attach a temperature sensor to it and therefore monitor the temperature of the water.
From what you’ve said, you would be happy to allow the thermostat that is part of the heater to control the heating elements, you just want to add some extra logic about when the boiler is allowed to turn on.
The extra temperature sensor that you add to the heater doesn’t need to be accurate, it just needs to provide data that is useable for your purpose.
If he had such a thermostat, I would just take out a probe and put the sensor. But when I saw that the new thermostat was different, I thought to throw out the thermostat and just put the sensor on, and then I would program the NodeMCU as a thermostat without being dependent on the application, then I’d type in the code for the application I mentioned earlier.
But it is risky to take over all the responsibility to the microcontroller, because if a microcontroller accidentally was out of controll and does not turn off the heater, and the temperature goes over 100 C it can be anything.
@Blynk_Coeur It’s expensive.
If I succeed in installing with the aforementioned sensor, I’ll throw out the thermostat, and if not, then I will not touch this part with the thermostat, I will only put one thermal sensor on the central heating pipe.
P.S. Sorry for bad translation.
Will I need analog inputs for HC-SR04 and DS18B20?
Since I’m thinking of buying Arduino nano and ESP-01, or nodemcu … If I do not need analog inputs, then it better NodeMCU.
Because ebay is almost the same price and I do not have to wait, so I will order from our KP website (kupujemprodajem.com), and this same controller costs about $ 7, so I already already pay it twice. From ebay if I order, I will have to I’m waiting for a month to arrive it … but I’m not waiting for … so I will order from ebay some another time.
Hi everyone!
After a short break, I returned to this project again and changed the code, and now I do not have these problems since before, I only encountered a error for one variable…
#define BLYNK_PRINT Serial
#include <OneWire.h>
#include <DallasTemperature.h>

#include <ESP8266WiFi.h>
#include <BlynkSimpleEsp8266.h>
#define ONE_WIRE_BUS 2

OneWire oneWire(ONE_WIRE_BUS);

OneWire  ds(D2);  // on pin 10 (a 4.7K resistor is necessary)


DallasTemperature sensors(&oneWire);

const int trigPin = D0;
const int echoPin = D1;

long duration, distance;
float temperature;

// You should get Auth Token in the Blynk App.
// Go to the Project Settings (nut icon).
char auth[] = "YourAuthToken";

BlynkTimer timer;


// Your WiFi credentials.
// Set password to "" for open networks.
char ssid[] = "YourNetworkName";
char pass[] = "YourPassword";

void setup()
{
  pinMode(trigPin, OUTPUT);
  pinMode(echoPin, INPUT);

  // Debug console
  Serial.begin(9600);

  sensors.begin();

  Blynk.begin(auth, ssid, pass);
  // You can also specify server:
  //Blynk.begin(auth, ssid, pass, "blynk-cloud.com", 8442);
  //Blynk.begin(auth, ssid, pass, IPAddress(192,168,1,100), 8442);
}


void rastojanje(){
  //merenje rastojanja - measuring distance
  //dojavljuje eventoru rastojanje - announces distance to the eventor
  Blynk.virtualWrite(V1, distance);
}

void temperatura(){
  //merenje temperature - measuring temperature
  //dojavljuje eventoru temperaturu vode -  announces water temperature to the eventor
  Blynk.virtualWrite(V0, temperature);
}

void loop()
{
  Blynk.run();
  timer.run();

  //rastojanje - reading the distance
  digitalWrite(trigPin, LOW);
  delay(2);
  digitalWrite(trigPin, HIGH);
  delay(10);
  digitalWrite(trigPin, LOW);

  duration = pulseIn(echoPin, HIGH);
  distance = (duration/2) / 29.1;

  temperature = sensors.requestTemperatures();
}
In this line of the code is reporting an error: temperature = sensors.requestTemperatures();
smart_bojler.ino.ino: In function 'void loop()':
smart_bojler.ino.ino:78:15: error: void value not ignored as it ought to be
void value not ignored as it ought to be
Btw, at the beginning of the code, I defined this variable with float…
Can this be a problem?