uno-ethernet shield-dht22 ok. how to Make uno-ethernet shield-DS18B20 dallaschip help please project
//dht22 ok
Was your problem solved?
BTW, you can post your code not as images. Just paste it here, select it and press </> button
1 Like
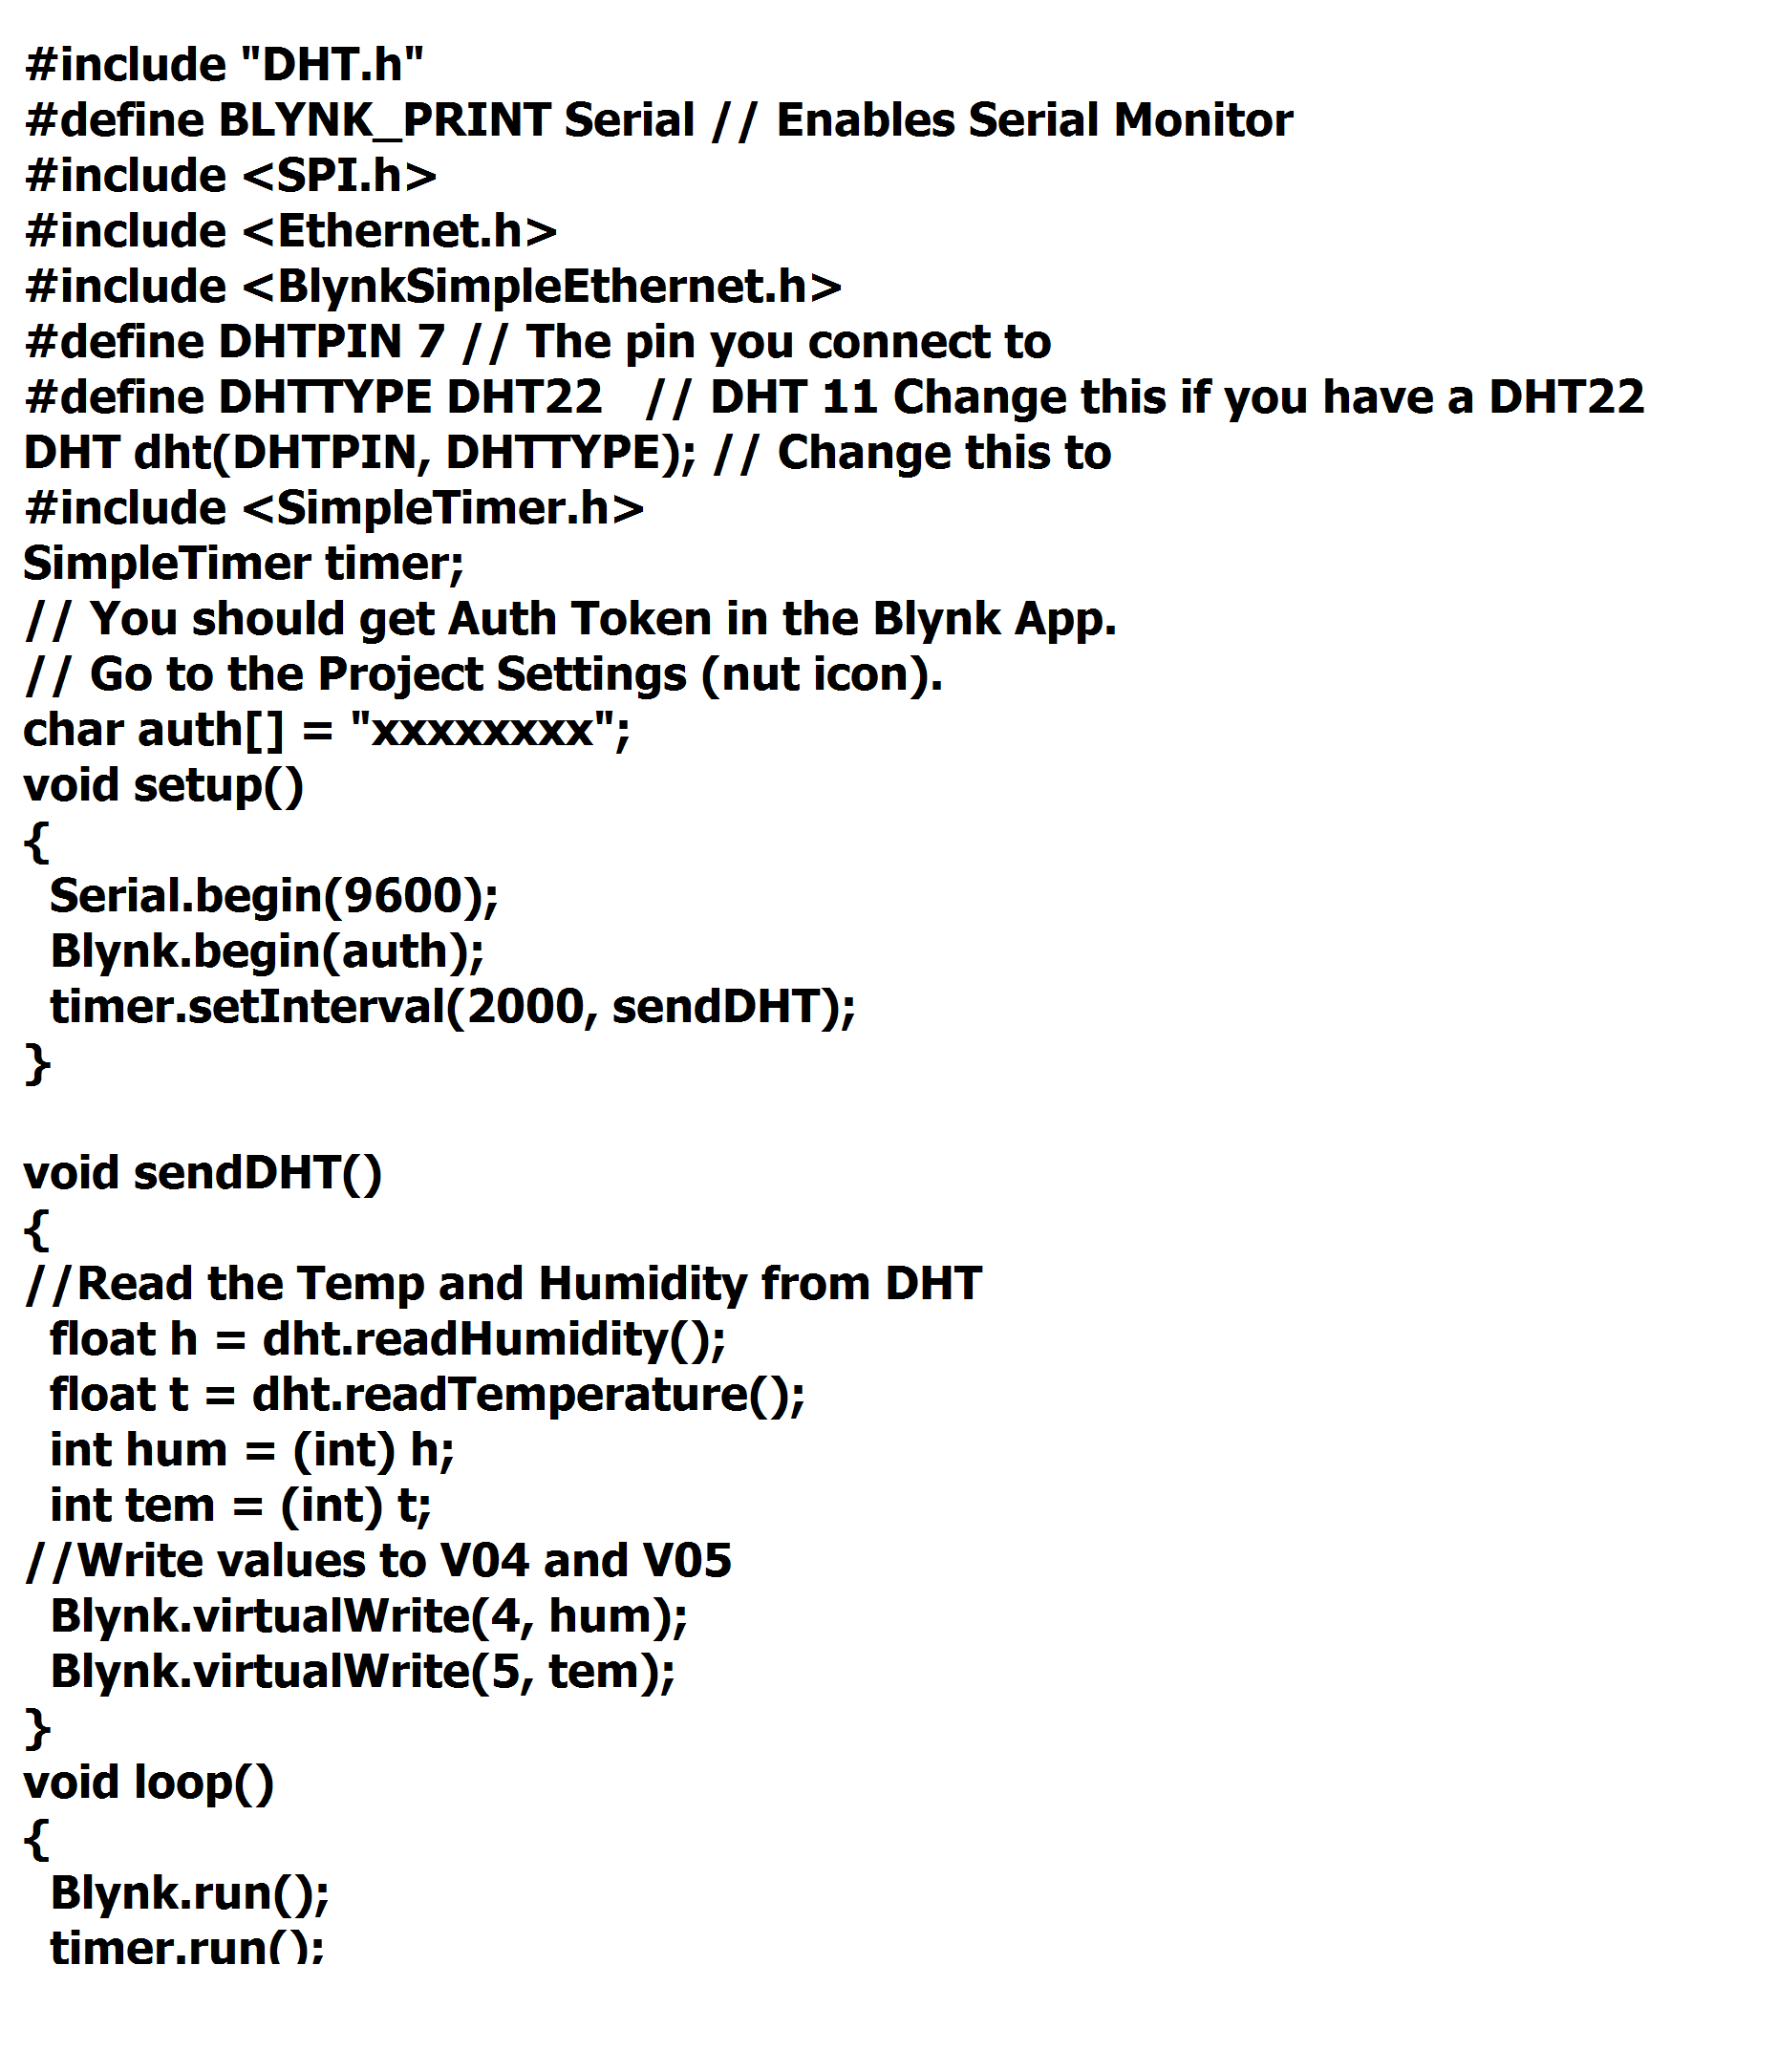
#include "DHT.h"
#define BLYNK_PRINT Serial // Enables Serial Monitor
#include <SPI.h>
#include <Ethernet.h>
#include <BlynkSimpleEthernet.h>
#define DHTPIN 7 // The pin you connect to
#define DHTTYPE DHT22   // DHT 11 Change this if you have a DHT22
DHT dht(DHTPIN, DHTTYPE); // Change this to
#include <SimpleTimer.h>
SimpleTimer timer;
// You should get Auth Token in the Blynk App.
// Go to the Project Settings (nut icon).
char auth[] = "xxxxxxxxx";
void setup()
{
  Serial.begin(9600);
  Blynk.begin(auth);
  timer.setInterval(2000, sendDHT);
}

void sendDHT()
{
//Read the Temp and Humidity from DHT
  float h = dht.readHumidity();
  float t = dht.readTemperature();
  int hum = (int) h;
  int tem = (int) t;
//Write values to V04 and V05
  Blynk.virtualWrite(4, hum);
  Blynk.virtualWrite(5, tem);
}
void loop()
{
  Blynk.run();
  timer.run();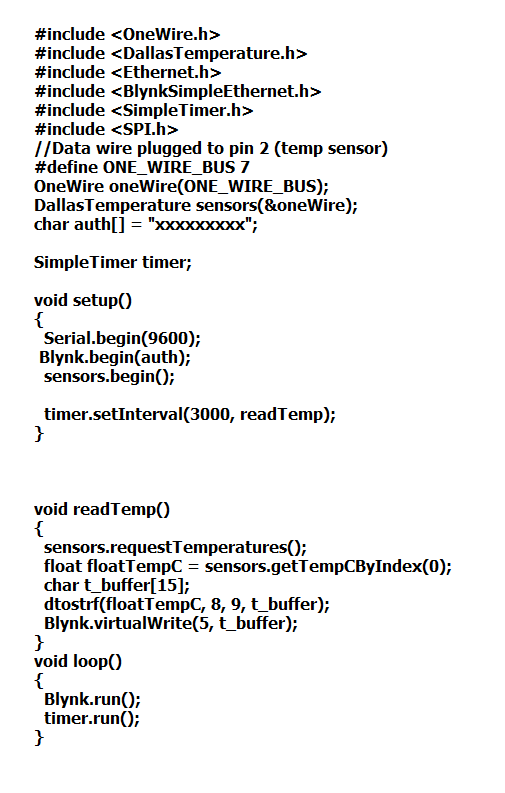
}#include <OneWire.h>
#include <DallasTemperature.h>
#include <Ethernet.h>
#include <BlynkSimpleEthernet.h>
#include <SimpleTimer.h>
#include <SPI.h>
//Data wire plugged to pin 7 (temp sensor)
#define ONE_WIRE_BUS 7
OneWire oneWire(ONE_WIRE_BUS);
DallasTemperature sensors(&oneWire);
char auth[] = "xxxxxxxxxx";
SimpleTimer timer;
void setup()
{
Serial.begin(9600);
Blynk.begin(auth);
sensors.begin();
timer.setInterval(3000, readTemp);
}
void readTemp()
{
sensors.requestTemperatures();
float floatTempC = sensors.getTempCByIndex(0);
char t_buffer[15];
dtostrf(floatTempC, 8, 9, t_buffer);
Blynk.virtualWrite(5, t_buffer);
}
void loop()
{
Blynk.run();
timer.run();
}I guess, "DHTPIN 7 " and Ethernet pin are confusing them.
You may change “DHTPIN 7” to “DHTPIN 8”.
How would you add another ds18b20 sensor to your sketch?. I tried doing that but I’m not at that level yet.
http://forum.arduino.cc/index.php?topic=43535.0
This has some interesting information.
You should check out the example Dallas sketch from the Arduino library. It has two examples. One with a simple bus, a.k.a. all sensors on a seperate line (Multiple_simple example) and a Multiple example which deals with all devices on one bus. It’s a but more complicated, but it should work OK.
Thanx i got it working. Is it possible to use blink with bmp 180 ?
I don’t see why not. It’s a simple I2C device which should work perfectly fine with the Arduino and hence with Blynk.