OK, wonderful, i hope this helps any others who are as techno-illiterate as i am…
sorry to take up so many posts, but i think we set out a fair few ways to approach troubleshooting this OTA thing didn’t we? ![]() )
)
OK, wonderful, i hope this helps any others who are as techno-illiterate as i am…
sorry to take up so many posts, but i think we set out a fair few ways to approach troubleshooting this OTA thing didn’t we? ![]() )
)
Here is the absolute minimum sketch I could make work.
Upload it once, reboot/power cycle your ESP, then plug it in to a battery and start developing! 
#include <ArduinoOTA.h>
#include <ESP8266WiFi.h>
#include <BlynkSimpleEsp8266.h>
char auth[] = "xxxxxxxxxxxxxxxxxxxxxxxxxxx";
char ssid[] = "xxxxxxxx";
char pass[] = "xxxxxxxx";
void setup() {
  WiFi.mode(WIFI_STA);
  Blynk.begin(auth, ssid, pass);
  while (Blynk.connect() == false) {}
  //ArduinoOTA.setHostname("xxxxxxx"); // OPTIONAL
  ArduinoOTA.begin();
}
void loop() {
  Blynk.run();
  ArduinoOTA.handle();
}
OK, hold on, so how would this work if i am on the train connected to 4G?
what http:// would i use?
is it whatever i specify here:
const char* host = "esp8266"; // will be "esp8266.local/update" in web browser
or is that only if i am on home network?
and if i specify:
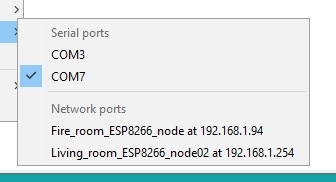
ArduinoOTA.setHostname("Fire_room_ESP8266_node");
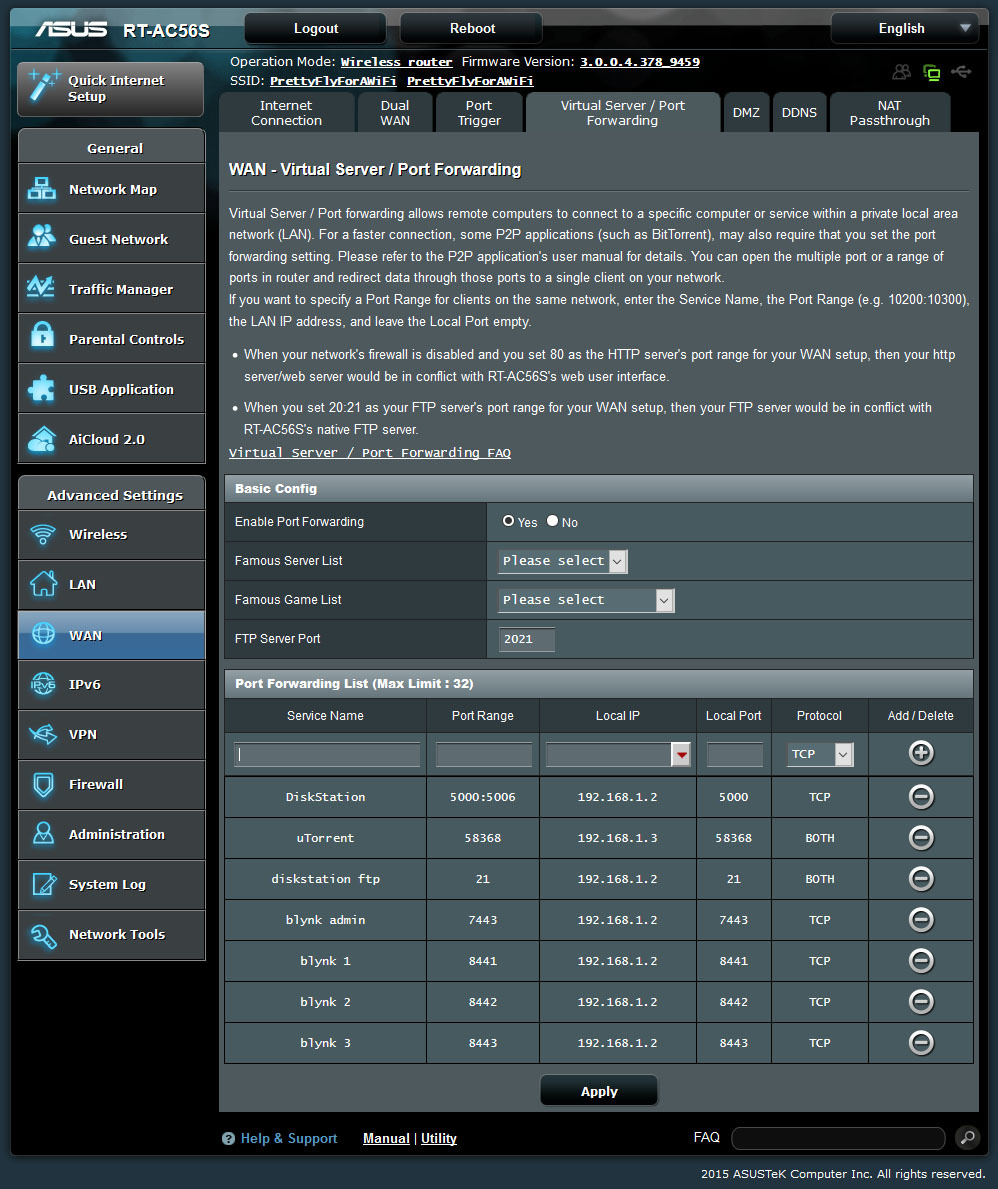
it doesnt show up here:
Create a port forward rule in your router to the IP of the device on port 80 (web port).
LOL, you guys just make it sound so easy! ![]()
oh oh oh!!! and can i use this to update a Arduino Mega 2560 that is connected to an ESP8266???
That’s because it is one of the easier things to do in a router (and a must know for any home tech) ![]()
Interested in knowing if this is possible… maybe hook up the ESP RX/TX to the Mega TX/RX?
but what is the URL i type in though?
What is your router IP? should be like 192.168.1.1 according to your image above.
You’ll then be taken to your device’s webpage to upload new code.
So basically http://your-public-ip:8004 would be the external link to http://your-device-ip (on lan)
Just saw your image also contained a clue to the rotuer model… similar to mine.
In the router settings, go to this screen. You can see some examples there of my setup.
ohhh, like i do for my blynk local server? but in my WiFi router…
sorry, that makes perfect sense now!
(I do my Blynk local server port forwards in my Ethernet router, not my WiFi one - but i might have it all unified soon…)
haha yeaaaaaaah the same thing! Externally connecting to internal network devices! ![]()
my internal network is embarrassing ![]()
but it does show up here, which is mostly what i need to know:
Here’s a good one. I have lots of modules with the same sketch on them so I want to update them all at once. I can do that with the ESP8266httpUpdate.h library and by calling ESPhttpUpdate.update(“https://server/file.bin”); in my sketch with server being the ip of my local server and file.bin being the location and file name of the compiled binary. I plan on calling the update during setup so it only runs once when it is powered on. My question is this. Does the local blynk server act like a http server and can I just put my bin file in my root folder? Or do I need to run a separate Apache server to make this work? If I need to run a separate Apache server can it be on the same Raspberry pi as my local Blynk server?
I got it working last night using an Apache server on my Raspberry Pi that is also running my Blynk Server. It works pretty great. Just pop the new firmware into the directory folder and away it goes to my army of Esp8266s. One thing that was tripping me up was that the documentation said I needed to tell it what port. That wasn’t working. Instead I pointed it to “http://IpADDRESS/FILENAME.bin” and left out the port and it worked great.
@Roccod the default port for web servers is 80 so I suspect the following url would also work:
http://IpADDRESS:80/FILENAME.bin
You don’t need the port number if you used the default settings for Apache but some people might change their default port in the httpd.conf.
That’s the port I was using, but it was a no go for me.
Will this work on the esp8266 esp 01 variant?
@claytoncamilleri100 there are several 01 variants with different amounts of memory.
You need free space equal to the size of your sketch for OTA.
So if you have a 512kb module and a 300kb sketch then you can’t do OTA.
Most WiFi sketches take up over half the 512kb so no OTA.
Generally you need the 1M variant of the ESP01.